1. Introduktion
Thank you for choosing the BitFenix AL118 ATX Mid Tower PC Case. This manual provides essential information for the proper installation, operation, and maintenance of your new PC case. Please read this manual thoroughly before beginning installation to ensure correct setup and to prevent any damage to the product or its components. Keep this manual for future reference.
Sikkerhedsoplysninger
- Afbryd altid strømforsyningen fra stikkontakten, før du installerer eller fjerner komponenter.
- Handle components with care to avoid electrostatic discharge (ESD) damage. Consider using an anti-static wrist strap.
- Ensure all cables are properly routed and secured to prevent interference with fans or other moving parts.
- Do not open the power supply unit (PSU) as it contains high voltage komponenter.
- Hold etuiet væk fra direkte sollys, høje temperaturer og fugt.
2. Produktet er slutview og funktioner
The BitFenix AL118 is a high-performance ATX Mid Tower PC case designed for enthusiasts. It features a tempered glass side panel, integrated ARGB lighting, and comes equipped with a 1000W 80+ Gold Gen5 ATX 3.0 power supply unit. The case offers extensive compatibility for various motherboard sizes, GPUs, and cooling solutions.
Nøglefunktioner:
- Formfaktor: ATX Midtårn
- Strømforsyning: Integrated 1000W 80+ Gold Gen5 ATX 3.0 PSU
- Sidepanel: Hærdet glas
- Belysning: Addressable RGB (ARGB) elements
- Bundkort support: MicroATX, Mini-ITX (ATX implied by case type)
- Foran I / O: 1 x USB 3.2 Type-C, 2 x USB 3.0
- Storage Bays: 2 x 2.5" internal, 1 x 3.5" internal
- GPU clearance: Op til 400 mm
- Kølestøtte:
- Top Radiator: 240mm, 280mm, 360mm
- Rear Radiator: 1 x 120mm
- Rear Fan: 1 x 120mm (pre-installed ARGB)
- Top Fan: 3 x 120mm or 3 x 140mm (support)
- Side Fan: 3 x 120mm (pre-installed ARGB)
3. Opsætningsvejledning
Follow these steps to properly set up your BitFenix AL118 PC case and install your components.
3.1 Udpakning og første inspektion
- Tag forsigtigt etuiet ud af emballagen.
- Inspect the case for any signs of damage during transit. If damaged, contact your retailer immediately.
- Remove the tempered glass side panel by unscrewing the thumb screws (if present) or releasing the latch mechanism. Place it on a soft, flat surface to prevent scratches.
- Find tilbehørsæsken inde i kabinettet, som indeholder skruer, kabelbindere og andet monteringsudstyr.
3.2 Installation af bundkort
- Ensure the correct standoffs are installed for your motherboard form factor (MicroATX, Mini-ITX). Additional standoffs may be in the accessory box.
- Installer I/O-skjoldet i den bageste åbning af kabinettet.
- Placer forsigtigt dit bundkort på afstandsstykkerne, og juster skruehullerne.
- Fastgør bundkortet med de medfølgende skruer. Spænd ikke for hårdt.

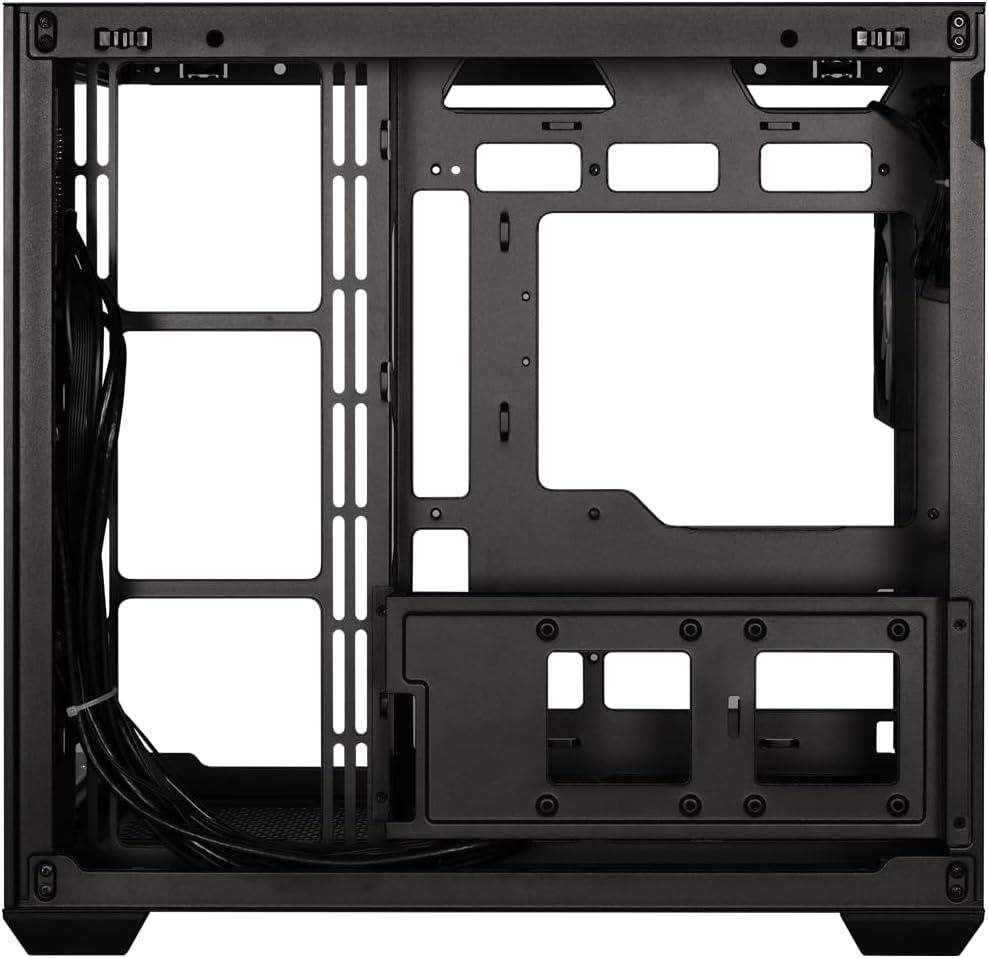
Figur 3.2.1: Intern view of the case, highlighting the motherboard tray and various mounting points for fans and components.
3.3 Installation af grafikkort (GPU)
- Remove the necessary expansion slot covers from the rear of the case, corresponding to your GPU's size.
- Insert your GPU into the appropriate PCIe slot on the motherboard until it clicks into place.
- Secure the GPU to the case with screws.
- Connect the required PCIe power cables from the PSU to the GPU.
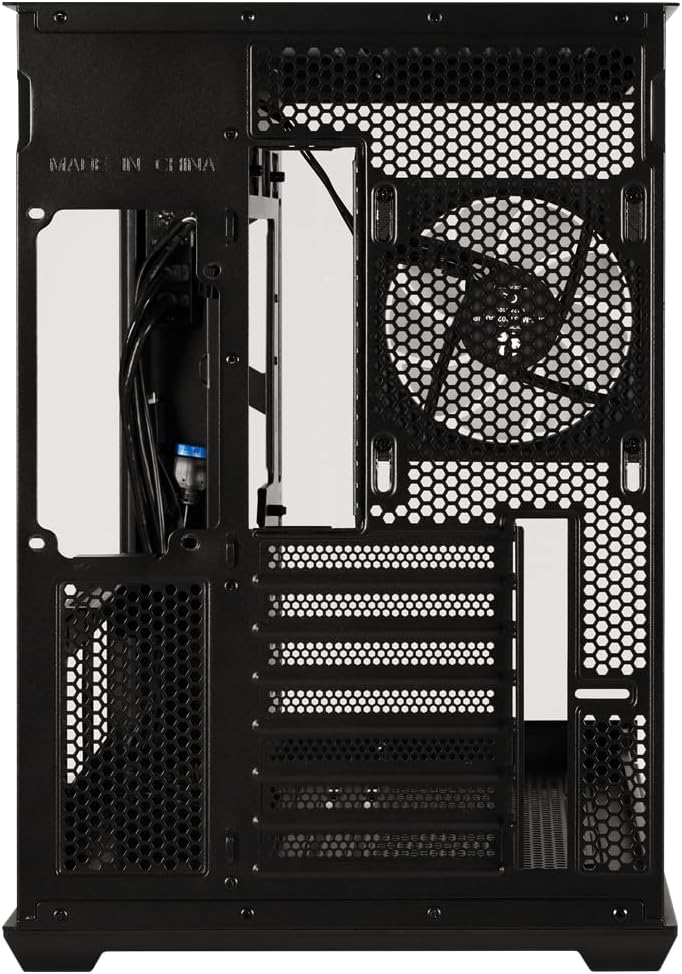
Figur 3.3.1: Bagside view of the case, showing the expansion slots where graphics cards are mounted and the pre-installed rear fan.
3.4 Storage Drive Installation (2.5" SSD/HDD, 3.5" HDD)
- Locate the 2.5" drive mounts (2 available) and 3.5" drive bay (1 available). These are typically found behind the motherboard tray or in a dedicated drive cage.
- For 2.5" drives, secure them to the mounting brackets with screws.
- For 3.5" drives, slide them into the drive cage and secure with screws or tool-less clips if available.
- Connect SATA data cables to the motherboard and SATA power cables from the PSU to each drive.
Figur 3.4.1: View behind the motherboard tray, illustrating the cable management channels and mounting locations for 2.5-inch and 3.5-inch storage drives.
3.5 Power Supply Unit (PSU) Connections
Your BitFenix AL118 case comes with a pre-installed 1000W 80+ Gold Gen5 ATX 3.0 PSU. Ensure all necessary power cables are connected:
- 24-bens ATX strømforsyning: Connect to the motherboard.
- 8-pin (4+4) EPS/CPU Power: Connect to the motherboard CPU power header.
- PCIe-strøm: Connect to your graphics card(s) as required.
- SATA-strøm: Connect to your storage drives.
- Peripheral/Molex Power: Connect to any other components requiring this type of power.
3.6 Frontpanelforbindelser
Connect the front panel cables to the corresponding headers on your motherboard:
- USB 3.2 Type-C: Connect the internal USB-C header cable to your motherboard's USB 3.2 Gen2 Type-C header.
- USB 3.0: Connect the internal USB 3.0 header cable to your motherboard's USB 3.0 header.
- HD-lyd: Connect to your motherboard's audio header.
- Power SW, Reset SW, HDD LED, Power LED: Connect these small connectors to the front panel header pins on your motherboard according to your motherboard manual.

Figur 3.6.1: Intern view showing the pre-installed ARGB fans and the routing of front panel I/O cables, including USB 3.2 Type-C and USB 3.0 connections.
3.7 Kabelstyring
Utilize the cable routing cutouts and tie-down points behind the motherboard tray to manage cables. Proper cable management improves airflow and aesthetics.
- Route main power cables (24-pin, EPS) through the largest cutouts.
- Use cable ties or Velcro straps (included in accessory box) to bundle and secure cables.
- Sørg for, at ingen kabler blokerer ventilatorblade eller luftstrømningsbaner.
4. Betjeningsvejledning
4.1 Tænd dit system
- Once all components are installed and cables connected, replace the tempered glass side panel.
- Connect the AC power cord to the PSU and then to a wall outlet.
- Sæt tænd/sluk-knappen på bagsiden af strømforsyningen i positionen 'ON'.
- Press the power button on the front panel of your case.
4.2 ARGB-lysstyring
The BitFenix AL118 features Addressable RGB (ARGB) lighting. The control method depends on how the ARGB components are connected:
- Bundkort synkronisering: If the ARGB cables are connected to a compatible 3-pin 5V ARGB header on your motherboard, you can control the lighting effects using your motherboard's RGB software (e.g., ASUS Aura Sync, MSI Mystic Light, Gigabyte RGB Fusion, ASRock Polychrome Sync).
- Integreret controller: If the case includes a built-in ARGB controller (often connected to a reset button or dedicated ARGB button), you can cycle through pre-programmed lighting modes by pressing that button. Refer to the specific controller's instructions if applicable.
5. Vedligeholdelse
Regelmæssig vedligeholdelse er med til at sikre optimal ydeevne og levetid for dine pc-komponenter.
- Støvfiltre: The case is equipped with dust filters (e.g., top, front, bottom). Regularly remove and clean these filters with water and mild soap, or by vacuuming/brushing them. Ensure they are completely dry before re-installing.
- Indvendig rengøring: Periodically use compressed air to blow dust out of the case interior, especially from fan blades, heatsinks, and vents. Ensure the system is powered off and unplugged before cleaning.
- Hærdet glas: Rengør det hærdede glaspanel med en mikrofiberklud og et ikke-slibende glasrensemiddel. Undgå skrappe kemikalier.
6. Fejlfinding
If you encounter issues with your PC build, refer to the following common troubleshooting steps:
- Ingen strøm / Systemet starter ikke:
- Ensure the PSU power switch is in the 'ON' position.
- Check that the AC power cord is securely connected to both the PSU and the wall outlet.
- Verify all PSU cables (24-pin, EPS, PCIe) are firmly connected to the motherboard and components.
- Confirm the front panel power switch cable is correctly connected to the motherboard header.
- Ingen skærmoutput:
- Ensure your monitor is connected to the graphics card (GPU) output, not the motherboard's integrated graphics output (unless you are using integrated graphics).
- Sæt grafikkortet tilbage i dets PCIe-slot.
- Check that the GPU's power cables are securely connected.
- Fans Not Spinning / ARGB Not Working:
- Verify that all fan power cables are connected to the motherboard fan headers or a fan controller.
- Check ARGB cables are connected to a compatible 3-pin 5V ARGB header on the motherboard or an ARGB controller.
- If using motherboard software, ensure it is installed and configured correctly.
- Overophedning:
- Sørg for, at alle kabinetblæsere drejer og er orienteret korrekt for optimal luftstrøm (indsugning/udsugning).
- Clean dust filters and case interior as described in the Maintenance section.
- Verify CPU cooler and GPU cooler are properly installed and functioning.
7. Specifikationer
| Feature | Specifikation |
|---|---|
| Modelnavn | BitFenix AL118 1000W 80+Gold Gen5 ATX 3.0 TemperedGlass ARGB ATX MidTower SiyahKasa BFC-ALB100KKGSK-4A |
| Varenummer | BFC-ALB100KKGSK-4A |
| Sagstype | ATX Midtårn |
| Bundkort kompatibilitet | MicroATX, Mini-ITX (ATX implied by case type) |
| Strømforsyningsenhed (PSU) | 1000W 80+ Gold Gen5 ATX 3.0 (Pre-installed) |
| PSU placering | Bund |
| Sidepanel | Hærdet glas |
| Front I / O-porte | 1 x USB 3.2 Type-C, 2 x USB 3.0 |
| Interne 2.5" drevbåse | 2 |
| Interne 3.5" drevbåse | 1 |
| Max GPU-længde | 400 mm |
| Top Radiator Support | 240 mm, 280 mm, 360 mm |
| Bagkølerstøtte | 1 x 120 mm |
| Front Panel Fan Support | None (Side fans are present) |
| Rear Panel Fan Support | 1 x 120 mm |
| Top Panel Fan Support | 3 x 120 mm, 3 x 140 mm |
| Pre-installed Fans (Side) | 3 x 120mm ARGB |
| Pre-installed Fans (Rear) | 1 x 120mm ARGB |
| Produktdimensioner | 48 x 45.5 x 34.5 cm |
| Produktets vægt | 8 kilo |
8. Garanti og support
BitFenix products are manufactured to the highest quality standards. For specific warranty terms and conditions, please refer to the warranty card included with your product or visit the official BitFenix website. If you encounter any issues that cannot be resolved using this manual, please contact BitFenix customer support or your retailer for assistance.
Officiel BitFenix Webwebsted: www.bitfenix.com