1. Introduktion
The Generic XM7 Wireless Vertical Ergonomic Mouse is designed to provide a comfortable and efficient computing experience. Its vertical design promotes a natural hand position, reducing wrist strain during prolonged use. This mouse offers versatile connectivity options, customizable settings, and a clear TFT display for enhanced usability.

Billede 1.1: Overview of the XM7 Wireless Vertical Ergonomic Mouse, showcasing its ergonomic design, multi-function knob, Type-C charging port, 5-speed DPI adjustment, RGB lighting, and TFT display screen.
2. Pakkens indhold
Tjek venligst pakken for følgende varer:
- XM7 Wireless Vertical Ergonomic Mouse
- USB 2.4G-modtager
- USB Type-C opladerkabel
- Brugervejledning (dette dokument)
3. Produktet er slutview
Familiarize yourself with the various buttons and features of your XM7 mouse:

Billede 3.1: Detailed diagram illustrating the button layout and the electronic display screen menu of the XM7 mouse.
- Venstre knap: Standard venstreklikfunktion.
- Højre knap: Standard højreklikfunktion.
- DPI knap: Press to cycle through DPI settings.
- Speed Roller Lock Key: Locks the shuttle roller.
- Speed Roller: For fast vertical scrolling.
- Menu Confirmation Key: Confirms selections on the TFT display.
- Menu Switching Knob: Navigates through the TFT display menu.
- Elektronisk skærm: TFT screen showing mouse status and settings.
- Frem-knap: Navigerer fremad i web browsere eller file opdagelsesrejsende.
- Baglæns knap: Navigerer baglæns i web browsere eller file opdagelsesrejsende.
- Type-C port: For charging the mouse.
The Electronic Display Screen Menu includes options such as Desktop display, Task switching, Forward and Backward switching, Table Scale, One-click screenshot, Screen Brightness, Page Up and Down, Volume control, and Voice switching.
4. Opsætning
4.1. Opladning af musen
Before first use, fully charge the mouse using the provided USB Type-C cable. Connect the Type-C end to the mouse's charging port (11) and the USB-A end to a computer's USB port or a USB wall adapter.
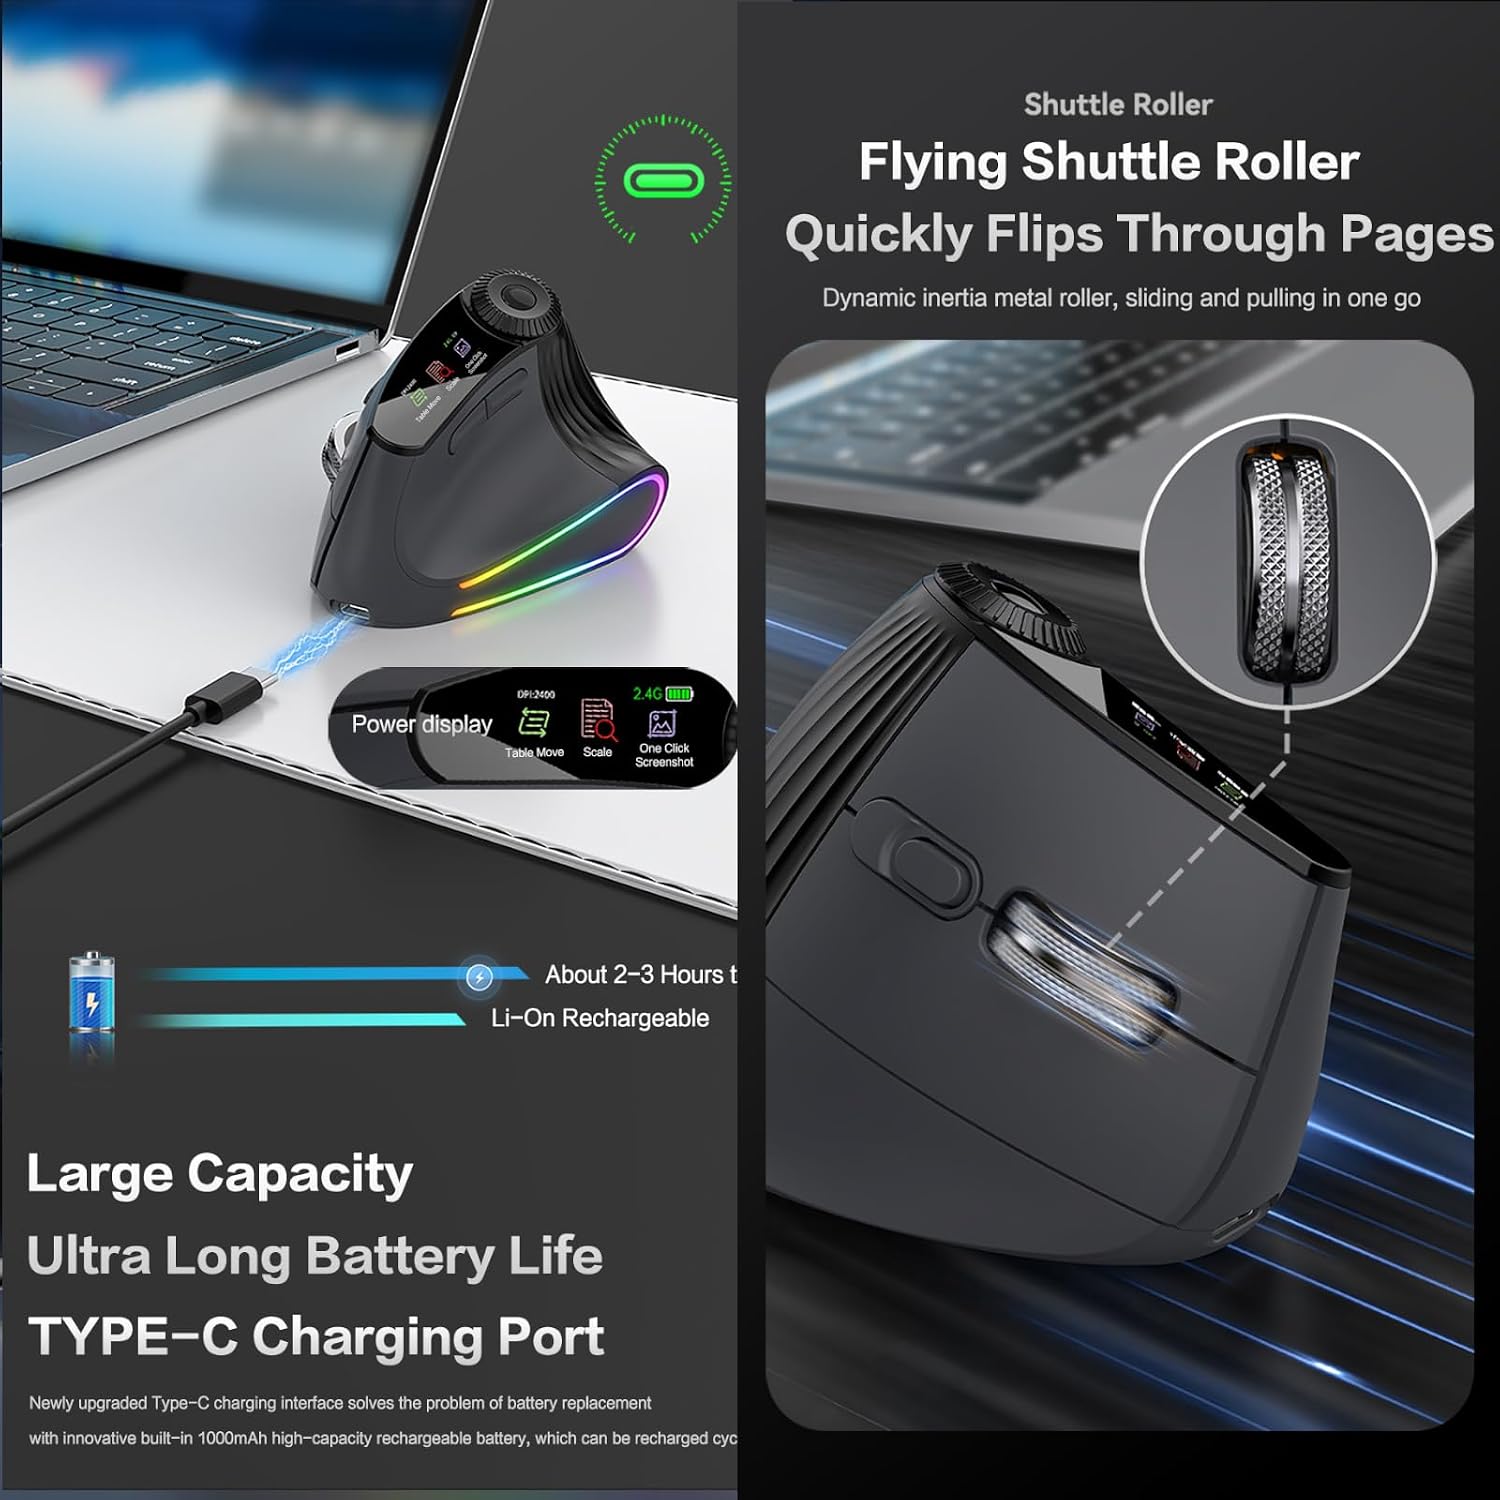
Billede 4.1: The XM7 mouse connected for Type-C charging, with the TFT display showing battery status. A full charge typically takes 2-3 hours and provides approximately 5 days of average use.
4.2. Tilslutning af musen
The XM7 mouse supports three connectivity modes: 2.4G Wireless, Bluetooth 1 (BT1), and Bluetooth 2 (BT2). You can switch between these modes using the mode switch located on the mouse, allowing connection to up to three devices simultaneously.

Billede 4.2: The XM7 mouse connected to multiple devices (laptop, tablet, smartphone) via its 2.4G, BT1, and BT2 triple mode connection.
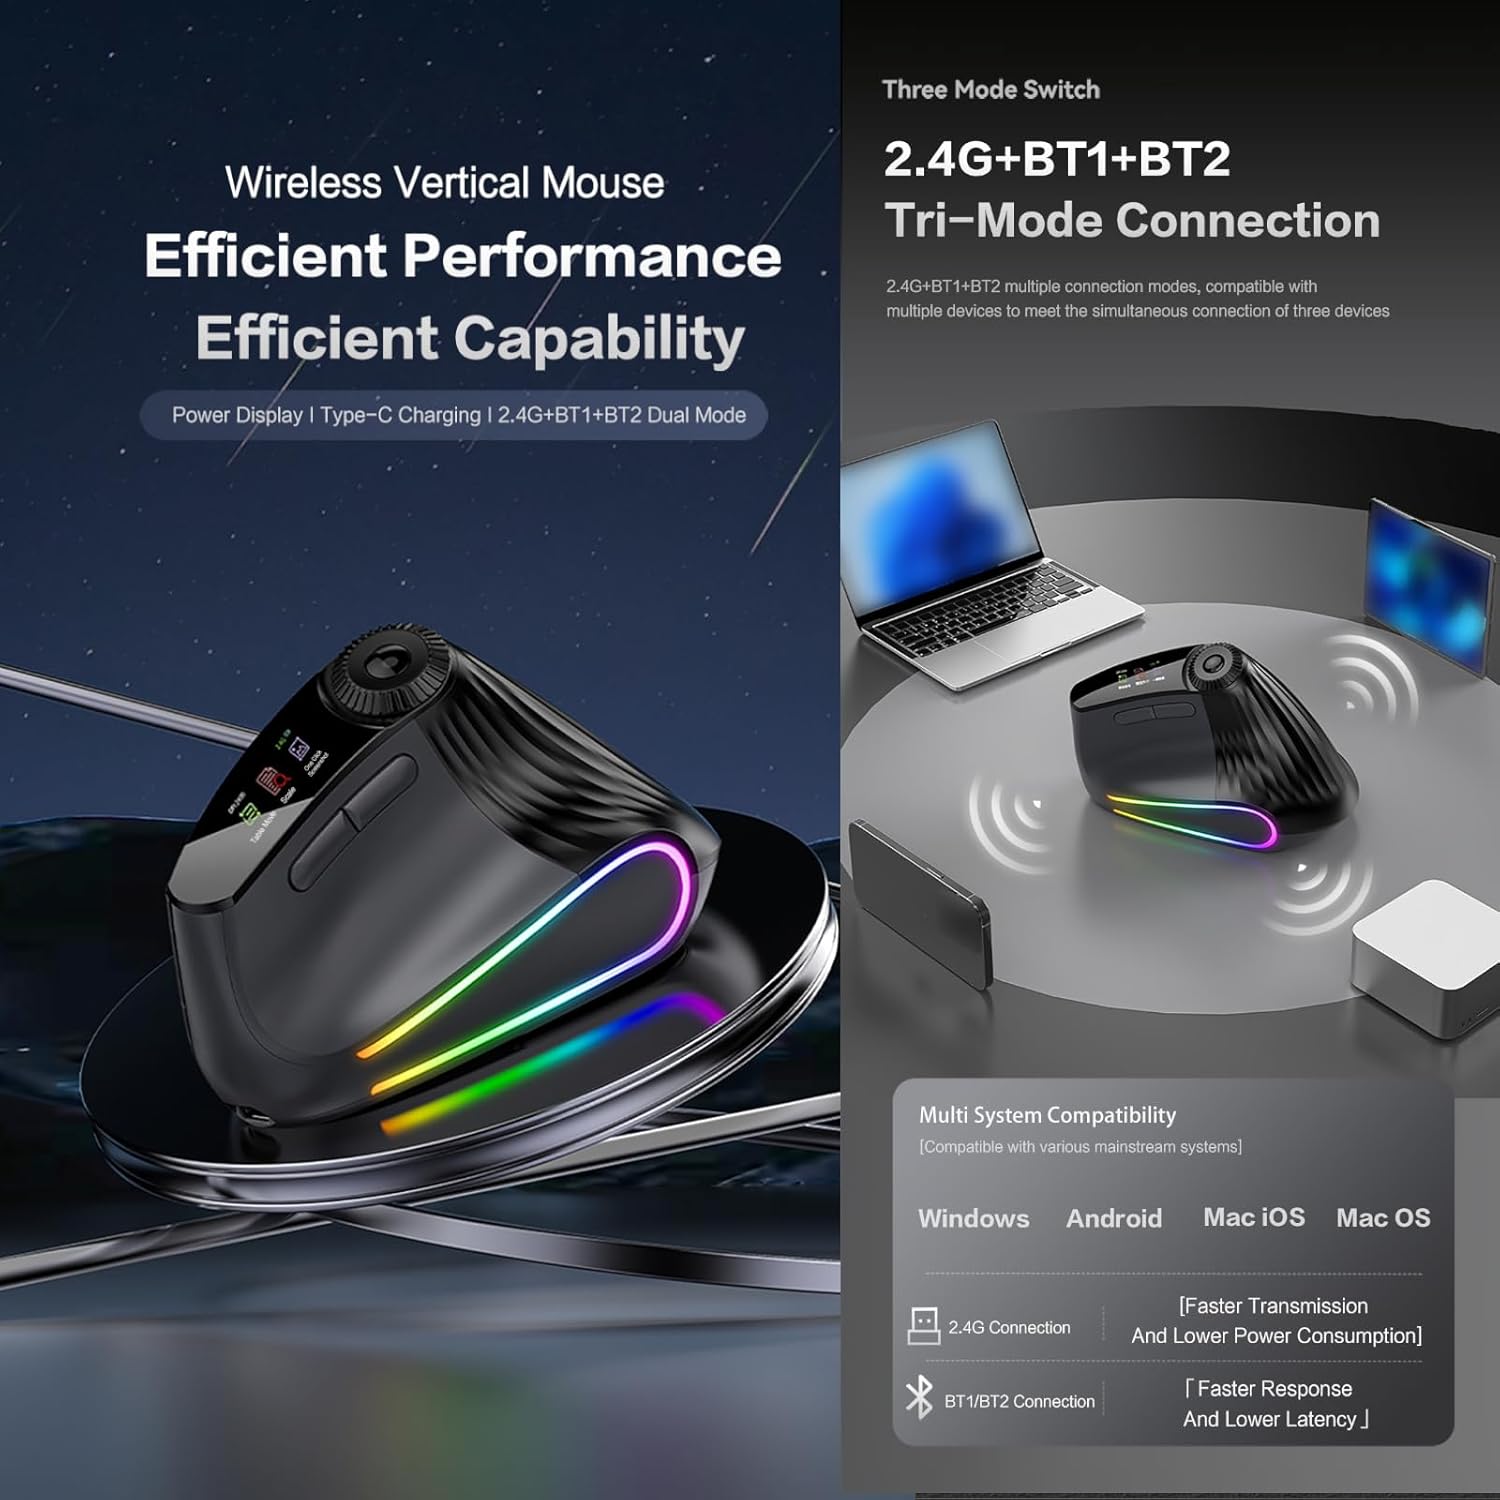
Billede 4.3: Visual representation of the XM7 mouse's triple mode connection (2.4G, BT1, BT2) and its compatibility with Windows, Android, Mac iOS, and Mac OS operating systems.
4.2.1. 2.4G trådløs tilstand
- Insert the USB 2.4G receiver into an available USB port on your computer.
- Switch the mouse to 2.4G mode. The mouse should connect automatically.
4.2.2. Bluetooth Mode (BT1/BT2)
- Switch the mouse to either BT1 or BT2 mode.
- The mouse will enter pairing mode (indicated on the TFT display).
- On your device (computer, tablet, smartphone), go to Bluetooth settings and search for "XM7 Mouse" or a similar name.
- Vælg den mus, der skal parres.
- Repeat for the other Bluetooth channel (BT2) to connect to a second device.
5. Betjeningsvejledning
5.1. DPI-justering
The XM7 mouse features 5 adjustable DPI levels to suit various tasks and preferences. Press the DPI button (3) to cycle through the available settings. The current DPI level will be displayed on the TFT screen.
- Available DPI settings: 800, 1200 (Default), 1600, 2400, 4800.

Billede 5.1: Illustration of the 5-level DPI adjustment (800-4800) and a comparison highlighting the ergonomic benefits of the vertical mouse design over traditional mice.
5.2. RGB-belysning
The mouse features customizable RGB lighting effects. To switch the lighting mode or turn it off, long press the DPI button (3) for 3 seconds.
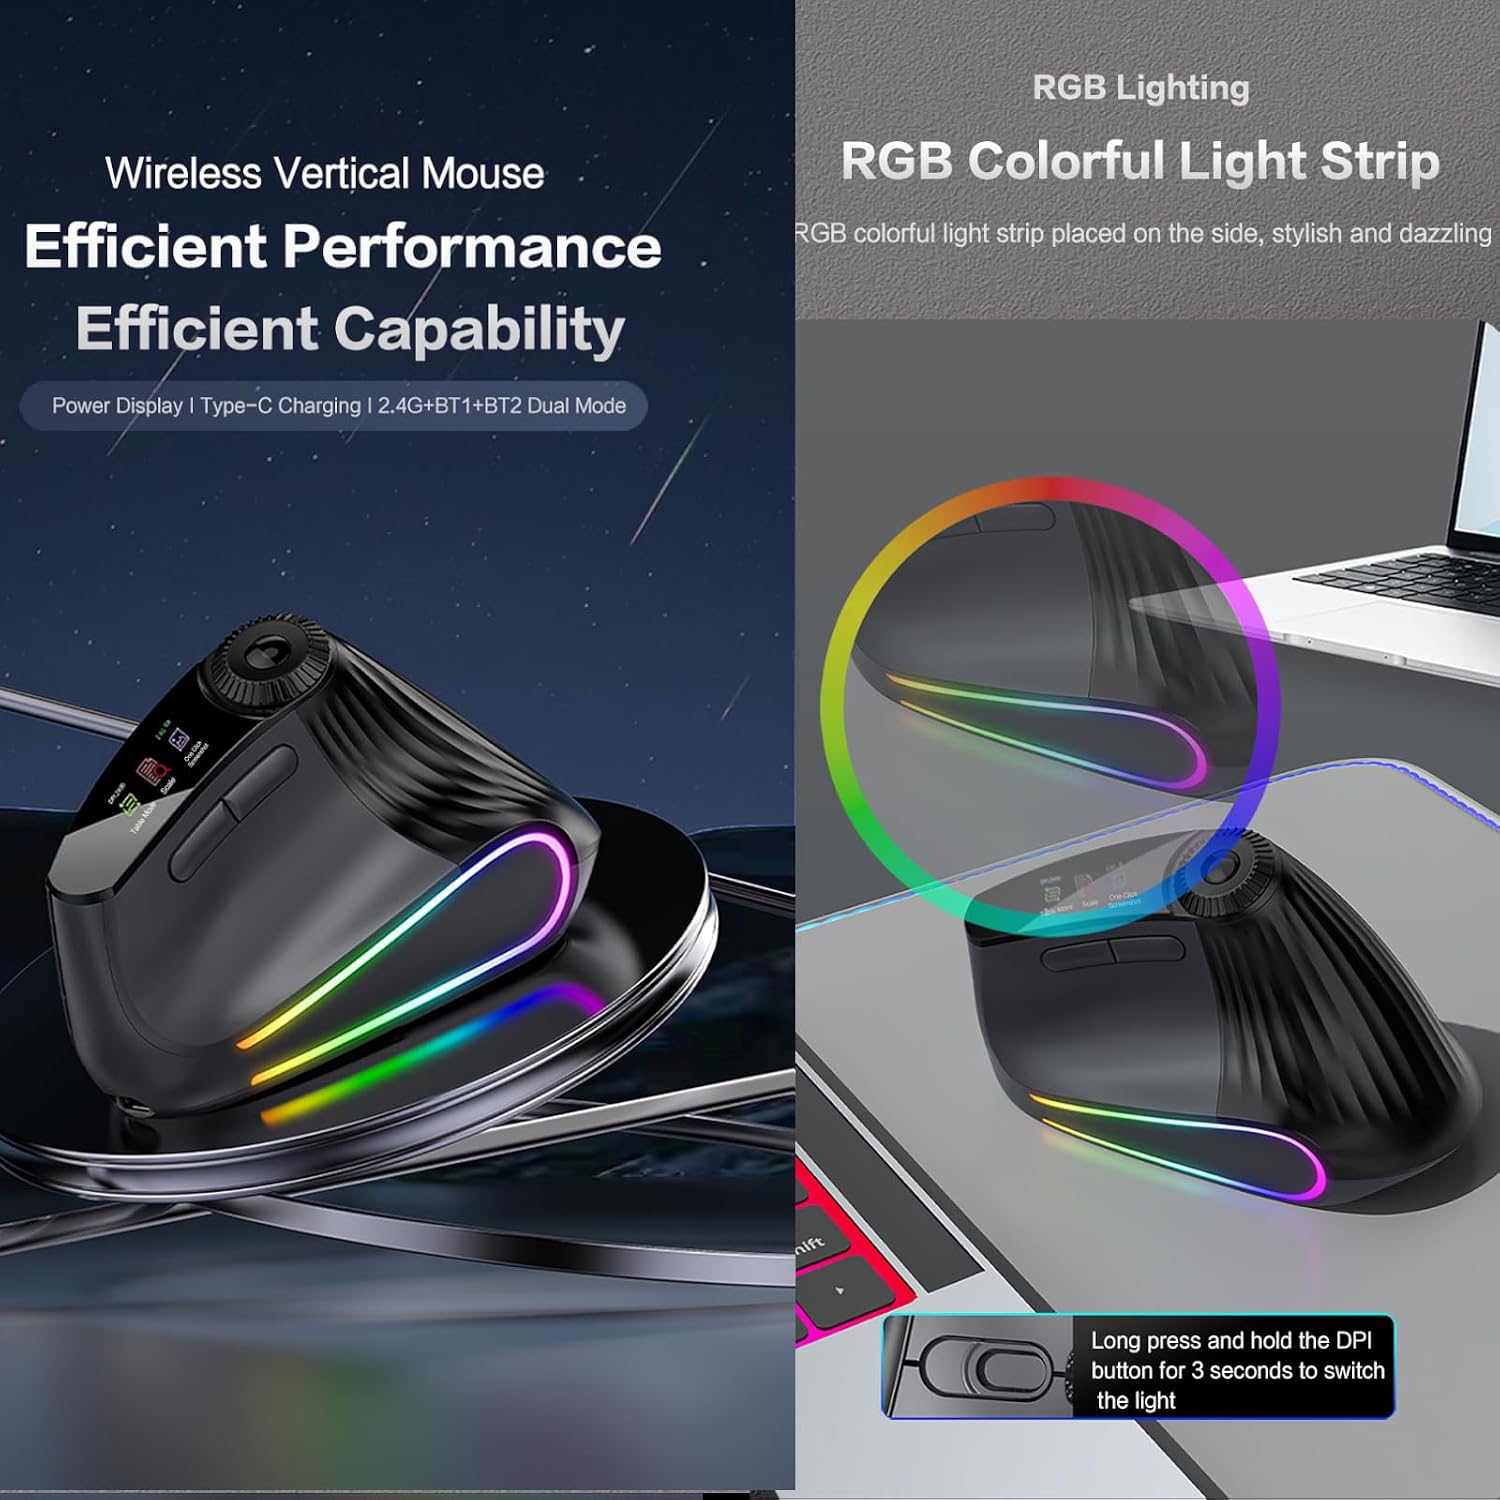
Billede 5.2: The XM7 mouse showcasing its RGB colorful light strip, which can be controlled by long-pressing the DPI button for 3 seconds.
5.3. Shuttle Roller Wheel
The dynamic inertia metal shuttle roller wheel (5) provides smooth and precise scrolling. It allows for quick navigation through documents and web pages. The Speed Roller Lock Key (4) can be used to lock its movement.
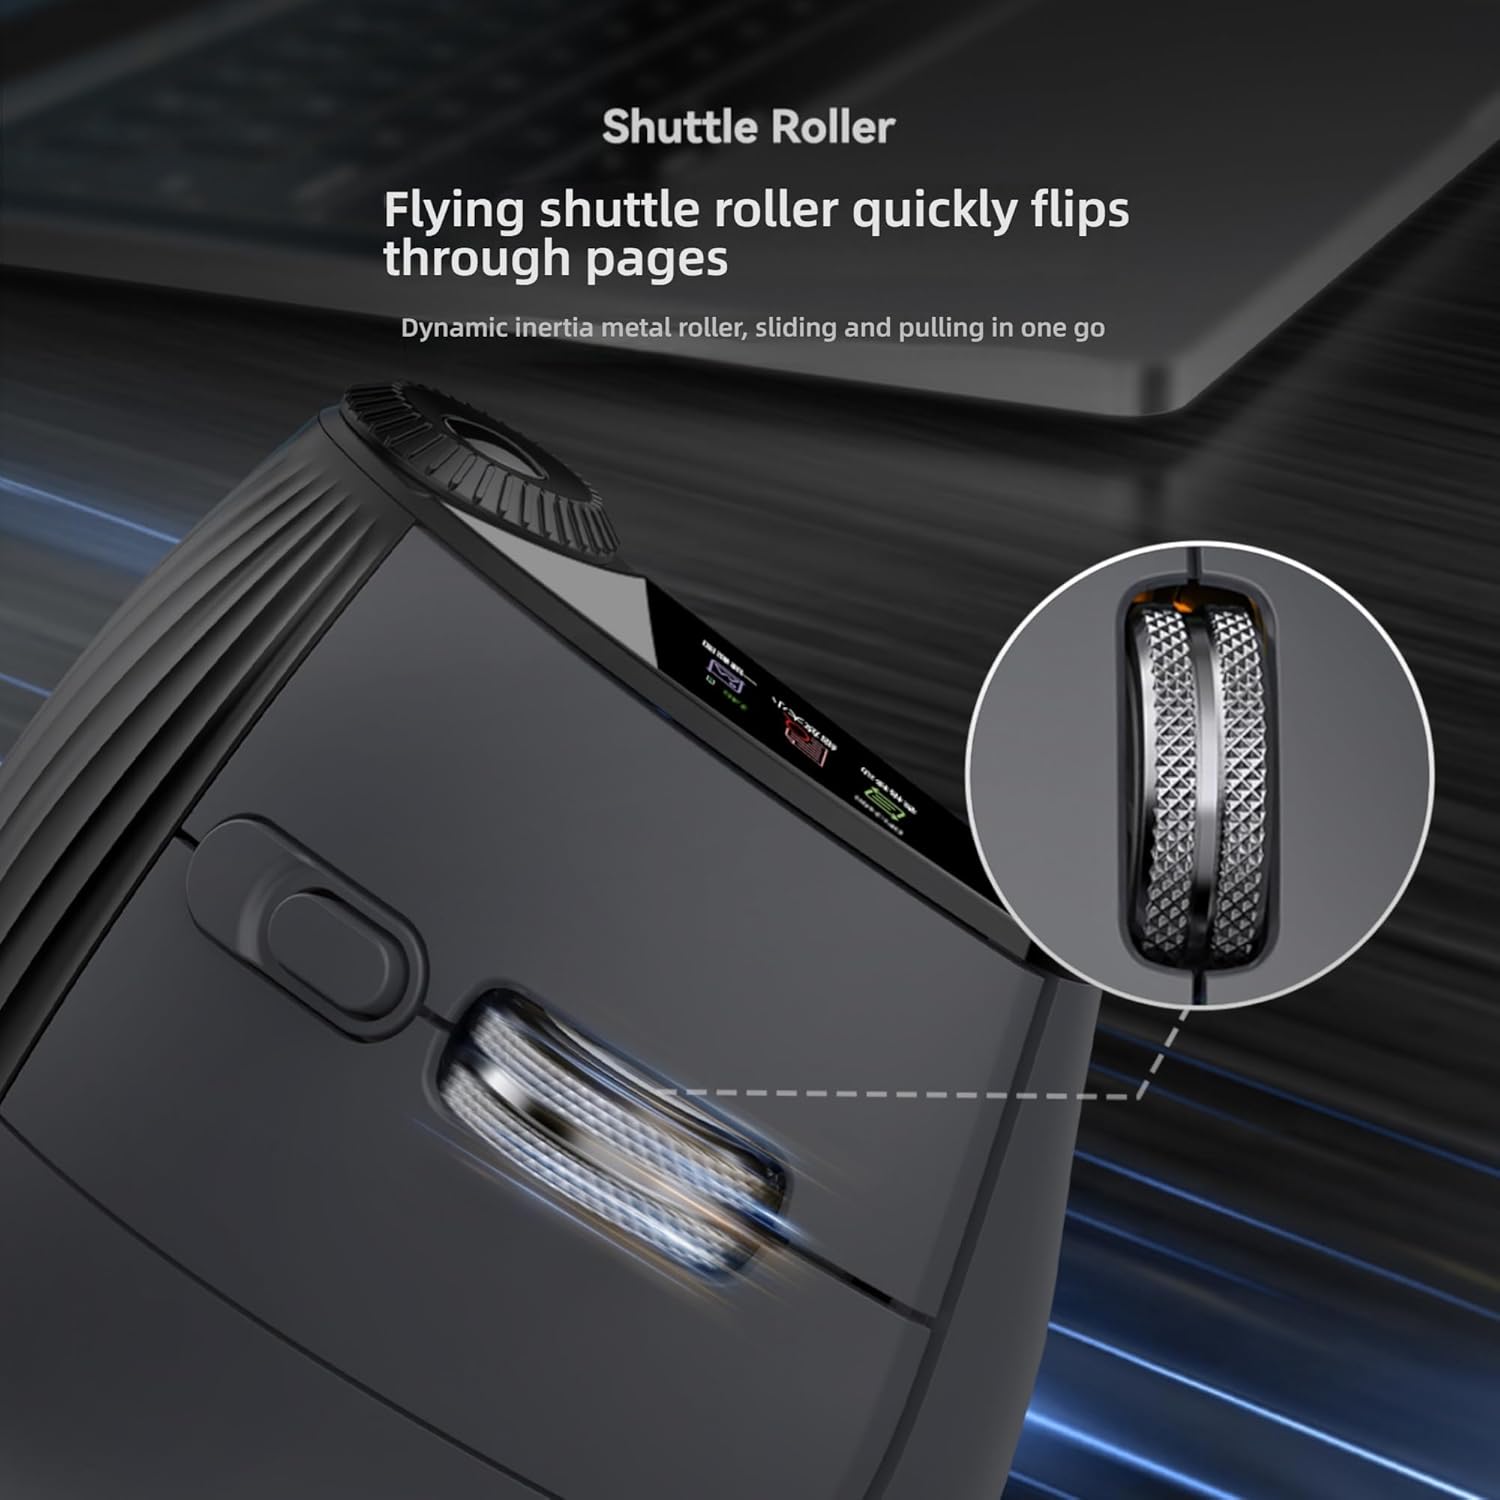
Billede 5.3: Et nærbillede view of the XM7 mouse's shuttle roller, designed for quick and dynamic page navigation.
5.4. Multi-function Knob and Buttons
The multi-function knob (7) and other buttons (9, 10) provide additional controls for various tasks. Refer to the Product Overview section (Image 3.1) for the specific functions of each button and the TFT display menu options.
6. Vedligeholdelse
- Rensning: Brug en blød, tør klud til at rengøre musen. Ved genstridigt snavs, tør letampRengør kluden med vand eller en mild rengøringsopløsning. Undgå skrappe kemikalier.
- Opbevaring: Opbevar musen et køligt, tørt sted væk fra direkte sollys og ekstreme temperaturer.
- Batteripleje: To prolong battery life, avoid fully discharging the mouse frequently. Recharge when the battery indicator on the TFT display is low.
7. Fejlfinding
| Problem | Mulig årsag | Løsning |
|---|---|---|
| Musen reagerer ikke | Lavt batteri; Forkert forbindelsestilstand; USB-modtager ikke tilsluttet (2.4G); Bluetooth ikke parret. | Charge the mouse; Ensure correct mode (2.4G, BT1, BT2) is selected; Reinsert USB receiver; Re-pair Bluetooth. |
| Markørbevægelsen er uregelmæssig eller langsom | Low battery; Dirty optical sensor; DPI setting too low; Uneven surface. | Charge the mouse; Clean the optical sensor; Increase DPI setting; Use on a smooth, even surface or mouse pad. |
| Kan ikke oprette forbindelse via Bluetooth | Musen er ikke i parringstilstand; Enhedens Bluetooth er slukket; Interferens. | Ensure mouse is in BT1/BT2 pairing mode; Turn on Bluetooth on your device; Move closer to the device; Try re-pairing. |
| RGB-belysning virker ikke | Lighting is off; Low battery. | Long press the DPI button for 3 seconds to cycle lighting modes; Charge the mouse. |
8. Specifikationer
| Feature | Beskrivelse |
|---|---|
| Modelnavn | XM7 |
| Forbindelsesteknologi | 2.4G Wireless, Bluetooth 1, Bluetooth 2 (Triple Mode) |
| DPI niveauer | 800, 1200 (Default), 1600, 2400, 4800 |
| Bevægelsesdetektion | Optisk |
| Knapper | 9 (Left, Right, DPI, Speed Roller Lock, Speed Roller, Menu Confirmation, Menu Switching Knob, Forward, Backward) |
| Opladningsport | USB Type-C |
| Batterilevetid | Approximately 5 days (average use) |
| Håndorientering | Ambidekstrøs |
| Operativsystemkompatibilitet | Windows, Mac OS, Linux, Android, iOS |
| Varens vægt | 69 gram |
| Emnedimensioner (L x B) | 4.4 cm L x 3 cm B |
| Materiale | Plast |
| Særlige funktioner | Ergonomic Vertical Design, RGB Lighting, TFT Display, Shuttle Roller Wheel |
9. Garanti og support
9.1. Garantioplysninger
This product comes with a 1-year warranty from the date of purchase. The warranty covers manufacturing defects and malfunctions under normal use. It does not cover damage caused by misuse, accidents, unauthorized modifications, or normal wear and tear.
9.2. Kundesupport
If you encounter any issues or have questions regarding your XM7 Wireless Vertical Ergonomic Mouse, please refer to the troubleshooting section of this manual. For further assistance, contact your retailer or the manufacturer's customer support channel.