
Indledning
This manual provides detailed instructions for the installation, operation, and maintenance of your GAMDIAS Aura GC11 ARGB Mid-Tower PC Case. Please read this manual thoroughly before beginning installation to ensure proper setup and safe use of the product. The GAMDIAS Aura GC11 ARGB is designed to accommodate Mini-ITX, Micro-ATX, and ATX motherboards, featuring a bar-patterned mesh front panel for optimal airflow and four pre-installed 120mm ARGB fans.
Sikkerhedsoplysninger
- Always disconnect the power supply from the wall outlet before installing or removing any components to prevent electrical shock.
- Håndter alle komponenter forsigtigt for at undgå skader.
- Wear an anti-static wrist strap or frequently touch a grounded metal object to discharge static electricity before handling internal components.
- Hold små dele og emballagematerialer væk fra børn.
- Sørg for tilstrækkelig ventilation omkring pc-kabinettet for at forhindre overophedning.
Pakkens indhold
Bekræft, at alle følgende varer er til stede i din pakke:
- GAMDIAS Aura GC11 ARGB Mid-Tower PC Case
- 4 x Pre-installed 120mm ARGB Fans
- Tilbehørssæt (skruer, afstandsstykker, kabelbindere)
- Brugervejledning (dette dokument)
Opsætning og installation
1. Udpakning af kufferten
Carefully remove the PC case from its packaging. Inspect the case for any signs of damage during transit. Remove any protective films from the tempered glass panel.

Billede: Vinklet view of the GAMDIAS Aura GC11 ARGB PC case, showcasing the tempered glass side panel and the distinctive bar-patterned mesh front panel.
2. Adgang til interiøret
To access the interior of the case, locate and remove the thumbscrews securing the tempered glass side panel. Carefully lift and remove the panel. The opposite solid side panel can also be removed for cable management access.

Billede: Interiør view of the GAMDIAS Aura GC11 ARGB PC case, with the side panel removed, revealing the motherboard mounting area, fan cutouts, and cable management space.
3. Installation af bundkort
- Install the necessary motherboard standoffs into the motherboard tray according to your motherboard's form factor (Mini-ITX, Micro-ATX, or ATX).
- Install your motherboard's I/O shield into the rear opening of the case.
- Placer forsigtigt dit bundkort på afstandsstykkerne, og juster skruehullerne.
- Fastgør bundkortet med de medfølgende skruer.
4. Installation af strømforsyningsenhed (PSU)
- Mount your PSU into the dedicated compartment at the bottom rear of the case.
- Fastgør strømforsyningen med skruer fra bagsiden af kabinettet.
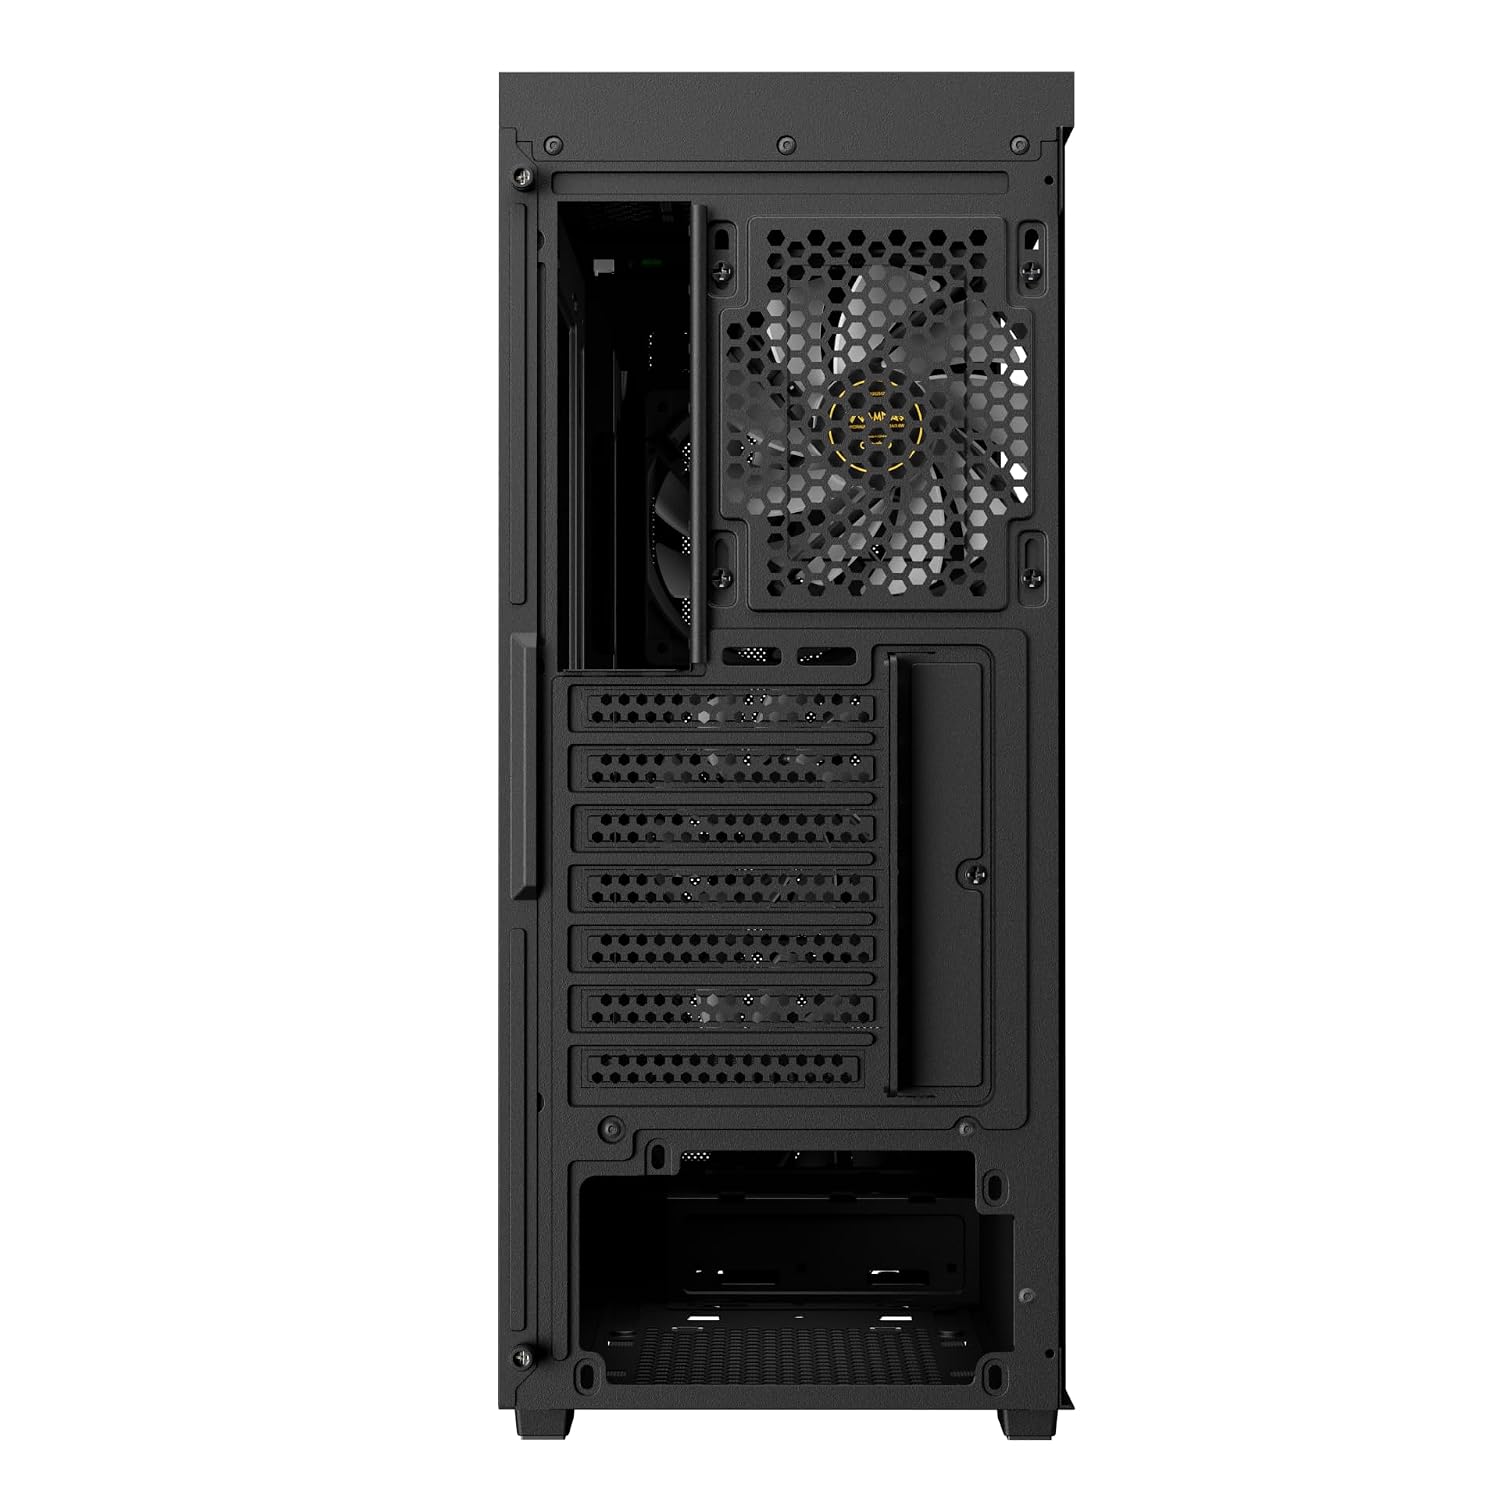
Billede: Bagside view of the GAMDIAS Aura GC11 ARGB PC case, highlighting the power supply unit mounting bracket at the bottom and the expansion slots for graphics cards and other components.
5. Installation af lagerdrev
The case supports multiple storage drives. Refer to the accessory kit for specific mounting hardware.
- 2.5" SSD'er: Mount SSDs to the designated trays or mounting points behind the motherboard tray.
- 3.5" harddiske: Installer harddiske i drevkabinettet, der er placeret under strømforsyningsdækslet.
6. Installation af grafikkort (VGA) og udvidelseskort
- Fjern de nødvendige dæksler til udvidelsespladserne fra bagsiden af kabinettet.
- Indsæt dit grafikkort eller andre udvidelseskort i de relevante PCIe-stik på dit bundkort.
- Fastgør kortene med skruer.
7. Kabelhåndtering og frontpanelforbindelser
Route all power and data cables through the cutouts in the motherboard tray for a clean build. Connect the front panel I/O cables (USB, HD Audio, Power, Reset, LED) to their corresponding headers on your motherboard. The case features a Type-C port, two USB 2.0 ports, HD Audio, and Reset button on the top panel.

Billede: Øverst-foran view of the GAMDIAS Aura GC11 ARGB PC case, displaying the front I/O panel with Type-C, USB 2.0 ports, and audio jacks, along with the top magnetic dust filter.
8. Sagens afslutning
Once all components are installed and cables are managed, reattach the side panels, starting with the solid panel, then the tempered glass panel. Secure them with the thumbscrews.
Betjeningsvejledning
1. First Power-On
After ensuring all connections are secure, connect your PC to a power outlet and press the power button on the top panel of the case. The pre-installed ARGB fans will illuminate, and your system should begin to boot.

Billede: Forside view of the GAMDIAS Aura GC11 ARGB PC case, with the four pre-installed ARGB fans visible and illuminated behind the bar-patterned mesh front panel.
2. ARGB-blæserstyring
The pre-installed ARGB fans are typically connected to a controller or directly to an ARGB header on your motherboard. Refer to your motherboard's manual or the fan controller's instructions for details on how to customize the lighting effects.
Opretholdelse
1. Rengøring af støvfilter
The GAMDIAS Aura GC11 ARGB case includes a magnetic dust filter on the top panel and a removable filter for the PSU intake. Regularly clean these filters to maintain optimal airflow and prevent dust buildup inside your system.
- Gently remove the magnetic dust filter from the top of the case.
- Slide out the PSU dust filter from the bottom rear of the case.
- Rengør filtrene med trykluft eller skyl dem med vand. Sørg for, at de er helt tørre, inden de monteres igen.
2. Generel rengøring
Brug en blød, damp cloth to wipe down the exterior surfaces of the case. Avoid using harsh chemicals or abrasive materials that could damage the finish or tempered glass.
Fejlfinding
No Power After Assembly
- Sørg for, at strømforsyningen er tændt og korrekt tilsluttet stikkontakten.
- Verify that the 24-pin ATX and 8-pin CPU power cables are securely connected to the motherboard.
- Kontroller, at kablet til strømafbryderen på frontpanelet er korrekt tilsluttet til bundkortets frontpanelheader.
Fans Not Spinning or ARGB Not Working
- Confirm that the fan power cables are connected to the motherboard or fan controller.
- Ensure ARGB cables are properly connected to the motherboard's ARGB header or the fan controller.
- Check your motherboard's BIOS/UEFI settings or ARGB software for fan and lighting control.
Problemer med overophedning
- Ensure all case fans are spinning correctly and oriented for optimal airflow (intake at front, exhaust at rear/top).
- Clean all dust filters and internal components to remove dust buildup.
- Kontroller, at CPU-køleren og GPU-blæserne fungerer korrekt.
Specifikationer
| Feature | Detalje |
|---|---|
| Mærke | GAMDIAS |
| Modelnavn | Aura GC11 ARGB |
| Sagstype | Mid Tower |
| Bundkort kompatibilitet | Mini-ITX, Micro-ATX, ATX |
| Forudinstallerede ventilatorer | 4 x 120 mm ARGB blæsere |
| Afkølingsmetode | Luft |
| Indkapslingsmateriale | Metal, hærdet glas |
| I/O-porte | 1 x Type-C, 2 x USB 2.0, 1 x HD Audio, 1 x Reset |
| Begrænsning af CPU-kølerhøjde | 160 mm |
| VGA Length Limitation | 300 mm |
| PSU-længdebegrænsning | 150 mm |
| Internal Bays Quantity | 3 (for 2.5"/3.5" drives) |
| Særlige funktioner | Bar Patterned Mesh Front Panel, Magnetic Dust Filter |
| Varens vægt | 4000 gram |
| Varedimensioner (D x B x H) | 46D x 20B x 40H Centimeter |
| Oprindelsesland | Kina |
Garantioplysninger
Dette produkt leveres med en 1 YEAR MANUFACTURER warranty. Please retain your proof of purchase for warranty claims. For detailed terms and conditions, refer to the official GAMDIAS webwebsted eller kontakt kundesupport.
Støtte
If you encounter any issues or have questions regarding your GAMDIAS Aura GC11 ARGB PC Case that are not covered in this manual, please contact GAMDIAS customer support. You can find contact information on the official GAMDIAS webhjemmeside eller gennem din forhandler.
Manufacturer Contact Information: GAMDIAS TAIWAN, No. 113, Jian 2nd Rd., Zhonghe, Dist., New Taipei City 235, Taiwan
Importer Contact Information: Allway Distributions Pvt Ltd, No-49, H.B. Samajha Road, Baswangudi, Bengaluru- 560004, Contact -8904307700