1. Introduktion
Tak for købetasing the ThermoPro TP210B Wireless Refrigerator/Freezer Thermometer. This device is designed to help you monitor the temperature of your refrigerator and freezer wirelessly, ensuring your food is stored at optimal temperatures. With a strong 500ft/150m wireless range and customizable alarms, you can easily keep track of temperature fluctuations.
2. Pakkens indhold
- 1 x modtagerenhed
- 1 x senderenhed
- 2 x AAA-batterier (til modtager)
- 1 x USB Charging Cable (for Transmitter)
- 1 x brugermanual
3. Nøglefunktioner
- Udvidet trådløs rækkevidde: Up to 500ft/150m using advanced RF technology for stable connection.
- Forparret til øjeblikkelig brug: No complex setup required; units are pre-paired from the factory.
- Bredt måleområde: Accurate readings within ±0.9°F across -40°F to 158°F (-40°C to 70°C).
- Smarte temperaturalarmer: Customizable high/low temperature limits with audio-visual alarms.
- Easy-to-Read Backlit Display: Shows fridge and freezer readings, Max/Min records, and low-battery status.
- Considerate Power Design: Receiver uses AAA batteries, transmitter features a rechargeable lithium battery.
- Fleksible placeringsmuligheder: Receiver has hook, stand, or magnet; transmitter has clip or stand.
4. Opsætning
4.1. Receiver Battery Installation
- Open the battery compartment on the back of the receiver unit.
- Isæt 2 AAA-batterier, og sørg for at polerne vender korrekt (+/-).
- Luk batterirummet forsvarligt.
Note: The receiver requires 2 AAA batteries, which are included in the package.
4.2. Transmitter Charging
- Locate the charging port on the transmitter unit.
- Connect the provided USB charging cable to the transmitter and a standard USB power source (e.g., wall adapter, computer USB port).
- Allow the transmitter to charge fully before first use. The charging indicator will change when fully charged.
Note: The transmitter uses a rechargeable lithium battery designed for low-temperature environments.
4.3. Initial Pairing (Pre-Paired)
The ThermoPro TP210B units are pre-paired at the factory. Simply power on both the receiver and transmitter, and they should automatically connect. If connection issues occur, refer to the Troubleshooting section.
4.4. Placering
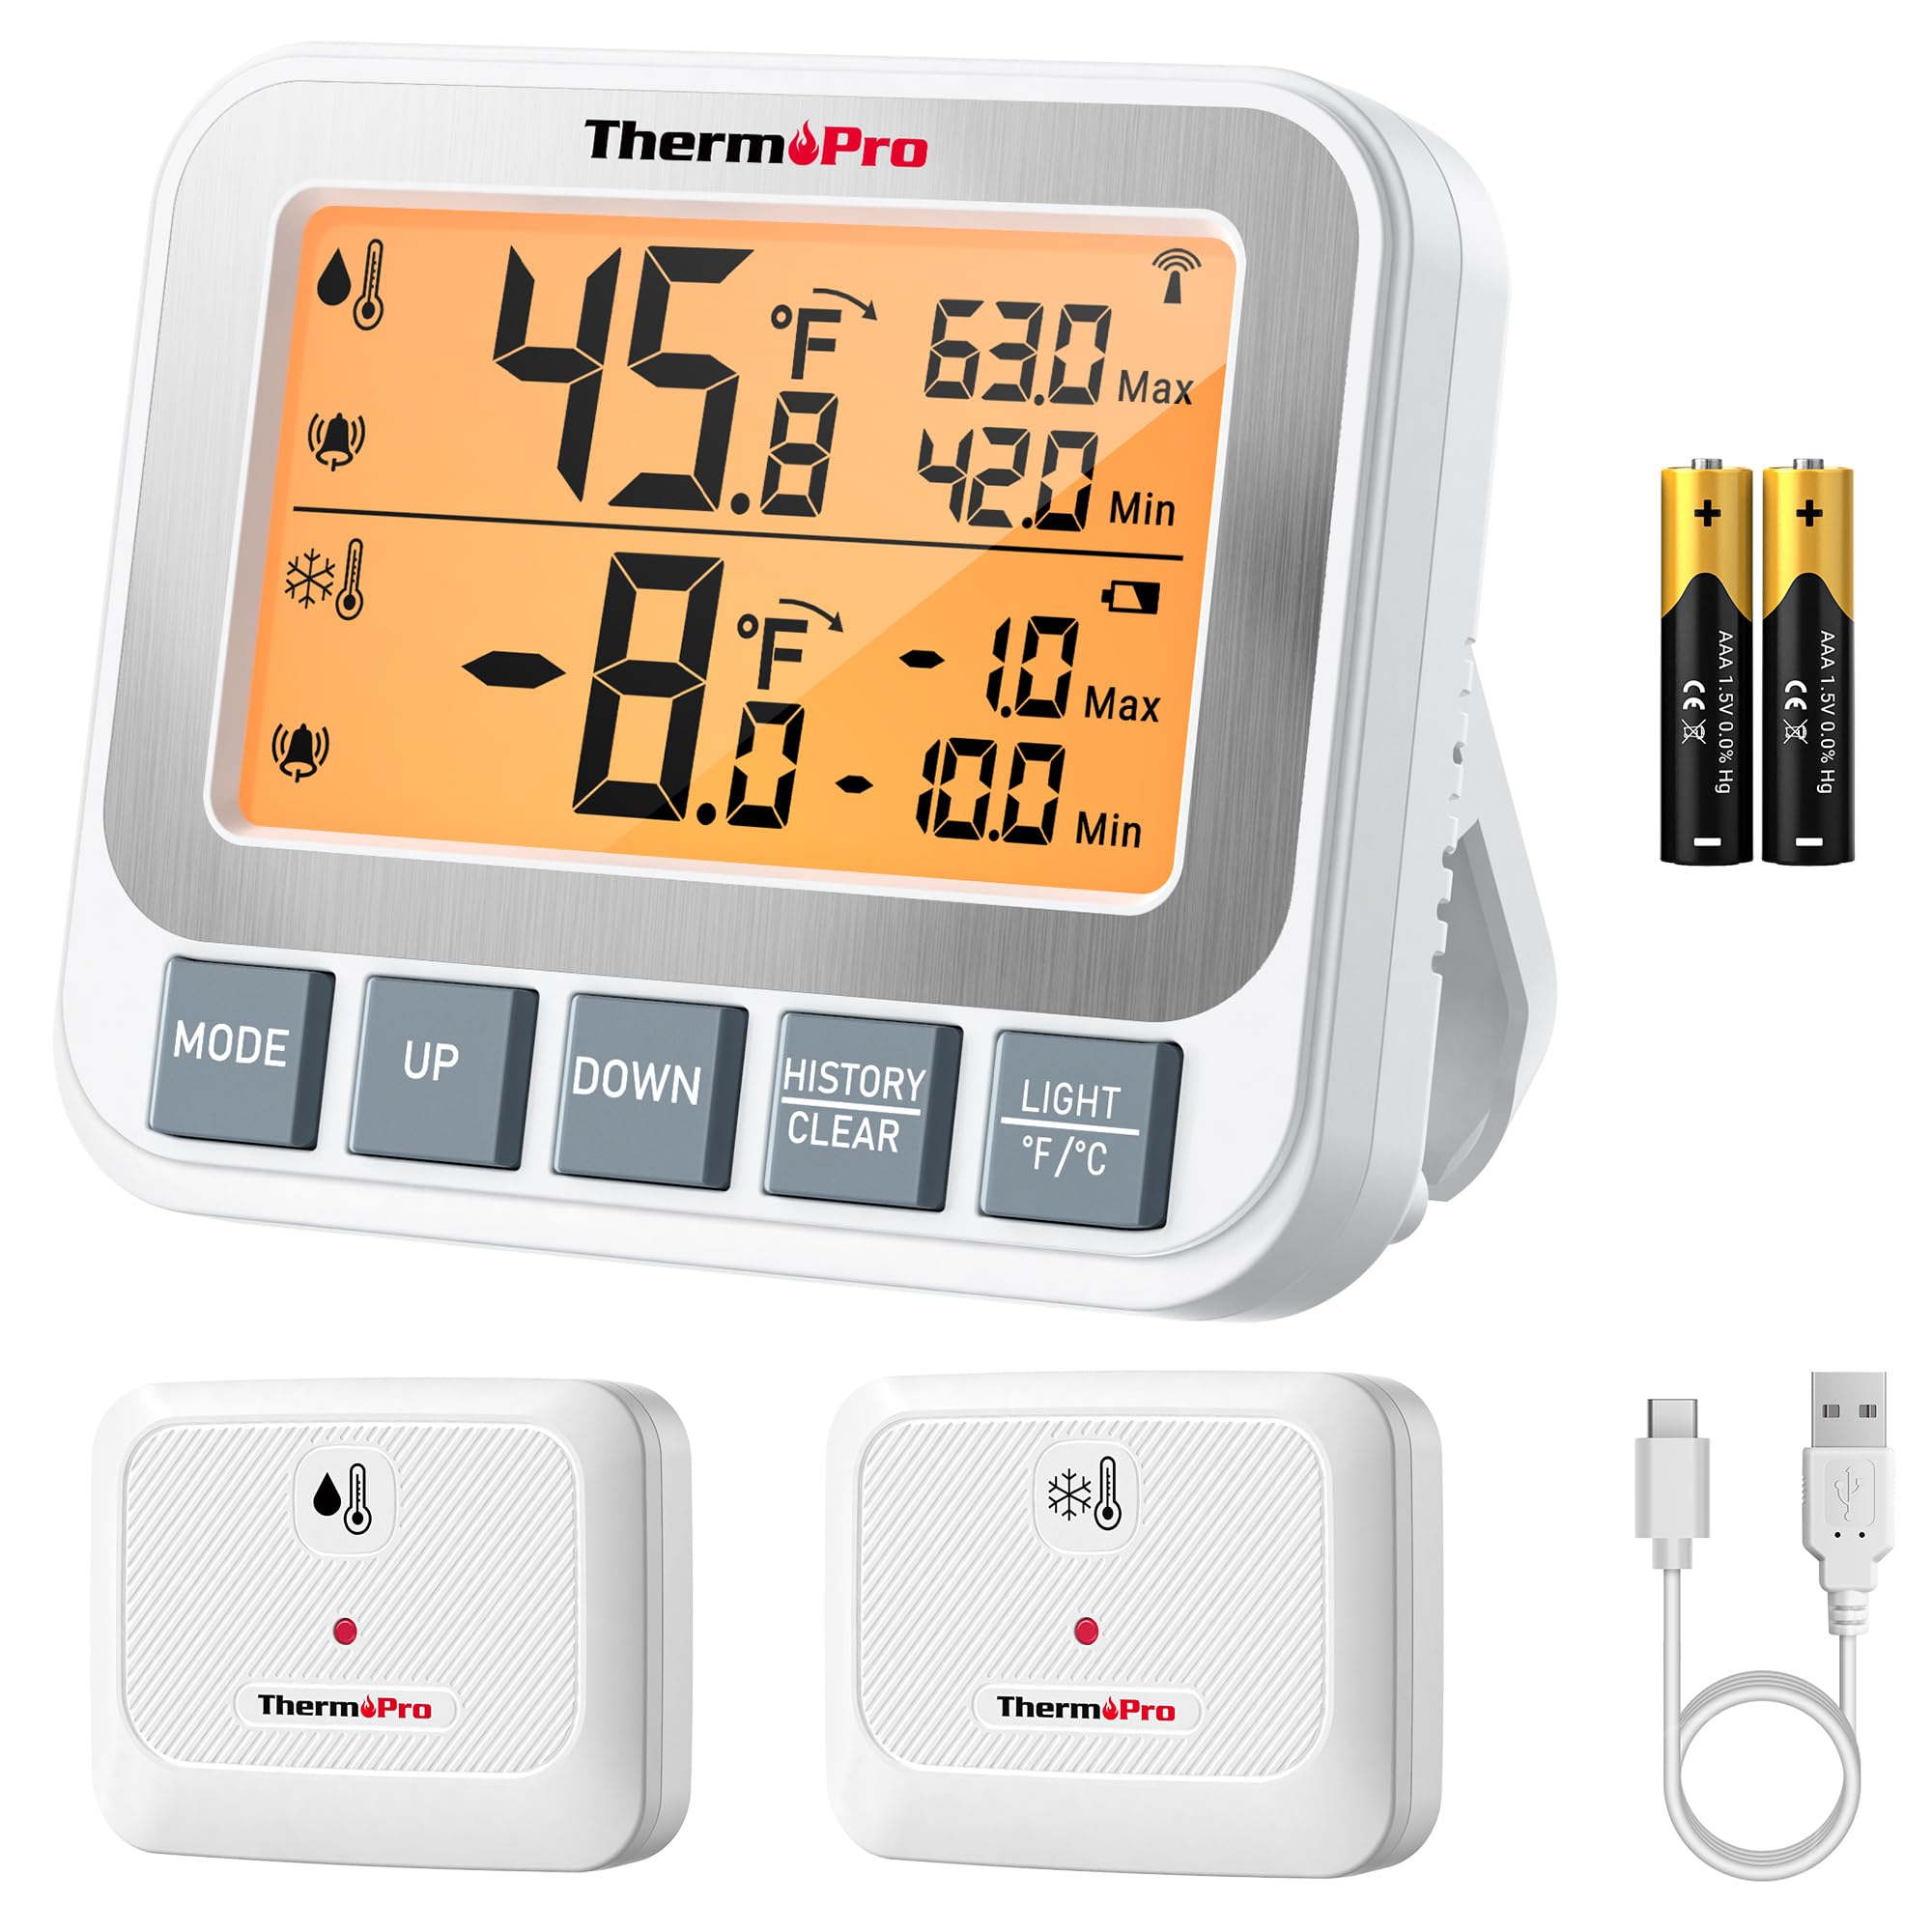
Image: ThermoPro TP210B Receiver and Transmitter. The receiver displays temperatures, while the transmitter sends data from inside the appliance.
Modtagerplacering:
- Use the integrated stand to place it on a countertop.
- Utilize the magnetic back to attach it to a metallic surface.
- Hang it using the hook on the back.
- Place the receiver in a location where you can easily view the display and hear alarms, within the 500ft/150m range of the transmitter.
Placering af sender:
- Place the transmitter inside your refrigerator or freezer.
- Use the integrated clip to attach it to a shelf or rack.
- Ensure the transmitter is not obstructed by large items that could block the wireless signal.
5. Betjeningsvejledning
5.1. Tænd/sluk
- Tryk på MAGT button on both the receiver and transmitter to turn them on or off.
5.2. Aflæsning af temperaturer
- The receiver's backlit LCD display will show the current temperature from the transmitter.
- The display typically shows both the current temperature and the all-time Max/Min records.
5.3. Setting Temperature Alarms
The TP210B allows you to set custom high and low temperature limits for alerts.
- Tryk på ALERT button on the receiver. The high limit will flash.
- Brug UP or NED buttons to adjust the high temperature limit.
- Trykke ALERT again to confirm the high limit and move to the low limit setting.
- Brug UP or NED buttons to adjust the low temperature limit.
- Trykke ALERT a third time to confirm the low limit and exit alarm setting mode.
When the temperature exceeds the set range, the receiver will emit an audio-visual alarm.
5.4. Max/Min Temperature Records
- The receiver automatically records the maximum and minimum temperatures detected since the last reset.
- Tryk på MAX/MIN button to cycle through current, maximum, and minimum temperature readings.
- To reset the Max/Min records, press and hold the MAX/MIN knappen i 3 sekunder mens viewing the Max/Min display.
5.5. Baggrundsbelysning
- The receiver features a bright backlit display for easy reading in low-light conditions.
- The backlight will activate automatically when a button is pressed and will turn off after a short period of inactivity to conserve battery.
6. Vedligeholdelse
6.1. Rensning
- Tør enhederne af med reklameamp klæde. Må ikke nedsænkes i vand.
- Brug ikke slibende rengøringsmidler eller opløsningsmidler.
6.2. Battery Replacement (Receiver)
- When the low battery indicator appears on the receiver display, replace the 2 AAA batteries.
- Ensure proper polarity when inserting new batteries.
6.3. Transmitter Charging
- Recharge the transmitter's lithium battery when the low battery indicator appears.
- Brug det medfølgende USB-opladningskabel.
6.4. Opbevaring
- If storing the device for an extended period, remove the AAA batteries from the receiver.
- Opbevares på et tørt sted væk fra ekstreme temperaturer.
7. Fejlfinding
| Problem | Mulig årsag | Løsning |
|---|---|---|
| No temperature reading / "--" displayed | Transmitter not powered on, out of range, or low battery. |
|
| Upræcise temperaturmålinger | Sensor obstruction, extreme environmental conditions, or sensor malfunction. |
|
| Alarmer lyder ikke | Alarm limits not set correctly or alarm function disabled. |
|
| Transmitter battery drains quickly | Operating in extremely low temperatures or frequent signal transmission. |
|
8. Specifikationer
- Temperaturområde: -40°F til 158°F (-40°C til 70°C)
- Temperatur nøjagtighed: ± 0.9 ° F (± 0.5 ° C)
- Trådløs rækkevidde: Op til 150 m i fri luft
- Transmissionsfrekvens: 433 MHz
- Modtagereffekt: 2 x AAA batterier (medfølger)
- Sendereffekt: Rechargeable Lithium battery (included, with USB charging cable)
- Vise: Baggrundsbelyst LCD
- Dimensioner (modtager): Approximately 4.33 inches (length)
- Vægt (vare): Cirka 11.2 ounce
9. Garanti og support
ThermoPro yder en garanti på dette produkt mod defekter i materialer og udførelse. For detaljerede garantioplysninger, produktregistrering eller teknisk support, besøg venligst den officielle ThermoPro-side. webhjemmeside eller kontakt deres kundeservice direkte.
Officiel Webwebsted: www.thermopro.com
Kundesupport: Refer to the contact information provided on the ThermoPro webwebsted eller produktemballage.