
Indledning
Thank you for choosing the Blukar K9187 Rechargeable Flashlight. This manual provides detailed instructions for the safe and efficient operation, maintenance, and troubleshooting of your new flashlight. Please read this manual thoroughly before use and retain it for future reference.
Pakkens indhold
Bekræft, at alle nedenstående varer er inkluderet i din pakke:
- 1 x Blukar K9187 Rechargeable Flashlight
- 1 x 5000mAh Rechargeable Battery (pre-installed or separate)
- 1 x 395nm UV Mini Flashlight
- 3 x AAA batterier
- 2 x USB-C ladekabler
- 4 x Waterproof Sealing Rings (spare)
- 1 x Dry Battery Rack (for AAA batteries)
- 1 x Dry Battery Sleeve
- 1 x Opbevaringsboks
- 2 x snore
- 1 x Flashlight Case/Holster

Billede: eksploderede view of the Blukar K9187 flashlight, detailing its various components and included accessories.
Produktegenskaber
- Dobbelt lyskilder: Main beam for long-range illumination and COB side light for close-range lighting.
- Justerbar fokus: Seamlessly switch between floodlight and spotlight modes.
- Multiple Modes & Color Temperatures: 7 lighting modes including white, warm, red, and SOS, with stepless dimming for main light.
- Langtidsholdbart batteri: Built-in 5000mAh rechargeable battery providing 6-24 hours of continuous use.
- Power Bank funktion: USB-A output port to charge other devices.
- Digital batterivisning: Real-time monitoring of remaining power.
- Holdbar og vandtæt: Crafted from impact-resistant aluminum alloy with IP67 waterproof rating.
- Smart hukommelsesfunktion: Remembers the last used mode and brightness settings.
Opsætning
Installation af batteri
The Blukar K9187 flashlight operates with either the included 5000mAh rechargeable battery or three AAA batteries using the provided dry battery rack and sleeve.
- Skru hætten på lommelygten af.
- For genopladeligt batteri: Insert the 5000mAh battery with the positive (+) end facing towards the flashlight head.
- For AAA-batterier: Place three AAA batteries into the dry battery rack, ensuring correct polarity. Insert the rack into the flashlight with the positive (+) end facing towards the flashlight head.
- Skru endehætten forsvarligt på igen.
Indledende opladning
Oplad det genopladelige batteri helt før første brug.
- Locate the Type-C input port on the side of the flashlight, protected by a rubber cover.
- Connect one end of the USB-C charging cable to the flashlight's Type-C port and the other end to a compatible USB power adapter (not included) or a computer's USB port.
- The digital display will show the charging progress. A full charge typically takes several hours.
- Once fully charged, disconnect the cable and ensure the rubber cover is securely closed to maintain waterproofing.

Billede: The Blukar K9187 flashlight connected for USB-C charging, displaying battery level.
Betjeningsvejledning
Tænd/sluk
- At tænde: Press the ON/OFF button once. The flashlight will activate in the last used mode due to its memory function.
- At slukke: Press and hold the ON/OFF button for 3 seconds. Alternatively, if the flashlight has been active for more than 8 seconds in any mode, a single press of the ON/OFF button will turn it off.
Main Light Operation (White & Warm Light)
- Switch Color Temperature: With the main light on, short press the dedicated Color Temperature button (located next to the ON/OFF button) to switch between white and warm light.
- Trinløs dæmpning: With the main light on, long press the Color Temperature button to adjust brightness from 100% down to 30% and vice versa. Release the button at your desired brightness level.
- Main Light SOS Mode: Double-click the ON/OFF button quickly to activate the main light's SOS flashing mode (available for both white and warm light).

Billede: Illustration of the Blukar K9187's white and warm light modes and stepless dimming function.
COB Side Light Operation
After cycling through the main light modes, further presses of the ON/OFF button will activate the COB side light modes:
- COB White High Brightness
- COB Red High Brightness
- COB Red SOS (flashing)
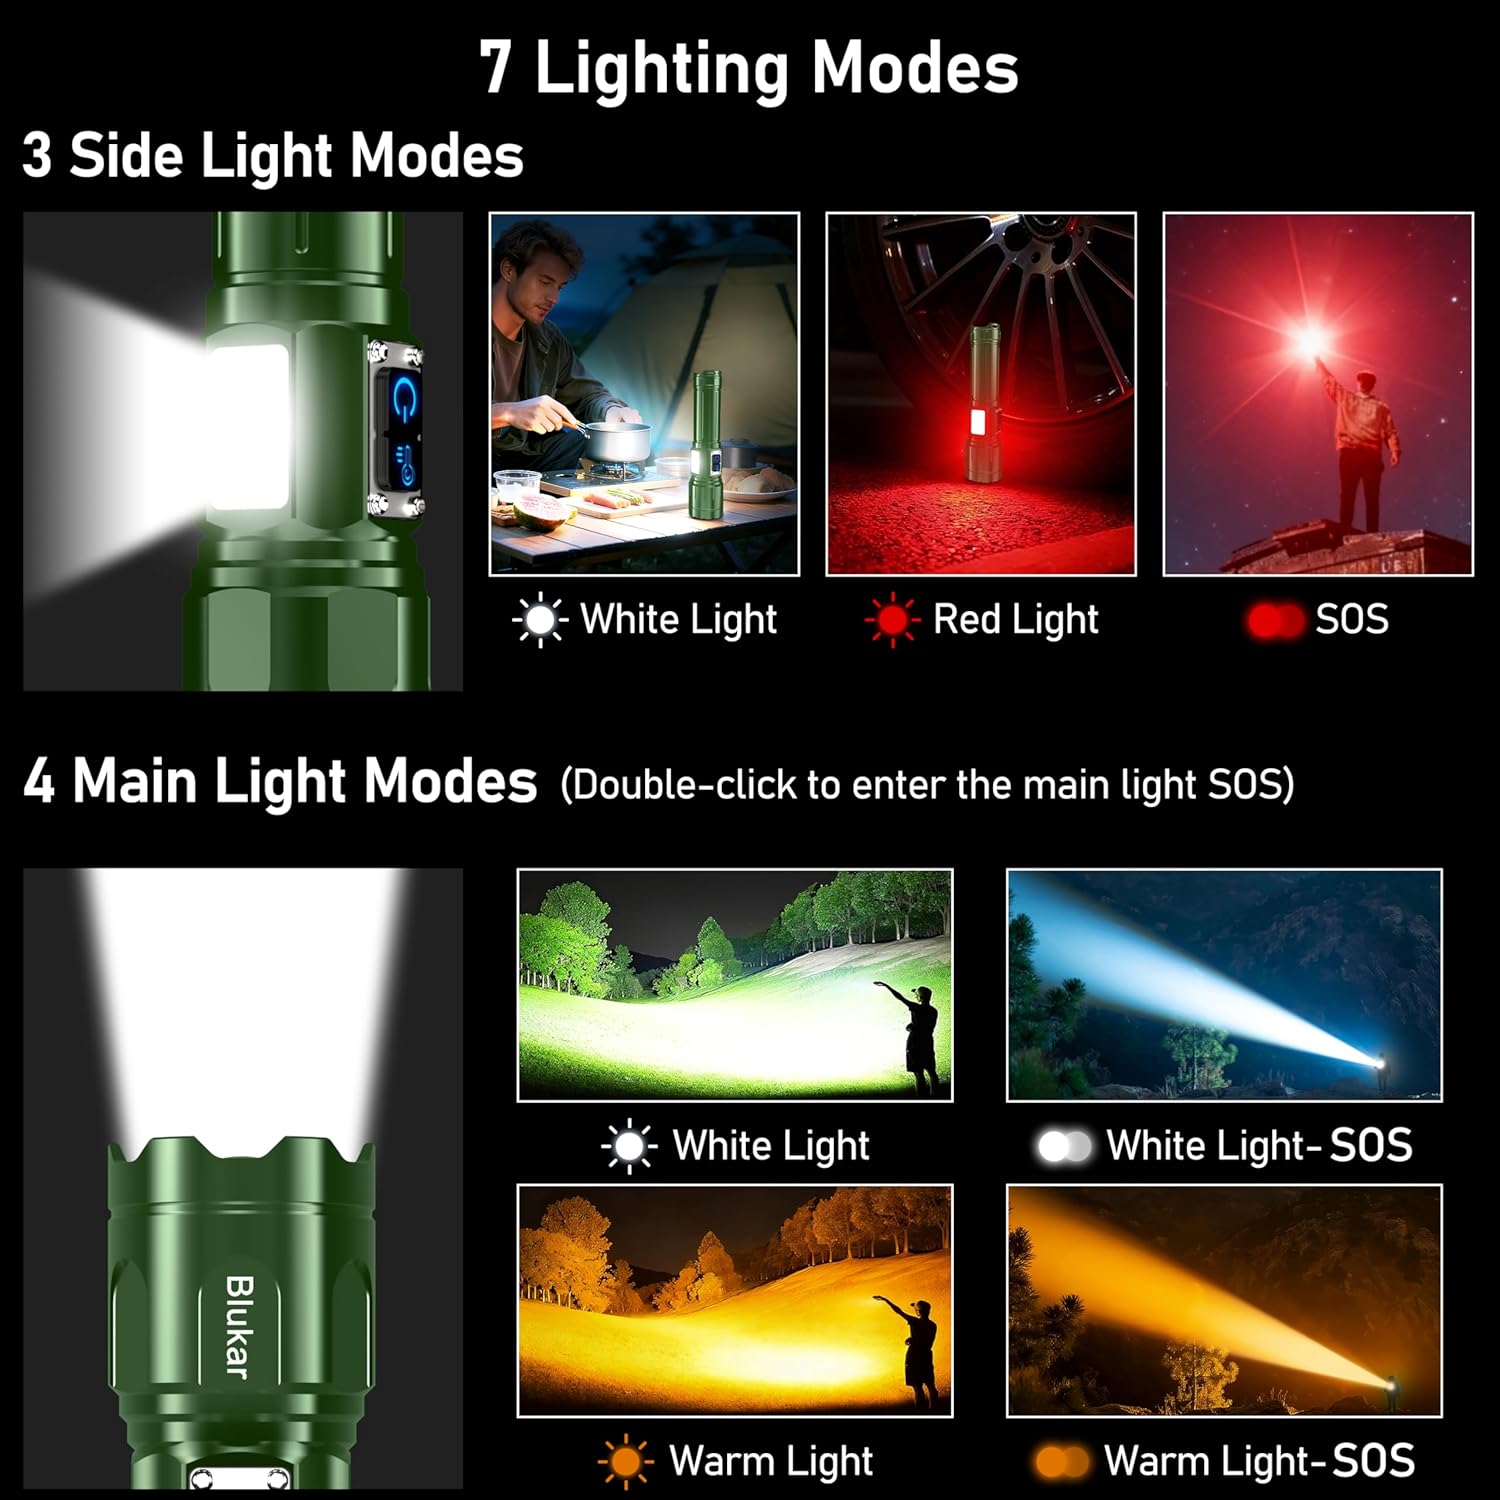
Billede: Visual guide to the 7 lighting modes, including main beam and COB side light options.
Justerbar fokus
To adjust the beam focus, gently slide the head of the flashlight forward or backward. Sliding forward narrows the beam for a focused spotlight, while sliding backward widens it for a broad floodlight.

Billede: Demonstration of the adjustable focus, transitioning between spotlight and floodlight beams.
Power Bank funktion
The flashlight can serve as an emergency power bank. Locate the USB-A output port next to the Type-C input port. Connect your device's charging cable to the USB-A port to begin charging.
Batteri display
Det integrerede digitale LED-display viser den resterende batteriprocenttage in real-time, allowing you to monitor power levels accurately.
Opladning
The Blukar K9187 flashlight is equipped with a Type-C input for convenient charging. A full charge provides approximately 6-24 hours of continuous use, depending on the selected lighting mode and brightness level.
- Use the provided USB-C cable to connect the flashlight to a 5V/2A power source.
- Det digitale display vil vise opladningsstatus.
- Avoid overcharging by disconnecting once the battery is full.
Billede: The Blukar K9187 flashlight connected for USB-C charging, displaying battery level.
Opretholdelse
- Rensning: Tør lommelygtens hus af med en blød kludamp klud. Brug ikke slibende rengøringsmidler eller opløsningsmidler. Hold linsen ren for optimal lysudbytte.
- Vandtætte forseglinger: Periodically inspect the waterproof sealing rings (O-rings) for wear or damage. Replace them with the provided spare rings if necessary to maintain the IP67 waterproof rating.
- Opbevaring: Store the flashlight in a cool, dry place away from direct sunlight when not in use. If storing for extended periods, charge the battery every 3-6 months to prolong its lifespan.
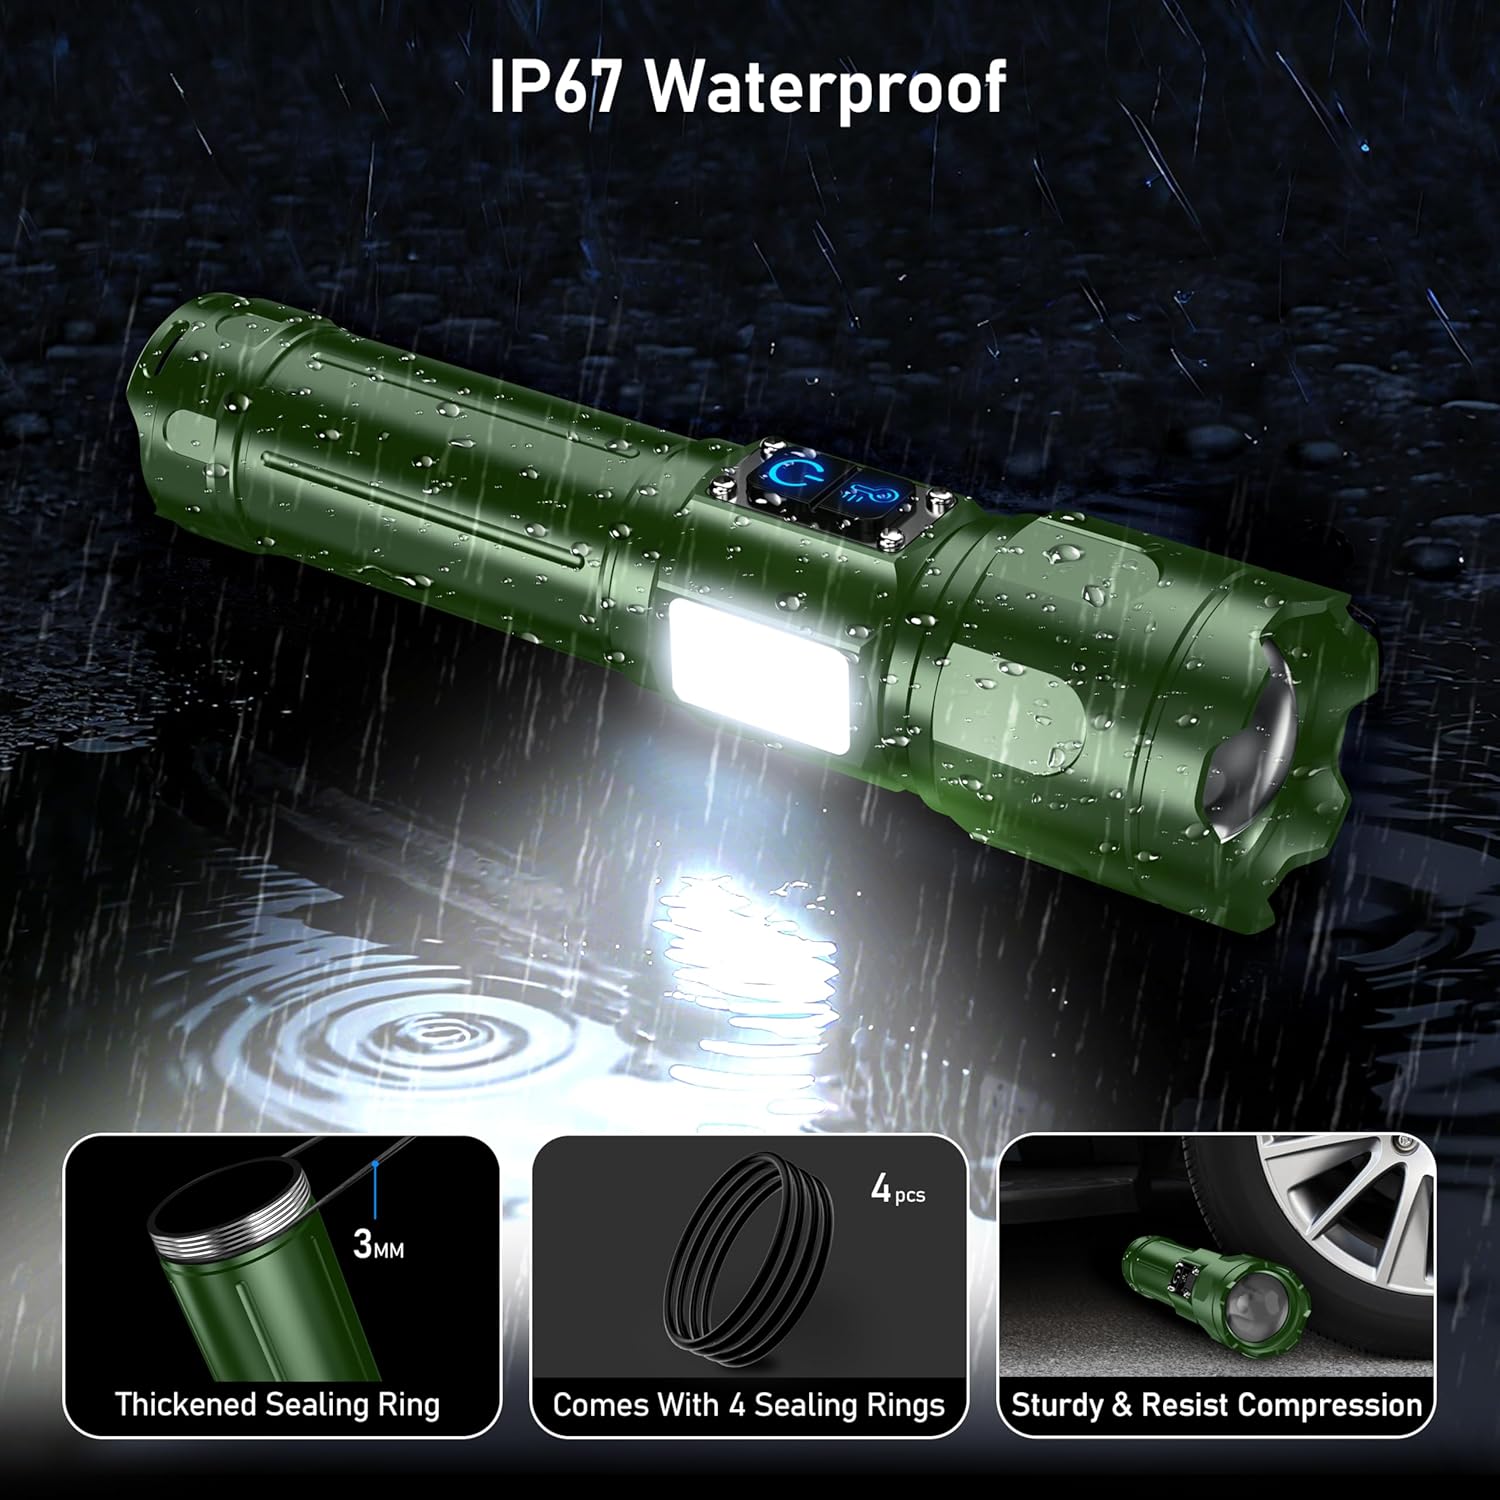
Billede: The Blukar K9187 flashlight demonstrating its IP67 waterproof capability and durable construction.
Fejlfinding
| Problem | Mulig årsag | Løsning |
|---|---|---|
| Lommelygten tænder ikke. | Batteriet er afladet eller forkert installeret. | Oplad batteriet, eller sørg for, at det er installeret med korrekt polaritet. |
| Lyset er svagt eller flimrer. | Lavt batteri eller løs forbindelse. | Recharge the battery. Ensure the tail cap is tightly screwed on. |
| Lommelygten oplades ikke. | Charging cable or adapter issue; port obstruction. | Prøv et andet USB-C-kabel eller en anden strømadapter. Kontroller opladningsporten for snavs. |
| Vandindtrængen. | Damaged or improperly seated sealing rings. | Inspect and replace sealing rings if damaged. Ensure all caps and covers are securely closed. |
Specifikationer
| Feature | Detalje |
|---|---|
| Modelnummer | K9187 |
| Mærke | Blukar |
| Farve | Mørkegrøn |
| Materiale | Aluminiumslegering |
| Produktdimensioner | 17 cm x 4.19 cm x 3.36 cm (6.69" D x 1.64" B x 1.32" H) |
| Varens vægt | 9.7 ounces (274 gram) |
| Batteritype | 5000mAh Lithium Ion (Rechargeable) / 3 x AAA (Alternative) |
| Opladningsport | USB Type-C-indgang |
| Udgangsport | USB Type-A Output (Power Bank Function) |
| Vandtæt vurdering | IP67 |
Sikkerhedsoplysninger
- Do not look directly into the flashlight beam or the UV light. High intensity light can cause eye damage.
- Opbevares utilgængeligt for børn.
- Do not disassemble or modify the flashlight. This may cause damage and void the warranty.
- Use only the specified battery types and charging cables.
- Undgå at udsætte lommelygten for ekstreme temperaturer eller åben ild.
- Ensure the charging port cover is securely closed when not charging to maintain waterproofing.
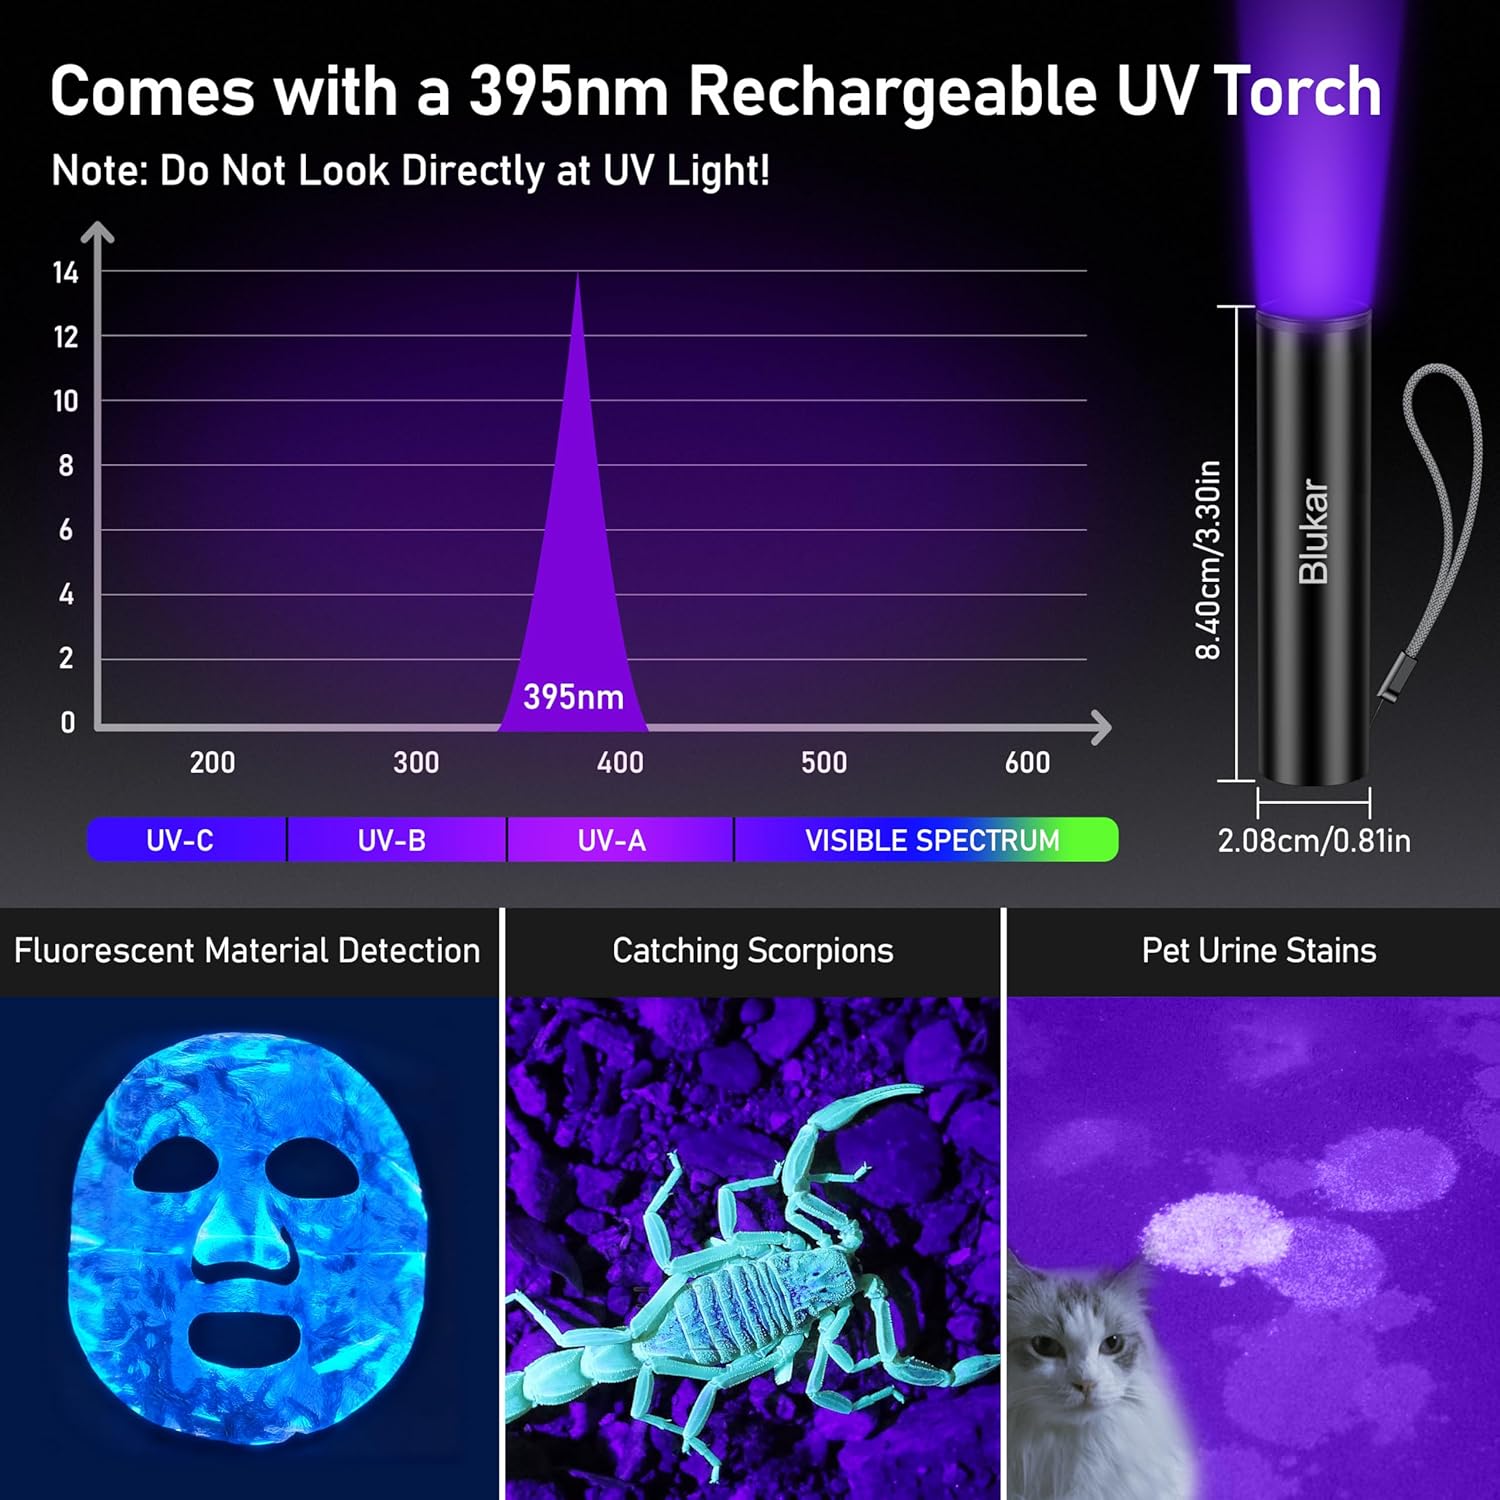
Billede: The 395nm UV mini flashlight and its applications, with a warning not to look directly at UV light.
Produkt video
Video: Demonstration of the Blukar K9187 flashlight's features, including its solid build, various lighting modes, adjustable beam, and power bank functionality.
Garanti og support
Blukar products are designed for reliability and performance. For warranty information, technical support, or any inquiries regarding your Blukar K9187 flashlight, please refer to the contact information provided with your purchase or visit the official Blukar webwebsted. Hav venligst dit modelnummer (K9187) og købsoplysninger klar, når du kontakter support.