
1. Introduktion
This manual provides detailed instructions for the installation, operation, and management of your MokerLink 8-Port 10G Managed Ethernet Switch. This device is designed to enhance network performance and efficiency with its high-speed connectivity and advanced management features. Please read this manual thoroughly before using the product to ensure proper setup and functionality.
2. Produktet er slutview
The MokerLink 8-Port 10G Managed Ethernet Switch features a robust design for high-bandwidth network environments. It includes 4x10Gbps Ethernet RJ45 ports and 4x10Gbps SFP+ slots, offering versatile connectivity options for various network devices. The switch supports a 160Gbps switching capacity and a packet forwarding rate of 119.04Mpps, ensuring non-blocking 10G line speed forwarding across all ports.
Nøglefunktioner omfatter:
- Højhastighedsporte: 4x10Gbps RJ45 ports (auto-adaptive 10G/5G/2.5G/1000M/100M) and 4x10Gbps SFP+ slots (compatible with 1G/10G optical modules).
- Høj båndbredde: 160Gbps switching capacity and 119.04Mpps packet forwarding rate.
- L3 Management: Understøtter Web and Command Line Interface (CLI) for comprehensive device and port configuration, including IPv4/IPv6 management and routing.
- Advanced Layer 2 Features: VLAN, ACL, QoS, Jumbo frame, DHCP, security, multicast, MAC address table, diagnosis, Statistics, MSTP/RSTP/STP.
- Security & Diagnosis: AAA/802.1X/MAC-Based authentication, DoS anti-attack, dynamic ARP inspection, DHCP Snooping, IP Source Guard, Port Security, Protected Ports, storm control, Console/RAM/Flash Logs, Port Mirroring, Ping, Traceroute, Port Tests, UDLD Protocol.
- Holdbart design: Metal case with industrial-grade fan for efficient heat dissipation, suitable for desktop or wall-mounting.
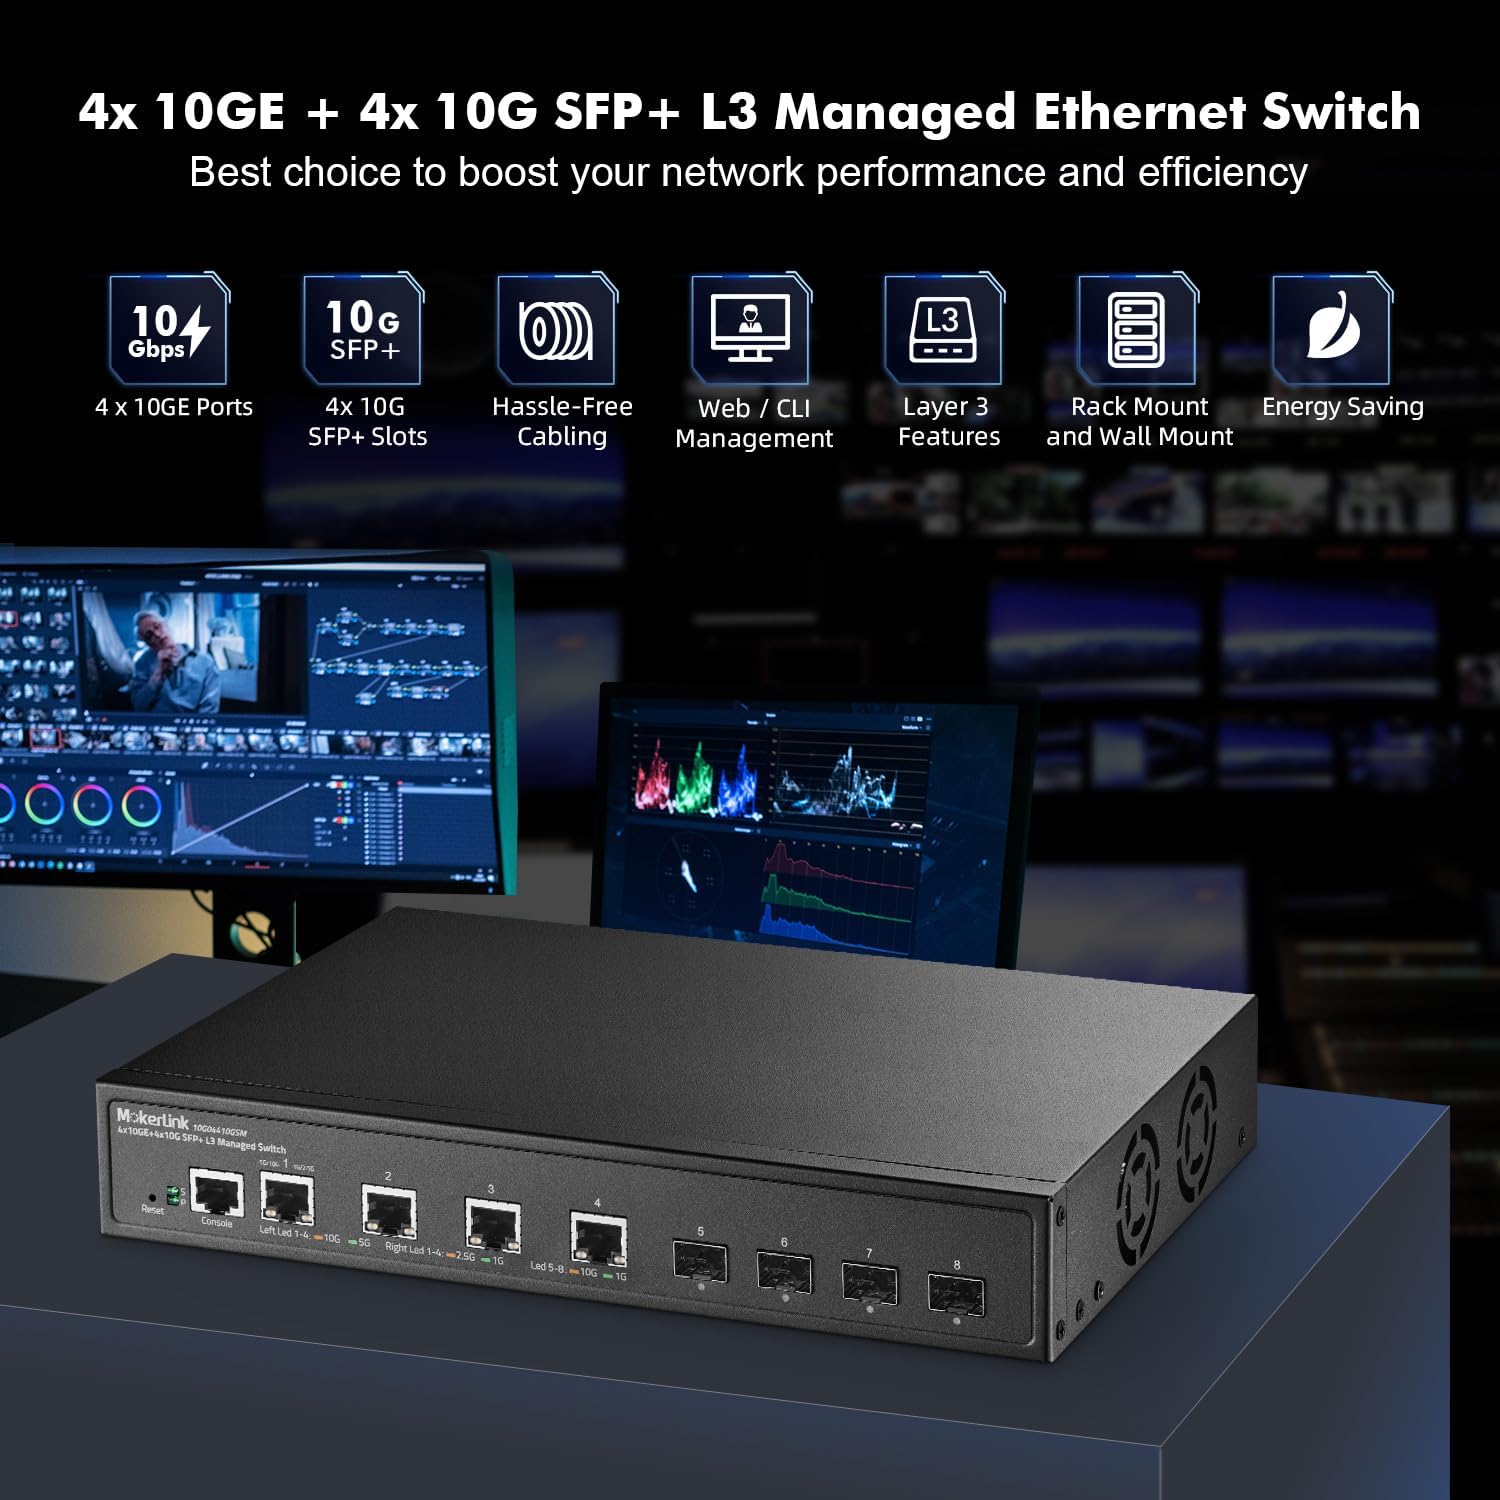
Figure 2.1: MokerLink 8-Port 10G Managed Ethernet Switch highlighting key features like 10G ports, SFP+ slots, Web/CLI management, L3 features, rack/wall mount, and energy saving.

Figur 2.2: For- og bagpanel view of the switch, showing 4x10Gbps RJ45 ports, 4x10Gbps SFP+ slots, console port, reset button, power indicator, system indicator, and external power supply input.
3. Pakkens indhold
Verify the contents of your package upon opening. If any items are missing or damaged, please contact your vendor.
- 1 x MokerLink 10G Managed Switch
- 1 x strømadapter
- 1 x Brugermanual (dette dokument)
- Mounting Accessories (for desktop or wall-mount installation)
4. Opsætning
4.1 Fysisk installation
The MokerLink 8-Port 10G Managed Ethernet Switch is designed for flexible deployment, supporting both desktop and wall-mount installations.
- Desktopplacering: Placer kontakten på en flad, stabil overflade, og sørg for tilstrækkelig ventilation omkring enheden.
- Vægmontering: Use the provided mounting accessories to securely attach the switch to a wall. Ensure the mounting location is sturdy and allows for proper cable management and ventilation.
4.2 Tilslutning af netværksenheder
Connect your network devices (e.g., servers, workstations, NAS, WiFi 6/7 APs) to the switch's RJ45 or SFP+ ports.
- RJ45-porte: Use appropriate Ethernet cables for optimal performance. For 10Gbps connections, Cat6a or Cat7 cables are recommended. For 2.5Gbps/5Gbps, Cat5e or Cat6 cables are suitable.
- SFP+ Slots: Insert compatible 1G or 10G SFP/SFP+ optical modules into the slots, then connect fiber optic cables to the modules.

Figure 4.1: The switch connected to various high-performance devices such as WiFi 6/7 AP, servers, workstations, NAS, and 4K/8K video systems, illustrating cable type recommendations for different speeds.
4.3 Tænd
Connect the provided power adapter to the switch's power input and then to a power outlet. The Power LED (P) on the front panel should illuminate, indicating the switch is receiving power. The System LED (S) will blink during startup and remain steady when the system is operational.
5. Betjeningsvejledning
5.1 LED-indikatorer
LED'erne på frontpanelet giver statusoplysninger:
- P (Strømindikator):
- Tændt: Der er strøm.
- Slukket: Ingen strøm.
- S (System Indicator):
- On: The system is normal.
- Off: System startup or abnormality.
- RJ45 Port LEDs (Left/Right):
- Left LED (Link/Activity): Orange for 10Gbps, Green for 5Gbps, 2.5Gbps, 1Gbps, or 100Mbps. Blinks for activity.
- Right LED (Speed): Orange for 10Gbps, Green for 1Gbps.
- SFP+ Port LED'er:
- Led: Orange for 10Gbps, Green for 1Gbps. Blinks for activity.
5.2 Initial Access to Management Interface
Switchen kan styres via en Web-based interface or Command Line Interface (CLI).
- Web Interface: Access the switch by entering its default IP address (typically 192.168.2.1) into a web browser. The default username is 'admin' and the default password is 'admin'.
- CLI: Connect to the console port using a console cable and a terminal emulator, or use Telnet/SSH for remote access.

Figure 5.1: Illustration of accessing the switch's management interfaces, including the web interface and command line interface, with default login credentials.
6. Administrationsfunktioner
The MokerLink 8-Port 10G Managed Ethernet Switch offers a comprehensive suite of Layer 2 and Layer 3 management features.
6.1 Layer 2 Switching Features
- VLAN (virtuelt lokalnetværk): Supports 802.1Q Tag-based VLANs to segment networks and improve security and performance.
- Linkaggregering (LACP): Combines multiple physical links into a single logical link to increase bandwidth and provide link redundancy.
- QoS (Quality of Service): Prioritizes network traffic to ensure critical applications receive sufficient bandwidth and low latency.
- MSTP/RSTP/STP: Spanning Tree Protocols prevent network loops.
- Jumbo rammer: Supports larger Ethernet frames for increased data throughput.

Figur 6.1: Eksample of 802.1Q Tag-based VLANs segregating network traffic for different devices like cameras, servers, and IP phones.

Figure 6.2: Illustration of Link Aggregation (LACP) connecting the switch to another switch and a NAS for enhanced bandwidth and resilience.

Figure 6.3: QoS mechanism prioritizing audio, video, and data traffic to reduce packet loss and latency.
6.2 Layer 3 Routing Features
- IPv4/IPv6-administration: Supports both IPv4 and IPv6 protocols for network addressing and routing.
- Statiske ruter: Configurable static routes for directing traffic between different IP networks.
- ARP (Address Resolution Protocol): Manages the mapping of IP addresses to MAC addresses.
- Loopback Interface: A virtual interface used for management and routing protocols.
6.3 Security and Diagnosis
- AAA/802.1X/MAC-Based Authentication: Provides robust user and device authentication.
- DoS Anti-Attack: Beskytter mod Denial of Service-angreb.
- DHCP Snooping & IP Source Guard: Prevents unauthorized DHCP servers and IP spoofing.
- Havnesikkerhed: Limits the number of MAC addresses on a port to prevent unauthorized access.
- Storm kontrol: Prevents network performance degradation due to excessive broadcast, multicast, or unknown unicast traffic.
- Portspejling: Duplicates network traffic from one port to another for monitoring and analysis.
- Ping, Traceroute, Port Tests: Diagnostic tools for network connectivity and performance.
- UDLD Protocol: Unidirectional Link Detection protocol to detect and disable unidirectional links.
- Loopdetektion: Identifies and removes network loops to prevent traffic disruptions.

Figure 6.4: Loop detection feature identifying and preventing network loops between two switches, ensuring stable network operation.
7. Vedligeholdelse
Regular maintenance ensures the longevity and optimal performance of your switch.
- Firmwareopgradering: Periodically check the MokerLink official website for firmware updates to enhance features and improve security. Follow the provided instructions for a safe upgrade process.
- Configuration Backup/Restore: Regularly back up your switch configuration to prevent data loss. This allows for quick restoration in case of misconfiguration or device replacement.
- Miljøforhold: Ensure the switch operates within recommended temperature and humidity ranges. Maintain clear airflow around the device to facilitate heat dissipation by the industrial-grade fan.
- Rensning: Hold kontakten ren og fri for støv. Brug en blød, tør klud til rengøring.
8. Fejlfinding
Dette afsnit omhandler almindelige problemer, du kan støde på.
8.1 Ingen strøm
- Sørg for, at strømadapteren er korrekt tilsluttet afbryderen og en fungerende stikkontakt.
- Kontroller, at stikkontakten fungerer ved at tilslutte en anden enhed.
- Kontroller strømadapteren for synlige skader.
8.2 Intet link på en port
- Check the Ethernet or fiber cable connection at both ends. Ensure cables are not damaged.
- Kontroller, at den tilsluttede enhed er tændt og fungerer korrekt.
- Ensure the correct cable type is used for the speed (e.g., Cat6a/7 for 10G RJ45).
- Check the port status in the switch's management interface.
- Prøv at tilslutte til en anden port på switchen eller brug et andet kabel.
8.3 Kan ikke få adgang Web Interface
- Ensure your computer's IP address is in the same subnet as the switch's default IP (192.168.2.x, with subnet mask 255.255.255.0).
- Verify the switch's IP address has not been changed from the default (192.168.2.1).
- Ryd din browsers cache, eller prøv en anden browser.
- Deaktiver midlertidigt enhver firewall eller antivirussoftware på din computer.
8.4 Nulstilling til fabriksindstillinger
If you forget the password or encounter persistent issues, you can restore the switch to its factory default settings.
- With the switch powered on, locate the Nulstil på frontpanelet.
- Use a paperclip or a similar pointed object to press and hold the Reset button for approximately 6 seconds.
- Slip knappen. Kontakten genstarter med fabriksindstillingerne.
9. Specifikationer
| Feature | Beskrivelse |
|---|---|
| Mærke | MokerLink |
| Modelnummer | 4x10G + 4x10G SFP Managed |
| Antal havne | 9 (4x10Gbps RJ45, 4x10Gbps SFP+, 1xConsole) |
| Inkluderede komponenter | 10G Managed Switch |
| Farve | Sort |
| Kompatible enheder | Desktop |
| Interface | RJ45, SFP+ |
| Dataoverførselshastighed | 160 Gigabit pr. sekund (switchingkapacitet) |
| Switch Type | Managed (L3) |
| MAC-adressetabelstørrelse | 16K |
| Pakkevideresendelseshastighed | 119.04 Mpps |
| Ledelse | Web, CLI, Telnet, SSH, SNMP |
| Strømforbrug | Empty Load Power: <36W |
10. Garanti og support
10.1 Garantioplysninger
The MokerLink 8-Port 10G Managed Ethernet Switch comes with a 1 års begrænset garanti fra købsdatoen. Denne garanti dækker defekter i materialer og udførelse ved normal brug. Den dækker ikke skader forårsaget af misbrug, ulykker, uautoriseret ændring eller eksterne årsager.
10.2 Teknisk support
For technical assistance, troubleshooting, or warranty claims, please contact MokerLink customer support through the official website or your point of purchase. Please have your product model number and purchase information ready when contacting support.