
1. Introduktion
Thank you for choosing the Kismile CM125A 8-Cup Drip Coffee Maker. This appliance is designed to provide a versatile brewing experience, offering both hot and deep-infusion cold brew options. It features SCA-certified precision brewing, rapid heating, adjustable flow control, and a removable water tank for convenience. Please read this manual thoroughly before first use to ensure proper operation and maintenance.
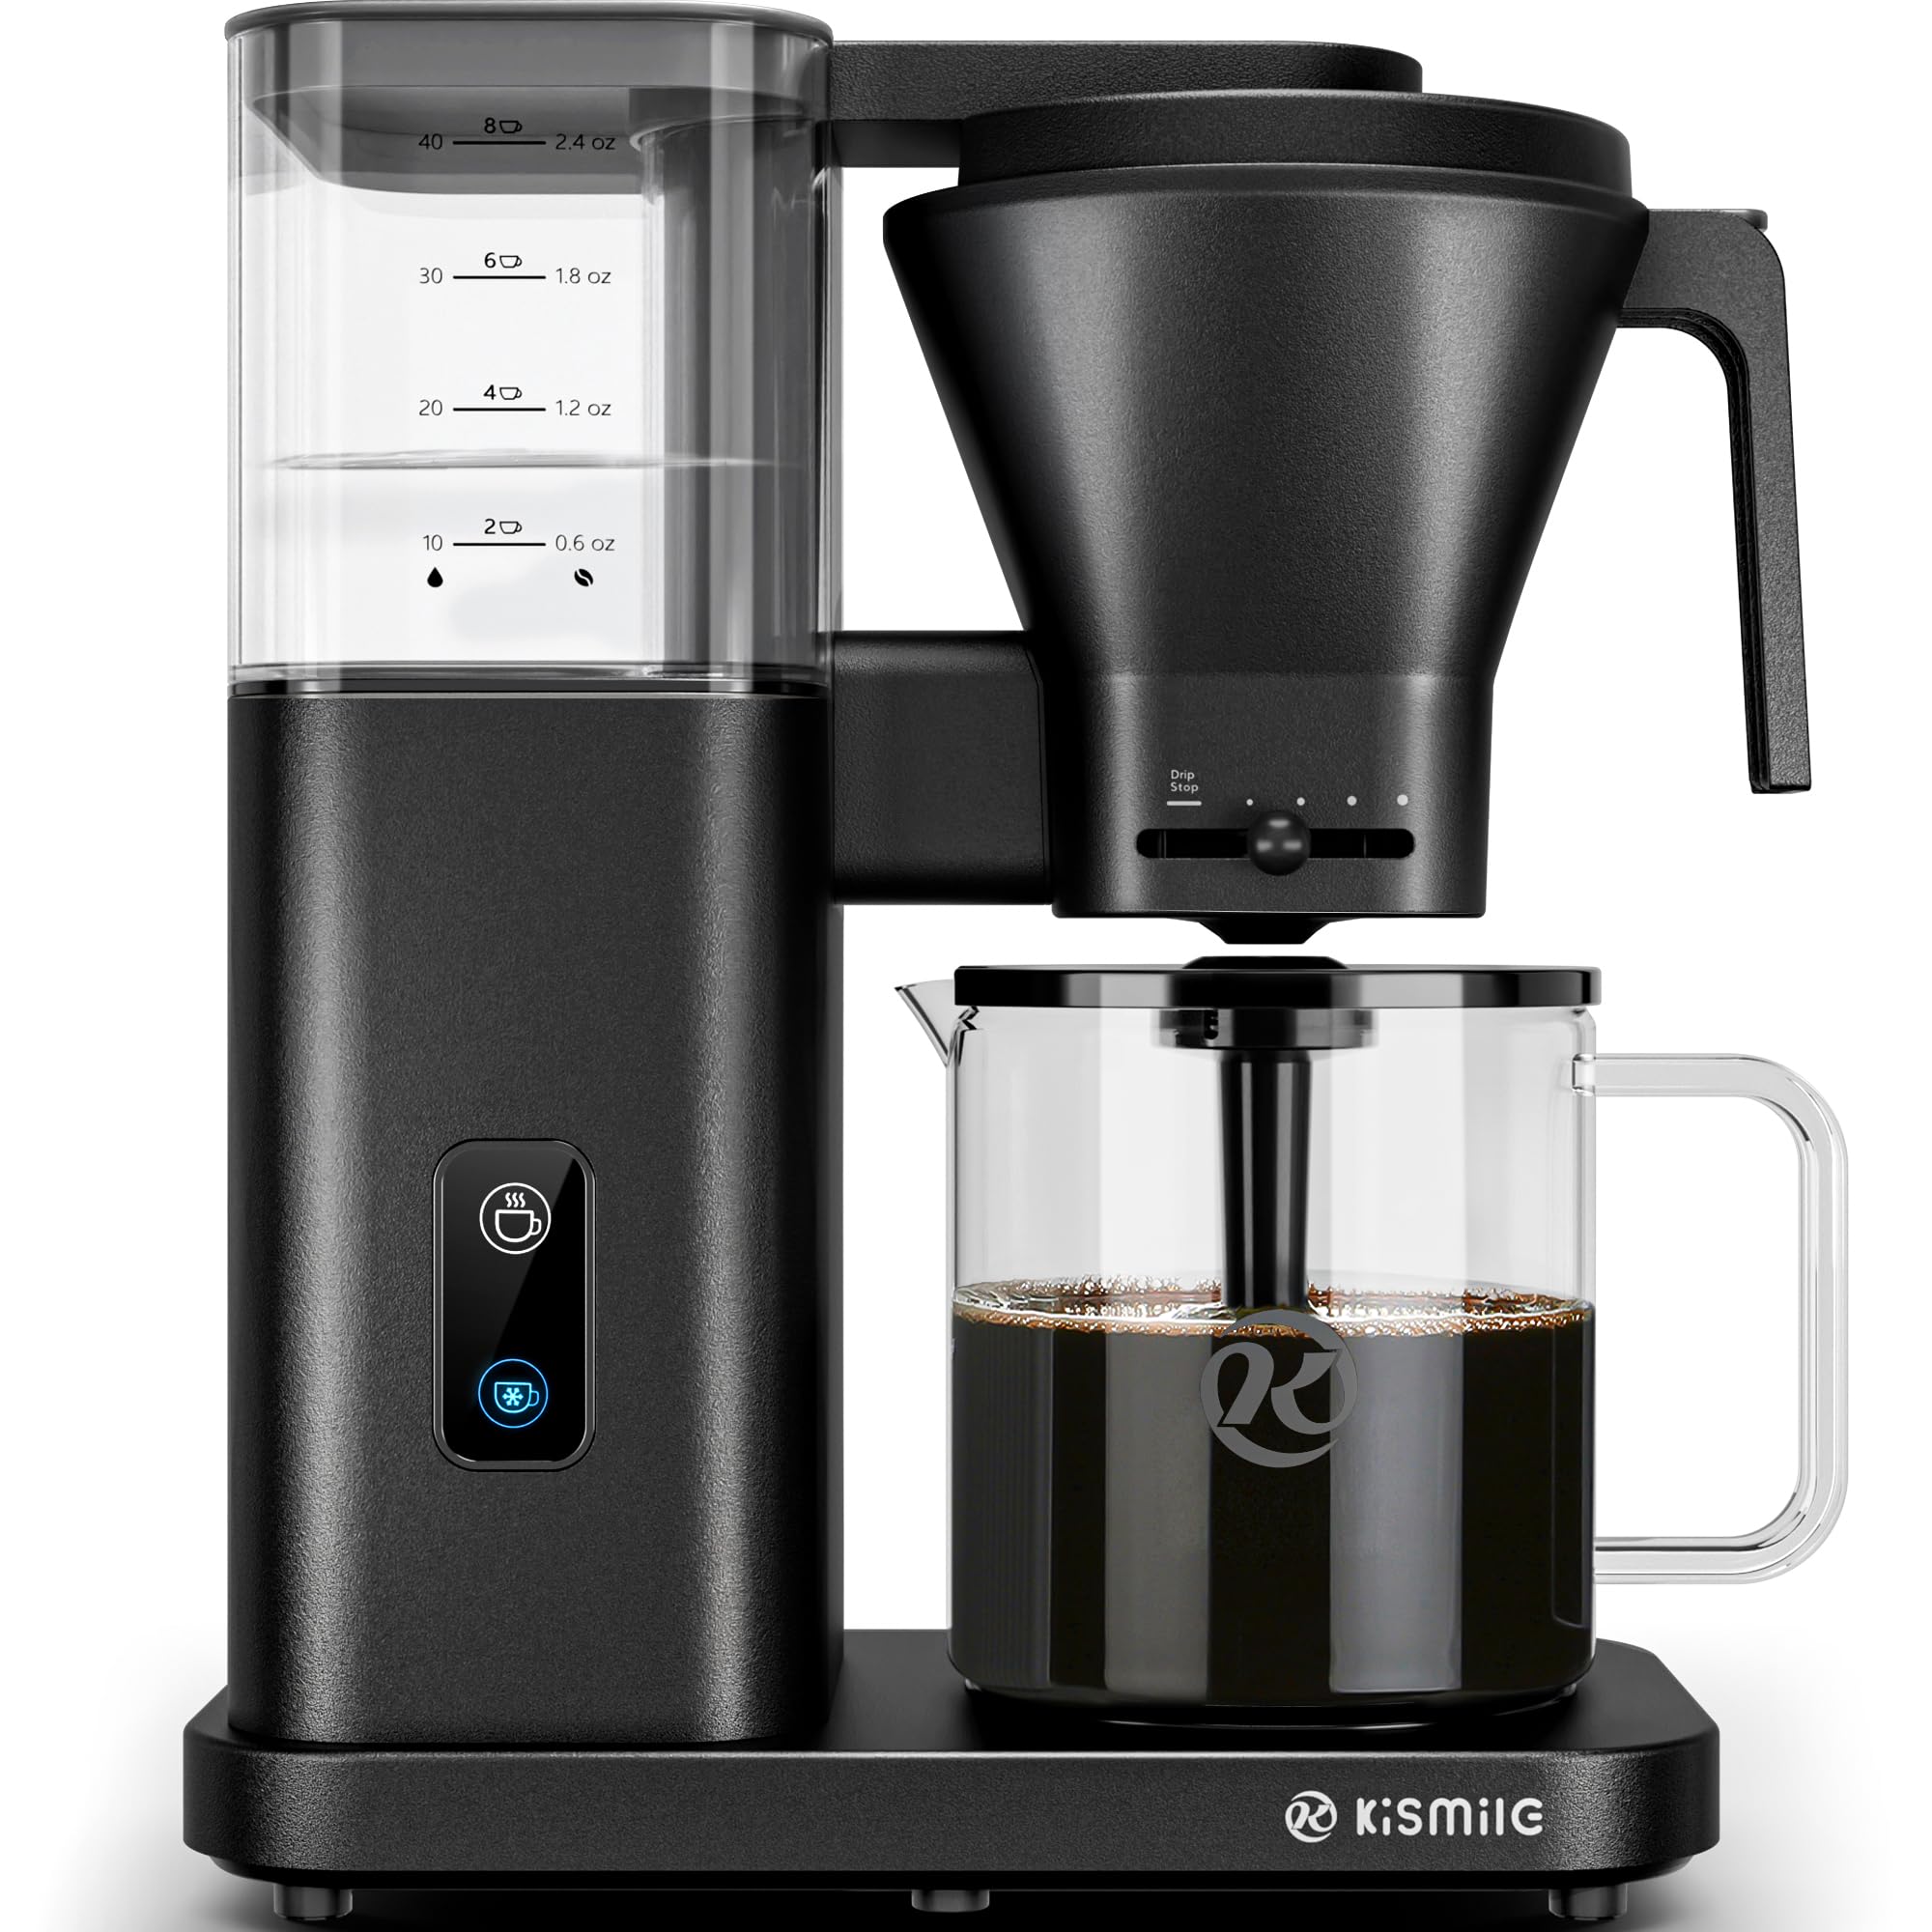
Figure 1: Kismile CM125A 8-Cup Drip Coffee Maker.
2. Vigtige sikkerhedsinstruktioner
Ved brug af elektriske apparater skal grundlæggende sikkerhedsforanstaltninger altid følges for at reducere risikoen for brand, elektrisk stød og/eller personskade, herunder følgende:
- Læs alle instruktioner.
- Rør ikke ved varme overflader. Brug håndtag eller knopper.
- For at beskytte mod brand, elektrisk stød og personskade må ledning, stik eller kaffemaskine ikke nedsænkes i vand eller anden væske.
- Tæt opsyn er nødvendigt, når et apparat bruges af eller i nærheden af børn.
- Træk stikket ud af stikkontakten, når det ikke er i brug, og før rengøring. Lad det køle af, før du sætter dele på eller af, og før du rengør apparatet.
- Betjen ikke noget apparat med en beskadiget ledning eller stik, eller efter at apparatet ikke fungerer korrekt eller er blevet beskadiget på nogen måde. Returner apparatet til det nærmeste autoriserede serviceværksted for undersøgelse, reparation eller justering.
- Brug af tilbehør, der ikke er anbefalet af apparatets producent, kan resultere i brand, elektrisk stød eller personskade.
- Må ikke bruges udendørs.
- Lad ikke ledningen hænge ud over kanten af bordet eller bordpladen eller røre ved varme overflader.
- Må ikke placeres på eller i nærheden af en varm gas- eller elektrisk brænder eller i en opvarmet ovn.
- Sæt altid stikket i apparatet først, og sæt derefter ledningen i stikkontakten. For at afbryde forbindelsen skal du slukke for en vilkårlig knap og derefter tage stikket ud af stikkontakten.
- Brug ikke apparatet til andet end tilsigtet brug.
- Kanden er designet til brug med dette apparat. Det må aldrig bruges på en range top.
- Stil ikke en varm karaffel på en våd eller kold overflade.
- Brug ikke en revnet kande eller en kande med et løst eller svækket håndtag.
- Rengør ikke karaffel med rensemidler, ståluldspuder eller andet slibende materiale.
- This appliance has a grounded plug. Please ensure your outlet is properly grounded.
3. Produktkomponenter
Familiarize yourself with the parts of your Kismile coffee maker:
- Vandtank: Removable, 1250ml capacity.
- Brusehoved: Fordeler vandet jævnt over kaffegrums.
- Filterholder: Accommodates V-shape or basket paper filters, or a metal filter.
- Adjustable Flow Control Lever: Allows customization of brew strength and pour-over style.
- Glaskaraffel: Borosilicate glass, designed to hold brewed coffee.
- Varmeplade: Holder kaffen varm efter brygning.
- Kontrolpanel: Buttons for hot brew and cold brew functions.
- Coffee Spoon: Til måling af kaffegrums.

Figure 2: Key components and materials of the coffee maker.

Figure 3: The 70g large filter basket supports various filter types.
4. Indledende opsætning
Før du bruger din kaffemaskine for første gang, skal du følge disse trin:
- Pakker ud: Fjern forsigtigt al emballage, og sørg for, at alle komponenter er til stede.
- Ren: Wash the carafe, filter holder, and water tank with warm, soapy water. Rinse thoroughly and dry. Wipe the exterior of the coffee maker with a damp klæde.
- Position: Placer kaffemaskinen på en flad, stabil og varmebestandig overflade.
- Første rengøringscyklus: Fill the water tank to the maximum level with fresh water. Place the empty carafe on the heating plate. Run a full brew cycle without coffee grounds to clean the internal components. Discard the water. Repeat this process once more.
5. Betjening
5.1 Hot Brew
For optimal hot coffee brewing, the machine heats water to 197–205°F.
- Fyld vandtank: Remove the water tank and fill it with fresh, cold water to your desired level (up to 8 cups/1250ml). Reattach the tank securely.
- Tilsæt kaffegrums: Place a paper filter (V-shape or basket) or a reusable metal filter into the filter holder. Add your desired amount of medium-ground coffee. A general guideline is 1-2 tablespoons per cup.
- Position Karaffel: Placer den tomme glaskande på varmepladen.
- Adjust Flow Control: Use the adjustable flow control lever on the filter holder to set your desired brew strength. Sliding it towards 'Drip Stop' will slow the flow, allowing for a stronger, pour-over style extraction.
- Begynd at brygge: Press the Hot Brew button (indicated by a coffee cup icon). The indicator light will illuminate, and brewing will begin. The machine heats water in approximately 3 seconds and completes an 8-cup brew in about 6 minutes.
- Hold dig varm: After brewing, the heating plate will automatically keep the coffee warm at 176–185°F for up to 40 minutes.
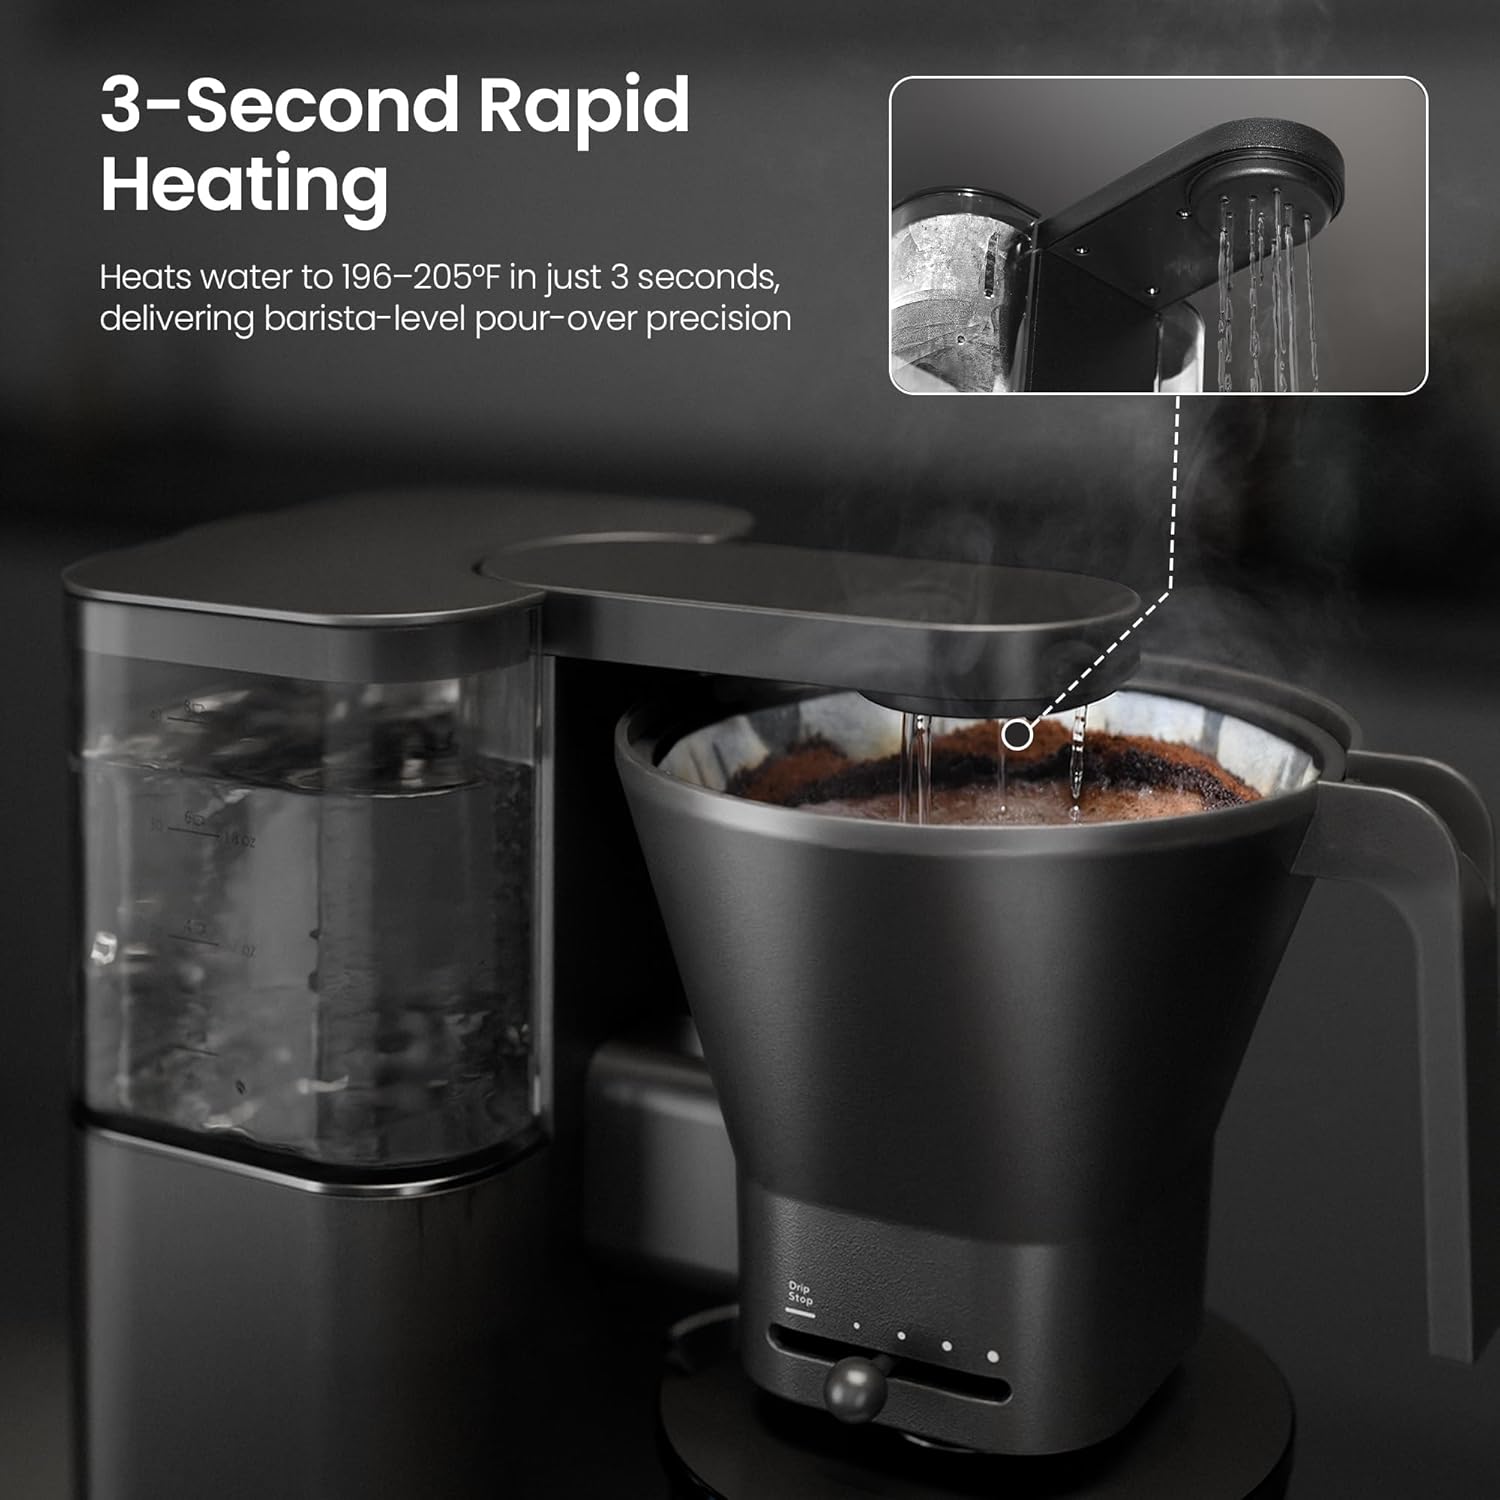
Figure 4: The shower head ensures even water distribution for optimal extraction.
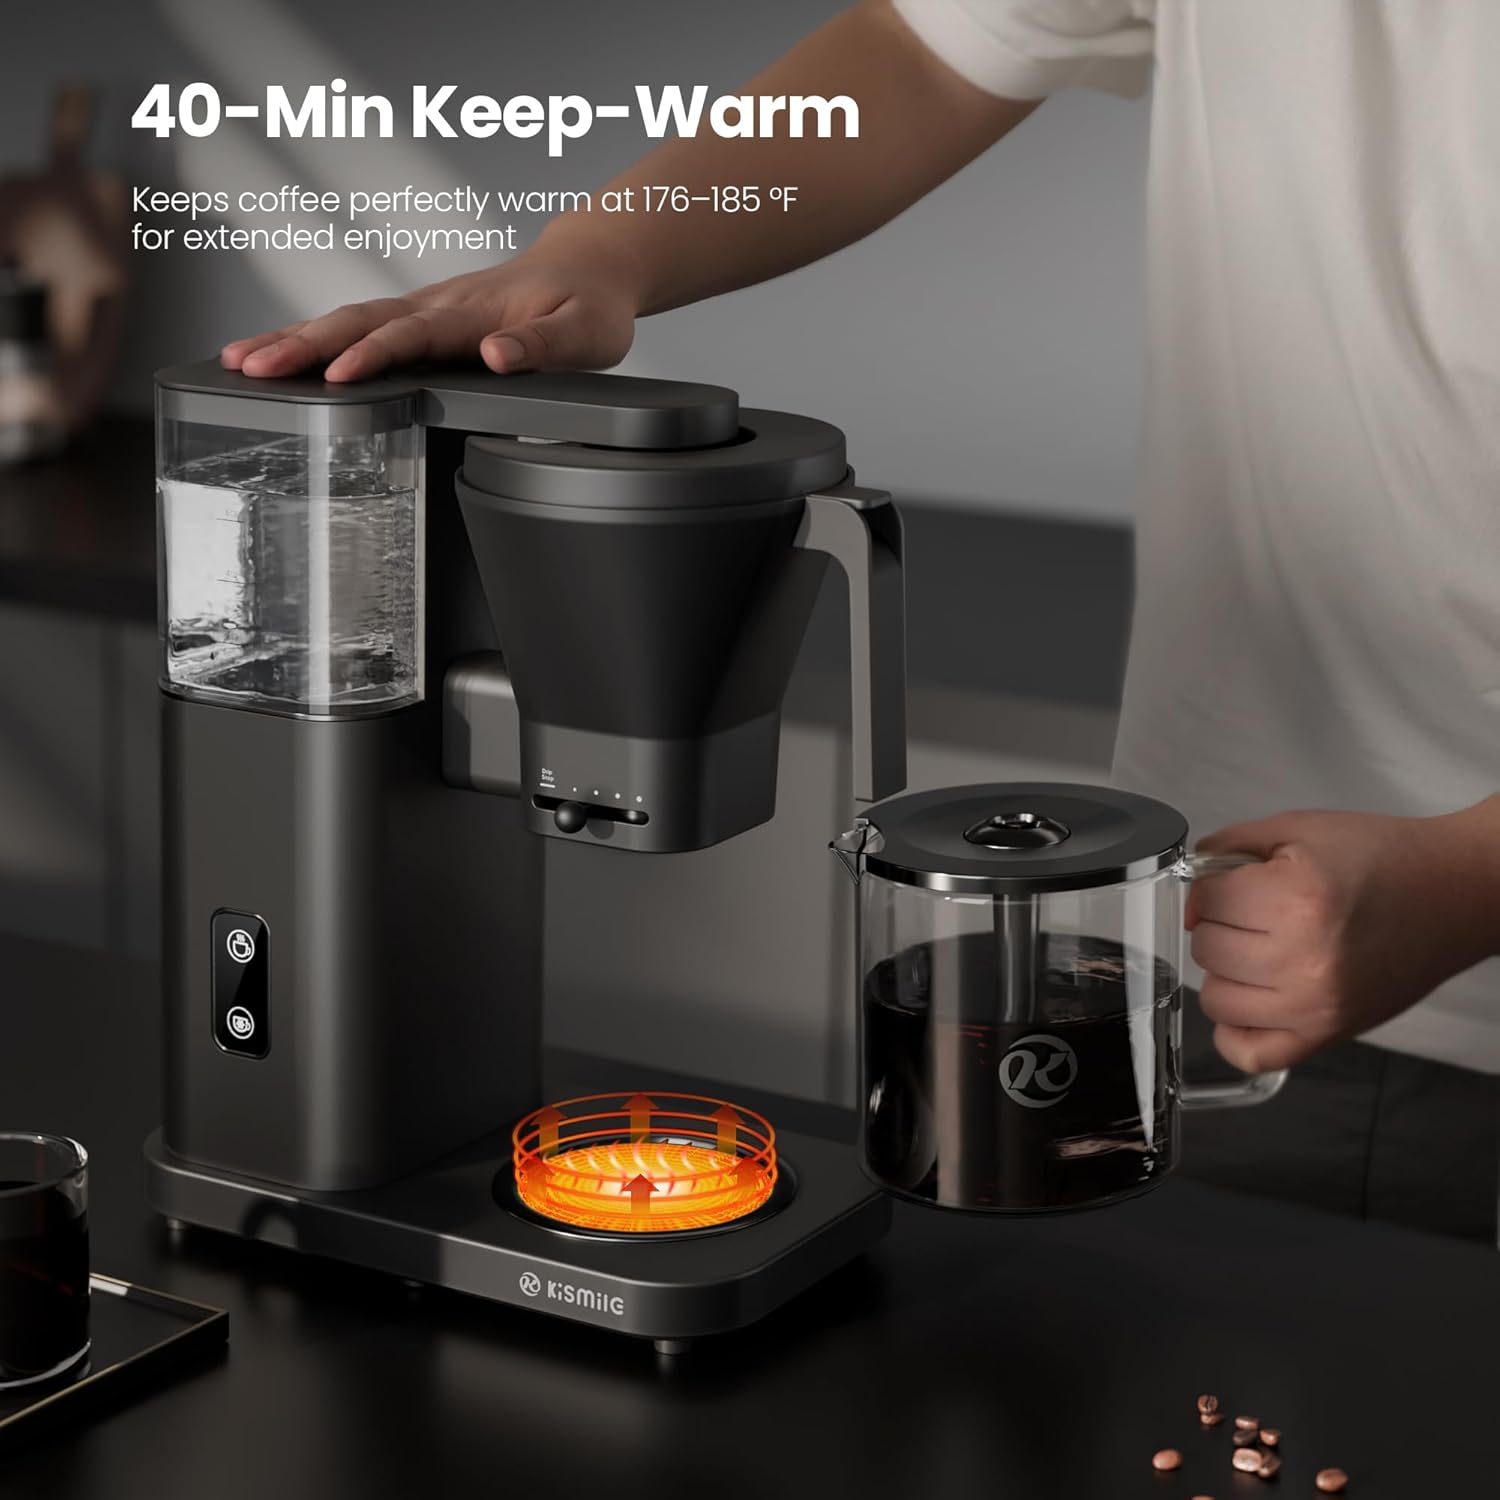
Figure 5: The heating plate keeps coffee warm for up to 40 minutes.
Video 1: Kismile Advanced Coffee Machine Usage Guide. This video demonstrates the general operation of the coffee maker, including filling the water tank and starting a brew cycle.
5.2 Cold Brew
The deep-infusion cold brew function provides a smoother, less acidic coffee by allowing a 20-minute extraction process.
- Forberede: Ensure the machine has cooled for 5-10 minutes if previously used for hot brewing.
- Fyld vandtank: Fill the removable water tank with cold water (between 39-50°F / 4-10°C). Do not add ice to the water tank, as it can dilute the flavor.
- Tilsæt kaffegrums: Place a filter in the filter holder and add your desired amount of coffee grounds.
- Position Karaffel: Placer den tomme glaskande på varmepladen.
- Start Cold Brew: Press the Cold Brew button (indicated by a snowflake icon). The blue indicator light will turn on, and the hot brew light will turn off. The cold brew process takes approximately 20 minutes for deep infusion. Occasional pauses during brewing are normal and help optimize flavor.
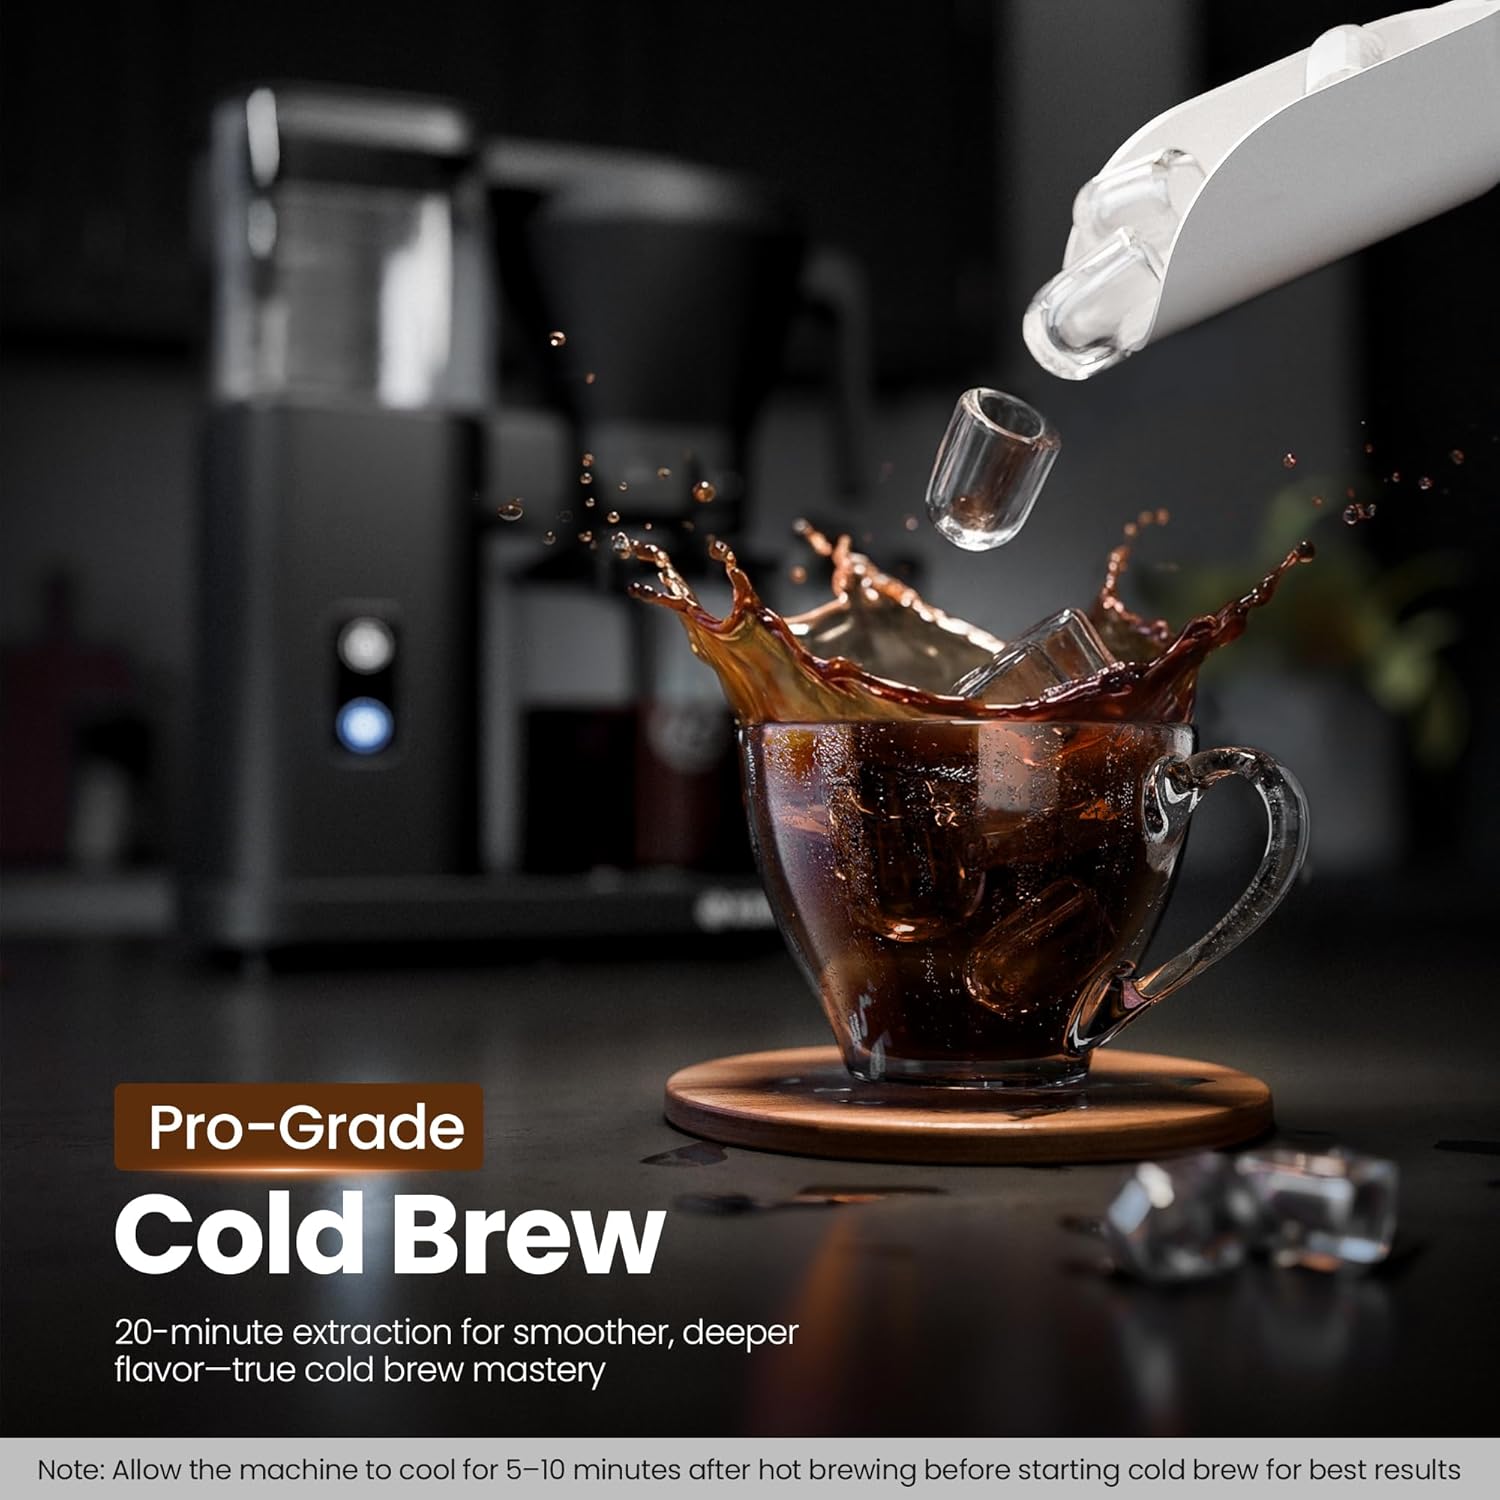
Figure 6: Enjoying a pro-grade cold brew coffee.
Video 2: Cold brew function demonstration. This video illustrates how to activate and use the cold brew feature of the coffee maker.
5.3 Justerbar flowkontrol
The manual flow-control lever allows you to customize your brewing experience:
- Slower Flow: Slide the lever towards the 'Drip Stop' position to reduce the water flow rate. This allows for pre-infusion and multi-stage extraction, resulting in a bolder, more intense coffee flavor, similar to a pour-over method.
- Faster Flow: Slide the lever away from 'Drip Stop' for a quicker brew and a lighter coffee.

Figure 7: Adjusting the flow control lever for customized brewing.
Video 3: How to Use Custom Settings. This video demonstrates how to utilize the adjustable flow control lever to customize your coffee's strength and flavor.
5.4 Auto Stop When Funnel Removed
The coffee maker is equipped with a safety feature that automatically stops the brewing process if the funnel (filter holder) is removed during operation. This prevents spills and ensures safe handling.

Figure 8: Auto-stop feature when the funnel is removed.
5.5 Anti-Drip Design
The magnetic anti-drip design helps prevent coffee from dripping onto the heating plate when the carafe is temporarily removed during brewing, keeping your countertop clean.

Figure 9: The anti-drip feature ensures a clean brewing area.
6. Vedligeholdelse & Rengøring
Regelmæssig rengøring sikrer optimal ydeevne og forlænger din kaffemaskines levetid.
- Daglig rengøring: After each use, unplug the coffee maker and allow it to cool. Remove the carafe, filter holder, and water tank. Wash these removable parts with warm, soapy water or place them in the dishwasher (top rack recommended). Wipe the exterior of the main unit with a damp klæde. Nedsænk ikke hovedenheden i vand.
- Afkalkning: Mineral deposits from water can build up over time, affecting performance. Descale your coffee maker every 2-4 weeks, depending on water hardness.
- Mix 1 part white vinegar with 2 parts water, or use a commercial descaling solution according to its instructions.
- Fyld vandbeholderen med afkalkningsopløsningen.
- Placer den tomme kande på varmepladen.
- Kør en fuld bryggecyklus.
- Efter cyklussen skal opløsningen stå i kanden i 15-30 minutter.
- Kassér opløsningen, og skyl kanden grundigt.
- Kør 2-3 cyklusser med frisk, rent vand for at skylle eventuel resterende afkalkningsopløsning ud.

Figur 10: Aftagelige dele tåler opvaskemaskine, så de er nemme at rengøre.
7. Fejlfinding
Hvis du støder på problemer med din kaffemaskine, kan du se følgende almindelige problemer og løsninger:
| Problem | Mulig årsag | Løsning |
|---|---|---|
| Kaffen brygger ikke. | No water in tank; power not connected; filter holder not properly seated. | Fill water tank; ensure power cord is plugged in; re-seat filter holder correctly. |
| Kaffe smager svagt. | Too little coffee grounds; coarse grind; flow control lever set too open. | Increase coffee amount; use finer grind; adjust flow control lever towards 'Drip Stop'. |
| Filteret til overløb af kaffe. | Too many coffee grounds; filter holder clogged; flow control lever set too closed. | Reduce coffee amount; clean filter holder; adjust flow control lever to allow faster drip. |
| Machine stops working (lights flash/beeps). | Intern fejl; overophedning. | Unplug the unit, wait 15 minutes, then plug back in. If issue persists, contact customer support. |
| Kaffe er ikke varm nok. | Descaling needed; keep-warm function expired. | Perform descaling; ensure coffee is consumed within the 40-minute keep-warm period. |
8. Specifikationer
| Feature | Detalje |
|---|---|
| Mærke | Kismile |
| Modelnavn | CM125A |
| Kapacitet | 1250 ml (8 Cups) |
| Farve | Sort |
| Produktmål (D x B x H) | 6.3 cm x 12.2 cm x 13.6 cm |
| Varens vægt | 6.9 pund |
| Wattage | 1650 watt |
| Voltage | 120 volt |
| Kaffe input type | Malet kaffe |
| Materiale | Aluminum, Glass, Plastic (FDA-compliant, food-grade) |
| Særlige funktioner | SCA-Certified Brewing, 3s Instant Heat, Adjustable Flow Control, Removable Water Tank, Deep Cold Brew, 40 Min Keep Warm, Auto Shut-Off |
9. Garanti og support
This Kismile CM125A Drip Coffee Maker comes with a 1 års producentgaranti fra købsdatoen. Denne garanti dækker fejl i materialer og udførelse ved normal brug.
Garantien dækker ikke:
- Damage caused by accident, abuse, misuse, or improper operation.
- Skader forårsaget af uautoriseret reparation eller modifikation.
- Almindelig slitage.
For warranty claims, technical support, or any questions regarding your product, please contact Kismile customer service through the retailer where the product was purchased or visit the official Kismile webwebsted for kontaktoplysninger.