
1. Introduktion
This manual provides comprehensive instructions for the setup, operation, and maintenance of your Procolored K13-Lite DTF Printer. Designed for high-quality apparel transfer printing, this machine incorporates advanced features to ensure efficient and vibrant results. Please read this manual thoroughly before operating the printer to ensure safe and optimal performance.
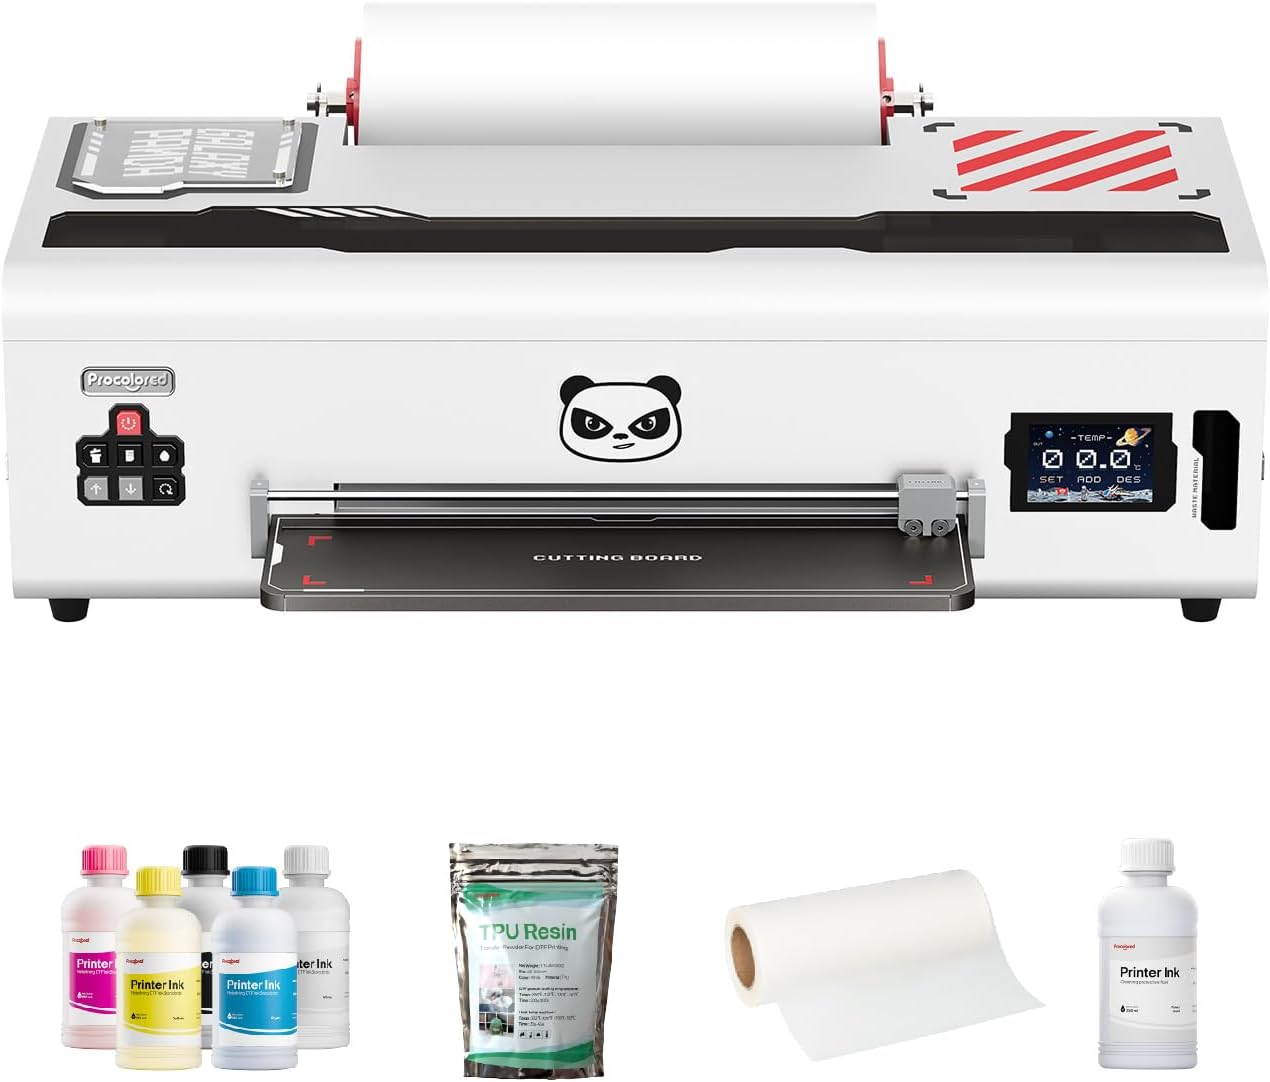
Figure 1: Procolored K13-Lite DTF Printer and included accessories.

Figure 2: Versatile garment printing capabilities of the K13-Lite.
2. Sikkerhedsoplysninger
Always follow basic safety precautions to reduce the risk of fire, electric shock, or injury. Keep the printer away from water and heat sources. Ensure proper ventilation during operation, especially when using the curing oven. Do not attempt to service the printer yourself; refer to qualified service personnel. Always wear appropriate personal protective equipment, such as gloves, when handling inks and powders.
3. Pakkens indhold
Bekræft at alle varer er til stede ved udpakning:
- Procolored K13-Lite DTF Printer
- Initial Ink Set (CMYK + White pigment-based ink)
- Adhesive Powder
- PET Roll Film
- Printhead Moisturizing Device
- Nozzle Protection Fluid
- USB kabel
- Software USB-drev
- Strømkabel
- Instruktionsmanual
4. Opsætning
Follow these steps to set up your Procolored K13-Lite DTF Printer:
- Udpakning og første inspektion: Carefully remove the printer and all accessories from the packaging. Inspect for any visible damage.
- Printerforberedelse:
- Open the printer cover and remove any plastic zip ties or fixed buckles securing internal components.
- Install the film roller rod and black knob, ensuring the film is positioned correctly close to the printhead side to prevent incomplete patterns.
- Install the tray by loosening the two front screws, inserting the tray, and then tightening the screws to secure it.
- Software installation:
- Slut printeren til din computer via USB.
- Install the printer driver and RIP software from the provided USB drive.
- Ink Filling:
- Shake ink bottles vigorously before adding to reduce sediment.
- Add ink to the corresponding ink bottles in the printer's ink tank.
- Slightly move the ink cartridges forth and back to pull them out in sequence. Use the provided syringe to draw 3-5ml of ink from each cartridge to prime the system.
- Initial Test Print:
- Execute the printhead cleaning function in the RIP software.
- Print a test page to check the printhead nozzle status. Ensure all lines are complete and clear.
Video 1: Initial Printer and Curing Oven Assembly Guide. This video demonstrates the unboxing, component installation, and initial setup steps for the printer and curing oven.
5. Betjeningsvejledning
Operating the Procolored K13-Lite involves preparing your design, printing, and then curing the transfer.
5.1 Design and Printing
- Designforberedelse: Use the Professional RIP software to prepare your design. The software automatically detects image formats and distinguishes between RGB and CMYK color modes. Pre-calibrated curves ensure consistent, vibrant colors.
- Indlæser film: Ensure the PET film is correctly loaded into the printer. The printer supports a maximum print width of 13 inches and a print length of 31 inches.
- Udskrivningsproces: The printer applies a mirrored color layer onto the PET film, followed by a white ink layer to enhance color richness and vibrancy.

Figure 3: Professional RIP software interface for design preparation and printing.

Figur 4: Eksample of a printed design on film, showcasing accurate color reproduction.
5.2 Curing and Transfer (with DTF Oven)
After printing, the transfer requires curing with an oven and then pressing onto the garment.
- Oven Setup:
- Ensure the oven's voltagKontakten (220V/110V) er indstillet korrekt til din region.
- Tilslut strømmen og tænd for kontakten.
- Set the desired temperature and time using the control panel. The oven defaults to 120°C for 150 seconds.
- Applying Adhesive Powder: Sprinkle a layer of adhesive powder evenly on the back of the printed film.
- Hærdning: Place the powdered film into the oven. The countdown starts automatically. After curing, remove the pattern.
- Varmepresseoverførsel: Use a heat press to transfer the cured design onto your apparel.
Video 2: Installation and Usage of DTF Oven. This video provides instructions for assembling and operating a DTF curing oven, including temperature and time settings.
6. Vedligeholdelse
Regelmæssig vedligeholdelse sikrer printerens levetid og optimale ydeevne.
- Automated Cleaning System: The printer features a scheduled cleaning cycle every 10 hours when powered on, reducing white ink clogging by up to 85%.
- Hvid blækcirkulation: White ink circulates every 30 minutes to prevent sedimentation and extend printhead life up to 5 times.
- Infrared SafeGuard System: This system detects debris as small as 2 mm, preventing 90% of common failures for a longer lifespan.
- Udskiftning af filterbomuld: The oven's filter cotton should be replaced every three months.

Figure 5: Automated Cleaning System in action, reducing clogging.

Figure 6: White Ink Circulation System for consistent ink flow.

Figure 7: Infrared SafeGuard System for enhanced printhead protection.
7. Fejlfinding
This section provides solutions to common issues. For more complex problems, contact customer support.
- Printhead Clogging: Ensure regular automated cleaning cycles are active. Perform manual cleaning if necessary. The white ink circulation system helps prevent this.
- Inconsistent Colors: Verify that G7 Certified Color Accuracy settings are applied in the RIP software. Ensure proper color profiles er valgt.
- Film Warping/Debris: The Infrared SafeGuard System should detect and prevent issues. Ensure the printing environment is clean and free of dust.
- Printeren svarer ikke: Check USB connection and power supply. Restart the printer and computer.
8. Specifikationer
| Modelnavn | K13-Lite |
| Maksimal mediestørrelse | A3 (13 inches) |
| Udskrivningsteknologi | Inkjet (DTF) |
| Printerblæktype | Pigment-based ink |
| Blækfarve | CMYK + Hvid |
| Forbindelsesteknologi | USB |
| Produktdimensioner | 12.6" D x 29.1" B x 9.1" H |
| Max input arkkapacitet | 150 |
| Maksimal udskrivningshastighed (farve/sort/hvid) | 1 ppm |
| Speciel funktion | DTF |
9. Garanti og support
The Procolored K13-Lite DTF Printer comes with an extended 12-month standard warranty. During this period, you are eligible for 2 free printhead replacements if your printhead suffers any damage. A one-year warranty is provided for other accessories. Our dedicated customer service team is available 24/6 to address any queries or technical issues.
For technical assistance or warranty claims, please contact Procolored customer support.