
1. Introduktion
Thank you for choosing the OMOTON WK209 Wireless Keyboard and Mouse Set. This manual provides detailed instructions for setting up, operating, and maintaining your new wireless peripheral set. Please read this manual carefully before use to ensure optimal performance and longevity of your product.
2. Pakkens indhold
The OMOTON WK209 Wireless Keyboard and Mouse Set package includes the following items:
- 1 x OMOTON WK209 Wireless Keyboard
- 1 x OMOTON Wireless Mouse
- 1 x USB 2.4 GHz Receiver
Note: AAA batteries are required for operation but are not included in the package.
3. Opsætningsvejledning
3.1. Installation af batterier
Before using the keyboard and mouse, you need to install batteries.
- Find batterirummet på undersiden af tastaturet og musen.
- Åbn batteridækslerne.
- Insert two AAA batteries into the keyboard and one AAA battery into the mouse, ensuring correct polarity (+/-).
- Luk batteridækslerne forsvarligt.

This image displays the battery compartments for the OMOTON WK209 keyboard and mouse. The keyboard requires two AAA batteries, and the mouse requires one AAA battery. Please note that batteries are not included with the product.
3.2. Tilslutning af USB-modtageren
The OMOTON WK209 set uses a single USB receiver for both the keyboard and mouse.
- Locate the USB 2.4 GHz receiver, usually stored in the mouse's battery compartment or packaging.
- Plug the USB receiver into an available USB port on your computer (laptop or desktop PC).
- The system will automatically detect and install the necessary drivers. This is a Plug & Play process and typically requires no manual installation.
- Turn on the mouse using the ON/OFF switch located on its underside. The keyboard does not have a separate power switch; it activates when keys are pressed.

This image illustrates the 2.4 GHz wireless connection of the OMOTON WK209 keyboard and mouse set. It highlights features such as Plug & Play functionality, a stable 2.4G connection, and a wireless range of up to 10 meters (33 feet).
3.3. Kompatibilitet
The OMOTON WK209 set is compatible with a wide range of Windows operating systems.
- Operativsystemer: Windows 11, Windows 10, Windows 8, Windows 7, Windows XP.
- Enheder: Laptop, Desktop PC.

This image demonstrates the broad compatibility of the OMOTON WK209 set with different Windows operating systems, including Windows 7, 8, 10, and 11, across desktop PCs and laptops.
4. Betjeningsvejledning
4.1. Tastaturbrug
The WK209 keyboard features a full-size QWERTZ layout with multimedia keys for enhanced productivity. Simply begin typing after successful connection.
- Multimedienøgler: Access functions like volume control, play/pause, and more directly from the keyboard.
- QWERTZ-layout: Standard German keyboard layout for familiar typing experience.
- 8° hældning: The keyboard is designed with a natural 8-degree tilt for ergonomic comfort during extended use.

This image provides the physical dimensions of the OMOTON WK209 full-size QWERTZ keyboard (43.8 cm x 12.4 cm) and mouse (10.3 cm x 6.6 cm x 3.6 cm). It also notes the keyboard's natural 8-degree tilt for comfortable typing.
4.2. Brug af mus
The WK209 mouse offers precise control and several functional buttons.
- Venstre klik: Standardvalg og aktivering.
- Højreklik: Åbner kontekstmenuer.
- Scrollhjul: Til lodret rulning og mellemklikfunktion.
- Tilbage knap: Navigerer tilbage i web browsere eller file opdagelsesrejsende.
- Frem-knap: Navigerer fremad i web browsere eller file opdagelsesrejsende.
- Desktop Show/Hide Button: Quickly minimizes all open windows to show the desktop, and restores them with another press.

This image highlights the features of the OMOTON WK209 wireless mouse, including the scroll wheel, left-click button, right-click button, back button, forward button, and a button for showing/hiding the desktop. It also emphasizes its ergonomic design and quiet click functionality.
5. Funktioner
- 2.4 GHz trådløs forbindelse: Provides a stable and reliable connection with a range of up to 10 meters (33 feet).
- Plug & Play: Easy setup without the need for additional software or drivers.
- Full-size QWERTZ Layout: Comfortable and familiar typing experience.
- Multimedienøgler: Convenient access to media controls.
- Ergonomisk design: The mouse is shaped for comfortable use, and the keyboard features a natural 8-degree tilt.
- Stille drift: Both the keyboard and mouse are designed for silent clicks and keystrokes, ideal for quiet environments.
- Indikator for lavt batteri: The keyboard features an indicator light to alert you when batteries are running low.

This image illustrates the quiet operation of the OMOTON WK209 keyboard and mouse, highlighting its silent keys and noiseless mouse clicks, suitable for quiet environments.
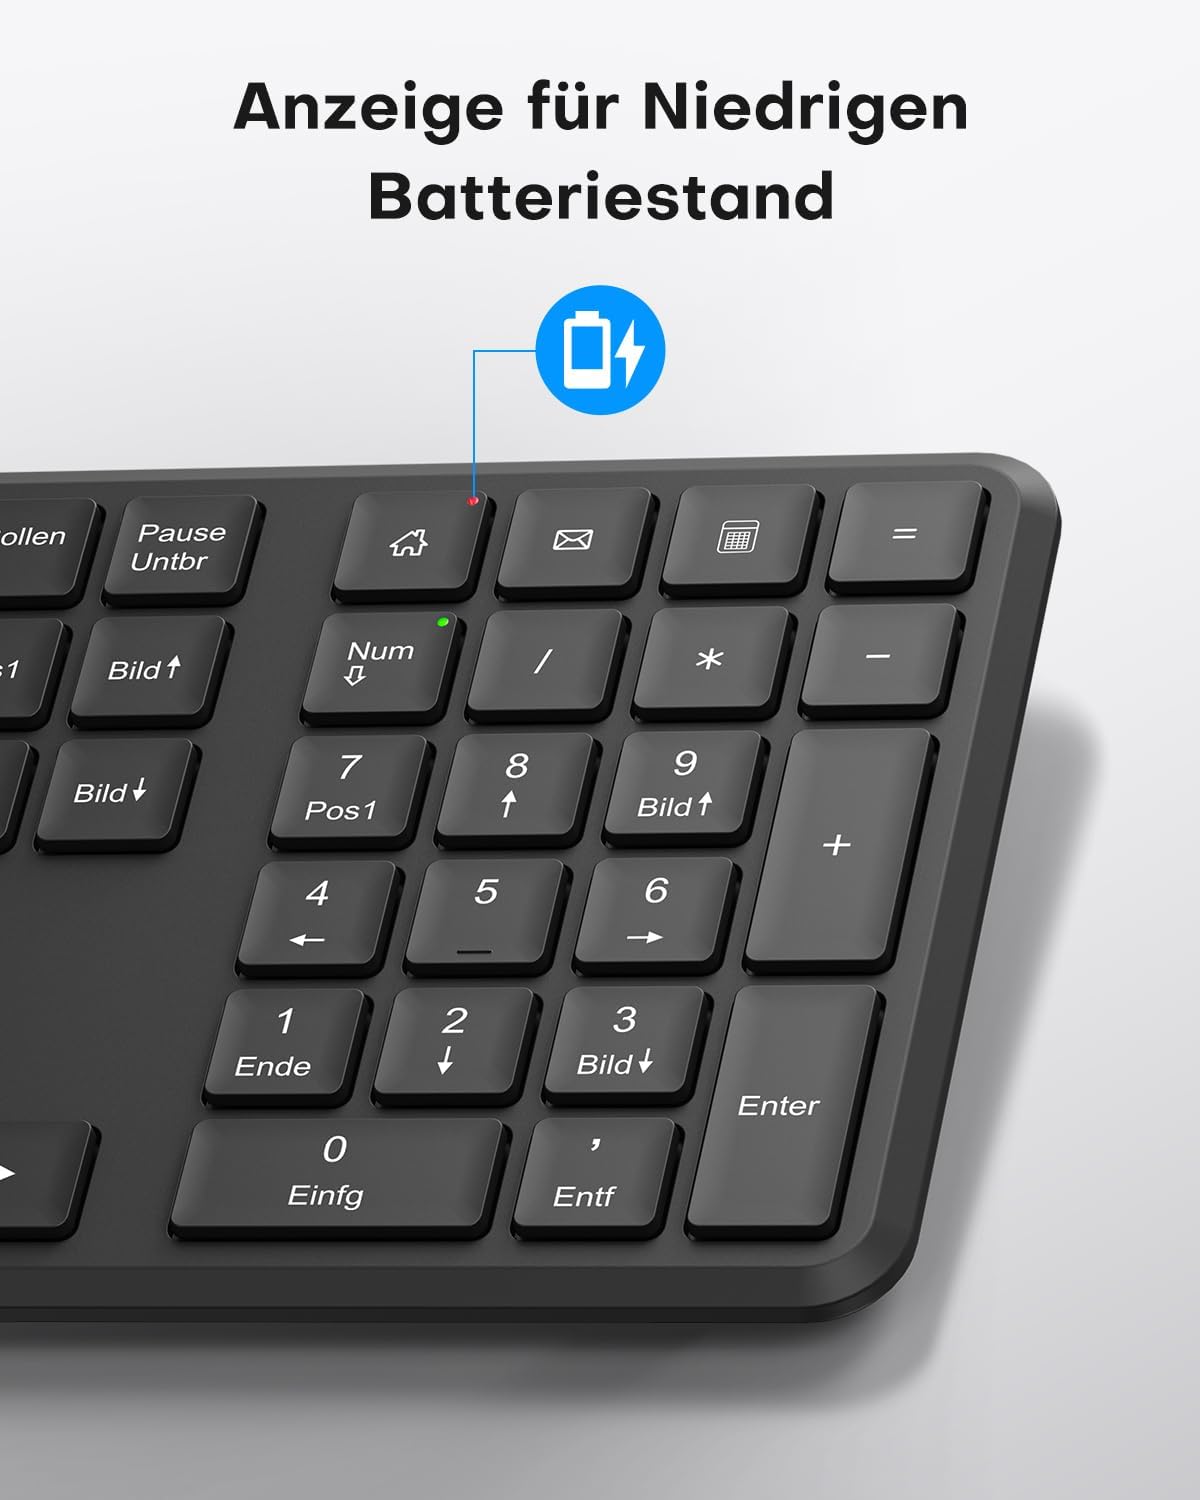
This image points out the low battery indicator on the OMOTON WK209 keyboard, which illuminates to alert the user when batteries need to be replaced.
6. Vedligeholdelse
To ensure the longevity and optimal performance of your OMOTON WK209 set, follow these maintenance guidelines:
- Rensning: Brug en blød, tør klud til at rengøre overfladerne på tastaturet og musen. Ved genstridigt snavs kan du bruge en let tør klud.amp En klud kan bruges, men sørg for, at der ikke trænger fugt ind i enhederne.
- Udskiftning af batteri: Replace batteries promptly when the low battery indicator appears or when performance degrades. Always use fresh, high-quality AAA batteries.
- Opbevaring: Når enhederne ikke er i brug i længere perioder, skal batterierne fjernes for at forhindre lækage. Opbevar enhederne et køligt og tørt sted.
- Undgå væsker: Keep the keyboard and mouse away from liquids to prevent damage.
7. Fejlfinding
If you encounter issues with your OMOTON WK209 set, try the following troubleshooting steps:
- Ingen reaktion fra tastatur/mus:
- Ensure batteries are correctly installed and not depleted. Replace them if necessary.
- Make sure the mouse's ON/OFF switch is in the 'ON' position.
- Kontroller, at USB-modtageren er korrekt tilsluttet en fungerende USB-port på din computer. Prøv en anden USB-port.
- Genstart din computer.
- Lag eller intermitterende forbindelse:
- Flyt tastaturet og musen tættere på USB-modtageren.
- Ensure there are no large metal objects or other wireless devices (e.g., Wi-Fi routers, cordless phones) interfering with the 2.4 GHz signal.
- Try plugging the USB receiver into a front USB port or using a USB extension cable to bring it closer to the devices.
- Taster virker ikke korrekt:
- Tjek for eventuelle snavs under tasterne.
- Ensure the keyboard layout setting on your computer matches the QWERTZ layout.
- Musemarkøren hopper eller er unøjagtig:
- Rengør den optiske sensor på undersiden af musen.
- Brug musen på en ren, ikke-reflekterende overflade eller en musemåtte.
8. Specifikationer
| Feature | Detalje |
|---|---|
| Mærke | OMOTON |
| Model | WK209 |
| Farve | Sort |
| Forbindelsesteknologi | 2.4 GHz trådløs |
| Tastaturlayout | Full-size QWERTZ (German Layout) |
| Særlige funktioner | 2.4 GHz, Full-size, QWERTZ-layout, Battery-operated, Multimedia keys |
| Kompatible enheder | Laptop, PC |
| Kompatible operativsystemer | Windows 11/10/8/7/XP |
| Strømkilde | Battery-Powered (2x AAA for keyboard, 1x AAA for mouse - not included) |
| Varens vægt (ca.) | 514 Grams (total set, including packaging) |
| Pakkedimensioner | 44.79 x 13.9 x 5.3 cm |
| ASIN | B0FQNS3FFB |
9. Garanti og support
OMOTON products are designed for reliability and performance. For warranty information and customer support, please refer to the warranty card included with your purchase or visit the official OMOTON website. If you experience any issues that cannot be resolved using the troubleshooting guide, please contact OMOTON customer service for assistance.