
Indledning
Thank you for choosing the Gevi 14-Cup Programmable Coffee Maker. This manual provides essential information for the safe and efficient operation, maintenance, and troubleshooting of your new appliance. Please read these instructions thoroughly before first use and keep them for future reference.
Vigtige sikkerhedsinstruktioner
Ved brug af elektriske apparater skal grundlæggende sikkerhedsforanstaltninger altid følges for at reducere risikoen for brand, elektrisk stød og/eller personskade, herunder følgende:
- Læs alle instruktioner.
- Rør ikke ved varme overflader. Brug håndtag eller knopper.
- For at beskytte mod brand, elektrisk stød og personskade må ledning, stik eller apparat ikke nedsænkes i vand eller anden væske.
- Tæt opsyn er nødvendigt, når et apparat bruges af eller i nærheden af børn.
- Træk stikket ud af stikkontakten, når det ikke er i brug, og før rengøring. Lad det køle af, før du sætter dele på eller af, og før du rengør apparatet.
- Betjen ikke noget apparat med en beskadiget ledning eller stik, eller efter at apparatet ikke fungerer korrekt eller er blevet beskadiget på nogen måde. Returner apparatet til det nærmeste autoriserede serviceværksted for undersøgelse, reparation eller justering.
- Brug af tilbehør, der ikke er anbefalet af apparatets producent, kan resultere i brand, elektrisk stød eller personskade.
- Må ikke bruges udendørs.
- Lad ikke ledningen hænge ud over kanten af bordet eller bordpladen eller røre ved varme overflader.
- Må ikke placeres på eller i nærheden af en varm gas- eller elektrisk brænder eller i en opvarmet ovn.
- Sæt altid stikket i apparatet først, og sæt derefter ledningen i stikkontakten. For at afbryde forbindelsen skal du slukke for en vilkårlig knap og derefter tage stikket ud af stikkontakten.
- Brug ikke apparatet til andet end tilsigtet brug.
- Do not open the top lid during brewing.
Hvad er inkluderet
Your Gevi 14-Cup Programmable Coffee Maker package includes the following components:
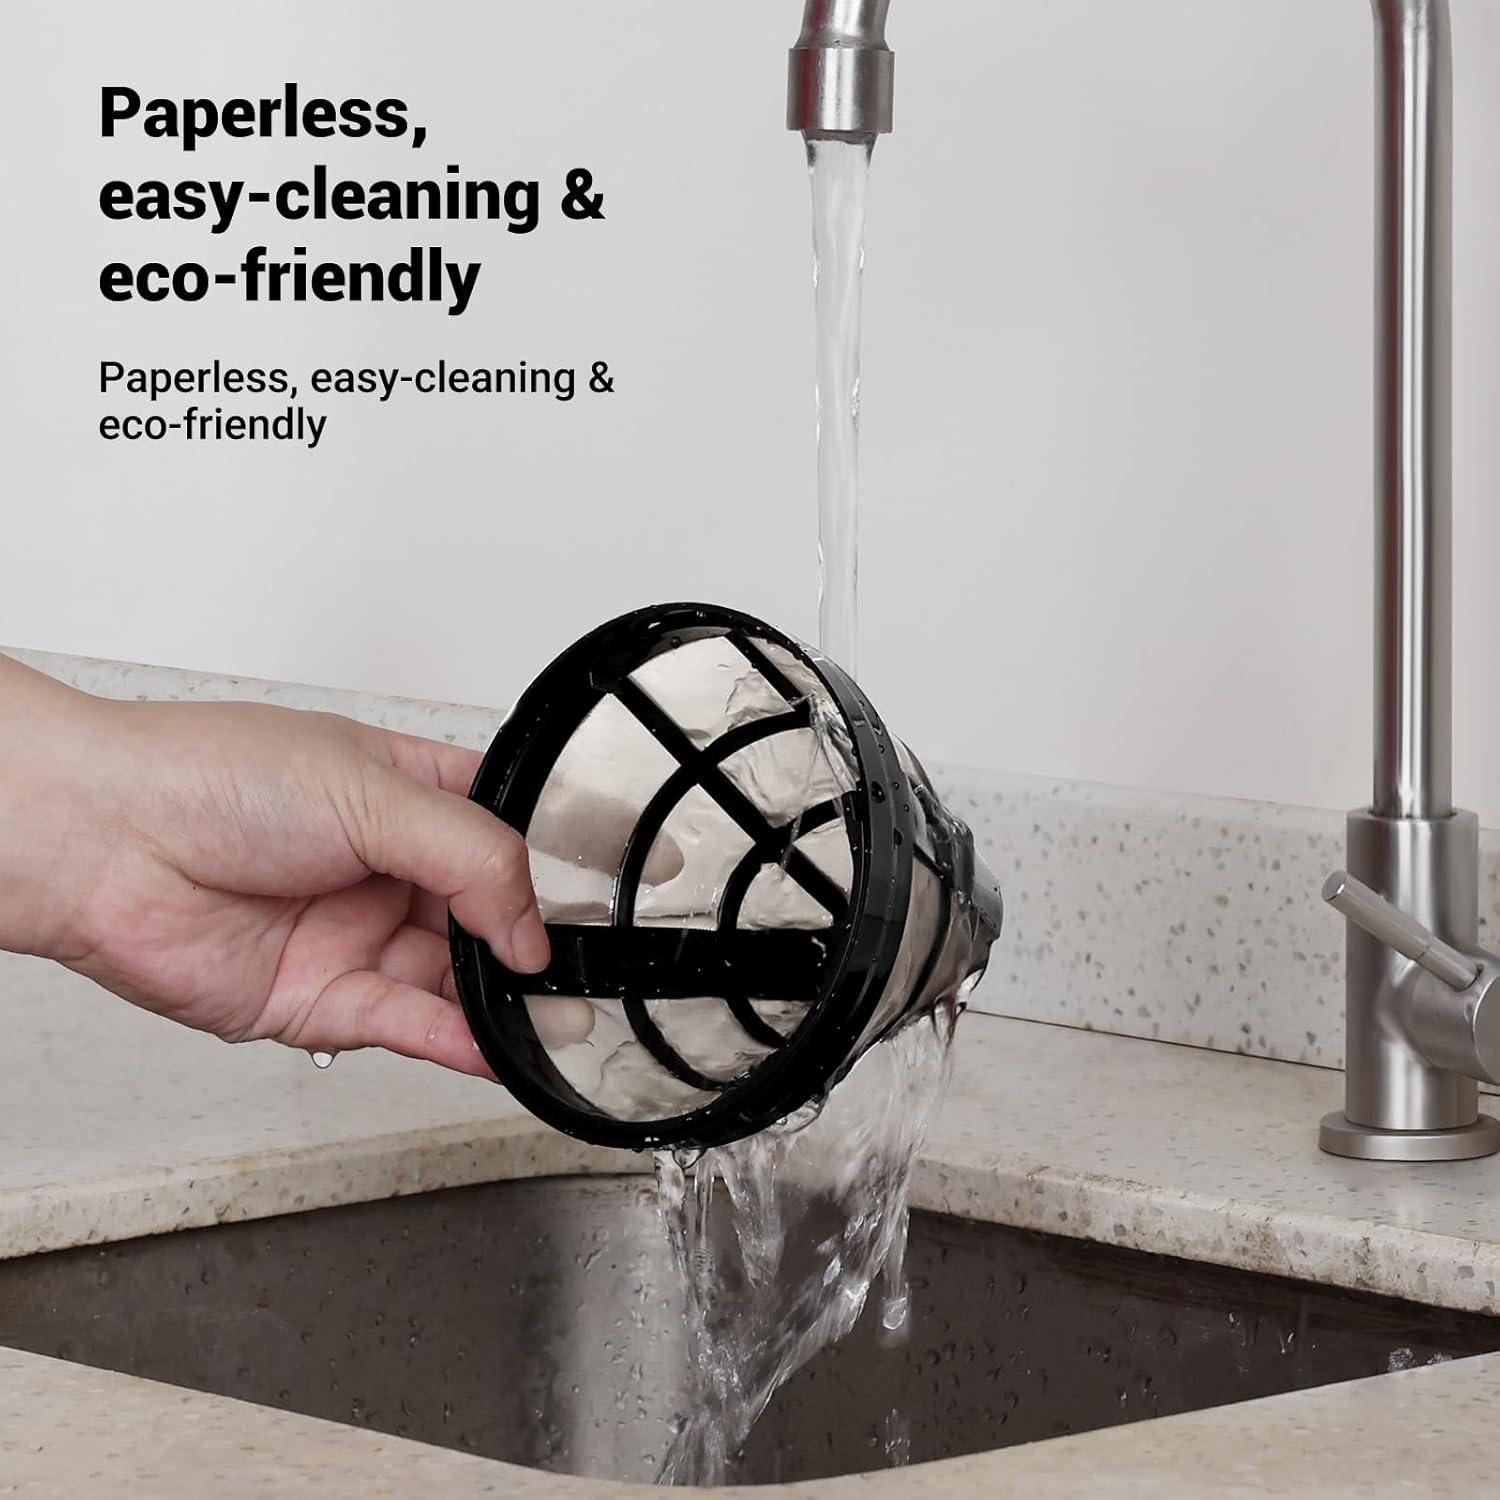
- Genanvendeligt filter
- Filterkurv
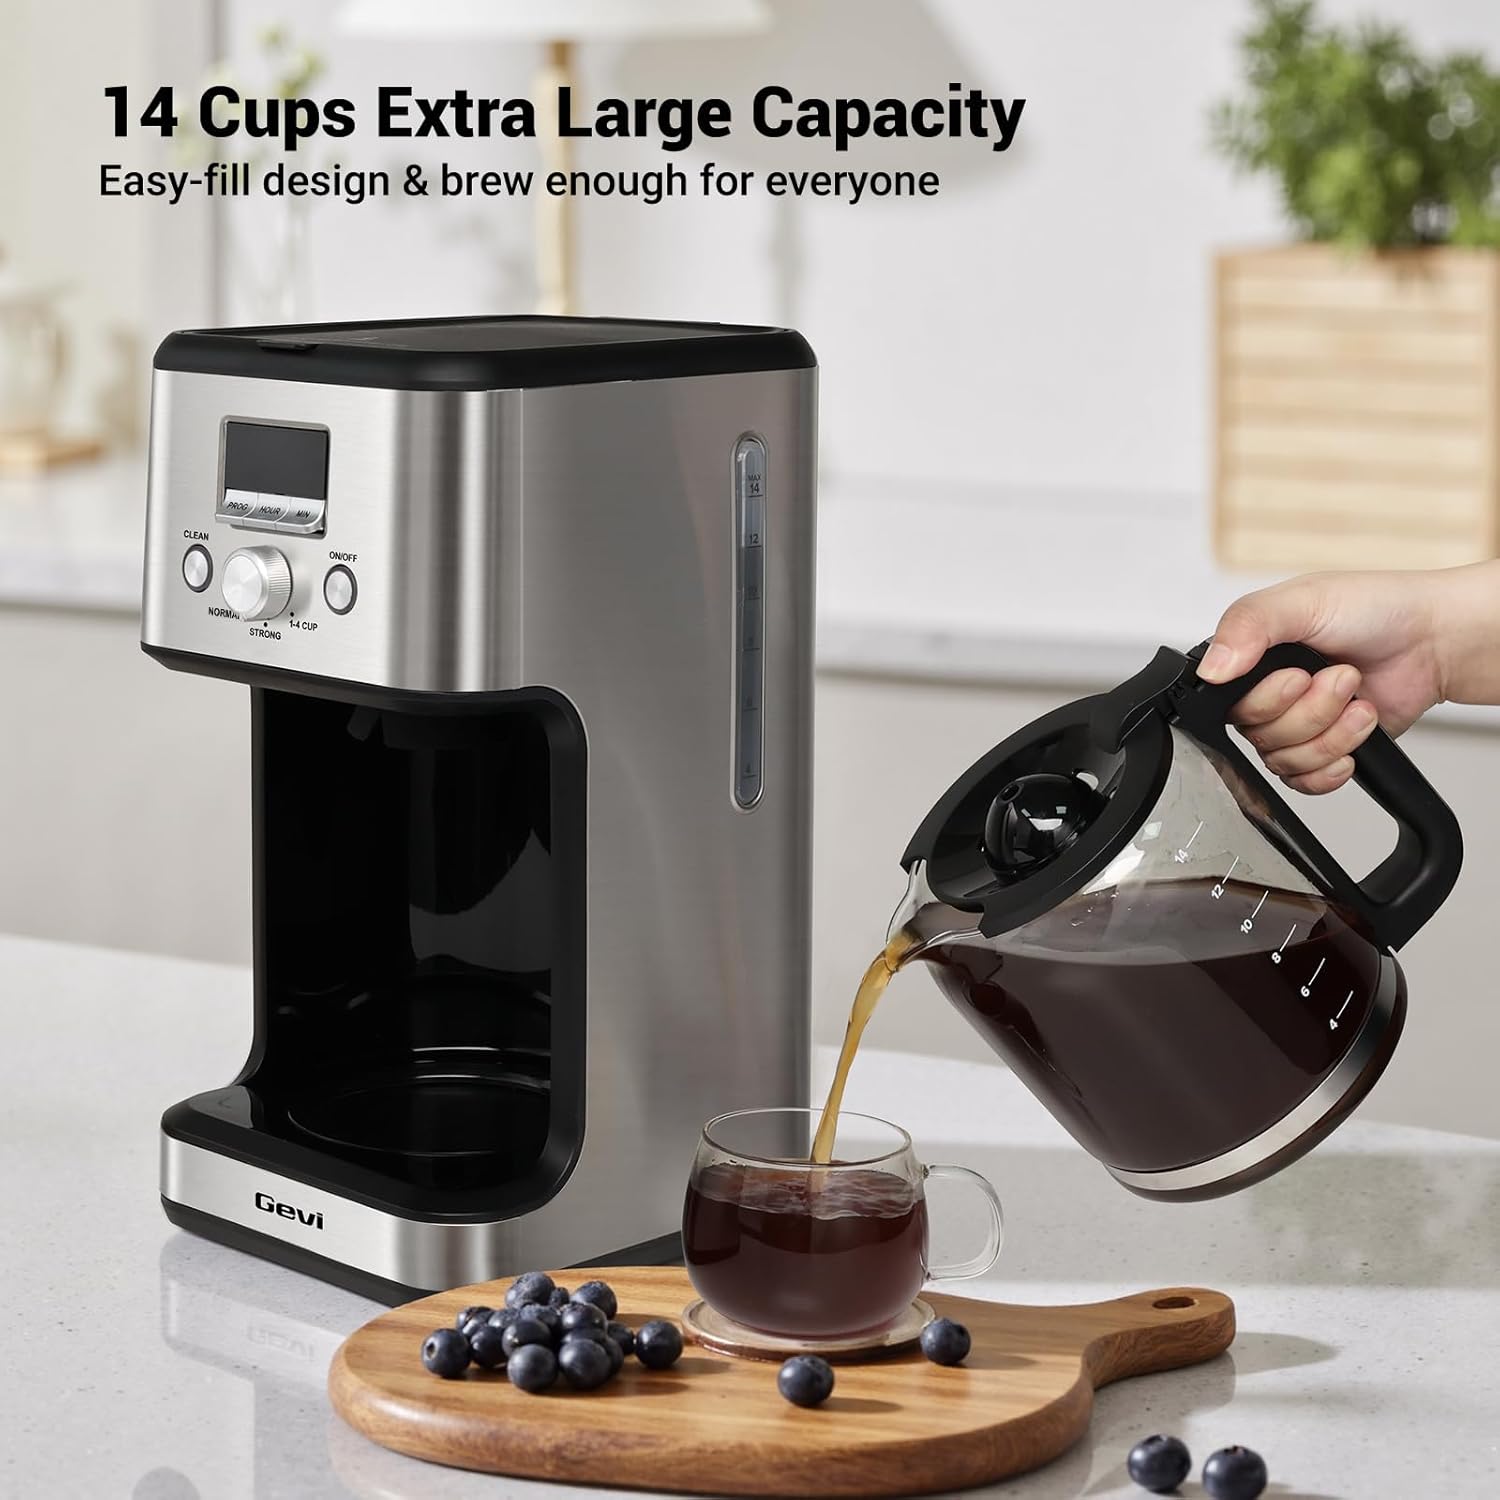
- 14 kopper glaskaraffel
- Kaffe ske

Produkt overview
The Gevi 14-Cup Programmable Coffee Maker is designed for convenience and versatility, offering several features to enhance your coffee brewing experience.
Nøglefunktioner:
- 14-Cup Large Capacity: Brews up to 2.1 liters of coffee, suitable for families, offices, or entertaining guests.
- Programmable Brewing & LCD Display: Features a 24-hour programmable timer and an easy-to-read LCD display for setting brewing times and monitoring settings.
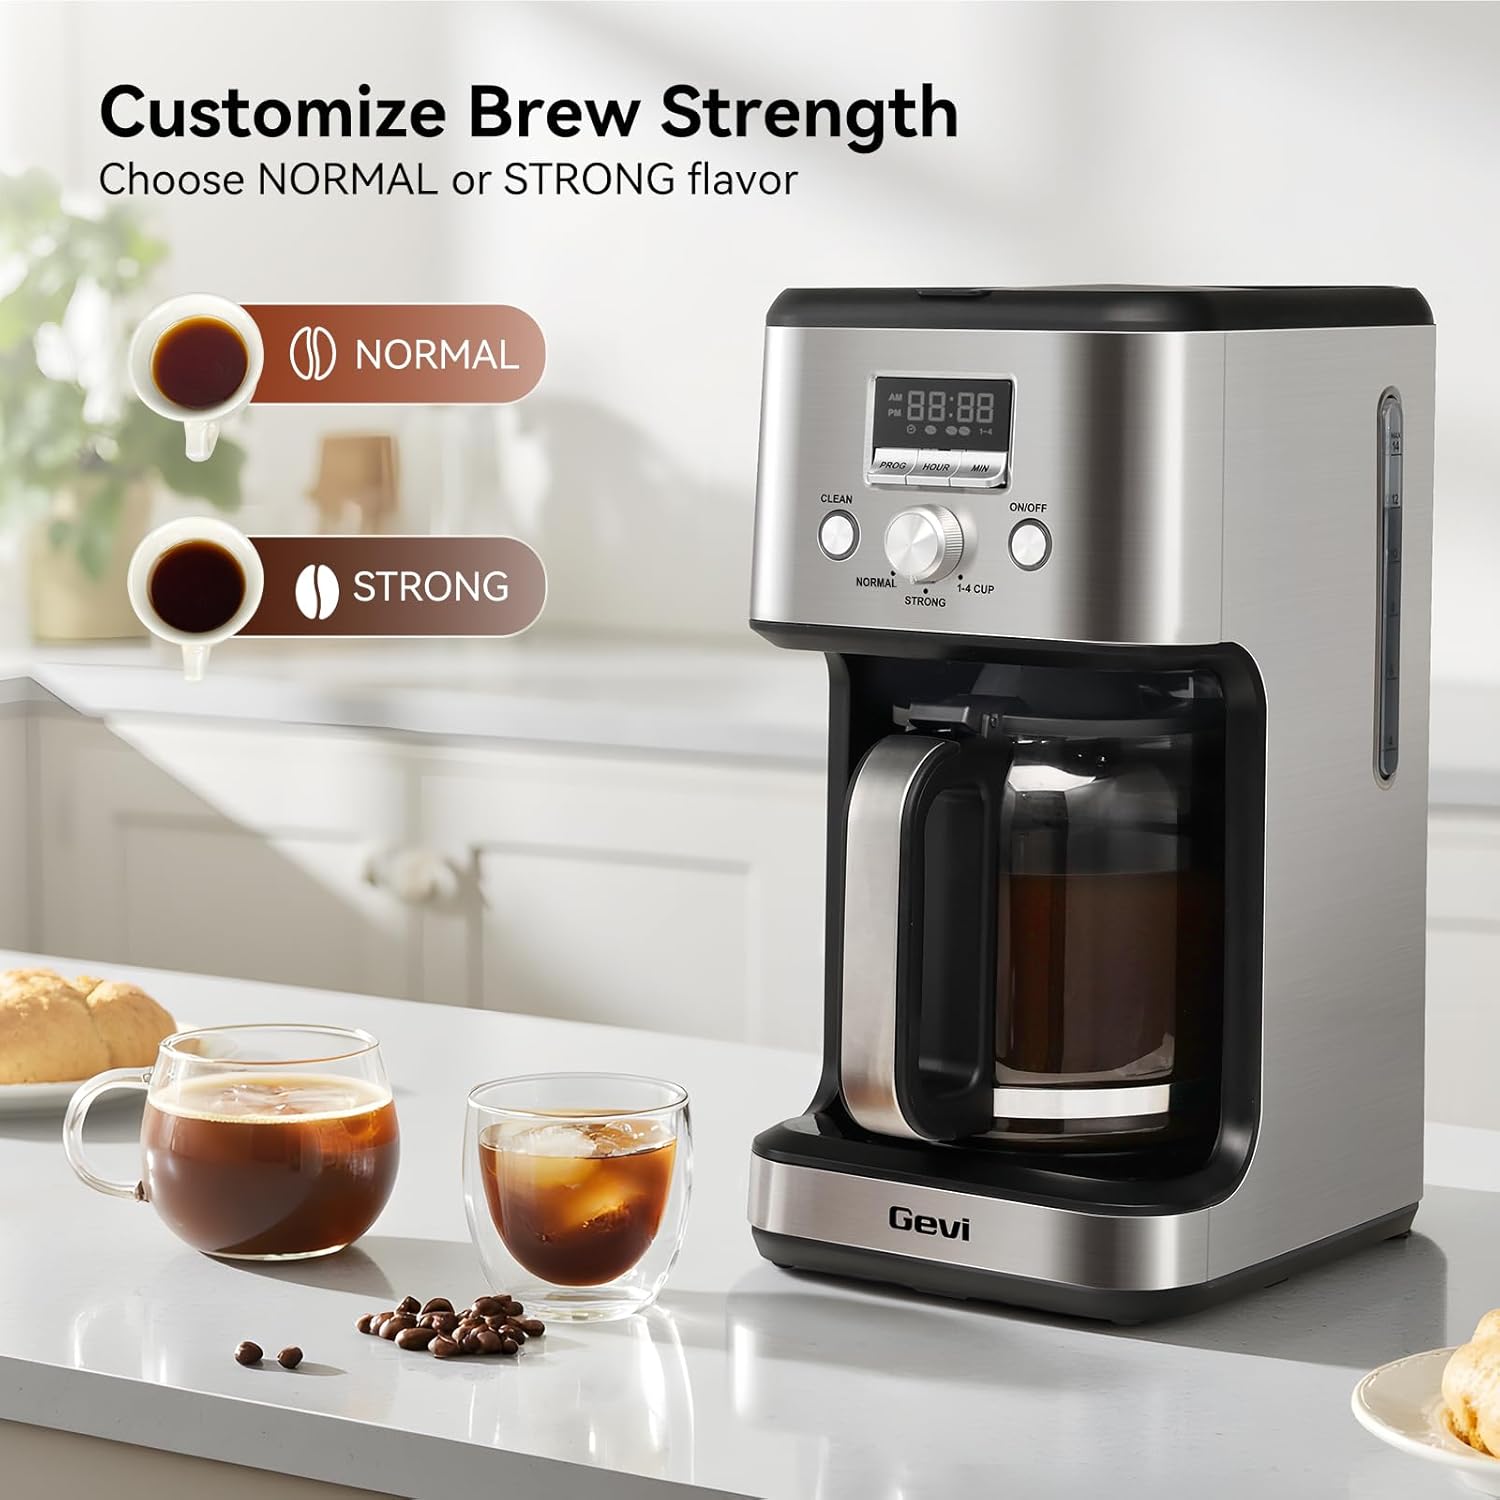
- Two Coffee Flavor Options: Select between 'STRONG' or 'NORMAL' brewing modes to customize your coffee's intensity.
- 2-Hour Keep Warm & Auto-Shutoff: Maintains coffee temperature for up to 2 hours and automatically turns off for safety.
- Pause og servering: The anti-drip system allows you to pause brewing and pour a cup without spills.
- Påmindelse om rengøringscyklus: A 'CLEAN' indicator flashes after 60 brewing cycles, signaling the need for descaling.
- Pladsbesparende design: Compact build with stainless steel housing, ideal for various kitchen and office spaces.




Opsætning
- Indledende rengøring: Before first use, clean all removable parts (carafe, filter basket, reusable filter) with warm, soapy water. Wipe the exterior of the coffee maker with a damp cloth. Run a full cycle with only water to flush the internal components.
- Tilsæt vand: Fill the glass carafe with the desired amount of fresh, cold water. Open the top lid of the coffee maker and pour the water into the water reservoir. Ensure the water level is between the 'MIN' and 'MAX' marks on the water level indicator.
- Tilsæt kaffegrums: Place the reusable filter or a paper filter into the filter basket. Add your preferred amount of ground coffee. Do not fill the coffee grounds past the 'MAX' line on the coffee filter. Close the top lid securely.
- Sted Karaffel: Ensure the empty glass carafe is correctly positioned on the warming plate.
- Tilslut: Plug the power cord into a standard electrical outlet. The display will show '12:00' blinking, indicating it's ready for time setting or brewing.
Video: How to Make Awesome Drip Coffee
This video demonstrates the basic steps for brewing coffee with the Gevi 14-Cup Drip Coffee Machine, including adding water and coffee grounds, and starting the brewing process.
Betjeningsvejledning
1. Indstilling af det aktuelle klokkeslæt
- When plugged in, the display will show '12:00' blinking.
- Press the 'HOUR' button to set the hour.
- Tryk på 'MIN'-knappen for at indstille minutterne.
- Once the desired time is set, the display will stop flashing after a few seconds, indicating the time is saved.
Video: How to Set the Time
This video guides you through the process of setting the current time on your Gevi coffee maker's digital display.
2. Setting the Brew Timer (Preset Time)
- Sørg for, at det aktuelle klokkeslæt er indstillet korrekt.
- Press the 'PROG' button. The display will show '12:00' blinking.
- Press the 'HOUR' button to set the desired hour for brewing.
- Press the 'MIN' button to set the desired minutes for brewing.
- After setting the preset time, the display will stop flashing, and a small preset icon will illuminate, indicating the timer is active. The machine will automatically start brewing at the set time.
- To cancel the preset mode, press the 'PROG' button again.
Video: How to Set the Brew Timer
This video demonstrates how to program your Gevi coffee maker to start brewing at a specific time using the brew timer function.
3. Adjusting Brew Strength
You can customize the strength of your coffee using the selector knob:
- Turn the knob to 'NORMAL' for a standard coffee flavor.
- Turn the knob to 'STRONG' for a bolder, more intense coffee flavor.
- Turn the knob to '1-4 CUP' for brewing smaller quantities (1-4 cups) with optimized extraction.
Video: How to Adjust the Flavor
This video demonstrates how to use the flavor selector knob to choose between 'Normal', 'Strong', and '1-4 Cup' brewing options.
4. Pause & Serve Function
The anti-drip system allows you to temporarily remove the carafe during the brewing cycle to pour a cup of coffee. The brewing will pause for approximately 30 seconds and resume once the carafe is returned to the warming plate. Avoid removing the carafe for longer than 30 seconds to prevent overflow.
5. Keep Warm & Auto-Shutoff
After brewing is complete, the coffee maker will automatically switch to a keep-warm mode, maintaining the coffee's temperature for up to 2 hours. After 2 hours, the appliance will automatically shut off for safety and energy conservation.
Rengøring og vedligeholdelse
Regelmæssig rengøring sikrer optimal ydeevne og forlænger levetiden på din kaffemaskine. Note: None of the components are dishwasher safe.
1. Daglig rengøring
- Karaffel og filterkurv: After each use, remove the carafe and filter basket. Discard used coffee grounds. Wash the carafe, filter basket, and reusable filter in warm, soapy water. Rinse thoroughly and dry.
- Ydre: Tør ydersiden af kaffemaskinen af med en blød, damp klæde. Brug ikke slibende rengøringsmidler eller skuresvampe.
2. Self-Clean Cycle (Descaling)
The 'CLEAN' indicator on the screen will start flashing after approximately 60 brewing cycles, indicating that the coffee maker needs to be descaled to remove mineral buildup.
- Forbered rengøringsopløsning: Fill the carafe with water up to the 14-cup mark. Add one packet of citric acid cleaning powder (or a suitable descaling solution as per manufacturer's instructions) to the water and stir until dissolved.
- Hæld opløsning: Pour the cleaning solution into the coffee maker's water reservoir.
- Start rengøringscyklus: Place the empty carafe on the warming plate. Press the 'CLEAN' button. The 'CLEAN' indicator will illuminate, and the machine will begin the auto-clean cycle.
- Soaking Phase: The brewing process will pause for a few minutes during the cycle to allow the cleaning solution to soak and dissolve mineral deposits.
- Færdiggørelse: Once the cleaning cycle is finished, the machine will beep and automatically switch to standby mode.
- Skyllecyklus: After the self-clean cycle, discard the dirty water from the carafe. Fill the water reservoir with fresh, clean water and run 2-3 full brewing cycles with only water to thoroughly rinse the machine.
Video: How to Run the Self-Clean on the Machine
This video demonstrates the steps to perform a self-clean cycle on your Gevi coffee maker, including preparing the cleaning solution and initiating the cleaning process.
Fejlfinding
| Problem | Mulig årsag | Løsning |
|---|---|---|
| Kaffen brygger ikke. | No water in reservoir, machine not plugged in, 'ON/OFF' button not pressed. | Fill water reservoir, ensure power cord is plugged in, press 'ON/OFF' button. |
| Svag kaffe. | Insufficient coffee grounds, 'NORMAL' brew strength selected, coarse grind. | Add more coffee grounds, select 'STRONG' brew, use a medium-fine grind. |
| Kaffen løber over fra filterkurven. | Too many coffee grounds, filter clogged, carafe not properly placed. | Reduce coffee grounds, clean filter, ensure carafe is correctly positioned. |
| 'CLEAN' indicator flashing. | Maskinen trænger til afkalkning. | Run the self-clean cycle as described in the 'Cleaning and Maintenance' section. |
| Kaffe er ikke varm nok. | Keep warm cycle ended, warming plate not functioning. | Ensure coffee is consumed within the 2-hour keep warm period. If issue persists, contact support. |
Specifikationer
| Feature | Detalje |
|---|---|
| Mærke | gevi |
| Modelnummer | DCMO0-SS0A1 |
| Kapacitet | 2.1 liter (14 kopper) |
| Farve | Rustfrit stål |
| Kaffemaskine type | Dryp kaffemaskine |
| Driftstilstand | Fuldautomatisk |
| Kaffe input type | Malet kaffe |
| Strømkilde | AC adapter |
| Tåler opvaskemaskine | Ingen |
| UPC | 767791889473 |
Garanti og support
Every Gevi product purchased through official or authorized channels includes a 12-month warranty and lifetime technical support. If you encounter any problems when using your Gevi coffee machine, please feel free to contact us for assistance.
For support, please refer to the contact information provided with your product packaging or visit the official Gevi webwebsted.