1. Introduktion
The Fotorgear Retro Photography Kit transforms your iPhone 15 Pro into a sophisticated camera with physical controls and an expandable lens system. This kit is designed to provide a vintage tactile control experience, eliminating touchscreen limitations and offering enhanced photographic capabilities. This manual will guide you through the setup, operation, and maintenance of your new photography kit.

Image: The Fotorgear Retro Photography Kit attached to an iPhone 15 Pro, showcasing its retro design and physical controls.
2. Pakkens indhold
Kontroller venligst, at alle følgende varer er inkluderet i din pakke:
- Retro Case
- Cold Shoe Mount
- Retro Bar (Physical Control Bar)
- Læderhåndtag
- Snor
- 67mm Filter Adapter

Billede: Et nærbillede view of the Fotorgear Retro Photography Kit components laid out on a wooden surface.
3. Opsætningsvejledning
3.1 Attaching the Retro Case to your iPhone
- Sørg for, at din iPhone 15 Pro er ren og fri for snavs.
- Carefully insert your iPhone into the Retro Case, ensuring it snaps securely into place.

Image: A hand holding an iPhone with the Fotorgear app interface visible, demonstrating app interaction.
3.2 Attaching the Retro Bar
The Retro Bar provides physical controls. It attaches magnetically to the top of the Retro Case.
- Align the Retro Bar with the top edge of the Retro Case.
- The magnetic connection will secure it in place. Ensure the physical buttons align with your iPhone's camera controls.
3.3 Attaching the Leather Handle and Lanyard
For improved grip and portability, attach the leather handle and lanyard.
- The Leather Handle slides onto the side of the Retro Case, providing an ergonomic grip.
- Attach the Lanyard to the designated loop on the Retro Case for secure carrying.
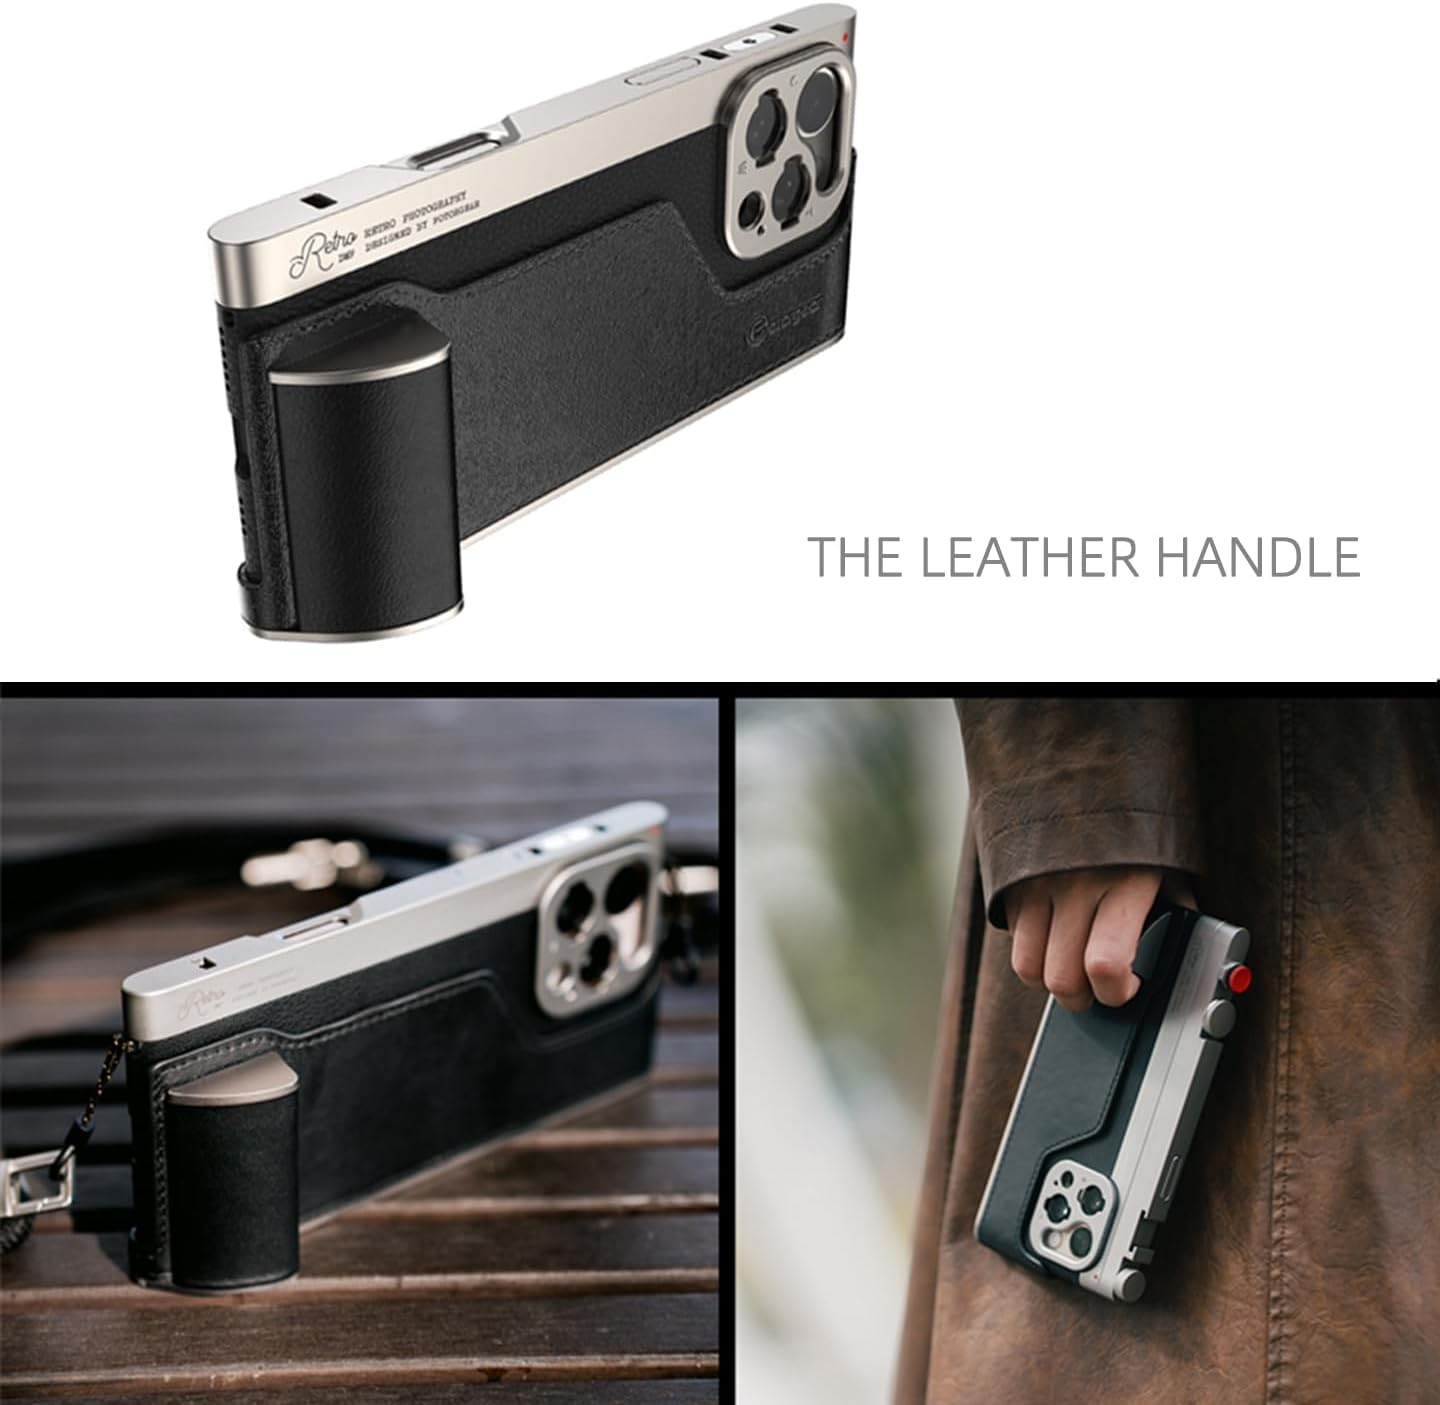
Image: The Fotorgear Retro Photography Kit with the leather handle attached, showing an improved grip.
3.4 Installing the Fotorgear App
For full functionality and customization, download the Fotorgear app from the App Store. The kit also works with the iPhone's native camera app and other compatible third-party apps like DAZZ Camera and Meitu.
4. Betjeningsvejledning
4.1 Brug af fysiske kontroller
The Retro Bar features physical buttons and dials for intuitive camera control:
- Udløserknap: Tryk for at tage billeder eller starte/stoppe videooptagelse.
- Adjustment Dials (Knob1, Knob2): These can be customized via the Fotorgear app to control functions such as manual focus, zoom, exposure compensation (EV), or filter selection.

Image: An illustration showing the compatibility of the Fotorgear Retro Photography Kit with both the Fotorgear App and the iPhone's native camera app.
4.2 Expandable Lens System
The kit features a T-mount interface for attaching various Fotorgear lenses (sold separately), including 1.55x wide, 60mm portrait, and 45mm macro lenses.
- Align the T-mount lens with the camera module on the Retro Case.
- Gently twist to secure the lens in place.
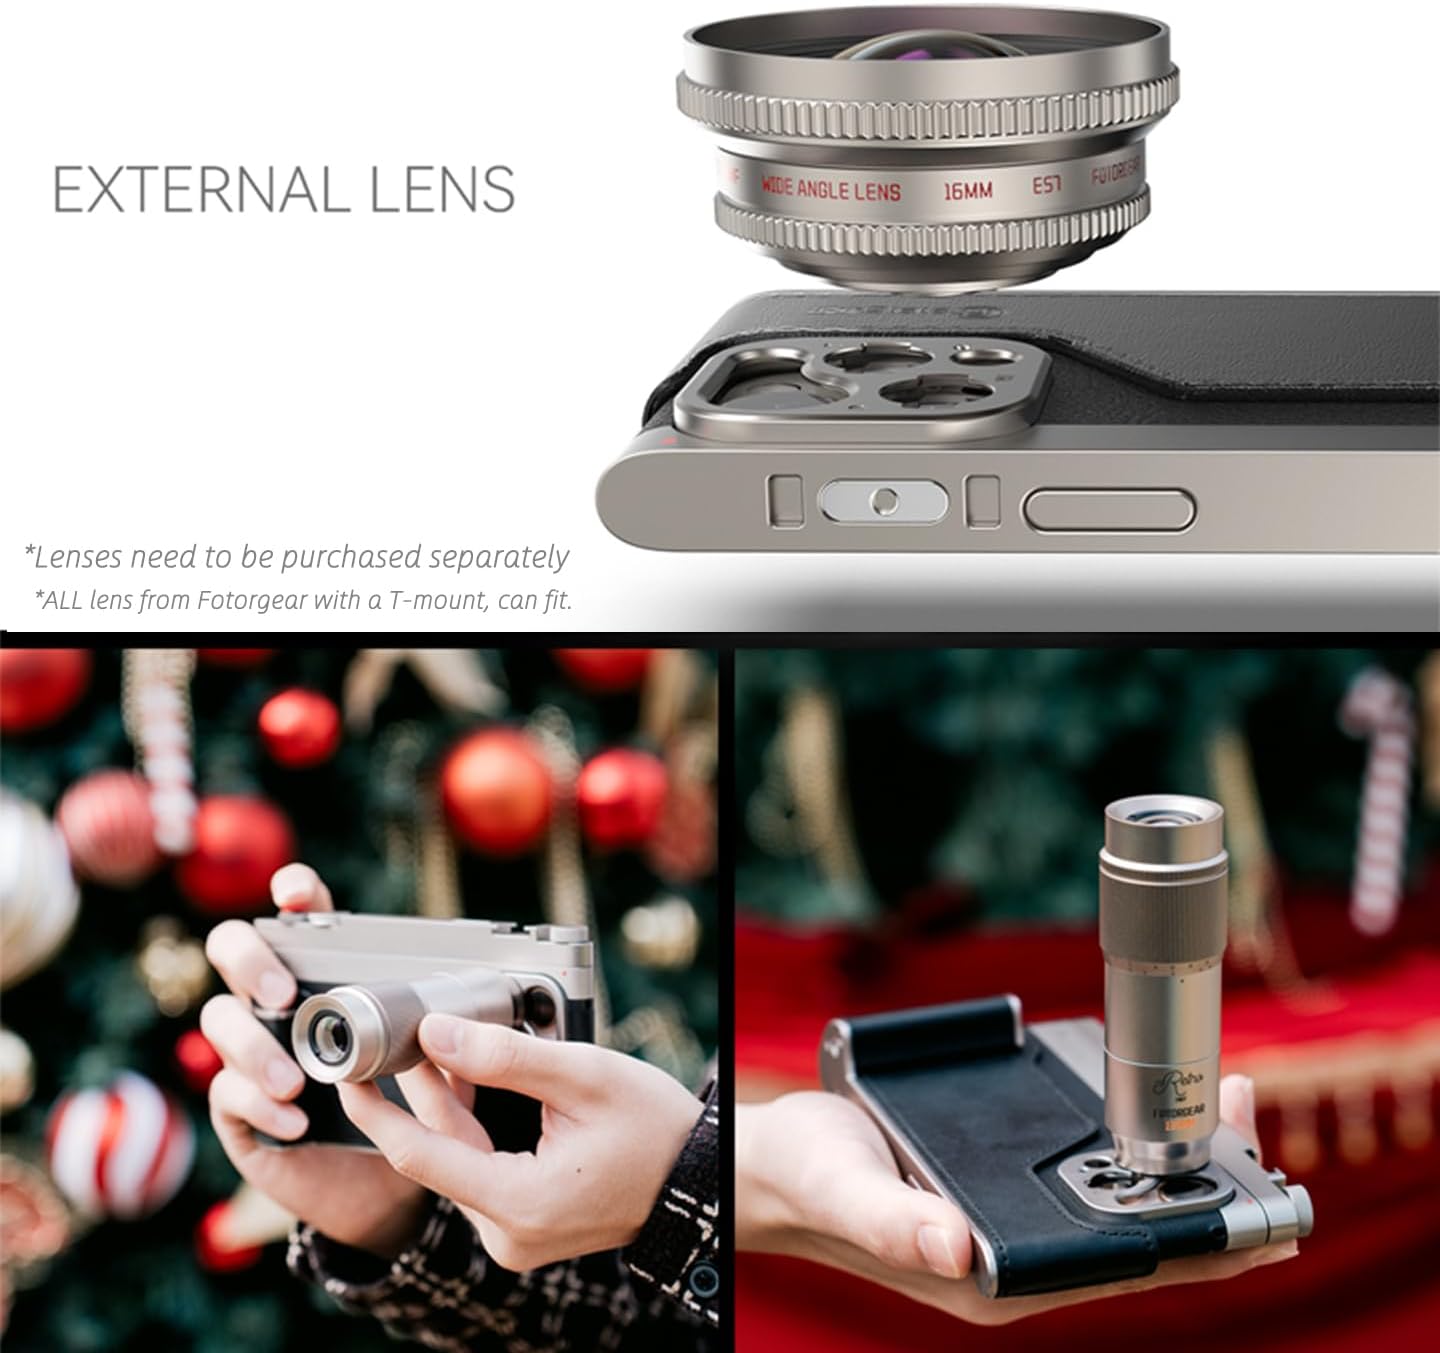
Image: The Fotorgear External Lens system, showing a wide-angle lens attached to the kit.
4.3 Using External Filters
The included 67mm filter adapter allows compatibility with standard 67mm filters (sold separately).
- Attach the 67mm filter adapter to the lens mount on the Retro Case.
- Screw your desired 67mm filter onto the adapter.

Image: The Fotorgear External Filters system, demonstrating how a 67mm filter adapter and filter attach to the kit.
4.4 Cold Shoe Mount
The Cold Shoe Mount allows you to attach external accessories such as microphones or LED lights.
- Slide the Cold Shoe Mount into the designated slot on the Retro Bar.
- Attach your accessory to the Cold Shoe Mount.

Image: The Fotorgear Cold Shoe Mount attached to the kit, with an external microphone mounted.
4.5 Official Product Video: How to use a retro photography kit?
Video: A comprehensive guide demonstrating the various features and usage of the Fotorgear Retro Photography Kit.
5. Vedligeholdelse
- Keep the Retro Case and Retro Bar clean by wiping with a soft, dry cloth.
- Avoid exposing the kit to extreme temperatures, moisture, or harsh chemicals.
- Store the kit in a protective pouch when not in use to prevent scratches.
6. Fejlfinding
6.1 Betjeningselementer reagerer ikke
- Ensure the Retro Bar is securely attached to the Retro Case.
- Verify that the Fotorgear app or native camera app is open and active.
- Check your iPhone's Bluetooth settings to ensure the kit is connected (if applicable, though the description implies physical connection).
- Restart your iPhone and the Fotorgear app.
6.2 External Lenses/Filters Not Fitting
- Ensure you are using Fotorgear T-mount compatible lenses or standard 67mm filters with the provided adapter.
- Check for any obstructions or misalignment during attachment.
7. Specifikationer
| Produktdimensioner | 6.3 x 2.95 x 0.61 tommer |
| Varens vægt | 14 pund |
| Kompatible telefonmodeller | iPhone 15 Pro |
| Materiale | Aluminum, Leather |
| Særlige funktioner | Magnetisk |
| Andre skærmfunktioner | Trådløs |
| Farve | Sort |
| Fabrikant | Fotogear |
8. Garanti og support
Fotorgear products are designed for quality and durability. For specific warranty information and customer support, please refer to the official Fotorgear webwebstedet eller kontakt deres kundeservice direkte. Gem din købskvittering til garantikrav.
For yderligere hjælp, besøg venligst: www.fotorgear.com