
1. Introduktion
This manual provides detailed instructions for the setup, operation, maintenance, and troubleshooting of your Muddy Pro Cam 20 MP Trail Camera. Please read this manual thoroughly before using the camera to ensure proper function and longevity of the device. The Muddy Pro Cam 20 MP is designed for capturing high-resolution images and videos of wildlife with its 20MP sensor and 720p video capabilities.

Figur 1: Forside view of the Muddy Pro Cam 20 MP Trail Camera.
2. Pakkens indhold
Bekræft, at alle nedenstående varer er inkluderet i din pakke:
- Muddy Pro Cam 20 Megapixel Trail Camera with Video Function
3. Nøglefunktioner
- Billedbehandling i høj opløsning: 20MP camera with 850nm LEDs for clear day and night captures. Supports 20MP, 8MP, and 4MP resolution images.
- High-Definition video: Captures 720p videos at 30 frames per second (FPS).
- Hurtig udløserhastighed: 0.5-second trigger speed to capture quick movements.
- Versatile Burst Mode: Captures 1 to 3 images per triggering event.
- Extensive Detection Range: 80-foot detection range for broad coverage.
- Strømkilde: Operates on eight AA batteries.
- Sikkerhed: Integrated Python lock latch for theft deterrence.
4. Opsætning
4.1. Batteriinstallation
- Åbn låsen på kamerahuset.
- Find batterirummet.
- Insert eight (8) AA batteries, ensuring correct polarity (+/-) as indicated inside the compartment.
- Luk batterirummet forsvarligt.
4.2. Installation af SD-kort
- With the camera powered off, locate the SD card slot.
- Insert a standard SD card (up to 32GB, not included) into the slot with the metal contacts facing down, until it clicks into place.
- To remove, press the SD card gently to release it.
4.3. Montering af kameraet
The camera can be mounted using the included strap or a compatible mounting accessory.
- Vælg et passende sted, f.eks. et træ eller en stolpe, og sørg for, at der er frit view af det ønskede område.
- Før monteringsstroppen gennem rillerne på bagsiden af kameraet.
- Securely fasten the strap around the mounting surface.
- Adjust the camera angle to optimize the field of view and detection zone.
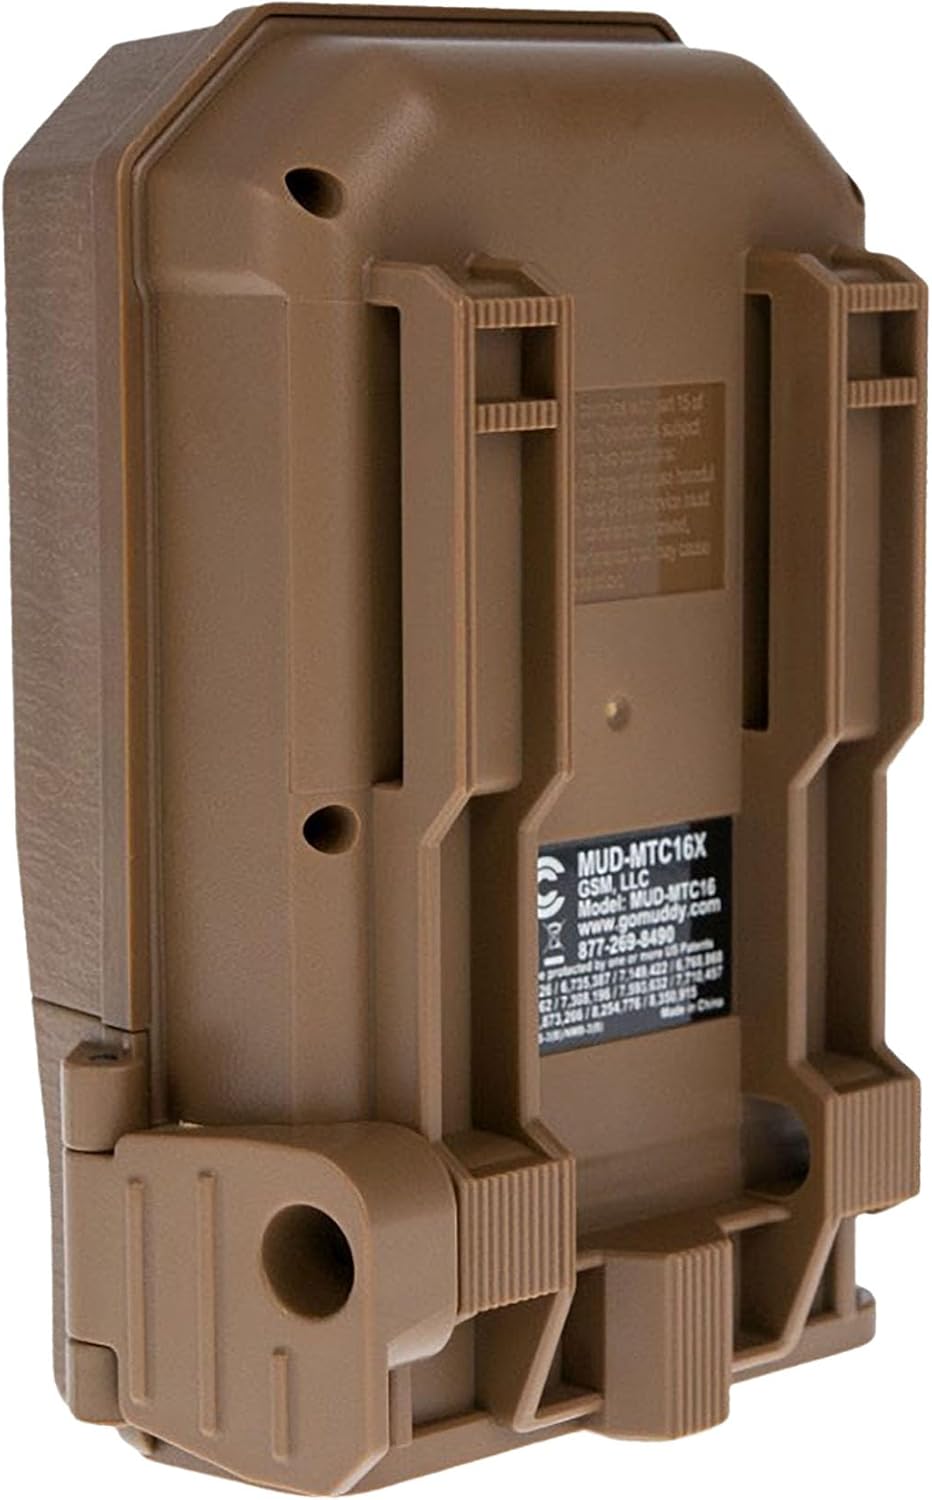
Figur 2: Tilbage view of the camera showing mounting slots and product label.
5. Betjeningsvejledning
5.1. Tænd/sluk
- To power on, slide the power switch to the 'ON' position. The camera will perform a self-check.
- For at slukke skal du skubbe tænd/sluk-knappen til 'OFF'-positionen.
5.2. Menu navigation
Use the navigation buttons (Up, Down, Left, Right, OK) to move through the menu options and confirm selections. The display screen will show current settings.
5.3. Photo Mode Settings
In the menu, navigate to 'Photo Settings' to adjust:
- Opløsning: Select 20MP, 8MP, or 4MP for image quality. Higher resolution results in larger file størrelser.
- Burst-tilstand: Set the number of images captured per trigger (1 to 3 photos).
- Forsinke: Set the time interval between consecutive triggers.
5.4. Indstillinger for videotilstand
In the menu, navigate to 'Video Settings' to adjust:
- Opløsning: Set to 720p for video capture.
- Videolængde: Specify the duration of each video clip.
- Lydoptagelse: Aktivér eller deaktiver lydoptagelse med video.
5.5. Detection and Trigger
The camera features an 80-foot detection range and a 0.5-second trigger speed. Ensure the detection area is clear of obstructions that might cause false triggers, such as swaying branches.
6. Vedligeholdelse
6.1. Udskiftning af batteri
When the battery indicator shows low power, replace all eight AA batteries with new ones to ensure optimal performance and prevent data loss.
6.2. SD-kortstyring
Regularly check the SD card capacity. Format the SD card periodically to maintain optimal performance and prevent corruption. Always power off the camera before inserting or removing the SD card.
6.3. Rensning
Use a soft, dry cloth to clean the camera lens and housing. Avoid using abrasive cleaners or solvents. Ensure the camera is dry before closing the housing.
7. Fejlfinding
- Kameraet tænder ikke: Kontroller batteriinstallationen, og sørg for, at batterierne er friske.
- Ingen billeder/videoer optaget: Verify SD card is inserted correctly and has sufficient space. Check camera settings for proper mode selection and trigger delay.
- Dårlig billed-/videokvalitet: Ensure the lens is clean. Check resolution settings.
- Falske udløsere: Adjust camera placement to avoid moving branches or excessive sunlight in the detection zone.
8. Specifikationer
| Feature | Specifikation |
|---|---|
| Modelnummer | MUD-MTC20X |
| Billedopløsning | 20MP, 8MP, 4MP |
| Video opløsning | 720p @ 30 FPS |
| Detektionsområde | 80 fod |
| Udløserhastighed | 0.5 sekunder |
| Flash-hukommelsestype | SD (op til 32 GB) |
| Strømkilde | 8 x AA batterier |
| Fotosensorteknologi | CMOS |
| Forbindelsesteknologi | Infrarød |
| Varens vægt | 12.3 ounce |
| Produktdimensioner | 1 x 1 x 1 tommer |
9. Garantioplysninger
For detailed warranty information, please refer to the official MUDDY website or contact customer support. Keep your purchase receipt as proof of purchase.
10. Support
If you require further assistance or have questions not covered in this manual, please visit the MUDDY support page on their official webwebstedet eller kontakt deres kundeserviceafdeling. Kontaktoplysninger kan typisk findes på produktemballagen eller i producentens webwebsted.