
1. Produktet er slutview
The STUDIOFINIX In-Wall Audio Control Amplifier Receiver Wall Plate is designed to integrate seamlessly into your home or office audio system. This 4-channel amplifier provides versatile audio input options and Bluetooth wireless streaming, allowing for flexible control of your sound environment.
Nøglefunktioner:
- 4-kanals output: Supports up to two pairs of speakers.
- Bluetooth 5.0-forbindelse: Wireless audio streaming from compatible devices with a range of up to 30 feet (10 meters).
- Flere lydindgange: Includes front 3.5mm AUX jack, rear line-level pigtail leads, USB port for flash drives, and a 1/4" microphone input.
- Integreret kontrol: Master volume knob with power ON/OFF function, and input selection switch.
- Kompakt design: All-in-one unit designed for in-wall installation.
2. Sikkerhedsoplysninger
Please read and understand all safety instructions before installing and operating this device. Retain this manual for future reference.
- Elektrisk sikkerhed: Ensure power is disconnected before installation or servicing. All wiring should be performed by a qualified professional if you are unsure.
- Ventilation: Bloker ikke ventilationsåbningerne. Sørg for tilstrækkelig luftgennemstrømning omkring enheden.
- Fugtighed: Udsæt ikke enheden for vand eller overdreven fugt.
- Temperatur: Avoid extreme temperatures. Operate the device within recommended environmental conditions.
- Højttalerforbindelse: Always match positive (+) and negative (-) terminals correctly to prevent damage to the amplifier og højttalere.
3. Hvad er inkluderet
Bekræft at alle komponenter er til stede i pakken:
- 1 x In-Wall Audio Control Amplifier Receiver Wall Plate
- 1 x vekselstrømsadapter
- 2 x monteringsskruer
- 1 x brugermanual
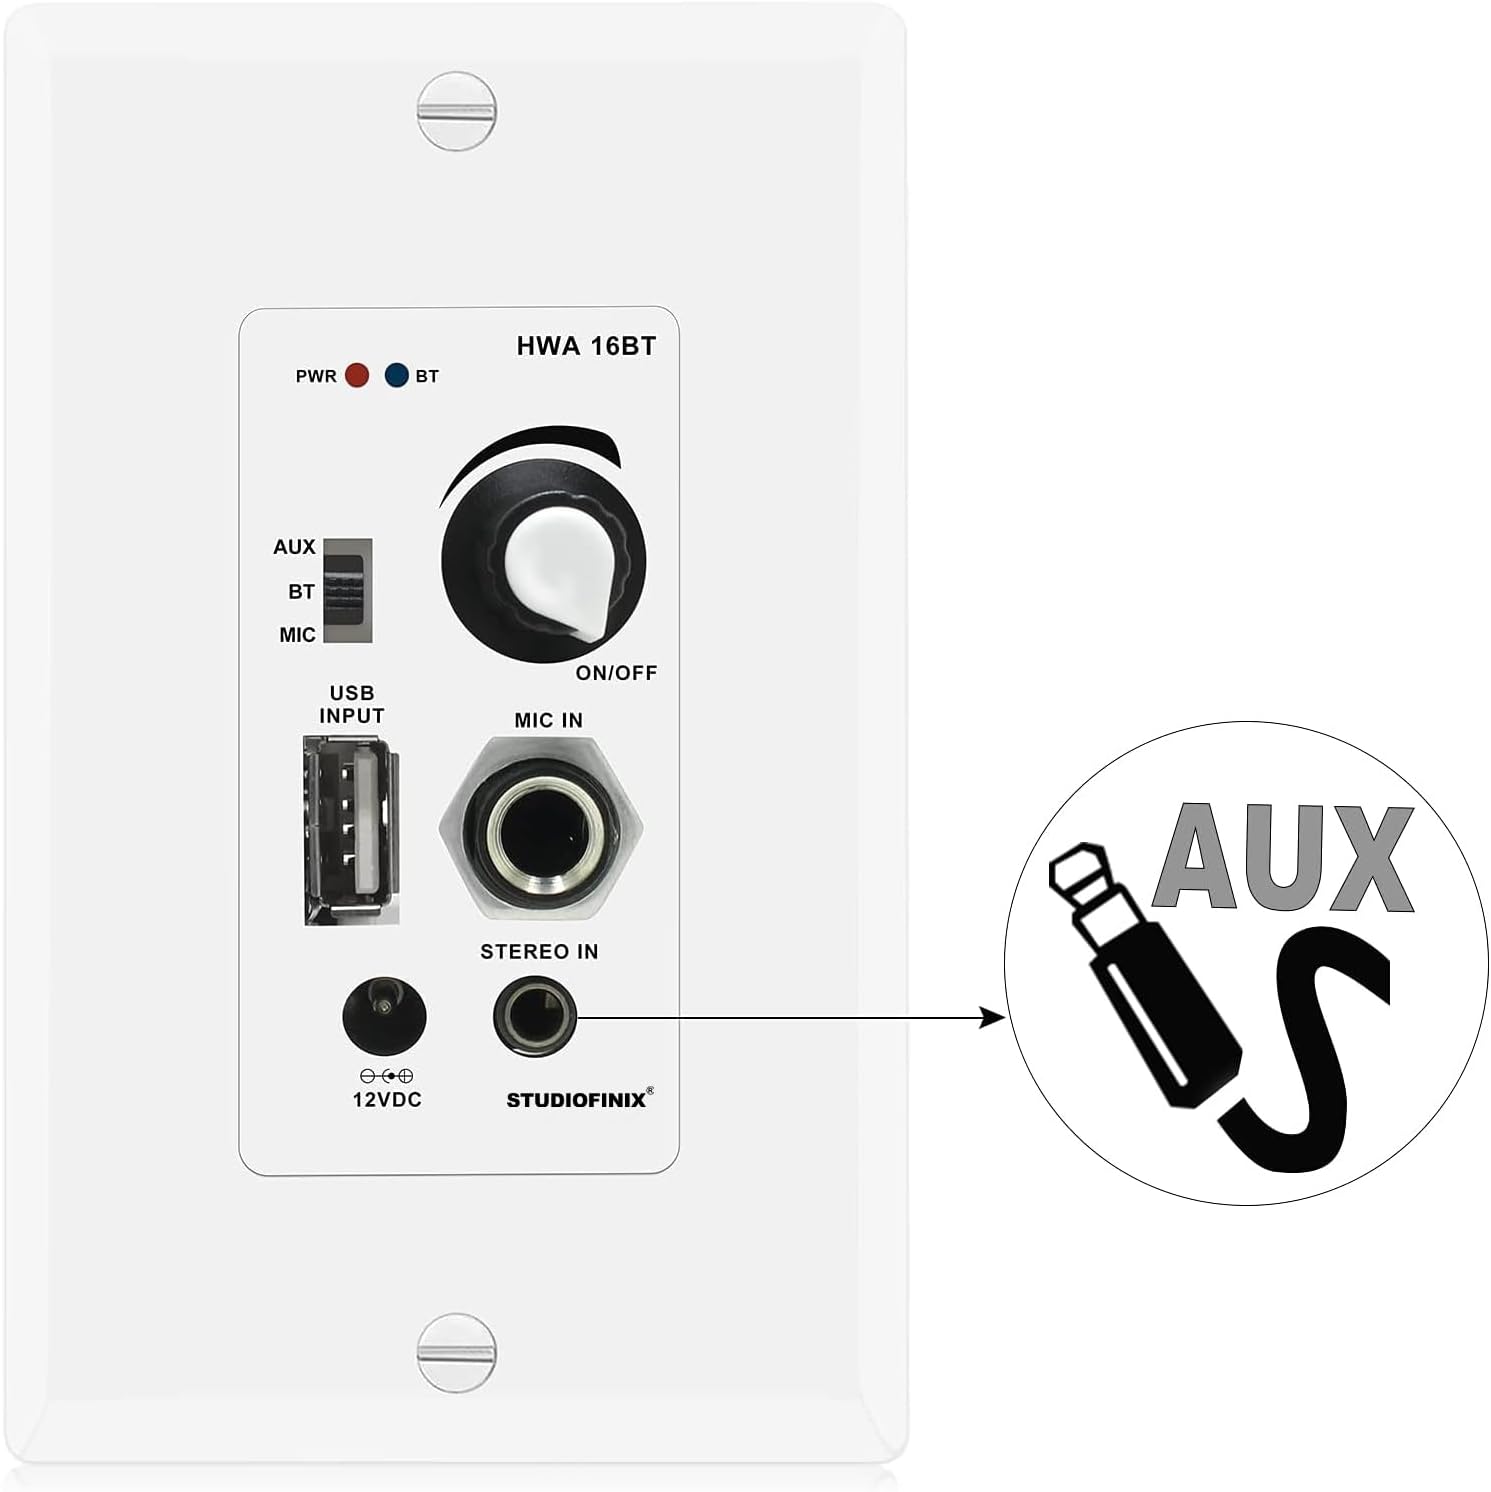
Image: Package contents showing the in-wall amplifier, power supply, screws, and user manual.
4. Opsætning og installation
This section outlines the steps for installing and connecting your in-wall amplivligere.
4.1 Højttalertilslutning
De amplifier supports up to two pairs of speakers (4 channels). Ensure correct polarity when connecting speaker wires.
- Identificer de positive (+) og negative (-) terminaler på dine højttalere.
- Connect the speaker wires from your speakers to the corresponding terminals on the amplifier's rear terminal block. Match positive to positive (red) and negative to negative (black).
- Sørg for, at alle forbindelser er sikre for at forhindre kortslutninger.

Image: Speaker wiring diagram for the 4-channel in-wall amplifier, showing connections for four speakers.
4.2 Strømtilslutning
Connect the included AC power adapter to the DC 12V input on the amplifier. The power adapter can be connected via the front access port or the rear board pigtail leads.
4.3 In-Wall Mounting
De amplifier is designed to fit into a standard single-gang wall box. Secure the unit using the provided mounting screws.
5. Betjeningsvejledning
Familiarize yourself with the controls and functions of your STUDIOFINIX in-wall amplivligere.

Image: Front panel layout of the 4-channel in-wall amplifier, detailing each control and port.
5.1 Power ON/OFF and Master Volume
The large knob on the front panel controls both power and master volume. Rotate clockwise to turn the unit ON and increase volume. Rotate counter-clockwise to decrease volume and turn the unit OFF.
5.2 Indgangsvalg
Use the slide switch located on the left side of the front panel to select your desired audio source:
- AUX: For connecting external devices via the 3.5mm AUX input.
- BT: For Bluetooth wireless audio streaming.
- MIC: For microphone input.
5.3 Bluetooth -parring
- Set the input selection switch to BT. The Bluetooth Signal LED will blink, indicating pairing mode.
- Aktiver Bluetooth på din mobilenhed (smartphone, tablet osv.) og søg efter tilgængelige enheder.
- Select "STUDIOFINIX" from the list of devices.
- Once paired, the Bluetooth Signal LED will illuminate steadily. You can now stream audio wirelessly.
5.4 USB-afspilning
Indsæt et USB-flashdrev med MP3-lyd files into the USB port. The unit will automatically detect and play audio from the drive. The USB port also provides 5V/1A for charging devices.

Image: USB port on the amplifier, used for MP3 flash drive playback or device charging.
5.5 AUX-indgang
Connect an external audio source (e.g., smartphone, media player) to the 3.5mm AUX input jack using a standard audio cable. Set the input selection switch to AUX.

Image: 3.5mm AUX input jack for connecting external audio devices.
5.6 mikrofonindgang
Connect a dynamic microphone to the 1/4" MIC IN jack. Set the input selection switch to MIC for microphone use.
6. Vedligeholdelse
To ensure the longevity and optimal performance of your STUDIOFINIX in-wall ampLifier, følg disse vedligeholdelsesretningslinjer:
- Rensning: Use a soft, dry cloth to clean the surface of the unit. Do not use liquid cleaners or abrasive chemicals.
- Ventilation: Kontrollér regelmæssigt, at ventilationsåbningerne er fri for støv og snavs.
- Forbindelser: Ensure all cable connections remain secure. Loose connections can affect audio quality.
7. Fejlfinding
If you encounter issues with your in-wall ampLifier, se følgende almindelige problemer og løsninger:
- Ingen strøm:
- Ensure the AC power adapter is securely connected to both the ampstrømforsyning og en fungerende stikkontakt.
- Verify the master volume knob is turned ON.
- Ingen lyd:
- Kontroller højttalerledningernes forbindelser for korrekt polaritet og sikker kontakt.
- Confirm the correct input source (AUX, BT, MIC) is selected via the slide switch.
- Juster masterlydstyrken.
- Hvis du bruger Bluetooth, skal du sørge for, at enheden er parret og afspiller lyd.
- If using AUX, ensure the cable is fully inserted and the external device's volume is up.
- Bluetooth-afbrydelse/Kan ikke parres:
- Sørg for amplifier's input is set to BT.
- Flyt din Bluetooth-enhed tættere på amplifter (inden for 10 meter).
- Sluk og tænd Bluetooth på din enhed, og prøv derefter at parre igen.
- Hvis den tidligere har været parret, så prøv at glemme enheden på din telefon og parre den igen.
- Forvrænget lyd:
- Skru ned for lydstyrken på begge amplifteren og lydkilden.
- Check speaker impedance compatibility (minimum 4 Ohm).
- Ensure speaker wires are not frayed or touching each other.
8. Specifikationer
Technical specifications for the STUDIOFINIX In-Wall Audio Control Amplifier Receiver Wall Plate:
| Modelnummer | ST-HWA16BT-4CH-CA |
| Strømudgang | 100 Watt Peak, 40 Watt RMS x 4 Ch. @ 4 Ohm |
| Bluetooth version | 5.0 |
| Wireless Range | 30 fod (10 meter) |
| Mikrofonindgangstype | Dynamisk |
| Magt Amplivligere Type | Stereo klasse-D |
| Minimum belastningsmodstand | 4 Ohm |
| Total harmonisk forvrængning (THD) | 0.03% (8 Ohm, 1KHz) |
| Power Draw | 12V 3Amps |
| Strømforsyning | DC 100-240V, 50/60Hz (12V DC Adapter) |
| Materiale | Plast |
| Farve | Hvid |
| Varens vægt | 9.6 ounce |
| Installationstype | Indskruning |

Image: Technical specifications of the in-wall Bluetooth amplivligere.
9. Garanti og support
For warranty information or technical support, please contact STUDIOFINIX directly through their official webwebstedet eller forhandleren, hvor produktet blev købt. Gem din købskvittering som købsbevis.