Indledning
This manual provides detailed instructions for the safe and efficient operation of your YUCHENGTECH 6L Automatic Black Garlic Fermenter, model AZK186-3. Please read this manual thoroughly before first use and retain it for future reference.
Vigtige sikkerhedsinstruktioner
- Læs alle instruktioner før brug af apparatet.
- Nedsænk ikke apparatet, ledningen eller stikket i vand eller andre væsker.
- Tæt opsyn er nødvendigt, når et apparat bruges af eller i nærheden af børn.
- Træk stikket ud af stikkontakten, når det ikke er i brug, og før rengøring. Lad det køle af, før du sætter dele på eller af.
- Betjen ikke noget apparat med en beskadiget ledning eller stik, eller efter at apparatet ikke fungerer korrekt eller er blevet beskadiget på nogen måde.
- Brug kun tilbehør anbefalet af producenten.
- Må ikke bruges udendørs.
- Lad ikke ledningen hænge ud over kanten af bordet eller bordpladen eller røre ved varme overflader.
- Må ikke placeres på eller i nærheden af en varm gas- eller elektrisk brænder eller i en opvarmet ovn.
- Sæt altid stikket i apparatet først, og sæt derefter ledningen i stikkontakten. For at afbryde forbindelsen skal du slukke for en vilkårlig knap og derefter tage stikket ud af stikkontakten.
- Dette apparat er kun til husholdningsbrug.
- Varmt tip: This machine may produce a garlic smell in your house or interior during the fermentation process. It is recommended to operate it in a well-ventilated area, such as a garage or utility room.
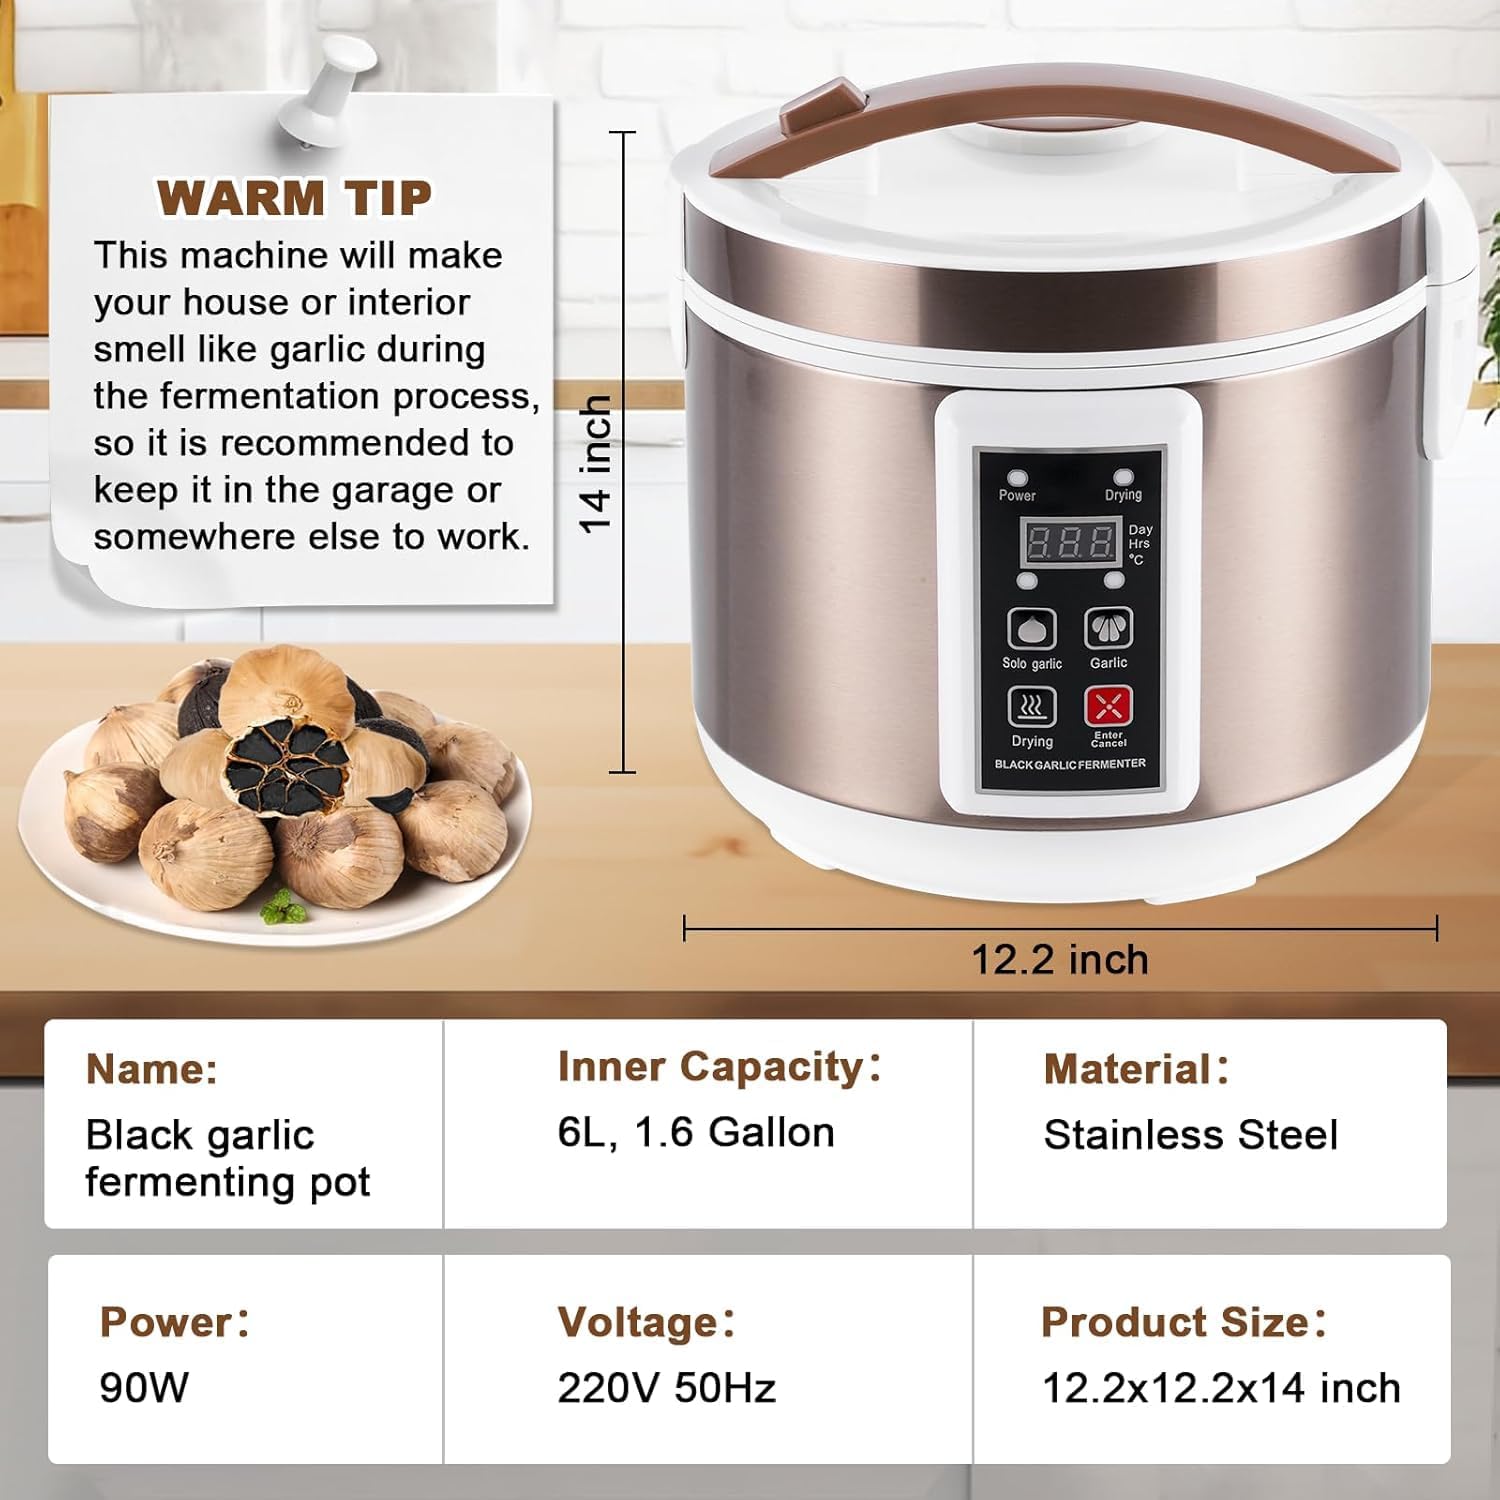
Figure 1: Product dimensions and important usage tip. The fermenter measures 12.2 inches in width and 14 inches in height. A note advises that the machine may produce a garlic smell during operation, suggesting use in a well-ventilated area.
Produkt overview
The YUCHENGTECH Black Garlic Fermenter is designed for automatic fermentation of black garlic. It features a 6-liter capacity, intelligent time and temperature control, and an independent drying function.

Figur 2: Forside view of the YUCHENGTECH Black Garlic Fermenter, showcasing its design and the end product (black garlic). The image emphasizes the health benefits and natural fermentation process.
Nøglefunktioner:
- 6L stor kapacitet: Ferments 1.5-2kg (3.3-4.4 lbs) of garlic at a time.
- Nem at bruge: Select fermentation function for single clove or multiple cloves of garlic. Adjustable fermentation time (7-12 days).
- Uniform Heating System: Upper, middle, and lower three-dimensional heating for consistent internal temperature and low heat loss. Features an edible-grade thickened independent inner lining for optimal fermentation.
- Two-Layer Stainless Steel Cage Rack: Provides good air circulation and large capacity. Designed for easy use and cleaning.
- Upgraded Drying Function: Enhances the drying and fermentation effect of black garlic.
- Hukommelse for strømsvigt: Automatic resumption of fermentation after a power outage.

Figur 3: Intern view of the fermenter, illustrating the 360-degree uniform heating system and the drying function. This image highlights the efficient heat distribution for consistent fermentation.
Tekniske specifikationer
| Voltage | 220-240V |
| Magt | 90W |
| Gæringstid | 9-13 days (216-312 hours) |
| Kapacitet | 6L (3.3-4.4 lb / 1.5-2 kg garlic) |
| Indre struktur | Double-layer stainless steel mesh cage |
| Produktdimensioner | 12.2 x 12.2 x 14 tommer (300 x 300 x 318 mm) |
| Varens vægt | 7.7 pund (3.5 kg) |
| Modelnummer | AZK186-3 |
Pakkens indhold
Ved udpakning skal du sørge for, at alle nedenstående varer er til stede og i god stand:
- 1 x Black Garlic Fermenter Unit
- 1 x Double-layer Stainless Steel Iron Frame (Cage Rack)
- 1 x brugermanual
Opsætning og forberedelse
- Pakker ud: Fjern forsigtigt alle komponenter fra emballagen.
- Inspicere: Check the fermenter and accessories for any signs of damage.
- Ren: Before first use, wipe the exterior of the fermenter with a damp cloth. Wash the stainless steel cage rack and inner pot with warm, soapy water, then rinse thoroughly and dry.
- Placering: Place the fermenter on a stable, flat, heat-resistant surface. Ensure adequate ventilation around the unit, especially if operating indoors due to potential garlic odor.
- Strømtilslutning: Sæt netledningen i en passende 220-240V stikkontakt.
Betjeningsvejledning
Kontrolpanel overview:

Figure 4: The control panel of the fermenter. It features a digital display for time, 'Solo garlic' and 'Garlic' buttons for different fermentation types, a 'Drying' button, and an 'Enter/Cancel' button.
- Strømindikator: Lyser, når enheden er tændt.
- Drying Indicator: Lights up when the drying function is active.
- Digital skærm: Shows remaining fermentation time (Days/Hours).
- Solo Garlic Button: Select for fermenting single-clove garlic (default 12 days).
- Garlic Button: Select for fermenting multiple-clove garlic (default 7 days).
- Drying Button: Activates the independent drying function after fermentation.
- Enter/Cancel Button: Long press for 3 seconds to enter program setting state or cancel current operation.
Fermenteringsproces:

Figure 5: Step-by-step guide for black garlic fermentation. It illustrates selecting fresh garlic, arranging it in the cage, choosing the fermentation program on the control panel, and the resulting black garlic.
- Step 1: Prepare Garlic
Choose fresh, whole garlic bulbs. Do not peel or clean them excessively. Cut off any excess stalk from the garlic bulbs. - Step 2: Load Garlic
Place the prepared garlic bulbs evenly into the double-layer stainless steel cage rack. Ensure the garlic is not overly packed to allow for proper air circulation. It is recommended to fill the pot with 1.5-2kg (3.3-4.4 lbs) of garlic for optimal results. - Trin 3: Start gæringen
- Place the loaded cage rack into the fermenter. Close the lid securely.
- Plug in the fermenter. The power indicator will light up.
- Long press the "Enter/Cancel" button for 3 seconds to enter the program setting state.
- Press the "Solo Garlic" button for single-clove garlic (default 12 days) or the "Garlic" button for multiple-clove garlic (default 7 days). The display will show the selected fermentation time.
- The fermentation process will begin automatically. The display will count down the remaining days and hours.
- Step 4: Post-Fermentation Drying (Optional)
- After the fermentation cycle is complete (7-12 days depending on selection), the fermenter will beep or indicate completion.
- If the black garlic has more moisture than desired, you can activate the independent drying function. Press the "Drying" button. The drying indicator will light up.
- The drying process will run for a set period to reduce moisture content and improve texture.
- Trin 5: Nyd
Once fermentation and optional drying are complete, unplug the unit. Carefully remove the black garlic. It is now ready for consumption or use as a seasoning.
Vedligeholdelse og rengøring
Regular cleaning ensures the longevity and hygienic operation of your black garlic fermenter.
- Tag stikket ud: Always unplug the fermenter from the power outlet and allow it to cool completely before cleaning.
- Inner Pot and Rack: Remove the stainless steel cage rack and the inner pot. Wash them with warm, soapy water using a soft sponge or cloth. Rinse thoroughly and dry completely before reassembling or storing. These parts are generally dishwasher safe, but hand washing is recommended for longevity.
- Ydre: Wipe the exterior of the fermenter unit with a damp klud. Brug ikke slibende rengøringsmidler eller skuresvampe, da de kan beskadige overfladen.
- Fordyb ikke: Never immerse the main fermenter unit (which contains electrical components) in water or any other liquid.
- Opbevaring: Store the clean and dry fermenter in a cool, dry place away from direct sunlight when not in use.
Fejlfinding
If you encounter any issues with your fermenter, please refer to the following common problems and solutions:
| Problem | Mulig årsag | Løsning |
|---|---|---|
| Fermenter does not power on. | Ikke tilsluttet korrekt; strømmen er slukkettage; defekt stikkontakt. | Sørg for, at netledningen er sat ordentligt i en stikkontakt, der virker. Kontroller din afbryder. |
| Fermentation process stops unexpectedly. | Strømafbrydelse. | The unit has a power failure memory function. If power is restored, it should resume automatically. If not, restart the process. |
| Black garlic is too moist after fermentation. | Natural moisture content of garlic; insufficient drying. | Activate the independent drying function after the fermentation cycle is complete. You can also air dry for a few days. |
| Garlic is not fermenting properly (e.g., not turning black). | Incorrect garlic type; improper loading; incorrect program selection. | Ensure you are using fresh, whole garlic. Do not peel. Ensure garlic is evenly distributed. Select the correct program ("Solo Garlic" or "Garlic") based on your garlic type. |
| Strong garlic smell during operation. | Normal during black garlic fermentation. | This is expected. Operate the fermenter in a well-ventilated area, such as a garage or utility room, to minimize odor indoors. |
Garanti og support
For warranty information or technical support, please refer to the documentation included with your purchase or contact YUCHENGTECH customer service through their official channels. Please have your model number (AZK186-3) and purchase date available when contacting support.