
1. Introduktion
The APLOS AP150 Dive Light is a powerful and durable flashlight designed for underwater and outdoor use. With its high lumen output and robust waterproof construction, it provides reliable illumination for various activities such as scuba diving, snorkeling, camping, and hiking. This manual provides essential information for the safe and effective use, setup, operation, and maintenance of your AP150 Dive Light.
2. Nøglefunktioner
- 15000 Lumens Super Bright: Delivers an impressive 15,000 lumens of cold white light for clear visibility, with an effective beam distance up to 356 meters.
- Holdbar konstruktion: Made from AL-6061-T6 aircraft-grade aluminum with military-grade Type III hard anodizing, ensuring resistance to wear, impact, and seawater corrosion. Features a tempered glass lens for durability and water resistance.
- 4 Lighting Modes & Rotary Switch: Easily switch between High, Medium, Low, and SOS modes using a smooth rotary switch located behind the light head.
- IPX8 vandtæt bedømmelse: Professional sealing design allows for use up to 150 meters (492 feet) underwater.
- Alsidig brug: Suitable for scuba diving, snorkeling, camping, swimming, hiking, hunting, fishing, and other outdoor adventures.
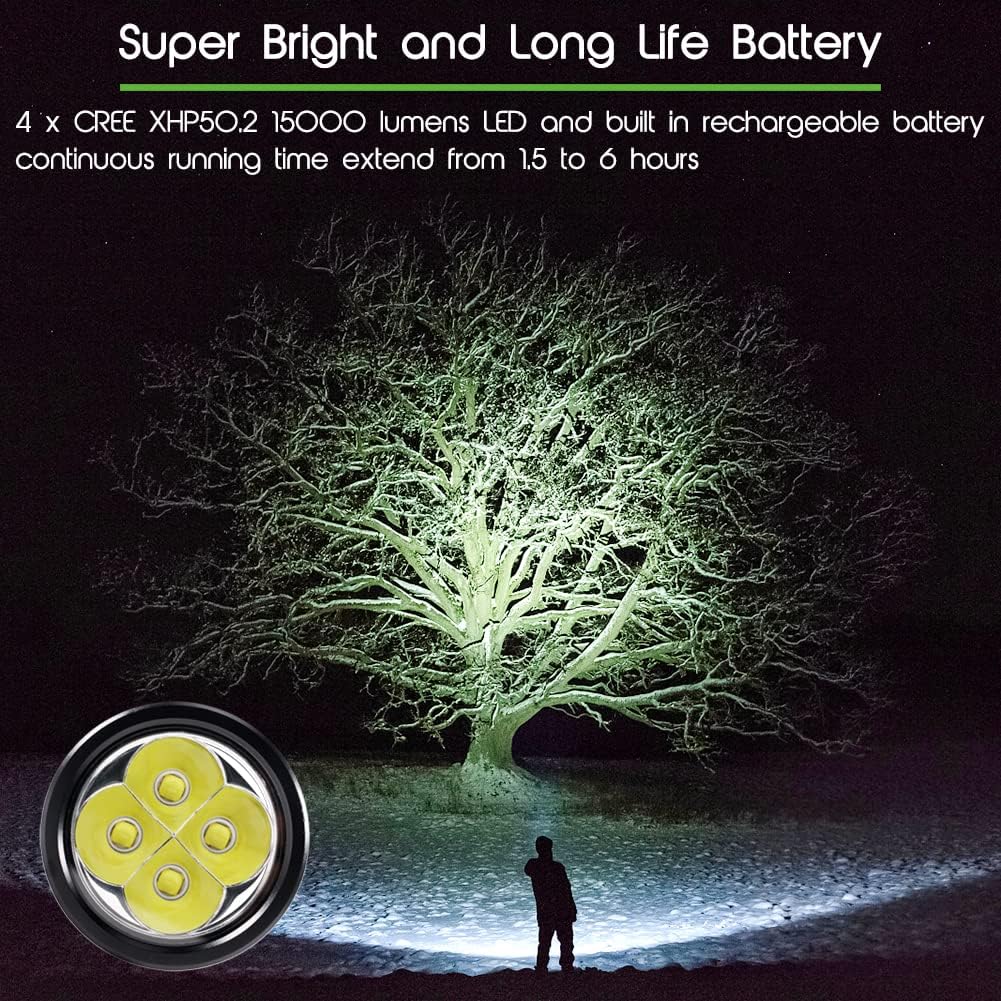
Image 1: The APLOS AP150 Dive Light's powerful 15000 lumen beam.

Image 2: Demonstrating the AP150's waterproof capability and beam distance.
3. Opsætningsvejledning
3.1. Batteriinstallation
- Unscrew the tail cap or the head of the flashlight by twisting it counter-clockwise.
- Insert the included rechargeable Lithium-Ion battery (CR5 type) into the battery compartment, ensuring correct polarity (positive end towards the light head).
- Carefully screw the tail cap or head back on clockwise until it is securely tightened. Ensure the O-rings are properly seated to maintain the waterproof seal.
3.2. Opladning af batteriet
- Remove the battery from the flashlight as described in section 3.1.
- Place the battery into the provided external battery charger.
- Connect the charger to a power source using the included cable.
- Monitor the charger's indicator light for charging status. A full charge typically takes approximately 4 hours.
- Once fully charged, remove the battery from the charger and reinstall it into the flashlight.
4. Betjeningsvejledning
4.1. Tænd/sluk og valg af tilstand
The APLOS AP150 features a rotary switch for easy control:
- At tænde lyset ON, rotate the switch clockwise from the OFF position.
- Continue rotating the switch clockwise to cycle through the four lighting modes: High (15000 lumens) > Medium (7000 lumens) > Low (2000 lumens) > SOS (7000 lumens).
- At tænde lyset SLUKKET, rotate the switch counter-clockwise back to the OFF position.
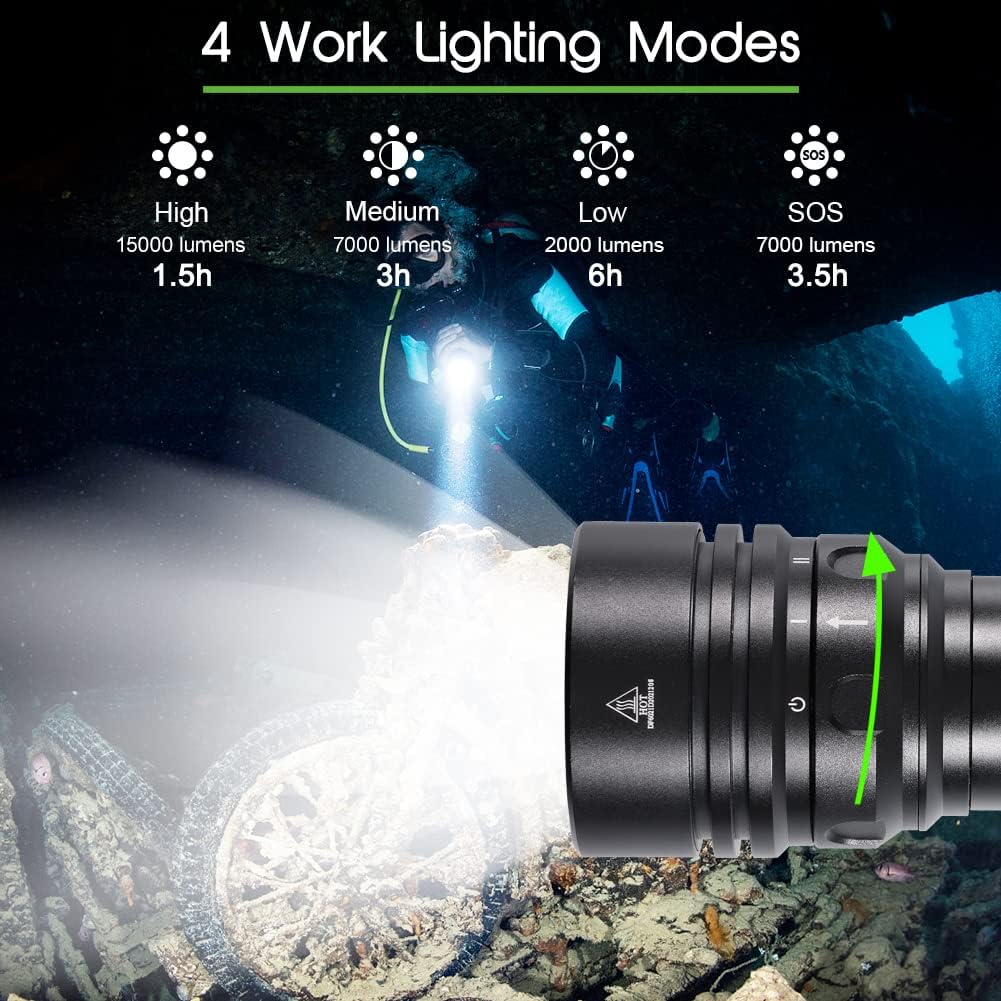
Image 3: The four lighting modes and rotary switch operation.
4.2. Batteriniveauindikator
The flashlight is equipped with a battery level indicator light on the switch:
- Grønt lys: Batteriniveauet er mellem 50% og 100%.
- Gult lys: Batteriniveauet er mellem 20% og 50%.
- Rødt lys: Battery level is below 20%. Recharge the battery promptly.
5. Vedligeholdelse
- Skylning: After each use in saltwater, thoroughly rinse the dive light with fresh water to prevent corrosion and salt buildup.
- O-ringpleje: Regularly inspect the O-rings for any signs of wear, cracks, or damage. Keep them clean and lightly lubricated with silicone grease to maintain a watertight seal. Replace damaged O-rings immediately using the provided spares.
- Batteripleje: Opbevar batteriet et køligt og tørt sted, når det ikke er i brug. Undgå at aflade batteriet helt i længere perioder.
- Rensning: Rengør ydersiden af lommelygten med en blød, damp klæde. Brug ikke slibende rengøringsmidler eller opløsningsmidler.
6. Fejlfinding
| Problem | Mulig årsag | Løsning |
|---|---|---|
| Lyset tændes ikke. | Batteriet er afladet eller forkert installeret. | Recharge the battery. Ensure the battery is inserted with correct polarity. Check for proper contact between the battery and terminals. |
| Lyset flimrer eller er svagt. | Lav batteriopladning eller løse forbindelser. | Recharge the battery. Ensure all parts are tightly screwed together. |
| Vandlækage. | Beskadigede eller forkert monterede O-ringe. | Inspect O-rings for damage. Clean and lubricate O-rings. Ensure O-rings are correctly seated and the flashlight is tightly sealed before use. |
| Batteriet oplades ikke. | Defekt oplader eller batteri. | Ensure the charger is properly connected to power and the battery. Try a different charging cable or power adapter if available. If issues persist, the battery or charger may need replacement. |
7. Produktspecifikationer
- Modelnummer: AP150
- Mærke: APLOS
- Lyskildetype: LED
- Hvid lysstyrke: 15000 lumen
- Strømkilde: Batteridrevet (lithium-ion)
- Antal batterier: 1 CR5 batteri (medfølger)
- Materiale: AL-6061-T6 Aircraft-grade Aluminum
- Vandmodstandsniveau: IPX8 (Waterproof up to 150 meters / 492 feet)
- Emnemål (L x B x H): 7 cm L x 1.5 cm B x 1.28 cm H
- Monteringstype: Håndholdt
- Inkluderede komponenter: APLOS AP150 Dive Light Set
8. Garanti og support
The APLOS AP150 Dive Light comes with a 2 års producentgaranti. For warranty claims, technical support, or any inquiries regarding your product, please contact APLOS customer service through the retailer where the product was purchased or visit the official APLOS webwebsted for kontaktoplysninger.
For yderligere information og produktopdateringer kan du besøge APLOS Store on Amazon.