DinoFire WP102
DinoFire Wireless Presentation Remote with Air Mouse User Manual
Model: WP102
Indledning
This manual provides comprehensive instructions for the DinoFire Wireless Presentation Remote with Air Mouse (Model WP102). This device combines the functionality of a traditional presentation clicker with a wireless air mouse, offering enhanced control during presentations. It features a 2.4GHz RF connection, a built-in rechargeable battery, and a bright red light pointer. The remote is designed for ease of use, supporting various operating systems and presentation software.
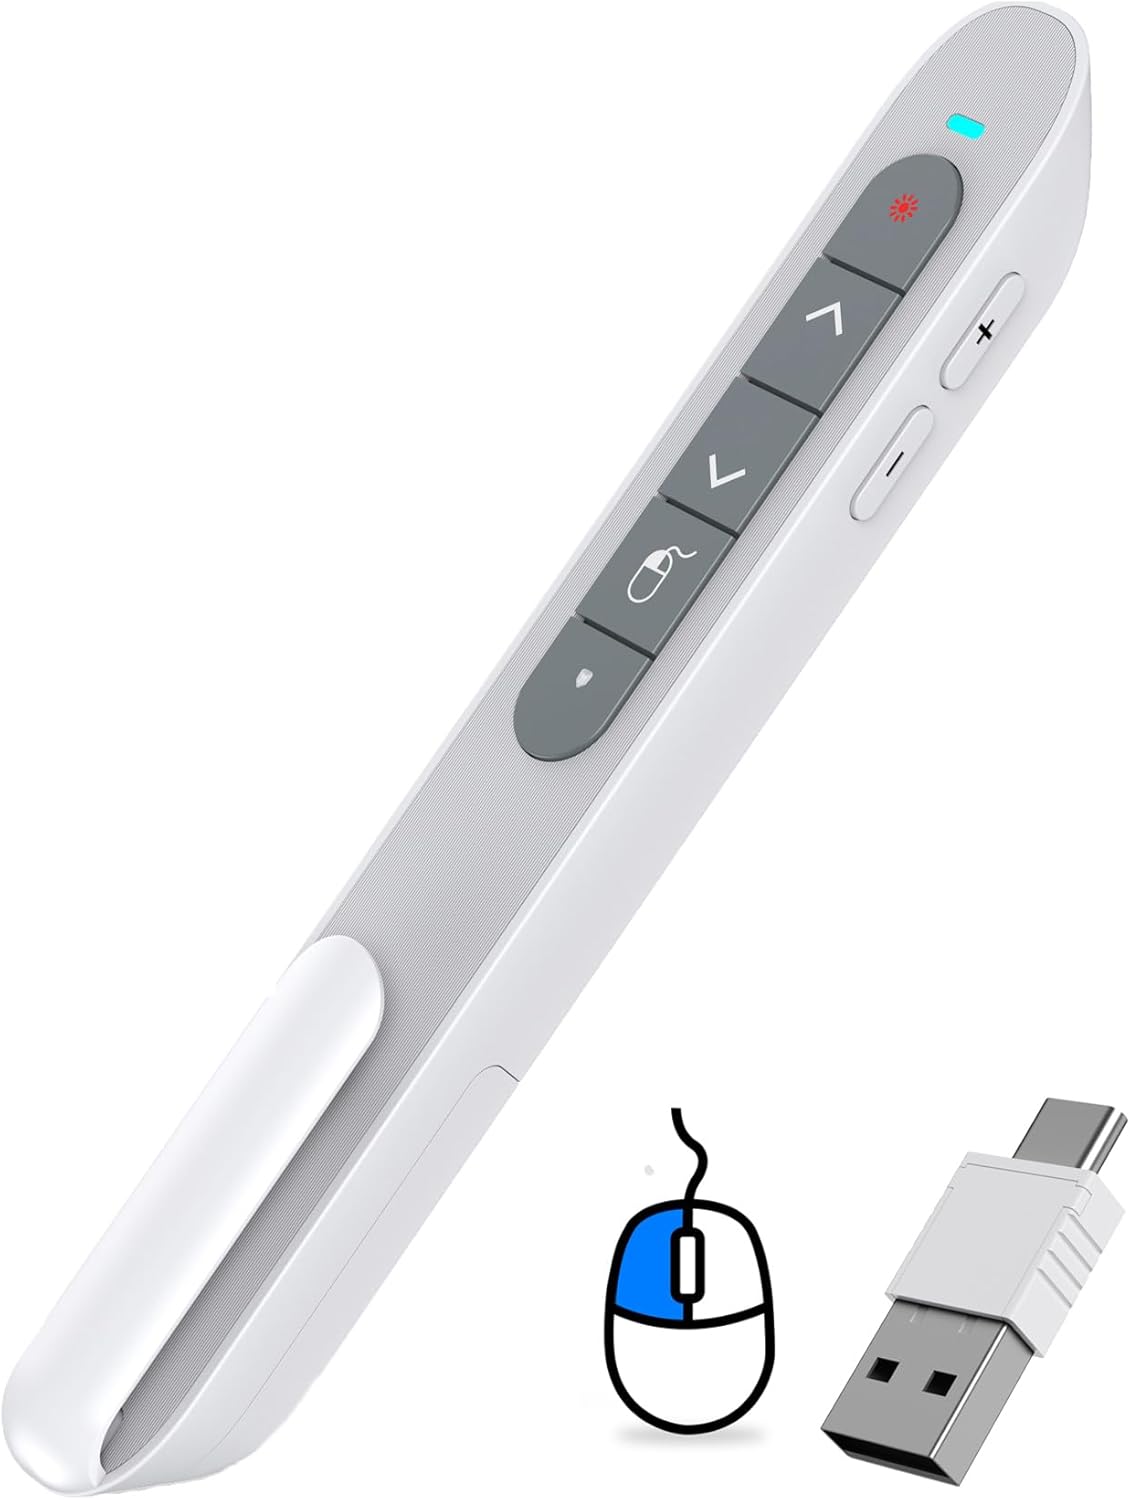
Figure 1: DinoFire Wireless Presentation Remote (Model WP102) with its dual USB receiver.
Opsætningsvejledning
- Oplad fjernbetjeningen: Before first use, ensure the presentation remote is fully charged. Connect the included USB-C cable to the remote's charging port and the other end to a USB power source (e.g., computer USB port, wall adapter). The LED indicator will show charging status. A full charge typically takes 3 hours and provides weeks of use.
- Find USB-modtageren: The 2-in-1 USB receiver is conveniently stored inside the remote's body. Gently slide open the magnetic storage compartment at the bottom of the remote to retrieve it.

Figure 2: Location of the USB receiver within the remote.
- Tilslut modtageren: Insert the USB receiver into an available USB-A or USB-C port on your computer or laptop. The receiver is designed to be compatible with both port types.
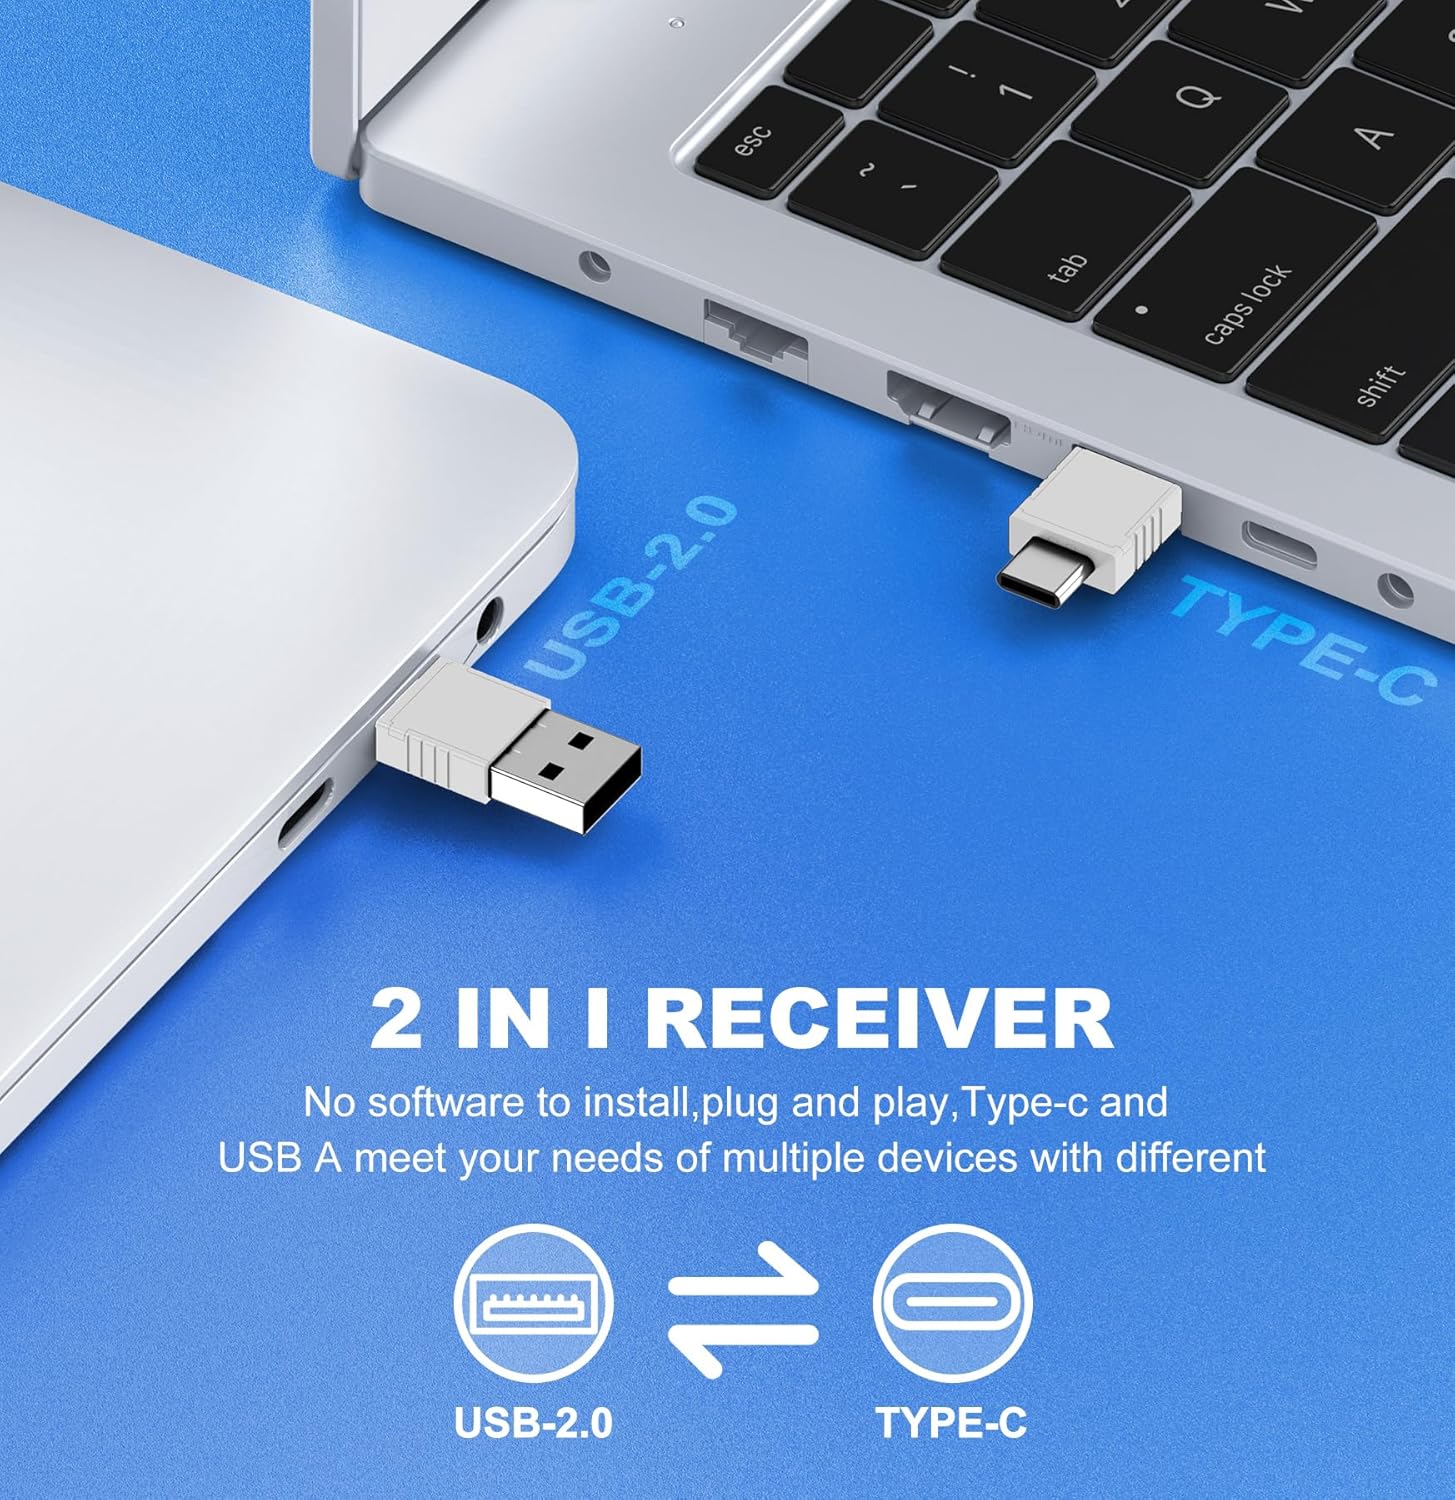
Figure 3: The versatile 2-in-1 USB receiver for USB-A and USB-C ports.
- Tænd for fjernbetjeningen: Slide the ON/OFF switch on the side of the remote to the "ON" position. The remote is plug-and-play, requiring no additional software installation. Your computer should automatically recognize the device.
Betjeningsvejledning
The DinoFire Wireless Presentation Remote offers multiple functions to enhance your presentation experience. Familiarize yourself with the button layout and their corresponding actions.

Figure 4: Key functions of the DinoFire Air Mouse Presenter.
Knap funktioner:
- Light Control (Red Laser Pointer): Press the button with the red light icon to activate the red laser pointer. This is useful for highlighting specific points on your presentation screen.
- Page Up (Single Press): Tryk på ^ button to move to the previous slide or page.
- Full Screen / Black Screen (Press and Hold): Tryk og hold på ^ button to toggle between full-screen mode and a black screen during a presentation.
- Page Down (Single Press): Tryk på v button to advance to the next slide or page.
- Sort skærm (tryk og hold nede): Tryk og hold på v button to activate a black screen.
- Venstre museknap: The button with the mouse icon acts as the left mouse click.
- Lydstyrke op (+): Press the '+' button on the side to increase the system volume.
- Skrue ned for lyden (-): Press the '-' button on the side to decrease the system volume.
- ON/OFF Mouse (Single Press): The button with the mouse icon and a circle (below the left mouse button) toggles the air mouse functionality on and off. This allows you to pause cursor movement when not needed.
Air Mouse-funktionalitet:
The integrated air mouse allows you to control your computer's cursor by moving the remote in the air. This is particularly useful for interacting with hyperlinks, playing videos, or navigating web pages directly from your presentation. Ensure the "ON/OFF Mouse" button is activated for air mouse control.

Figure 5: Air Mouse functionality for interactive presentations.
Kompatibilitet:
The DinoFire WP102 is widely compatible with various operating systems and presentation software:
- Systemer: Windows 2003/XP/Vista/7/8/10 or above, Mac OS, Linux, Android.
- Software: PowerPoint, Excel, Prezi, iWork (Keynote & Numbers & Pages), Web browsers, and more.
The 2.4GHz RF technology provides a long control range, allowing you freedom of movement up to 100 feet (30 meters) from your computer.
Opretholdelse
- Opladning: Recharge the built-in 300mAh battery when the LED indicator shows low power. Use the provided USB-C cable. Avoid overcharging for extended battery life.
- Opbevaring: When not in use, store the USB receiver inside the remote's magnetic compartment to prevent loss. Store the remote in a cool, dry place away from direct sunlight and extreme temperatures.
- Rensning: Tør fjernbetjeningen af med en blød, tør klud. Brug ikke flydende rengøringsmidler eller slibende materialer.
- Batteripleje: Hvis enheden ikke skal bruges i en længere periode, skal den oplades med jævne mellemrum (f.eks. hver 3. måned) for at opretholde batteriets sundhedstilstand.
Fejlfinding
| Problem | Mulig årsag | Løsning |
|---|---|---|
| Remote not responding / No cursor movement. |
|
|
| Red laser pointer not working. |
|
|
| Buttons not performing expected actions (e.g., page up/down). |
|
|
Specifikationer
- Modelnummer: WP102
- Forbindelse: RF 2.4GHz trådløs
- Modtagertype: 2-in-1 USB-A / USB-C
- Batteri: Indbygget 300mAh genopladeligt batteri
- Opladningsport: USB-C
- Kontrolområde: Op til 100 fod (30 meter)
- Laser type: Rødt Lys
- Dimensioner: Cirka 6.3 x 1.61 x 1.18 tommer (16 x 4.1 x 3 cm)
- Vægt: Cirka 1.76 ounce (50 gram)
- Kompatibilitet: Windows 2003/XP/Vista/7/8/10+, Mac OS, Linux, Android; PowerPoint, Excel, Prezi, Keynote, etc.
- Fabrikant: Shenzhen Qixun Space Technology Co., Ltd
Garantioplysninger
Specific warranty details for the DinoFire Wireless Presentation Remote (Model WP102) are typically provided at the point of purchase or within the product packaging. Please refer to the documentation included with your product or contact the seller/manufacturer directly for information regarding warranty coverage, terms, and conditions.
Kundesupport
For technical assistance, troubleshooting beyond this manual, or inquiries regarding your DinoFire Wireless Presentation Remote, please contact the seller through the platform where you purchased the product. You may also visit the official DinoFire brand store for additional resources and contact information.
Ask a question about this manual
Ask about setup, troubleshooting, compatibility, parts, safety, or missing instructions. Manuals+ will review the question and use this page’s manual context to help answer it.