
1. Introduktion
This manual provides detailed instructions for the ESSAGER 8-in-1 USB C Hub with SSD Enclosure. It covers product features, setup, operation, maintenance, troubleshooting, and specifications to ensure optimal performance and user experience. Please read this manual thoroughly before using the device.
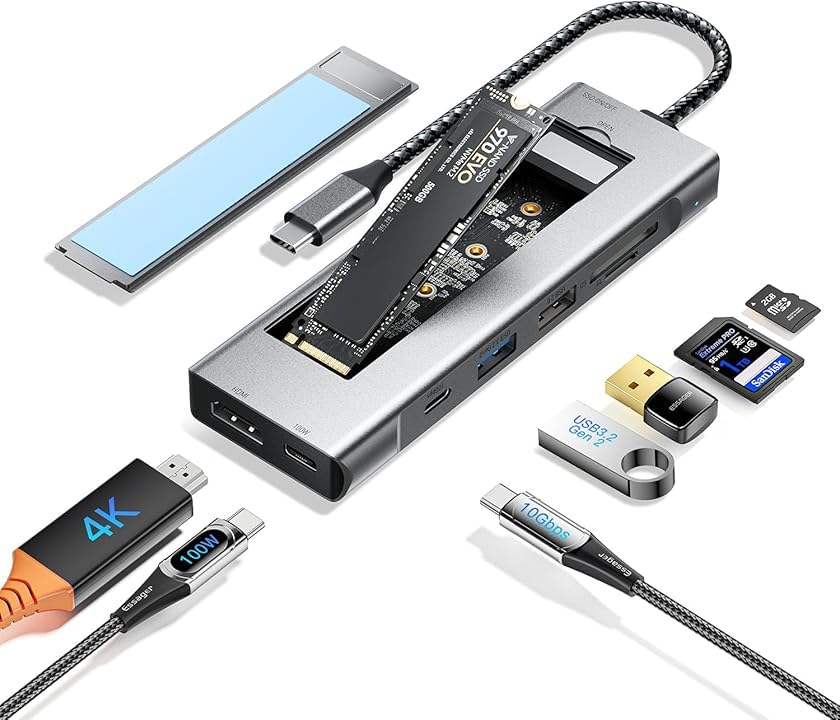
Figure 1: ESSAGER 8-in-1 USB C Hub with SSD Enclosure and included accessories.
2. Produktet er slutview
The ESSAGER 8-in-1 USB C Hub is a versatile docking station designed to expand the connectivity of your USB-C enabled devices. It integrates an M.2 NVMe/SATA SSD enclosure, multiple USB ports, an HDMI output, a PD charging port, and an SD/TF card reader.
Nøglefunktioner:
- 8-i-1-udvidelse: Combines M.2 NVMe/SATA SSD enclosure, PD100W fast charging, 4K HDMI, 10Gbps USB-C, USB 3.2 Gen 2, USB 2.0, and SD/TF card reader.
- Højhastighedsdataoverførsel: M.2 NVMe/SATA SSD interface supports up to 10 Gbps, with read/write speeds up to 900 MB/s. USB 3.2 Gen 2 ports also offer 10Gbps.
- 4K HD-videoudgang: HDMI 1.4 port supports 4K (3840 x 2160) resolution at 30Hz for immersive display.
- PD100W hurtigopladning: Power Delivery port ensures rapid charging for your connected devices.
- Rapid Card Reading: SD/TF card reader supports transfer speeds up to 104 MB/s.
- Bred kompatibilitet: Compatible with Windows, macOS, Linux, Chrome OS, Android, and devices like MacBook Pro/Air, Huawei P30/Mate30, Samsung Note10/S10, Steam Deck, and Switch.
- Holdbart design: Crafted from aluminum alloy for effective heat dissipation, ensuring portability and longevity.
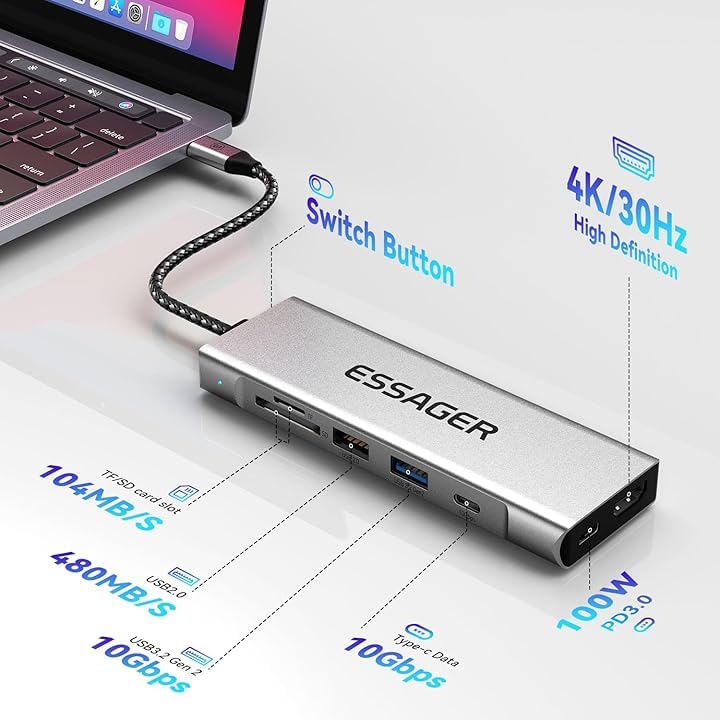
Figur 2: Detaljeret view of the hub's ports and their respective data transfer and power specifications.
3. Opsætning
3.1 SSD installation
The hub features an integrated M.2 NVMe/SATA SSD enclosure. Follow these steps to install your M.2 SSD:
- Forbered kabinettet: Open the SSD enclosure cover. If included, install the heat dissipation silicone pad onto the SSD slot.
- Indsæt SSD: Carefully insert your M.2 NVMe or SATA SSD into the M.2 slot. Ensure it is fully seated.
- Sikker SSD: Use the provided screw to fix the SSD securely in place.
- Luk låg: Close the hard drive cover until it clicks into place.
Note: A brand new SSD must be initialized and formatted before it can be used by your operating system. Refer to your operating system's documentation for instructions on disk initialization (e.g., Disk Management on Windows, Disk Utility on macOS).
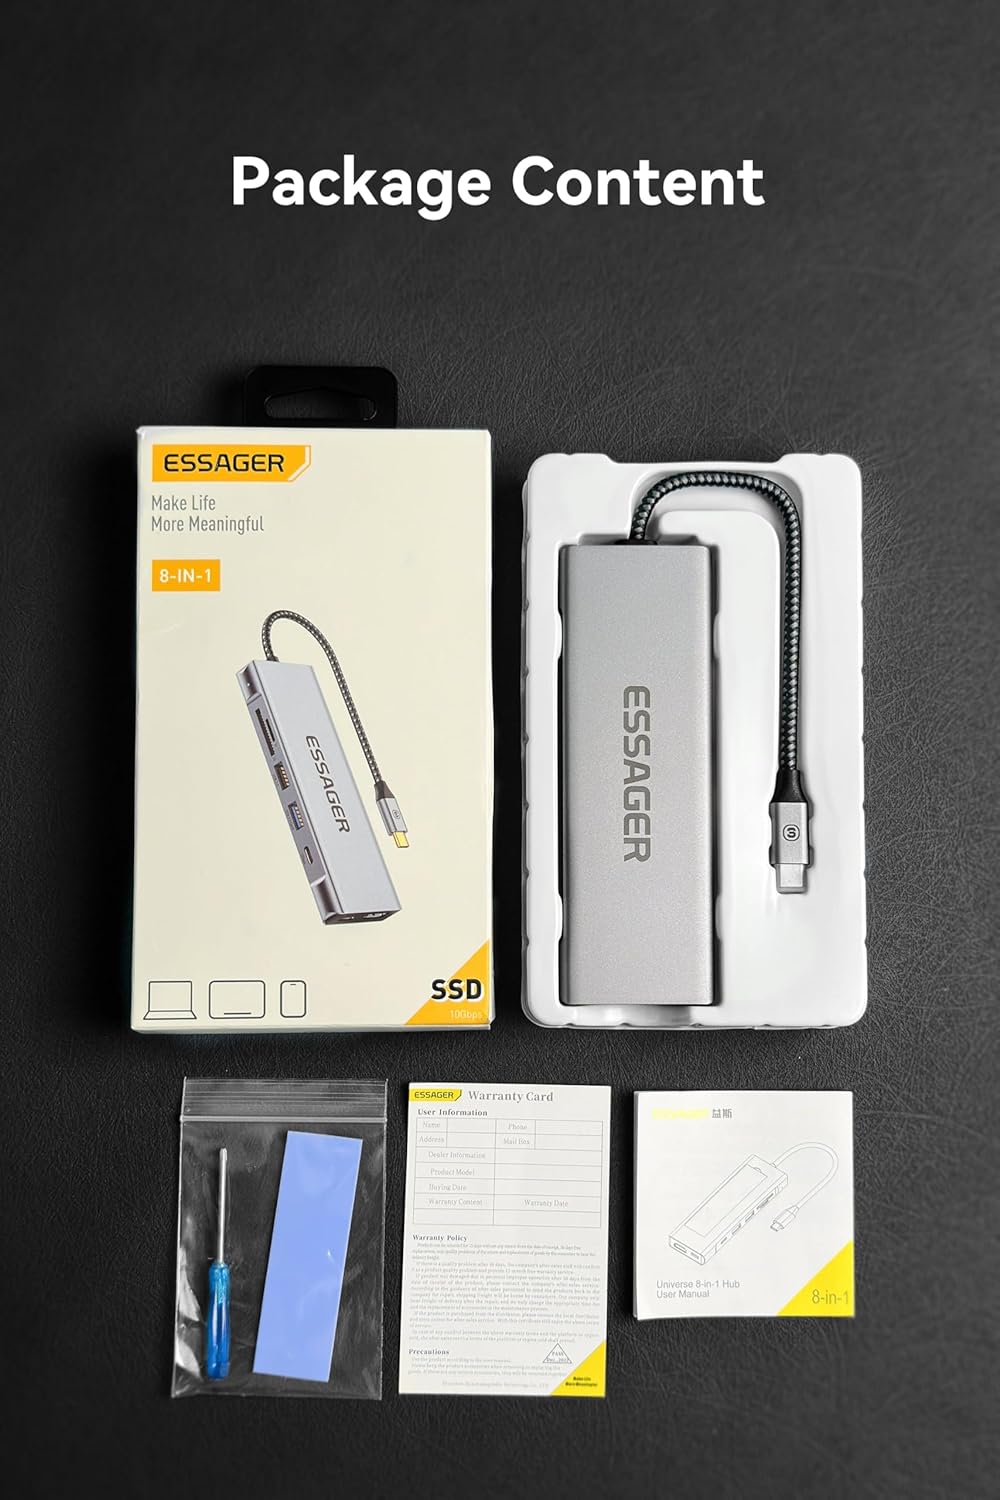
Figure 3: Step-by-step guide for installing an M.2 SSD into the enclosure.
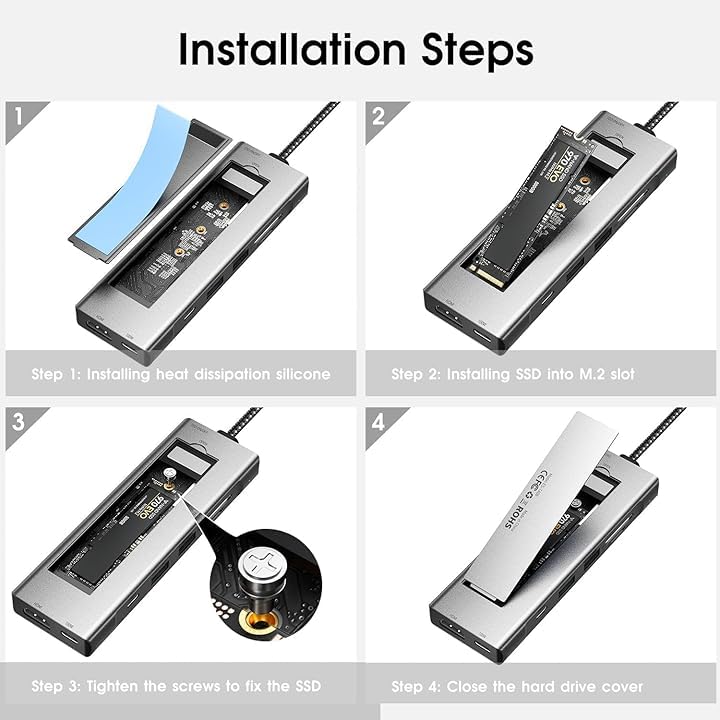
Figure 4: Illustration of compatible M.2 NVMe (M Key, B+M Key) and SATA (B+M Key) SSD types and supported sizes (2242, 2260, 2280).

Figure 5: Visual representation of M.2 NVMe and SATA SSD compatibility with the hub's enclosure.
3.2 Tilslutning af hubben til din enhed
Connect the integrated USB-C cable of the ESSAGER hub to a compatible USB-C port on your laptop, tablet, or smartphone. The hub is plug-and-play and typically requires no additional drivers for basic functionality.
4. Betjeningsvejledning
4.1 Brug af USB-portene
- USB 3.2 Gen 2 (10 Gbps): Connect high-speed peripherals such as external hard drives, SSDs, or high-resolution cameras for fast data transfer.
- USB 2.0: Ideal for connecting standard peripherals like keyboards, mice, or printers.
- USB-C-dataport (10 Gbps): Use this port for connecting USB-C devices that require high-speed data transfer.
4.2 HDMI-videoudgang
Connect an HDMI cable from the hub's HDMI port to an external monitor, TV, or projector. The hub supports 4K (3840 x 2160) resolution at 30Hz. Ensure your display device and HDMI cable support 4K resolution for optimal performance.

Figur 6: Eksamples of using the hub for screen projection and data sharing with laptops, tablets, and mobile phones.
4.3 Opladning af strømforsyning (PD)
Connect your original USB-C power adapter to the hub's PD port (marked "PD" or with a lightning bolt icon) to charge your host device (laptop, tablet) while using the hub. The hub supports up to 100W Power Delivery.
4.4 SD/TF-kortlæser
Insert your SD or TF (Micro SD) card into the corresponding slot. The hub supports high-speed data transfer for quick photo and video transfers, up to 104 MB/s.
4.5 Data Sharing Switch
The hub features a switch to control data sharing. When the switch is in the "On" position, data sharing is enabled, allowing full functionality of connected peripherals and storage. When "Off", data sharing is disabled, which can be useful for privacy or security in certain scenarios.
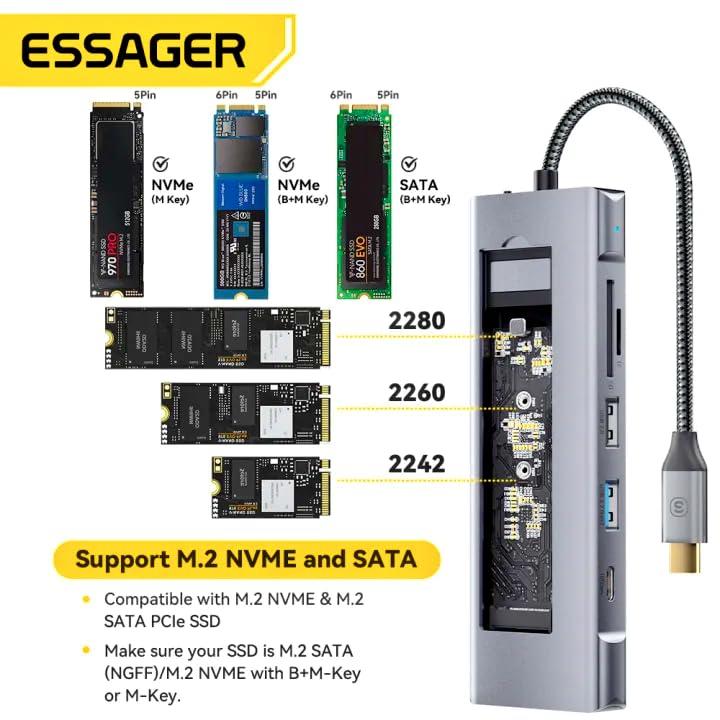
Figure 7: Location and function of the On/Off switch for data sharing.
5. Vedligeholdelse
To ensure the longevity and optimal performance of your ESSAGER USB C Hub, follow these maintenance guidelines:
- Rensning: Brug en blød, tør klud til at rengøre hubbens yderside. Undgå at bruge flydende rengøringsmidler eller aerosoler, da de kan beskadige enheden.
- Opbevaring: Opbevar hubben et køligt, tørt sted væk fra direkte sollys og ekstreme temperaturer.
- Håndtering: Handle the hub with care. Avoid dropping it or subjecting it to strong impacts. Do not bend the integrated USB-C cable excessively.
- Varmeafledning: The aluminum alloy design aids in heat dissipation. Ensure the hub is placed in a well-ventilated area during prolonged use to prevent overheating.
6. Fejlfinding
If you encounter issues with your ESSAGER USB C Hub, refer to the following common troubleshooting steps:
- Enhed ikke genkendt:
- Ensure the hub's USB-C cable is securely connected to your host device.
- Try connecting the hub to a different USB-C port on your device.
- Genstart din værtsenhed.
- SSD ikke fundet:
- Verify that the SSD is correctly installed within the enclosure and securely fastened.
- For new SSDs, ensure they have been initialized and formatted through your operating system's disk management utility.
- Check if the SSD is compatible (M.2 NVMe or SATA, correct size).
- HDMI Display Issues:
- Sørg for, at HDMI-kablet er korrekt tilsluttet til både hubben og skærmen.
- Kontroller, at din skærm er indstillet til den korrekte inputkilde.
- Check if your host device's display settings are configured to extend or duplicate the display.
- Prøv et andet HDMI-kabel eller en anden skærm.
- Charging Not Working (PD Port):
- Sørg for, at din USB-C-strømadapter er tilsluttet hubbens PD-port og fungerer korrekt.
- Kontroller, at din strømadapter leverer tilstrækkeligt med strømtage for your host device (up to 100W supported by the hub).
- Langsom dataoverførsel:
- Ensure you are using the correct USB ports for high-speed devices (USB 3.2 Gen 2 or USB-C data port).
- Check the specifications of your connected device and cable to ensure they support the desired speeds.
7. Specifikationer
| Feature | Specifikation |
|---|---|
| Model | B0FG1B11P6 |
| Mærke | ESSAGER |
| Produktdimensioner | 1.7 x 4.4 x 14 cm |
| Varens vægt | 150 g |
| Materiale | Aluminiumslegering |
| Operativsystemkompatibilitet | Windows, macOS, Linux, Chrome OS, Android |
| Hardware-interface | USB Type C |
| Antal havne | 8 |
| SSD-kabinet | M.2 NVMe/SATA (10Gbps) |
| HDMI udgang | 4K (3840 x 2160) @ 30Hz |
| Strømforsyning (PD) | Op til 100W |
| USB-dataporte | 1x USB 3.2 Gen 2 (10Gbps), 1x USB 2.0, 1x USB-C Data (10Gbps) |
| Kortlæser | SD/TF (up to 104 MB/s) |
| Særlige funktioner | Fast Data Transfer, Heat Resistant, Portable, NVMe Enclosure with HDMI Hub |
8. Garanti og support
This product comes with a manufacturer's warranty. Please refer to the warranty card included in the product packaging for specific terms and conditions, including warranty period and coverage.

Figure 8: Product package content, including the warranty card and user manual.
Kundesupport:
For technical assistance, troubleshooting, or warranty claims, please contact the importer/packer:
MRJ ELECTRONICS AHMEDABAD
Kontakt: 9023265213
Please have your product model number (B0FG1B11P6) and purchase details ready when contacting support.