
Acegeek AG-KNIGHT-V1-BK
Acegeek Knight-V1 Gaming Chair User Manual
Model: AG-KNIGHT-V1-BK
Indledning
This manual provides comprehensive instructions for the assembly, safe operation, and proper maintenance of your Acegeek Knight-V1 Gaming Chair. Please read this manual thoroughly before assembly and use to ensure optimal performance and longevity of your product. Keep this manual for future reference.
Sikkerhedsoplysninger
Vigtige sikkerhedsforanstaltninger:
- Overskrid ikke den maksimale vægtgrænse på 110 kg (242 lbs). Exceeding this limit may cause damage to the chair and potential injury.
- Use all adjustable mechanisms (recline, height, armrests) only as instructed in this manual. Improper use can lead to instability or damage.
- Sørg for, at alle skruer og bolte er forsvarligt spændt før brug, og kontroller regelmæssigt for løse dele.
- Hold hænder og fingre væk fra bevægelige dele under justering.
- Stå ikke på stolen.
- Hold børn og kæledyr væk fra stolen under montering.
- Placer stolen på en flad, stabil overflade.
Pakkens indhold
Before beginning assembly, verify that all components are present and undamaged. If any parts are missing or damaged, please contact Acegeek customer support.
- Ryglæn
- Sædeunderlag
- Armlæn (2)
- Stjernebase
- Hjul (5)
- Gas Lift cylinder
- Gasliftdæksel
- Mekanismeplade
- Lændepude
- Nakkestøttepude
- Hardware-sæt (skruer, skiver, unbrakonøgle)
- Instruktionsmanual (dette dokument)
Opsætning og montering
Follow these steps carefully to assemble your Acegeek Knight-V1 Gaming Chair. It is recommended to have two people for assembly.
Trin 1: Fastgør hjul til stjernebase
Sæt hvert af de fem hjul ind i hullerne for enden af hvert ben på stjernebasen. Tryk godt til, indtil de klikker på plads.

Image: The chair's star base with casters being inserted into the leg openings.
Trin 2: Installer gasløftecylinderen
Place the gas lift cylinder into the center hole of the assembled star base. Then, slide the gas lift cover over the cylinder.
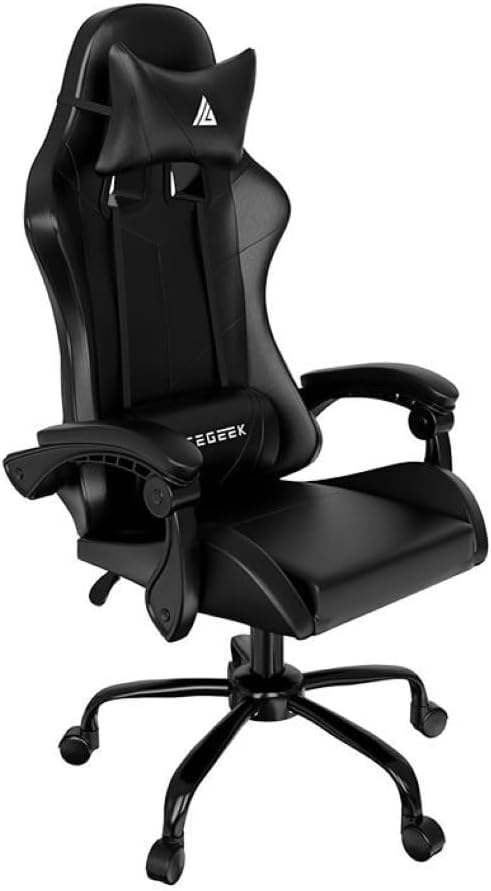
Image: The gas lift cylinder being placed into the center of the five-star base.
Step 3: Attach Mechanism Plate to Seat Base
Align the mechanism plate with the pre-drilled holes on the underside of the seat base. Secure it using the provided screws and Allen key. Ensure the front of the mechanism plate faces the front of the seat.

Image: The underside of the seat base with the mechanism plate attached, showing screw points.
Trin 4: Fastgør armlænene til sædebasen
Attach the armrests to the sides of the seat base using the designated screws. Pay attention to the "L" (left) and "R" (right) markings on the armrests.

Image: The seat base with one armrest partially attached, showing the screw holes.
Trin 5: Fastgør ryglænet til sædebasen
Align the backrest with the mounting brackets on the seat base and armrests. Secure it with the remaining screws. It may be helpful to have another person hold the backrest in place during this step.

Image: The backrest being attached to the seat base, showing the connection points.
Trin 6: Tilslut sædeenheden til gasløfteren
Placer forsigtigt det samlede sæde og ryglæn på gasliftcylinderen, og sørg for, at mekanismepladens midterhul flugter med toppen af gasliften. Tryk godt ned for at fastgøre.

Image: The fully assembled chair, viewed from the side, showing its overall structure.
Step 7: Attach Cushions
Attach the headrest cushion to the top of the backrest using its elastic straps. Position the lumbar cushion on the lower backrest, adjusting its height for personal comfort.
Betjeningsvejledning
Højdejustering
To adjust the chair's height, pull the lever located on the right side of the seat upwards. To raise the chair, lift the lever while standing. To lower the chair, lift the lever while seated.
Tilpasning af ryglænet
The backrest can be reclined between 90 and 120 degrees. Pull the recline lever, typically located on the left side of the seat, to adjust the angle. Release the lever to lock the backrest in your desired position.
Justering af armlæn
The armrests are adjustable. Locate the adjustment buttons or levers on the armrests to change their height or angle, if applicable to your model. Adjust to support your arms and shoulders comfortably.
Lumbar and Headrest Cushion Adjustment
The lumbar and headrest cushions are adjustable. Slide them up or down along the backrest straps to find the most comfortable and supportive position for your neck and lower back.
Vedligeholdelse og pleje
Proper maintenance ensures the longevity and appearance of your gaming chair.
- Rensning: Tør stolen af med adamp cloth. Avoid using abrasive cleaners, harsh chemicals, or solvents, as these can damage the PU and PVC material.
- Inspektion: Periodically check all screws and bolts to ensure they are tight. Re-tighten if necessary to prevent wobbling or instability.
- Hjul: Keep the casters clean and free of debris (hair, dust) to ensure smooth movement.
- Undgå direkte sollys: Langvarig udsættelse for direkte sollys kan få materialet til at falme eller revne.
- Vægtgrænse: Always adhere to the maximum weight recommendation of 110 kg.
Fejlfinding
If you encounter issues with your Acegeek Knight-V1 Gaming Chair, refer to the following common problems and solutions:
| Problem | Mulig årsag | Løsning |
|---|---|---|
| Stolen vakler eller føles ustabil. | Løse skruer eller bolte. Ujævnt gulv. | Kontrollér og spænd alle monteringsskruer. Sørg for, at stolen står på en plan overflade. |
| Gasliften justerer ikke højden. | Gas lift cylinder malfunction. Lever not engaged. | Sørg for, at højdejusteringshåndtaget er trukket helt ud. Hvis problemet fortsætter, skal gasliften muligvis udskiftes. Kontakt support. |
| Hjulene ruller ikke jævnt. | Debris caught in casters. Damaged casters. | Fjern hår eller snavs fra hjulene. Hvis hjulene er beskadigede, skal de muligvis udskiftes. |
| Backrest not reclining or locking. | Lænemekanismen sidder fast eller er beskadiget. | Ensure the recline lever is fully engaged. Check for any obstructions. If the mechanism is damaged, contact support. |
Specifikationer
| Mærke | Acegeek |
| Model | AG-KNIGHT-V1-BK |
| Farve | Sort |
| Materiale (ramme) | Metal + Plate |
| Materiale (Omslag) | PU + PVC |
| Material (Filling) | Normal Foam |
| Gasliftklasse | Klasse 3 |
| Hældningsvinkel | 90-120 grader |
| Base Type | 320 mm Metal Base |
| Hjulstørrelse | 50 mm Nylon |
| Maksimal vægtkapacitet | 110 kg (242 lbs) |
| Produktmål (D x B x H) | 81 cm x 26 cm x 62 cm |
| Montering påkrævet | Ja |
| Særlige funktioner | Adjustable headrest and lumbar cushions, adjustable armrests, high backrest with integrated headrest. |
Garantioplysninger
Specific warranty details for the Acegeek Knight-V1 Gaming Chair are typically provided at the point of purchase or on the official Acegeek website. Please retain your proof of purchase for any warranty claims. The warranty generally covers manufacturing defects under normal use. It does not cover damage resulting from misuse, accidents, unauthorized modifications, or exceeding the weight limit.
Kundesupport
For technical assistance, missing parts, or warranty inquiries, please contact Acegeek customer support through their official website or the retailer where the product was purchased. Have your model number (AG-KNIGHT-V1-BK) and proof of purchase ready when contacting support.
Online support: Visit the official Acegeek webhjemmeside med ofte stillede spørgsmål og kontaktoplysninger.
E-mail support: Refer to your purchase documentation for the appropriate email address.
Ask a question about this manual
Ask about setup, troubleshooting, compatibility, parts, safety, or missing instructions. Manuals+ will review the question and use this page’s manual context to help answer it.