1. Introduktion
This manual provides detailed instructions for the installation, operation, and maintenance of your Evanshow Fingerprint Door Lock, Model 190NOSilver. Please read this manual thoroughly before installation and use to ensure proper function and security. This smart lock offers multiple convenient access methods, enhancing security for various indoor applications.
2. Produktfunktioner
- 4-in-1 Smart Lock: Offers multiple access options including fingerprint, password, IC card, and mechanical keys.
- Høj kapacitet: Supports up to 100 unique fingerprints and 100 user-defined passwords.
- Avanceret fingeraftrykssensor: Features an upgraded sensor with 0.5-second recognition speed and 360° recognition for quick and accurate access.
- Nem installation: Designed for straightforward installation on wooden doors 1.18"-1.97" thick, without requiring complex drilling or wiring.
- Forbedret sikkerhed: Utilizes advanced biometric technology to prevent unauthorized access, ensuring home security.
- Automatisk låsefunktion: Customizable auto-lock feature for added convenience and peace of mind.
- Anti-Peep Password: Allows users to enter random digits before or after the actual password to prevent onlookers from guessing the code.
3. Pakkens indhold
Kontroller, at alle komponenter er til stede, før installationen påbegyndes:
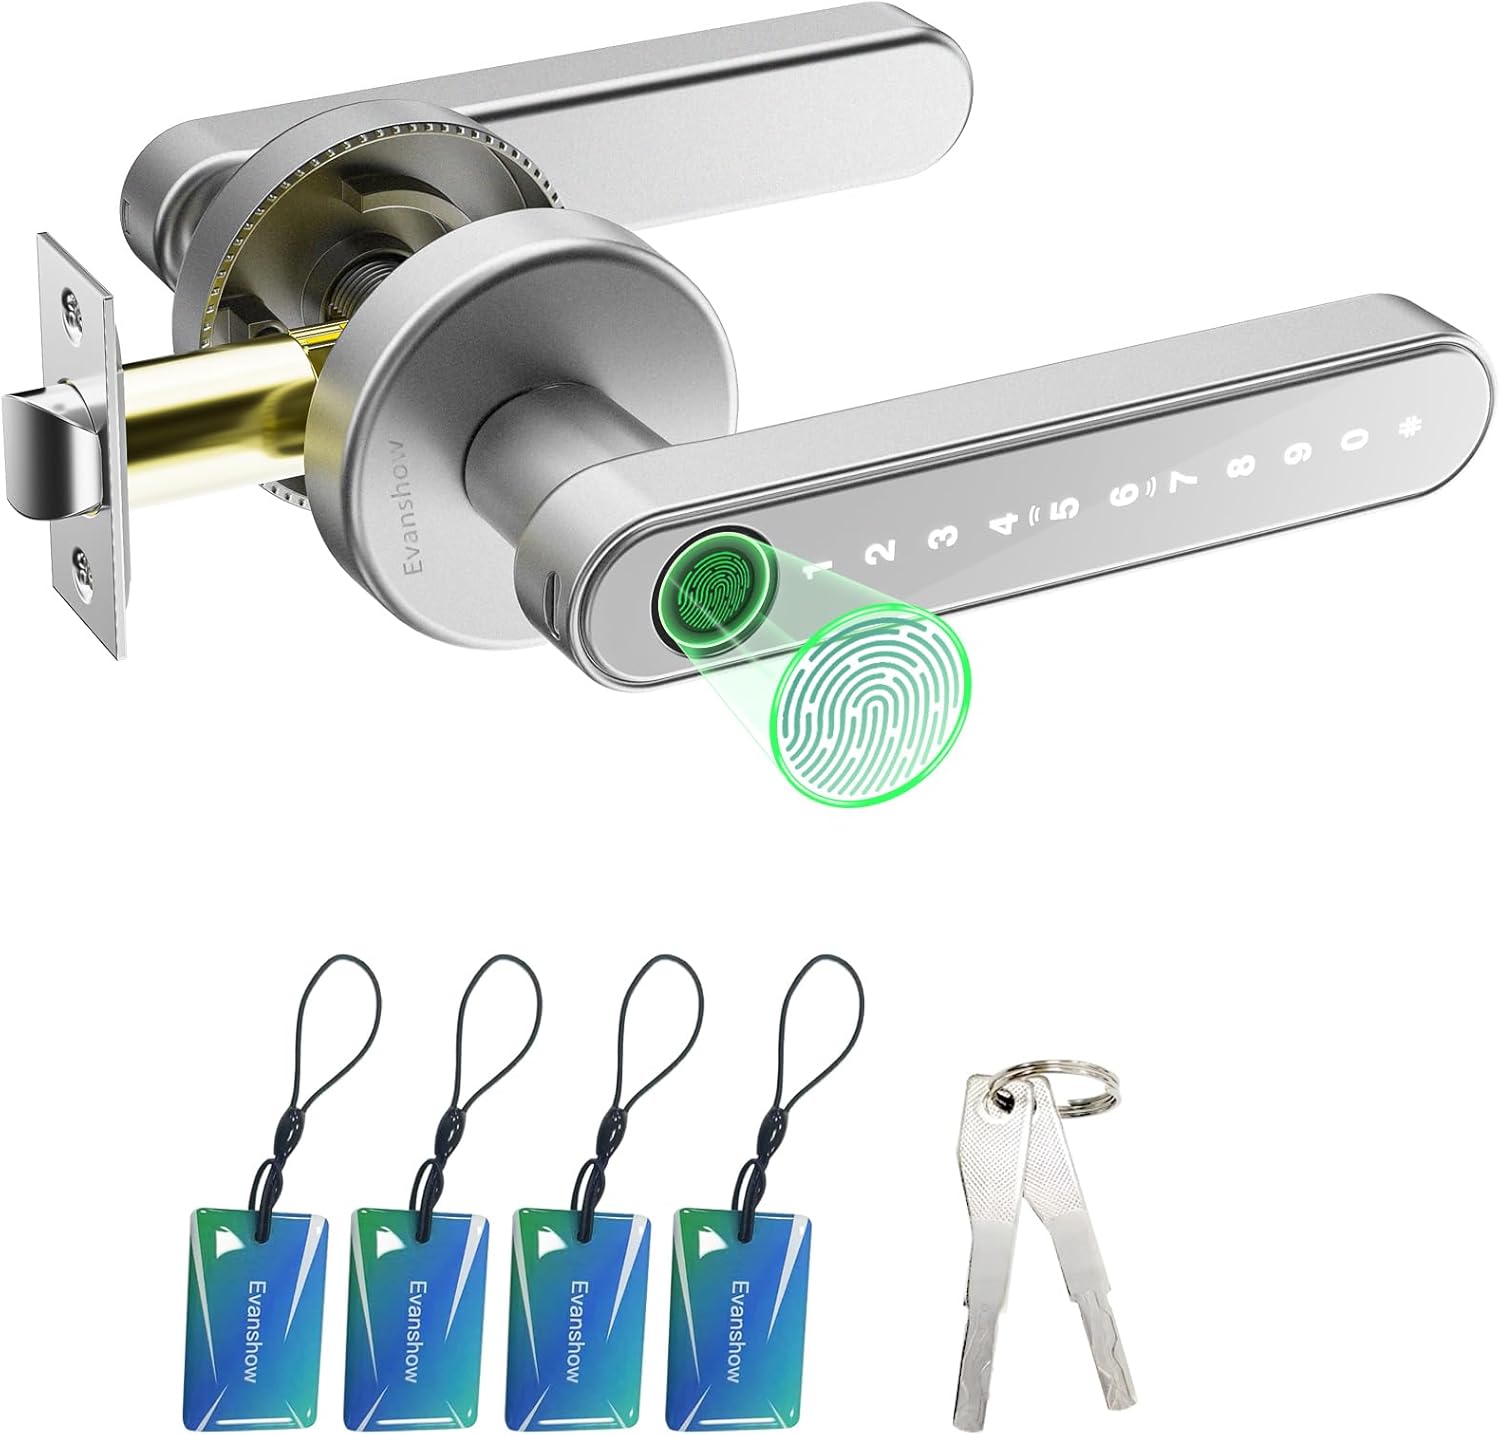
Figure 3.1: All components included in the Evanshow Fingerprint Door Lock package.
- Exterior Handle with Keypad and Fingerprint Sensor (1)
- Interior Handle (1)
- Latch Mechanism (1)
- Strike Plate (1)
- Screws and Installation Hardware (various)
- Small Screwdriver (1)
- IC-kort (4)
- Mekaniske nøgler (2)
- USB-C opladningskabel (1)
- AAA-batterier (4)
- Instruktionsmanual (dette dokument)
4. Installationsvejledning
The Evanshow Fingerprint Door Lock is designed for easy installation. A video tutorial is available to guide you through the process.
Video 4.1: Official installation guide for the Evanshow Fingerprint Door Lock.
4.1 Kontrol før installation
- Ensure your door thickness is between 1.18 inches (30mm) and 1.97 inches (50mm).
- Confirm the door bore hole diameter is suitable for standard door locks.
- Determine the hand orientation (left or right swing) of your door. The lock is reversible.

Figure 4.2: Door dimension requirements for installation.
4.2 Trin-for-trin installation
- Installer låsen: Insert the latch mechanism into the edge of the door and secure it with screws. Ensure the latch bolt faces the correct direction for your door swing.
- Installer låsepladen: Attach the strike plate to the door frame, aligning it with the latch mechanism.
- Prepare Handles: Connect the wires from the exterior handle to the interior handle.
- Monter håndtag: Insert the exterior handle through the door, ensuring the spindle aligns with the latch. Then, attach the interior handle, securing both sides with the provided screws.
- Installer batterier: Open the battery compartment on the interior handle and insert 4 AAA batteries, ensuring correct polarity.
- Test funktionalitet: After installation, test all unlocking methods (fingerprint, password, IC card, mechanical key) to ensure proper operation.
5. Betjeningsvejledning
Your Evanshow Fingerprint Door Lock offers multiple ways to secure and access your space.

Figur 5.1: Overview of the 4-in-1 smart lock access options.
5.1 Oplåsningsmetoder
- Lås op med fingeraftryk: Placer din registrerede finger på fingeraftrykssensoren. Låsen låses op på cirka 0.5 sekunder efter korrekt genkendelse.
- Adgangskodelås: Enter your registered passcode on the keypad. The keypad illuminates when activated.
- Oplåsning af IC-kort: Tap a registered IC card against the designated area on the exterior handle.
- Mekanisk nøgleoplåsning: In case of emergency or battery depletion, use the provided mechanical keys to unlock the door. The keyhole is located at the bottom of the exterior handle.

Figur 5.2: Oplåsning med fingeraftryk i aktion.

Figure 5.3: Using the keypad for password entry.

Figure 5.4: Unlocking the door with an IC card.

Figure 5.5: Using a mechanical key for emergency access.
5.2 Automatisk låsefunktion
The lock can be configured to automatically lock after a set period. This feature can be customized or disabled as needed.

Figure 5.6: Auto-lock functionality for enhanced security.
5.3 Anti-Peep Password
To prevent others from observing your password, you can enter random digits before or after your actual password. The lock will still recognize the correct sequence within the longer input.

Figure 5.7: Using the anti-peep password feature.
5.4 Adding/Deleting Users
Refer to the detailed instructions in the included instruction manual for specific steps on how to enroll new fingerprints, set up new passcodes, and register or remove IC cards. This process typically involves accessing the lock's programming mode.
6. Vedligeholdelse
6.1 Udskiftning af batteri
The lock requires 4 AAA batteries. When the battery level is low, the lock will provide an audible or visual warning. Replace all four batteries simultaneously to ensure optimal performance.

Figure 6.1: Location of the battery compartment on the interior handle.
6.2 Rengøring
Tør låsens overflade af med en blød, tør klud. Undgå at bruge slibende rengøringsmidler eller opløsningsmidler, der kan beskadige overfladen eller de elektroniske komponenter.
7. Fejlfinding
- Låsen svarer ikke: Check battery levels and replace if necessary. Ensure the wires are securely connected.
- Fingeraftryk ikke genkendt: Sørg for, at din finger er ren og tør. Registrer dit fingeraftryk igen, hvis problemerne fortsætter.
- Adgangskoden virker ikke: Verify the correct passcode is being entered. Try resetting the passcode.
- Automatisk låsning aktiveres ikke: Check the auto-lock settings and ensure it is enabled with the desired delay.
- Mekanisk nøgle virker ikke: Sørg for, at nøglen er sat helt i og drejet korrekt.
8. Specifikationer
| Feature | Specifikation |
|---|---|
| Modelnummer | 190NOSilver |
| Materiale | Metal |
| Produktdimensioner | 1 cm L x 2 cm B |
| Varens vægt | 1.2 pund |
| Låsetype | Privatliv |
| Håndtag Materiale | Metal |
| Håndorientering | Vendbar |
| Speciel funktion | Fingeraftryk |
| Batterier påkrævet | 4 AAA batterier |
| Farve | Sort |
9. Garanti og support
For warranty information and technical support, please refer to the contact details provided on the product packaging or the official Evanshow webwebsted. Behold din købskvittering som købsbevis i tilfælde af garantikrav.