
1. Introduktion
Thank you for choosing the STUDIOFINIX 6.5-inch 300W Bluetooth In-Ceiling Speaker System. This system is designed to provide high-quality, immersive audio for various indoor environments, including homes, offices, and covered terraces. Featuring a space-saving flush-mount design and Bluetooth connectivity, it offers a seamless audio experience. This manual provides essential information for safe installation, operation, and maintenance of your speaker system.
2. Sikkerhedsoplysninger
- Læs alle instruktioner omhyggeligt før installation og brug.
- Gem denne vejledning til fremtidig reference.
- Do not expose the speakers or amplifier to water or excessive moisture. This product is not waterproof.
- Sørg for ordentlig ventilation til ampfor at forhindre overophedning.
- Afbryd strømmen, før du udfører nogen form for installation eller vedligeholdelse.
- Installation should be performed by qualified personnel if you are unsure about electrical wiring or structural requirements.
- Use only the provided power adapter and speaker cables.
3. Pakkens indhold
Kontroller, at alle varer er til stede i kassen:
- 2 x 6.5-inch In-Ceiling Speakers
- 1 x 2-Channel Bluetooth Amplivligere (AMP-BTX01)
- 1 x strømadapter
- 1 x 5-meter Speaker Cable
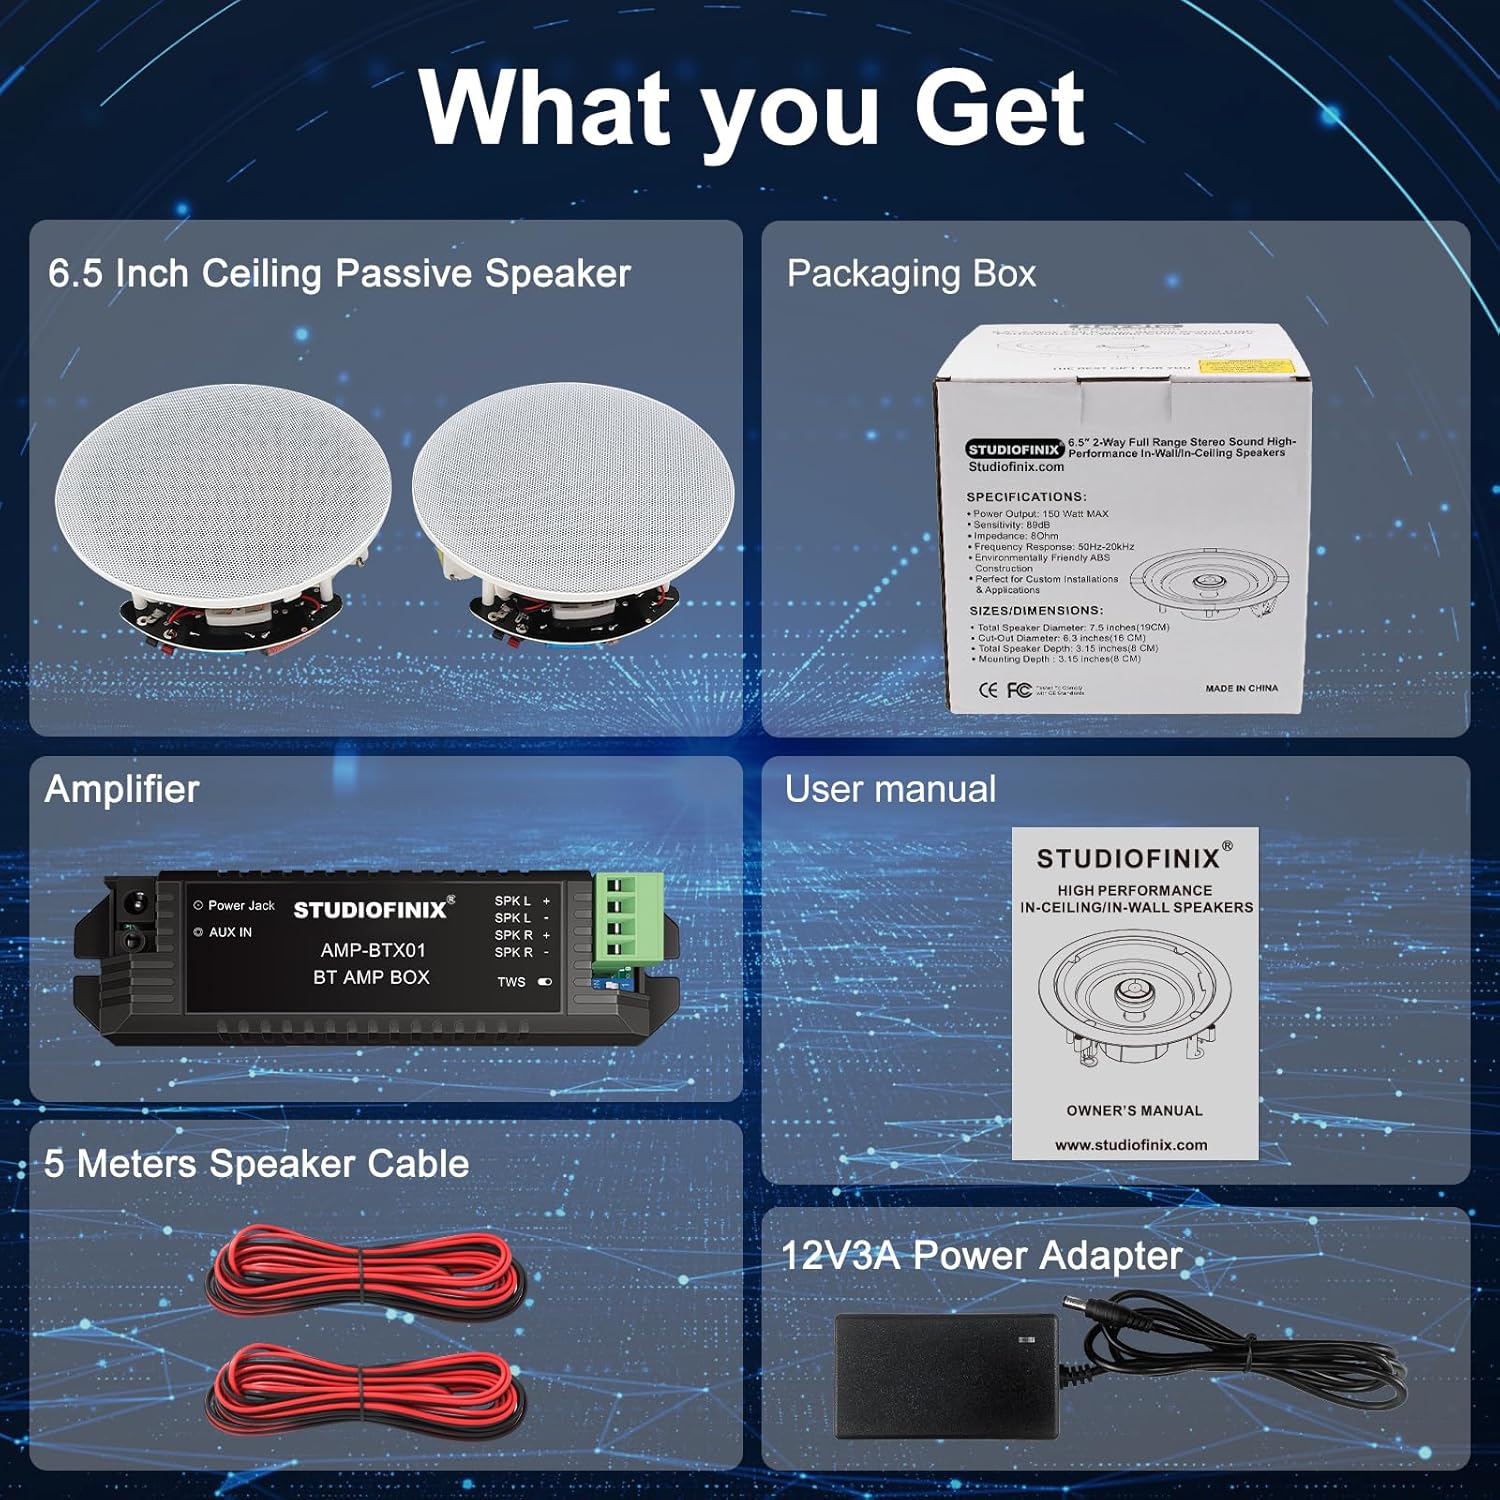
Figur 3.1: Pakkens indhold
4. Produktet er slutview
The STUDIOFINIX In-Ceiling Speaker System features a compact design with powerful audio components. Each speaker includes a 6.5-inch woofer for rich bass and a 1-inch coaxial tweeter for clear highs, delivering a full-range sound experience. The included Bluetooth amplifier allows for wireless audio streaming from your compatible devices.

Figure 4.1: Speaker Internal Components

Figure 4.2: Speaker Features (Grille, Tweeter, Terminals)
5. Installation og opsætning
5.1 Speaker Dimensions
Before installation, ensure you have the correct cutout and mounting depth clearances.
- Samlet højttalerdiameter: 7.5 tommer (19 cm)
- Udskåret diameter: 6.3 tommer (16 cm)
- Monteringsdybde: 3.15 tommer (8 cm)

Figure 5.1: Speaker Installation Dimensions
5.2 Speaker Installation Steps
- Vælg placering: Select a suitable location in your ceiling or wall, ensuring no obstructions (e.g., electrical wires, pipes, studs) behind the surface.
- Klip hul: Use the provided template (if applicable) or measure carefully to cut a 6.3-inch (16 cm) diameter hole in the chosen surface.
- Trådhøjttalere: Kør højttalerledningerne fra amplifier location to each speaker cutout. Ensure sufficient length for connections.
- Tilslut ledninger: Connect the speaker wires to the spring-loaded terminals on the back of each speaker. Match positive (+) to positive and negative (-) to negative.
- Monter højttalere: Insert the speaker into the cutout. The mounting clamps will automatically engage and secure the speaker to the surface. Tighten any screws if necessary to ensure a snug fit.
- Fastgør gitter: Gently press the magnetic grille onto the speaker frame until it is securely in place.

Figure 5.2: Speaker Wire Terminals
5.3 Amplivligere forbindelse
Tilslut amplifier to the speakers and power source as follows:
- Connect Speakers to Amplivligere: Connect the speaker cables from your in-ceiling speakers to the corresponding terminals on the amplifier (SPK L+ / SPK L- for left speaker, SPK R+ / SPK R- for right speaker). Ensure correct polarity.
- Tilslut strøm: Plug the power adapter into the 'Power Jack' on the ampadapteren, og sæt derefter adapteren i en stikkontakt.
- Valgfri AUX-indgang: If you wish to connect a non-Bluetooth audio source, use a 3.5mm audio cable (not included) to connect it to the 'AUX IN' port on the amplivligere.

Figur 5.3: Systemforbindelsesdiagram

Figur 5.4: Amplifier Connection Ports
6. Betjeningsvejledning
6.1 Tænd/sluk
Når amplifier is connected to power, it will automatically power on. There is no physical power button on the amplifier. Disconnect the power adapter to turn off the system.
6.2 Bluetooth -parring
- Sørg for ampkøleren er tændt.
- Gå til Bluetooth-indstillingerne på din Bluetooth-aktiverede enhed (smartphone, tablet osv.).
- Søg efter tilgængelige enheder. Den amplifier will appear as "STUDIOFINIX" or a similar name.
- Vælg amplifier to pair. A confirmation sound or indicator light on the amplifier may signal a successful connection.
- Once paired, you can stream audio from your device to the in-ceiling speakers.
Note: De amplifier can only be connected to one Bluetooth device at a time. If you wish to connect a different device, disconnect the currently paired device first.
6.3 Brug af AUX-indgang
If an audio source is connected via the AUX IN port, the amplifier will automatically switch to the AUX input when a signal is detected. Disconnect the AUX cable to revert to Bluetooth mode (if a Bluetooth device is paired).
7. Vedligeholdelse
7.1 Rengøring
- Wipe the speaker grilles and ampmed en blød, tør klud.
- Do not use harsh chemicals, cleaning solvents, or abrasive cleaners.
7.2 Paintable Grilles
The speaker grilles are paintable to match your ceiling or wall color. To paint, carefully remove the grille (it is magnetic) and apply paint evenly. Allow to dry completely before reattaching.

Figure 7.1: Removing Speaker Grille
8. Fejlfinding
| Problem | Mulig årsag | Løsning |
|---|---|---|
| Ingen lyd fra højttalerne |
|
|
| Bluetooth-enhed kan ikke parres |
|
|
| Lydforvrængning |
|
|
9. Specifikationer
| Feature | Specifikation |
|---|---|
| Mærke | STUDIOFINIX |
| Modelnavn | 6.5" 600 Watts Bluetooth Ceiling Speakers |
| Modelnummer | 06974065533855 |
| Højttaler type | Ceiling / In-Wall |
| Højttaler størrelse | 6.5 tommer (bashøjttaler) |
| Maksimal højttalerudgangseffekt | 300 Watts (per speaker, 600W total system) |
| Forbindelsesteknologi | Bluetooth |
| Trådløs kommunikationsteknologi | Bluetooth |
| Kontrolmetode | Application (via Bluetooth device) |
| Strømkilde | Elektrisk med ledning |
| Produktdimensioner | 16P x 8l x 8H centimeters (approx. 6.3D x 3.15W x 3.15H inches) |
| Varens vægt | 2.36 kilogram (ca. 5.2 lbs) |
| Monteringstype | Loftmontering |
| Lydudgangstilstand | Omgive |
| Surround Sound Kanalkonfiguration | 2.0 |
| Anbefalede anvendelser | Indoor, Kitchen, Home Cinema, Bedroom, Office, Covered Terrace |
| Kompatible enheder | Smartphone, Tablet, Laptop, Television, Home Cinema Systems |
| Vandtæt | falsk |
10. Garantioplysninger
This STUDIOFINIX product comes with a Limited Warranty. For detailed information regarding warranty coverage, terms, and conditions, please refer to the official STUDIOFINIX webwebsted eller kontakt kundesupport.
11. Support
For further assistance, technical support, or inquiries about your STUDIOFINIX In-Ceiling Speaker System, please visit the official STUDIOFINIX website or contact their customer service department. Contact details can typically be found on the brand's webwebsted eller produktemballage.
Officiel mærkebutik: STUDIOFINIX Amazon Store