
1. Introduktion
Thank you for choosing the DEPSTECH DS650-DL Dual-Lens Articulating Industrial Endoscope. This device is designed for detailed visual inspection in hard-to-reach areas, featuring a dual-lens system with 210° bidirectional rotation, a 4.5-inch IPS monitor, and 1080P high-definition imaging. It is an essential tool for home maintenance, vehicle inspection, and machinery checks.
Please read this manual thoroughly before use to ensure proper operation and to maximize the product's lifespan.
2. Sikkerhedsoplysninger
- Do not use the endoscope in environments with flammable or explosive gases.
- The probe is IP67 waterproof, but the main unit is not. Avoid exposing the main unit to water or excessive moisture.
- Forsøg ikke at skille enheden ad eller ændre den. Dette vil ugyldiggøre garantien og kan forårsage skade.
- Opbevar enheden utilgængeligt for børn.
- Undgå direkte kontakt med LED-lysene.
- The device features overheat protection. If the temperature exceeds 70°C, a warning will display. If it exceeds 80°C, the device will automatically shut down to prevent damage. Allow the device to cool down before resuming operation.
3. Pakkens indhold
Kontroller, at alle varer er til stede og i god stand, når du åbner pakken.
- DEPSTECH DS650-DL Endoscope Unit
- Opbevaringskasse
- Brugermanual
- Type-C opladerkabel
- 32GB Memory Card (pre-installed or included separately)

Image: Contents of the DEPSTECH DS650-DL package.
4. Opsætning
4.1 Opladning af enheden
Before first use, fully charge the endoscope unit. Connect the provided Type-C charging cable to the charging port on the device and to a suitable USB power adapter (not included).
4.2 Isætning af hukommelseskortet
If the 32GB memory card is not pre-installed, locate the TF card slot on the side of the monitor unit. Insert the memory card with the contacts facing down until it clicks into place.
4.3 Tænd/sluk
Press and hold the power button (usually located near the monitor) for a few seconds to turn the device on or off. The IPS monitor will display the startup screen.
5. Betjening
5.1 Forståelse af betjeningselementerne

Billede: Overview of the endoscope controls and ports.
- OK/Bekræft-knap: Bekræfter valg i menuer.
- Up/Zoom In Button: Navigates up in menus or zooms in on the image.
- Down/Zoom Out Button: Navigates down in menus or zooms out on the image.
- 180° rotationsknap: Rotates the real-time image on the screen by 180 degrees.
- Lens Switch Button: Toggles between front camera, side camera, and dual-view mode.
- Foto/video knap: Kort tryk for at tage et billede, langt tryk for at starte/stoppe videooptagelse.
- Power Button/LED Adjustment: Short press to adjust LED brightness (3 levels), long press to power on/off.
- Articulating Angle Dial: Controls the 210° bidirectional rotation of the probe tip.
- TF-kortslot: Til isætning af hukommelseskortet.
- Type-C port: Til opladning og dataoverførsel.
- Nulstil knap: Nulstiller enheden (brug en nål til at trykke på).
5.2 Using the Dual-Lens and Articulation
The DS650-DL features both a front camera and a side camera, allowing for a wider inspection range. The probe tip can be articulated up to 210° in two directions for comprehensive viewing.
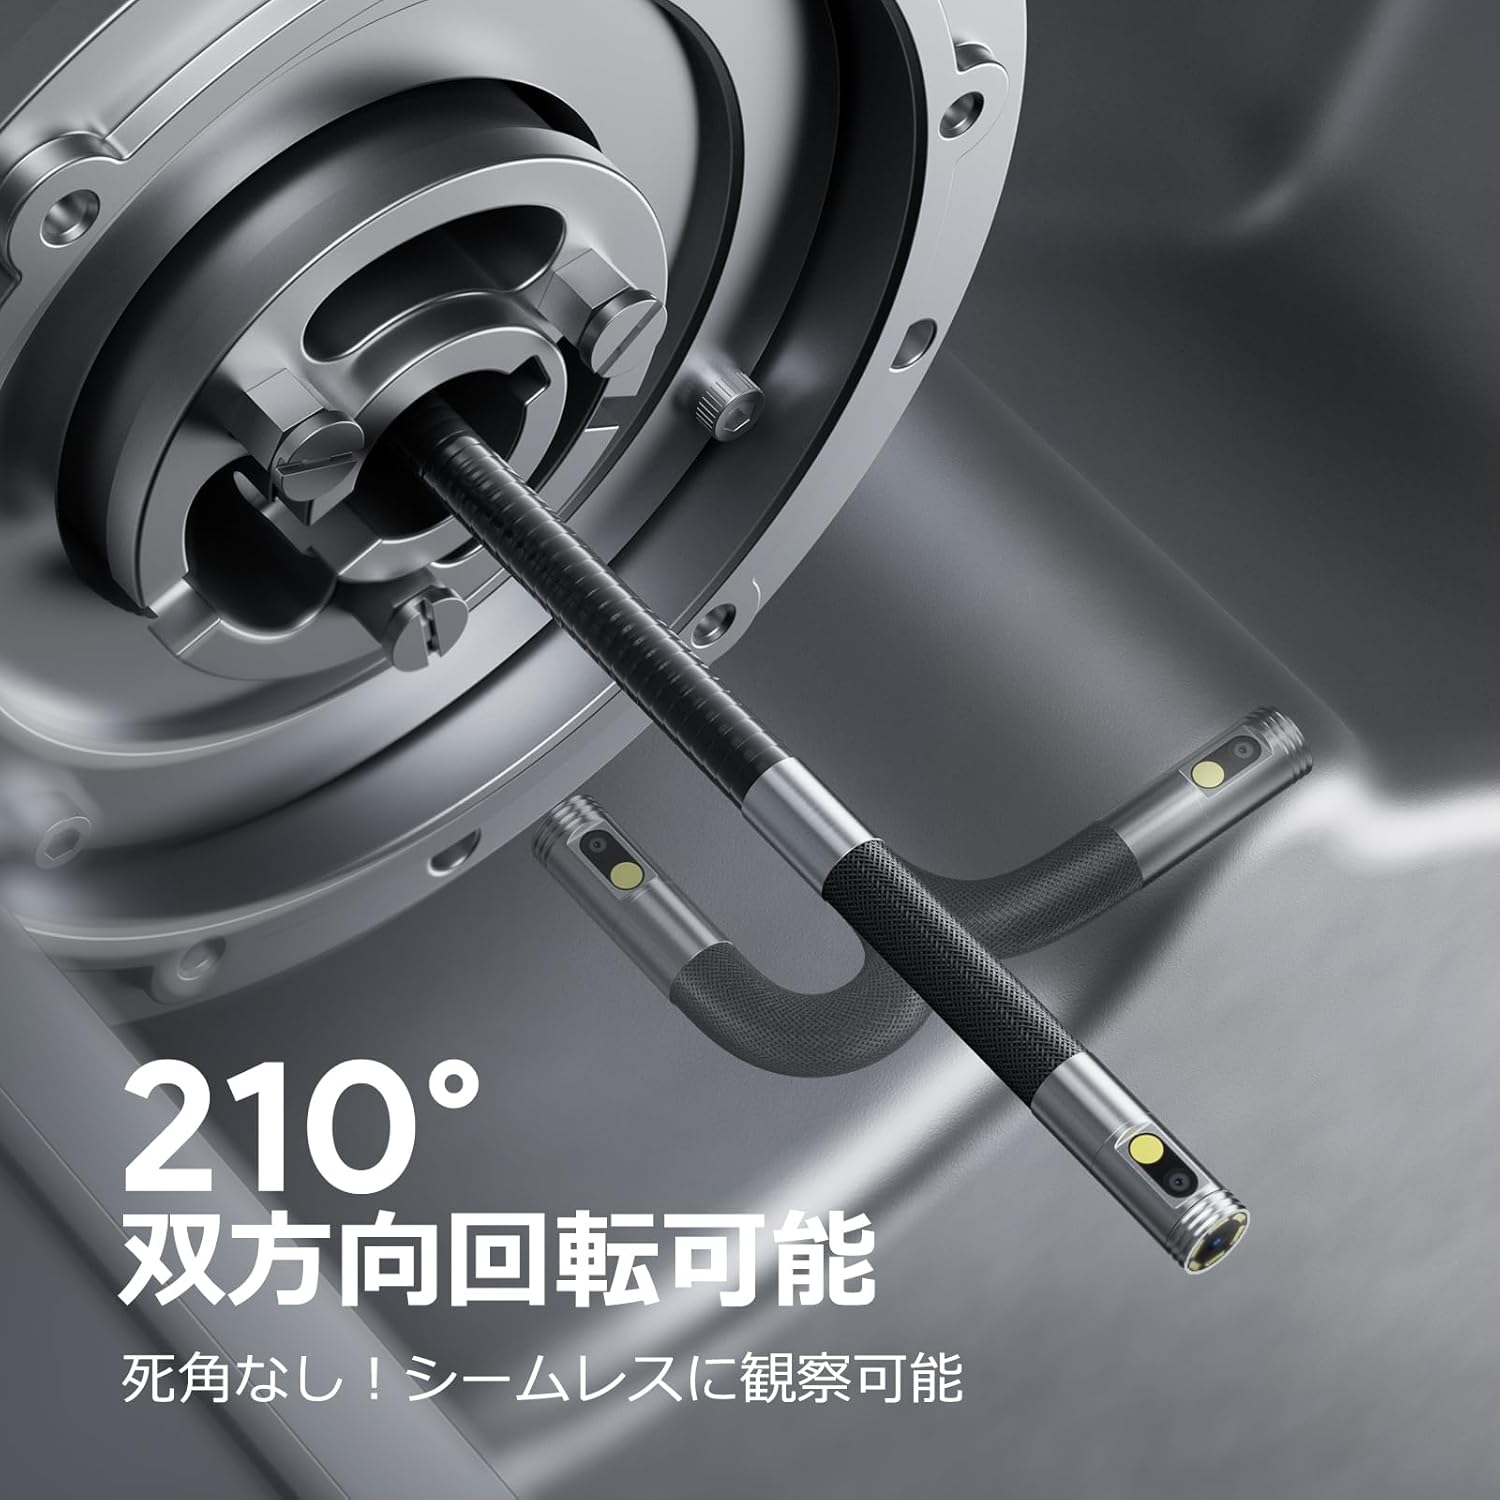
Image: Endoscope probe demonstrating 210° bidirectional articulation.
- Brug Linseafbryderknap to cycle between the front camera, side camera, or a split-screen dual-view mode.
- Drej på Articulating Angle Dial to precisely adjust the direction of the probe tip. This allows you to navigate around obstacles and view areas from multiple angles without repositioning the entire cable.
5.3 Optagelse af billeder og videoer
The device supports capturing both still images and video recordings directly to the inserted 32GB memory card.

Image: Monitor display showing photo and video capture features.
- Sådan tager du et billede: Tryk kort på Foto/video -knap.
- Sådan optager du video: Tryk længe på Foto/video -knap for at starte optagelsen. Tryk længe igen for at stoppe optagelsen.
- Fanget files are saved to the 32GB memory card. You can store approximately 10,000 images or 50 videos.
5.4 Justering af LED-lysstyrke
The probe is equipped with high-brightness LED lights to illuminate dark inspection areas. Short press the Power Button/LED Adjustment button to cycle through 3 levels of LED brightness.

Image: IP67 waterproof probe with adjustable LED illumination.
5.5 Dataoverførsel
You can transfer captured images and videos to a computer via the Type-C cable or by directly accessing the memory card.

Image: High-speed data transfer from endoscope to PC.
6. Vedligeholdelse
- Rengøring af sonden: After use, especially in dirty or wet environments, gently wipe the probe with a soft, damp cloth. Ensure no debris remains on the camera lenses.
- Rengøring af skærmen: Use a soft, dry cloth to clean the IPS monitor. Avoid abrasive cleaners or solvents.
- Opbevaring: Store the endoscope in its provided storage case in a cool, dry place, away from direct sunlight and extreme temperatures. This prevents damage from improper storage and moisture.
- Batteripleje: For at forlænge batteriets levetid bør du undgå at aflade enheden helt ofte. Oplad den regelmæssigt, selvom den ikke er i brug i længere perioder.
7. Fejlfinding
| Problem | Mulig årsag | Løsning |
|---|---|---|
| Enheden tænder ikke. | Lavt batteri; enhedfejl. | Oplad enheden helt. Kontakt support, hvis problemet fortsætter. |
| Intet billede på skærmen. | Cable not connected properly; camera lens obstructed. | Ensure the probe cable is securely connected. Check for obstructions on the lens. |
| Billedet er sløret eller uklart. | Lens is dirty; focus distance incorrect. | Clean the camera lens. Ensure the object is within the optimal focal range (3-10cm). |
| Kan ikke optage billeder/videoer. | Hukommelseskortet er fuldt eller ikke isat korrekt. | Check if the 32GB memory card is inserted correctly. Delete old fileeller udskift kortet, hvis det er fuldt. |
| Device shuts down automatically. | Overophedningsbeskyttelse aktiveret. | Allow the device to cool down. Avoid using in excessively hot environments. |
8. Specifikationer
| Feature | Detalje |
|---|---|
| Mærke | DEPSTECH |
| Modelnummer | DS650DJ |
| Vise | 4.5-inch IPS LCD Monitor |
| Kameraopløsning | 1080P |
| Sondediameter | 8.5 mm |
| Artikulationsvinkel | 210° Bidirectional |
| Kabeltype | 1.5M Semi-rigid |
| Vandtæt vurdering | IP67 (kun probe) |
| Belysning | Justerbare LED-lys |
| Opbevaring | 32 GB Micro SD-kort (medfølger) |
| Batteri inkluderet | Ja |
| Pakkedimensioner | 43.1 x 21.4 x 7.4 cm |
| Pakkevægt | 1.33 kg |
9. Garanti og support
9.1 Producentens garanti
This DEPSTECH product comes with a 24 måneders producentgaranti. Your order number serves as your proof of purchase for warranty claims. Please retain it.
9.2 Kundesupport
For any questions, technical assistance, or warranty inquiries, please contact our professional support team:
E-mail: support.jp@depstech.com
We aim to respond to all inquiries within 24 hours (excluding weekends and public holidays, where responses will be provided on the next business day).

Image: DEPSTECH customer support and warranty information.