1. Introduktion
Denne manual indeholder vigtige oplysninger til sikker og effektiv betjening af din GooDee 4K UHD Smart-projektor GD500PLUS. Læs den grundigt, inden du bruger produktet, og gem den til senere brug. Denne projektor integrerer Google TV, AI-stemmestyring, WiFi, Bluetooth og Dolby Sound for en omfattende hjemmeunderholdningsoplevelse.
2. Hvad er der i æsken
Bekræft at alle varer er til stede ved udpakning:
- Projektor
- Strømledning
- HDMI kabel
- Projektor linsedæksel
- Fjernbetjening
- Brugermanual
3. Nøglefunktioner
- Indbygget Google TV: Få direkte adgang til populære streamingapps som Netflix, YouTube og Prime Video.
- AI Smart Stemmeassistent: Styr projektoren og søg efter indhold ved hjælp af stemmekommandoer via fjernbetjeningen.
- 4K UHD-understøttelse: Understøtter 4K-opløsningsindgang til high-definition viewing.
- Dual-Band WiFi 6: Giver stabil trådløs forbindelse med lav latenstid.
- Bluetooth 5.2: Til trådløs tilslutning af eksterne lydenheder.
- Dolby Audio: Forbedret lydoplevelse for fordybende lyd.
- AI autofokus og keystone-korrektion: Automatisk billedjustering for optimal klarhed og geometri.
- AI automatisk forhindringsundgåelse og skærmtilpasning: Justerer automatisk projektionen for at undgå forhindringer og tilpasse sig skærmen.
- Flere tilslutningsmuligheder: HDMI-, USB-, AV- og headsetporte.
4. Opsætningsvejledning
4.1 Placering
Placer projektoren på en stabil, flad overflade, eller monter den sikkert. Sørg for, at der ikke er nogen forhindringer foran linsen. For optimal viewprojicer på en glat, lys væg eller et dedikeret projektorlærred. Sørg for tilstrækkelig ventilation omkring projektoren.
4.2 Strømtilslutning
- Tilslut netledningen til projektorens strømindgang.
- Sæt den anden ende af netledningen i en stikkontakt.
- Tryk på tænd/sluk-knappen på projektoren eller fjernbetjeningen for at tænde den.
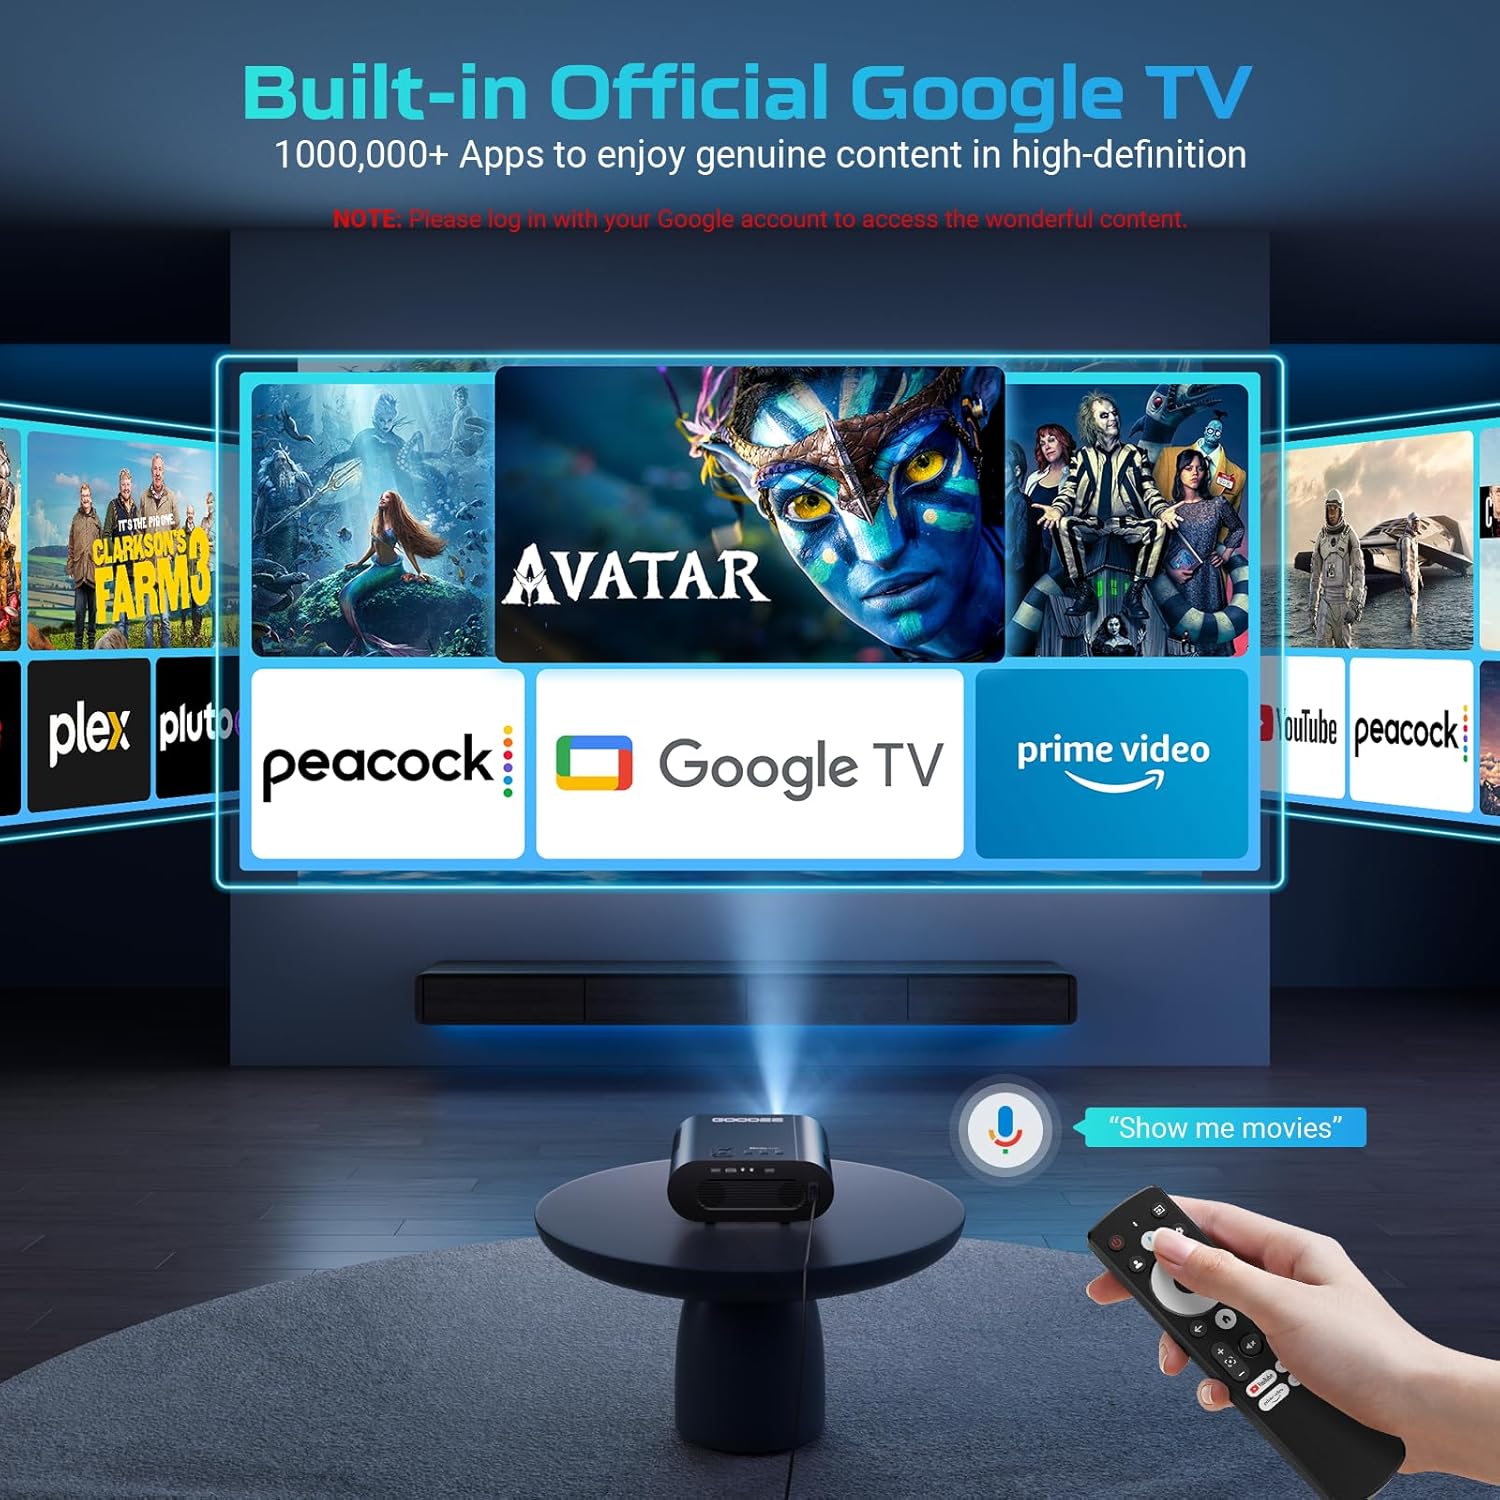
4.3 Første opsætning (Google TV)
Ved første brug vil projektoren guide dig gennem opsætningsprocessen for Google TV. Følg instruktionerne på skærmen for at:
- Vælg dit sprog.
- Opret forbindelse til et Wi-Fi-netværk.
- Log ind med din Google-konto for at få adgang til streamingtjenester og apps.
- Installer ønskede apps som Netflix, Prime Video og YouTube.

Billede: GooDee 4K UHD Smart Projector projicerer Google TV-startskærmen og viser forskellige ikoner for streamingapplikationer såsom Hulu, Prime Video og YouTube.
5. Betjeningsvejledning
5.1 Navigation og brugerflade
Brug den medfølgende fjernbetjening til at navigere i Google TV-grænsefladen. Navigationsknappen og valgknappen bruges til menunavigation og -valg. Dedikerede knapper til populære streamingtjenester kan være tilgængelige for hurtig adgang.
Billede: GooDee-projektoren, der viser Google TV-grænsefladen med flere streamingapps. En hånd holder fjernbetjeningen og demonstrerer stemmekommandofunktionalitet.
5.2 AI Smart Stemmeassistent
AI Smart Voice Assistant giver mulighed for håndfri styring. Tryk og hold stemmestyringsknappen på fjernbetjeningen nede, og sig din kommando. F.eks.amples inkluderer:
- "Åbn Netflix"
- "Søg efter actionfilm"
- "Juster lydstyrken til 50"
- "Hvad er vejret?"

Billede: En kvinde på en sofa, der taler ind i projektorens fjernbetjening, med stemmekommandoer som "Åbn Netflix" og "Afspil Avatar" vist på den projicerede skærm, hvilket illustrerer den smarte AI-stemmeassistentfunktion.
5.3 Forbindelse
5.3.1 Wi-Fi-forbindelse (Dual-Band WiFi 6)
Sørg for, at din projektor er forbundet til et stabilt Wi-Fi-netværk for at streame indhold og systemopdateringer. Naviger til Indstillinger> Netværk og internet for at administrere din Wi-Fi-forbindelse.

Billede: GooDee-projektoren viser et billøb i høj hastighed, med en smartphone, der spejler indhold, og et Wi-Fi 6-ikon, der angiver avanceret trådløs forbindelse.
5.3.2 Bluetooth-forbindelse (Bluetooth 5.2)
Tilslut eksterne Bluetooth-højttalere, hovedtelefoner eller andre lydenheder for en forbedret lydoplevelse. Gå til Indstillinger > Fjernbetjeninger og tilbehør > Par fjernbetjening eller tilbehør at parre nye enheder.

Billede: GooDee-projektoren projicerer en koncertscene, hvor lydbølger udgår fra projektoren til to eksterne Bluetooth-højttalere, hvilket fremhæver Bluetooth 5.2 og Dolby Audio-funktioner.
5.3.3 HDMI- og USB-indgange
Brug HDMI-porten til at tilslutte eksterne enheder såsom spillekonsoller, bærbare computere eller Blu-ray-afspillere. USB-porten kan bruges til afspilning af medier fra USB-drev eller til tilslutning af kompatibelt tilbehør.

Billede: GooDee-projektoren omgivet af forskellige kompatible enheder, herunder hovedtelefoner, en AV-receiver, et USB-drev, et HDMI-kabel, en spilcontroller, en bærbar computer og en smartphone, hvilket illustrerer dens alsidige tilslutningsmuligheder.
5.4 Billedjustering
5.4.1 AI autofokus og keystone-korrektion
Projektoren har automatisk fokus og keystone-korrektion. Dette system justerer automatisk billedet for klarhed og korrigerer trapezformet forvrængning, hvilket sikrer et perfekt rektangulært billede, selvom projektoren ikke er perfekt justeret i forhold til skærmen.

Billede: GooDee-projektoren, der viser en fodboldkamp med overlejringer, der viser AI Auto Keystone, AI Auto Focus, AI Auto Obstacle Avoidance, AI Auto Screen Fit og 50-100% zoomfunktioner, hvilket indikerer automatiske billedjusteringer.
5.4.2 AI Automatisk forhindringsundgåelse og skærmtilpasning
Projektoren kan registrere forhindringer i projektionsstien og automatisk justere billedet for at undgå dem. Den har også en automatisk skærmtilpasningsfunktion til at optimere billedstørrelsen og -positionen til din skærm.
5.5 Medieafspilning
Brug de indbyggede Google TV-apps til streaming. For lokale medier skal du indsætte et USB-drev i USB-porten og bruge en file Manager-appen (kan downloades fra Google Play Store) til at gennemse og afspille indhold.
Video: En officiel GooDee-videovisningasin4K-projektorens funktioner, herunder Google TV-integration, AI-stemmestyring, automatiske justeringer og forskellige underholdningsscenarier.
6. Vedligeholdelse
6.1 Linsepleje
For at opretholde optimal billedkvalitet skal projektorlinsen holdes ren. Brug en blød, fnugfri klud, der er specielt designet til optiske linser. Undgå at bruge slibende rengøringsmidler eller overdreven kraft.
6.2 Rengøring af projektoren
Tør projektorens yderside af med en blød, tør klud. Brug ikke flydende rengøringsmidler eller aerosolrengøringsmidler direkte på enheden. Sørg for, at ventilationsportene er fri for støv og snavs for at forhindre overophedning.
6.3 Opbevaring
Når projektoren ikke er i brug i længere perioder, skal den opbevares et køligt og tørt sted, væk fra direkte sollys og ekstreme temperaturer. Brug linsedækslet til at beskytte linsen mod støv og ridser.
7. Fejlfinding
- Ingen strøm: Sørg for, at netledningen er korrekt tilsluttet til både projektoren og stikkontakten. Kontroller, om stikkontakten fungerer.
- Intet billede: Bekræft, at den korrekte inputkilde er valgt. Kontroller HDMI-kabelforbindelserne, hvis du bruger en ekstern enhed. Sørg for, at linsedækslet er fjernet.
- Sløret billede: Projektoren har AI-autofokus. Hvis billedet forbliver sløret, kan du prøve at flytte projektoren eller manuelt justere fokus, hvis en mulighed er tilgængelig i indstillingerne.
- Ingen lyd: Kontrollér lydstyrkeindstillingerne på både projektoren og alle tilsluttede eksterne lydenheder. Sørg for, at Bluetooth-enheder er korrekt parret.
- Problemer med Wi-Fi-forbindelse: Genstart din router og projektoren. Sørg for, at projektoren er inden for rækkevidde af dit Wi-Fi-netværk. Indtast Wi-Fi-adgangskoden igen, hvis det er nødvendigt.
- Fjernbetjeningen reagerer ikke: Udskift batterierne i fjernbetjeningen. Sørg for, at der ikke er nogen forhindringer mellem fjernbetjeningen og projektoren.
8. Specifikationer
| Feature | Specifikation |
|---|---|
| Produktdimensioner | 20.8 x 13 x 10.6 tommer |
| Varens vægt | 4.2 pund |
| Varemodelnummer | GD500PLUS |
| Skærmopløsning | 1920 x 1080 (oprindelig) |
| Forbindelsesteknologi | Wi-Fi, Bluetooth |
| Speciel funktion | Indbygget Wi-Fi |
| Anbefalede anvendelser | Erhverv, Uddannelse, Gaming, Hjemmebiograf |
9. Garanti og support
GooDee-produkter er designet til pålidelighed og ydeevne. For garantioplysninger henvises til garantikortet, der følger med dit produkt, eller besøg den officielle GooDee-side. webwebsted. For teknisk support, hjælp til fejlfinding eller serviceforespørgsler, kontakt venligst GooDee kundesupport via de kontaktoplysninger, der findes på den officielle hjemmeside. webwebstedet eller i din produktemballage.