1. Introduktion
This manual provides essential instructions for the safe and efficient operation, installation, and maintenance of your Primo Water Dispenser Model 601380. Please read all instructions carefully before use and retain this manual for future reference.
2. Sikkerhedsoplysninger
Overhold følgende sikkerhedsforanstaltninger for at mindske risikoen for brand, elektrisk stød eller personskade.
- Always connect the dispenser to a grounded electrical outlet.
- Brug ikke dispenseren med en beskadiget ledning eller stik.
- Hold dispenseren væk fra direkte sollys og varmekilder.
- Ensure adequate ventilation around the dispenser. Maintain at least 4 inches of clearance from walls.
- The hot water function dispenses water at high temperatures. Exercise caution to prevent burns. Utilize the child safety lock feature on the hot water tap.
- Nedsænk ikke dispenseren, ledningen eller stikket i vand eller andre væsker.
- Tag stikket ud af dispenseren, før du rengør eller udfører vedligeholdelse.
3. Pakkens indhold
Bekræft at alle komponenter er til stede:
- Primo Water Dispenser Unit (Model 601380)
- Drip Tray and Grill
- Water Probe Assembly (for bottom loading)
- Netledning (integreret)
- Instruktionsmanual
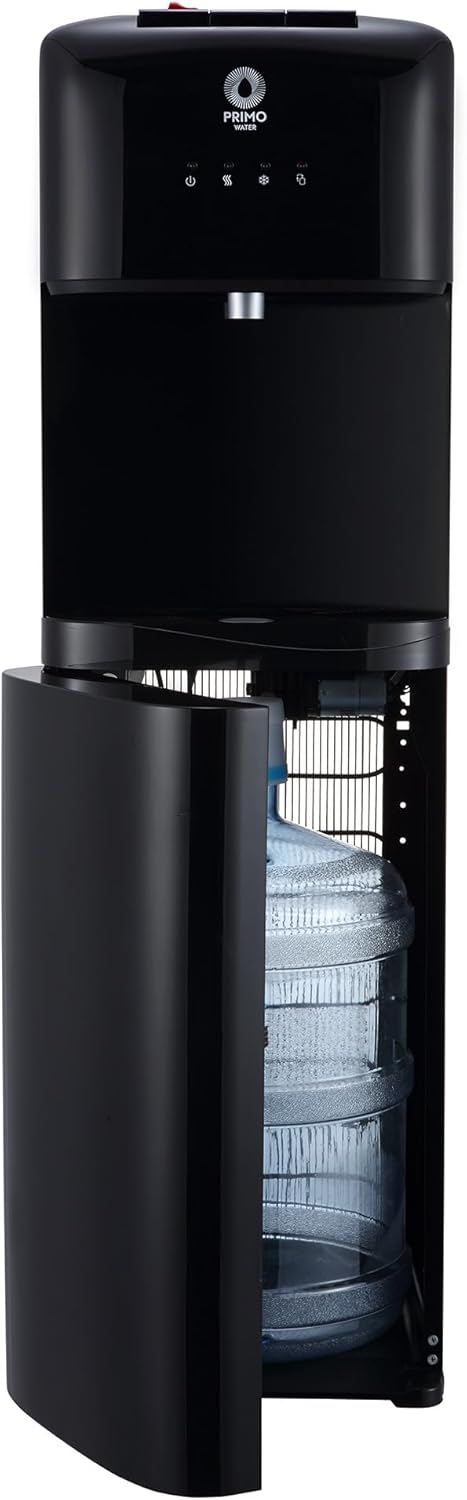
4. Produktet er slutview
The Primo Water Dispenser Model 601380 is a bottom-loading unit designed for 3- and 5-gallon water bottles, providing both hot and cold water.

5. Opsætning
5.1 Udpakning
Carefully remove the dispenser from its packaging. Inspect for any shipping damage. Retain packaging materials for potential future transport.
5.2 Placering
Place the dispenser on a level, stable surface. Ensure it is positioned in an upright position and away from direct sunlight or heat sources. Allow at least 4 inches of clearance from walls for proper ventilation.
5.3 Water Bottle Installation
- Åbn dispenserens nederste kabinetdør.
- Remove the cap from a 3- or 5-gallon water bottle.
- Insert the water probe assembly into the bottle opening. Ensure the probe reaches the bottom of the bottle.
- Slide the water bottle into the lower cabinet.
- Luk skabslågen forsvarligt.
5.4 Indledende priming
Before plugging in the unit, ensure the water bottle is correctly installed. Press the cold water tap until water flows continuously. This primes the system and prevents damage to heating elements.
5.5 Strømtilslutning
Plug the dispenser into a grounded 120V AC electrical outlet. The indicator lights will illuminate, and the cooling and heating processes will begin.
6. Betjening
The dispenser features easy push-button controls for water dispensing.

6.1 Tapping af koldt vand
Place a glass or container under the cold water tap. Press the cold water button to dispense chilled water. Release the button to stop the flow.
6.2 Udlevering af varmt vand
The hot water tap is equipped with a two-step child safety lock. To dispense hot water:
- Push the child safety lock button inward.
- While holding the safety lock, press the hot water button.
- Release both buttons to stop the flow.
Exercise extreme caution when dispensing hot water to avoid burns.
6.3 Indikatorlys
The dispenser features LED indicator lights:
- Strømindikator: Lyser, når enheden er tændt.
- Indikator for varmt vand: Illuminates when the hot water is heating and turns off when the target temperature is reached.
- Koldtvandsindikator: Illuminates when the cold water is cooling and turns off when the target temperature is reached.
- Genopfyldningsindikator: Lyser, når vandflasken er tom og skal udskiftes.
7. Vedligeholdelse
7.1 Rengøring af drypbakken
The drip tray should be emptied and cleaned regularly to prevent overflow and bacterial growth. Simply slide out the tray, empty any collected water, wash with mild soap and water, rinse thoroughly, and replace.
7.2 Udvendig rengøring
Tør dispenserens yderside af med en blød, tør klud.amp klæde. Brug ikke slibende rengøringsmidler eller opløsningsmidler.
7.3 Draining the System (for extended storage or relocation)
- Tag stikket til dispenseren ud af stikkontakten.
- Fjern vandflasken.
- Place a large bucket under the drain plug located at the back of the dispenser.
- Remove the drain plug to allow water to empty from the reservoirs.
- Når den er tømt, skal du sætte aftapningsproppen ordentligt på.
8. Fejlfinding
| Problem | Mulig årsag | Løsning |
|---|---|---|
| Ingen vanddispensering | Water bottle empty or not properly installed. System not primed. | Replace water bottle. Ensure water probe is fully inserted. Prime the system by pressing cold water tap until water flows. |
| Vandet er ikke varmt/koldt nok | Heating/cooling switch off. Insufficient time for heating/cooling. Poor ventilation. | Ensure hot/cold switches (if present, typically internal) are on. Allow 15-30 minutes for water to reach desired temperature. Ensure 4 inches of clearance around the unit. |
| Lækage | Water bottle cap not sealed properly. Drain plug loose. | Check water bottle for cracks or improper seal. Ensure drain plug is tightened. |
| Usædvanlig støj | Kompressoren kører i cyklusser (normalt). Enheden er ikke i vater. | Some noise during cooling/heating cycles is normal. Ensure the unit is on a level surface. |
9. Specifikationer
- Model: 601380
- Mærke: Primo
- Kapacitet: Compatible with 3 and 5 Gallon Bottles
- Produktmål (D x B x H): 14.2 cm x 12.2 cm x 40.9 cm
- Varens vægt: 39.4 pund
- Stil: Bundbelastning
- UPC: 817206013808
- Certificeringer: UL-certified, Energy Star rated

10. Garanti og support
For warranty information and customer support, please refer to the documentation included with your purchase or visit the official Primo Water webwebsted. Gem din købsbevis til garantikrav.