
1. Produktet er slutview
The NEEWER BASICS BP66 Bicolor LED Video Panel Lighting Kit is designed to provide versatile and high-quality illumination for various creative applications. This kit includes two LED video panels, two portable light stands, and four color filters (two white and two orange).
Each LED panel features 66 LEDs, delivering 10W of power and an illumination of 750 lux at 0.5 meters (with an attached filter). The panels offer a bicolor temperature range of 3200K to 5600K and boast a Color Rendering Index (CRI) greater than 95, ensuring accurate color reproduction.
The lights are ideal for makeup artists, aestheticians, tattoo artists, barbers, selfies, TikTok/YouTube video recording, podcasts, Facetime, Zoom calls, video conferencing, live streaming, vlogging, and general photography.

Image: NEEWER BP66 LED Video Panel Kit in various application scenarios including live streaming, studio creation, and Zoom meetings.
2. Pakkens indhold
Kontroller venligst, at alle varer er til stede i din pakke:
- 2 x LED Video Lights
- 2 x Orange Color Filters
- 2 x White Color Filters
- 2 x Light Stands
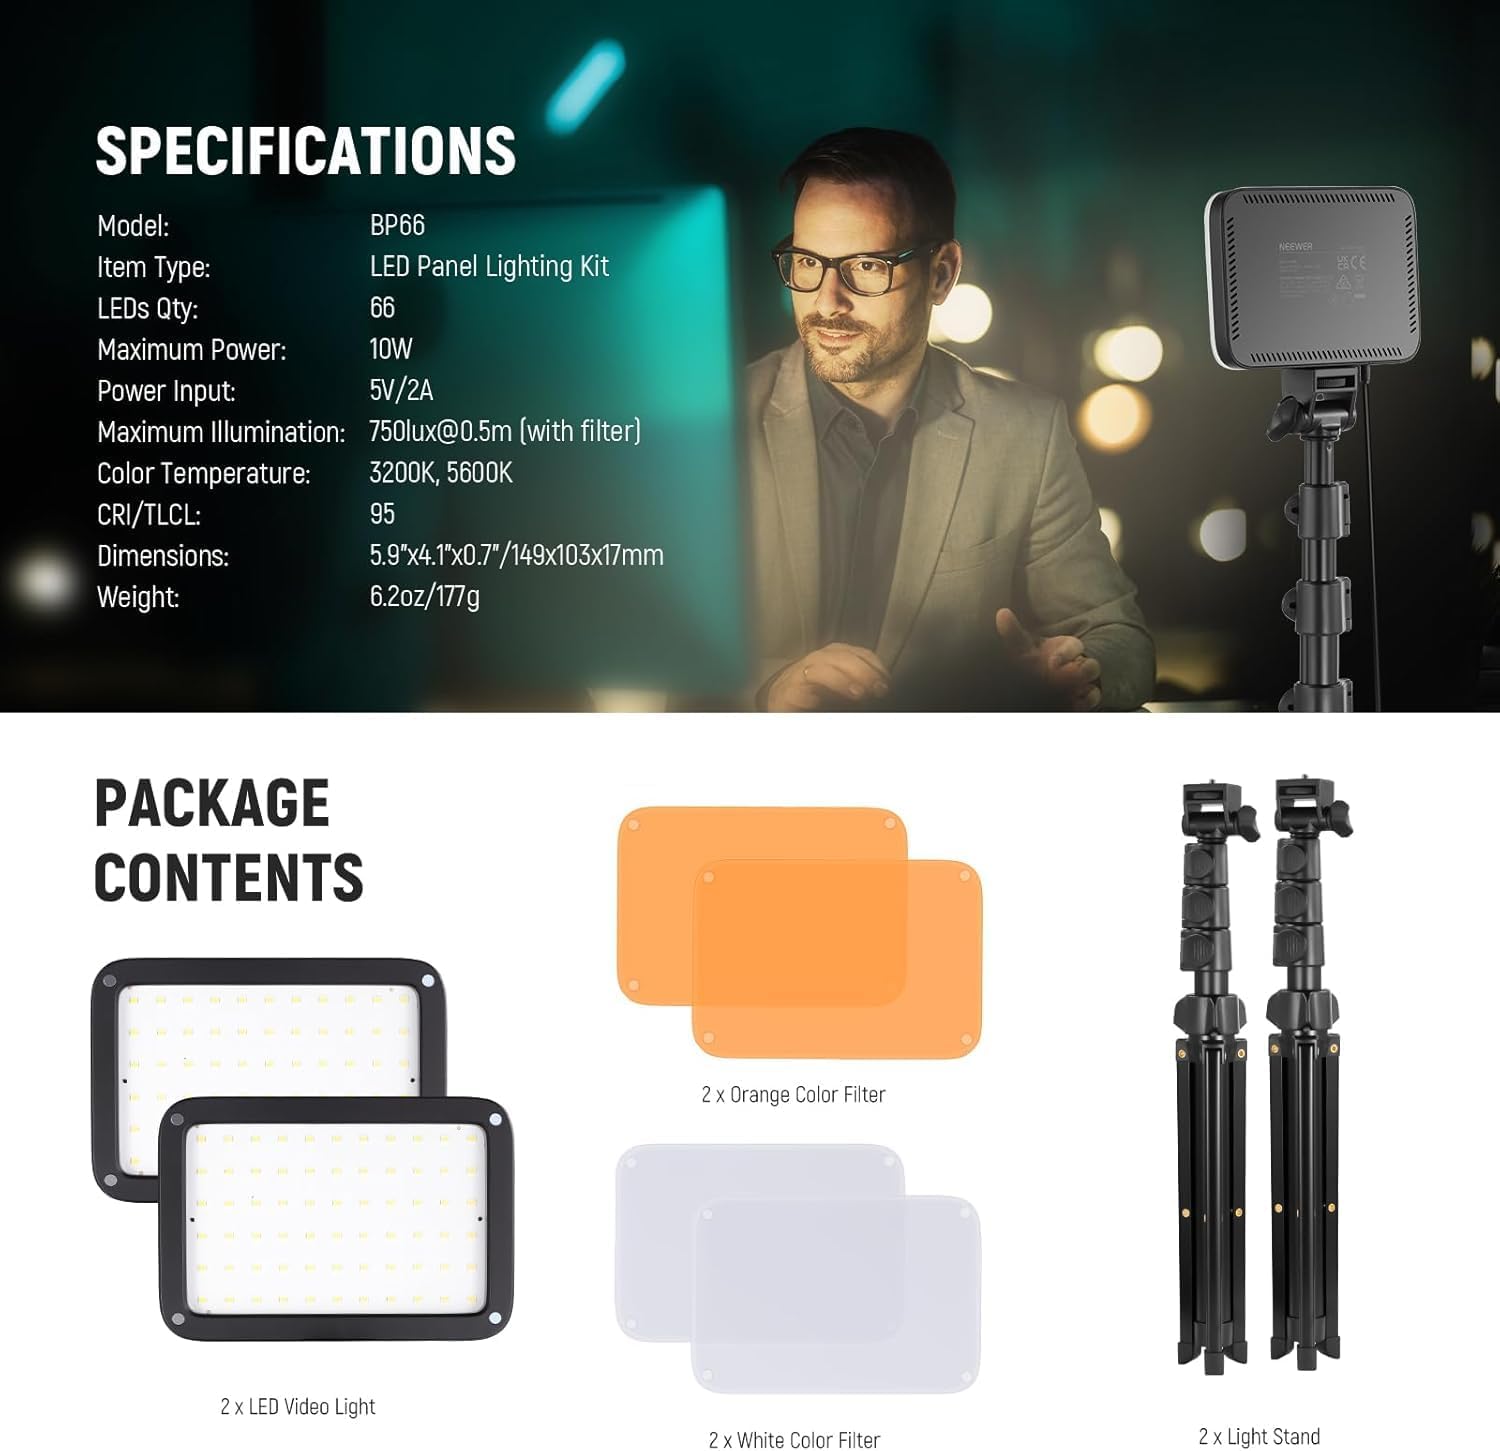
Image: Diagram showing the contents of the NEEWER BP66 LED Video Panel Kit: two LED lights, two orange filters, two white filters, and two light stands.
3. Opsætningsvejledning
3.1 Assemble Light Stands
- Fold benene på lampestativet ud, indtil de er helt udstrakte og stabile.
- Loosen the locking knobs on the stand sections and extend the central column to your desired height.
- Tighten all locking knobs securely to prevent the stand from collapsing.
3.2 Attach LED Panels
- Locate the 1/4" screw on top of the light stand.
- Align the 1/4" threaded hole on the bottom of the LED panel with the screw on the stand.
- Screw the LED panel onto the stand until it is firmly attached.

Image: Close-up of the 1/4 inch threaded hole on the bottom of the LED panel, demonstrating its versatility for mounting on various accessories like tripods or camera hot shoes.
3.3 Attach Color Filters
The BP66 LED panels feature a magnetic design for easy filter attachment:
- Select either a white filter for soft, diffused light or an orange filter for warm tones.
- Simply place the filter onto the front of the LED panel; it will magnetically snap into place.

Image: Comparison of 3200K warm light with an orange diffuser and 5600K cool light with a white diffuser, demonstrating the magnetic dome diffuser feature.
3.4 Strømtilslutning
Connect the integrated 2-meter USB charging cable to a 5V/2A power source. This can be a wall adapter, a laptop, a computer's USB port, or a portable power bank.

Image: NEEWER BP66 LED panel connected via USB for power, showing the inline controller for power and brightness adjustments.
4. Betjeningsvejledning
4.1 Tænd/sluk
Once connected to a power source, a blue LED indicator will light up. Press the power button on the inline controller to turn the LED panel on or off.
4.2 Justering af lysstyrke
The LED panel offers 10 levels of brightness. Short press the brightness adjustment button on the inline controller to adjust in steps, or long press for continuous dimming.
4.3 Farvetemperaturjustering
The BP66 panels provide a fixed bicolor temperature of 3200K (warm) and 5600K (cool). To change the color temperature, attach the appropriate magnetic filter (orange for 3200K, white for 5600K).
4.4 Panel Angle Adjustment
The LED panel can be tilted 180 degrees forward and backward. Adjust the angle to direct the light as needed for your shooting setup.
4.5 Stand Height Adjustment
Adjust the height of the light stand from 50cm to 137cm. With the top platform, it can reach up to 153cm. The stand can also be used as a tabletop tripod or folded for use as a selfie stick.

Image: Diagram illustrating the 180-degree tilt capability of the NEEWER BP66 LED panel for flexible lighting angles.
5. Vedligeholdelse
5.1 Rengøring
To clean the LED panels and stands, use a soft, dry cloth. Do not use abrasive cleaners or solvents, as these may damage the product's surface or electronic components.
5.2 Opbevaring
When not in use, store the lighting kit in a cool, dry place, away from direct sunlight and excessive humidity. Ensure all components are properly packed to prevent damage.
5.3 Kabelpleje
Avoid bending, twisting, or crimping the USB power cable excessively. Always grasp the plug, not the cable, when disconnecting from a power source.
6. Fejlfinding
6.1 Lyset tændes ikke
- Ensure the USB cable is securely connected to both the LED panel and a functioning 5V/2A power source.
- Verify that the power source is active (e.g., wall outlet is working, laptop is on).
- Check if the blue LED indicator on the cable is lit. If not, try a different USB port or power adapter.
- Tryk på tænd/sluk-knappen på den indbyggede controller.
6.2 Insufficient Brightness
- Adjust the brightness level using the inline controller.
- Ensure the power source provides sufficient current (5V/2A recommended). Lower current may result in reduced brightness.
- The light is designed for short-distance supplementary lighting, ideally within 2 meters. For larger areas, consider additional lighting.
6.3 Color Not as Expected
- Verify that the correct color filter (white for cool, orange for warm) is attached magnetically to the LED panel.
- Ensure the filter is clean and free from obstructions.
6.4 Ståinstabilitet
- Ensure the light stand legs are fully extended and the locking knobs are securely tightened.
- Placer stativet på en flad, stabil overflade.
- Avoid extending the stand to its maximum height if stability is a concern, especially in windy conditions or high-traffic areas.
7. Specifikationer
| Feature | Specifikation |
|---|---|
| Model | BP66 |
| Varetype | LED Panel Lighting Kit |
| LEDs Antal | 66 |
| Maksimal effekt | 10W |
| Strømindgang | 5V/2A |
| Maksimal belysning | 750lux @ 0.5m (with filter) |
| Farvetemperatur | 3200K, 5600K |
| CRI/TLCL | >95 |
| Panelets dimensioner | 5.9"x4.1"x0.7" / 149x103x17mm |
| Panelvægt | 6.2 oz / 177 g |
| Light Stand Height | 50cm to 137cm (up to 153cm with top platform) |
| Light Stand Max Load | 2 kg |
| Forbindelse | Kablet (USB) |
| Kompatible enheder | Cameras, Smartphones, Computers, Laptops, Portable Chargers, USB Power Banks, Action Cameras |
Image: Detailed specifications table for the NEEWER BP66 LED Video Panel, including model, LED quantity, power, illumination, color temperature, CRI, dimensions, and weight.
8. Garantioplysninger
This NEEWER BASICS BP66 LED Video Panel Lighting Kit is covered by a 1 års producentgaranti fra købsdatoen. Denne garanti dækker defekter i materialer og udførelse ved normal brug. Den dækker ikke skader forårsaget af misbrug, ulykker, uautoriseret ændring eller eksterne årsager såsom strømstød.
Gem venligst dit købsbevis for garantikrav.
9. Support
For further assistance, technical support, or warranty inquiries, please visit the official NEEWER website or contact their customer service department. You can find contact information on the NEEWER brand store page or through your purchase platform.
Online ressourcer:
- NEEWER Official Webwebsted: www.newer.com
- NEEWER Amazon Store: Visit NEEWER Store