
Indledning
This manual provides detailed instructions for the installation, operation, and maintenance of your SMONET M9 WiFi Smart Deadbolt with Handle. Please read this manual thoroughly before installation and use to ensure proper function and security. Keep this manual for future reference.
Produkt overview
Nøglefunktioner
- WiFi- og Bluetooth-forbindelse: Remote unlocking and real-time operation logs.
- Flere oplåsningsmetoder: Fingerprint, App control, Anti-peep code, Key Fobs, Traditional Keys, Auto Lock, Remote control, Alexa voice control.
- Fast Unlock: Fingerprint or IC card unlock in 0.5 seconds.
- Customizable Auto-Lock: Adjustable timing from 5 to 900 seconds.
- Nødkraft: USB-C charge port for backup power.
- Smart Home Integration: Compatible with Alexa (Hub included).
- Adgangsstyring: Create permanent, one-time, or temporary passwords for guests.
Inkluderede komponenter
The SMONET M9 package includes the following items:
- Udvendig låsesamling
- Indvendig låsesamling
- Håndsæt
- Låsemekanisme
- Låseskruer
- Nøglering (2)
- Traditional Keys
- Brugervejledning (dette dokument)
- Diagramskabelon til installation
- Monteringsplade

Image: Complete SMONET M9 WiFi Smart Deadbolt set with handle, including exterior and interior units, latch, key fobs, and keys.
Opsætning
1. Kontrol før installation
Before beginning installation, verify your door dimensions and compatibility. No extra drilling is typically required for standard doors.

Image: Diagram illustrating door hole diameter, backset, minimum distance, and bore distance requirements for installation. Also shows compatibility with latch holes and single cylinder doors.
2. Mekanisk installation
- Installer låsen i dørkanten.
- Attach the exterior lock assembly and handleset, ensuring proper alignment.
- Secure the interior mounting plate.
- Tilslut kablet fra den udvendige enhed til den indvendige enhed.
- Mount the interior lock assembly and handleset.
- Insert batteries into the interior unit.
Refer to the included diagram template for precise measurements and step-by-step visual guidance during installation. A simple screwdriver is the only tool typically needed.
3. App Setup and Initial Programming
Download the 'Next Lock' application from your device's app store (App Store/Play Store). Follow the in-app instructions to pair your SMONET M9 lock via Bluetooth and then connect it to your home WiFi network using the included Hub. Once connected, you can program fingerprints, user codes, and key fobs through the app.

Image: A user interacting with the mobile application to manage the smart door lock, demonstrating app control functionality.
Betjeningsvejledning
Oplåsningsmetoder
- Lås op med fingeraftryk: Placer dit registrerede fingeraftryk på sensoren. Låsen låses op om cirka 0.5 sekunder.
- Tastaturkode: Indtast din programmerede adgangskode på tastaturet.
- Anti-Peep Code: To prevent others from seeing your code, you can enter random digits before and after your actual passcode. For exampHvis din kode er 123456, kan du indtaste 987123456321.
- Nøglebrik: Present the registered key fob to the designated area on the lock.
- Traditionel nøgle: Brug den fysiske nøgle som backup.
- Mobil app: Use the 'Next Lock' app to remotely unlock the door.
- Alexa stemmestyring: With the included Hub connected, you can use Alexa voice commands to unlock the door. (e.g., "Alexa, unlock the front door").

Image: A family in a kitchen setting, demonstrating the use of Alexa voice commands to unlock the smart door lock.
Låsemetoder
- Autolås: The lock will automatically engage after a set period (default or customized between 5-900 seconds).
- Lås med et enkelt tryk: Press the '#' button on the keypad or use the app to manually lock the door.

Image: A woman carrying groceries, illustrating the convenience of the auto-lock feature which engages after a set time (5-900 seconds).
Remote Access and Guest Management
The 'Next Lock' app allows you to generate permanent, one-time, or temporary passcodes for guests, delivery personnel, or service providers. You can also monitor real-time unlock records and manage access from anywhere.
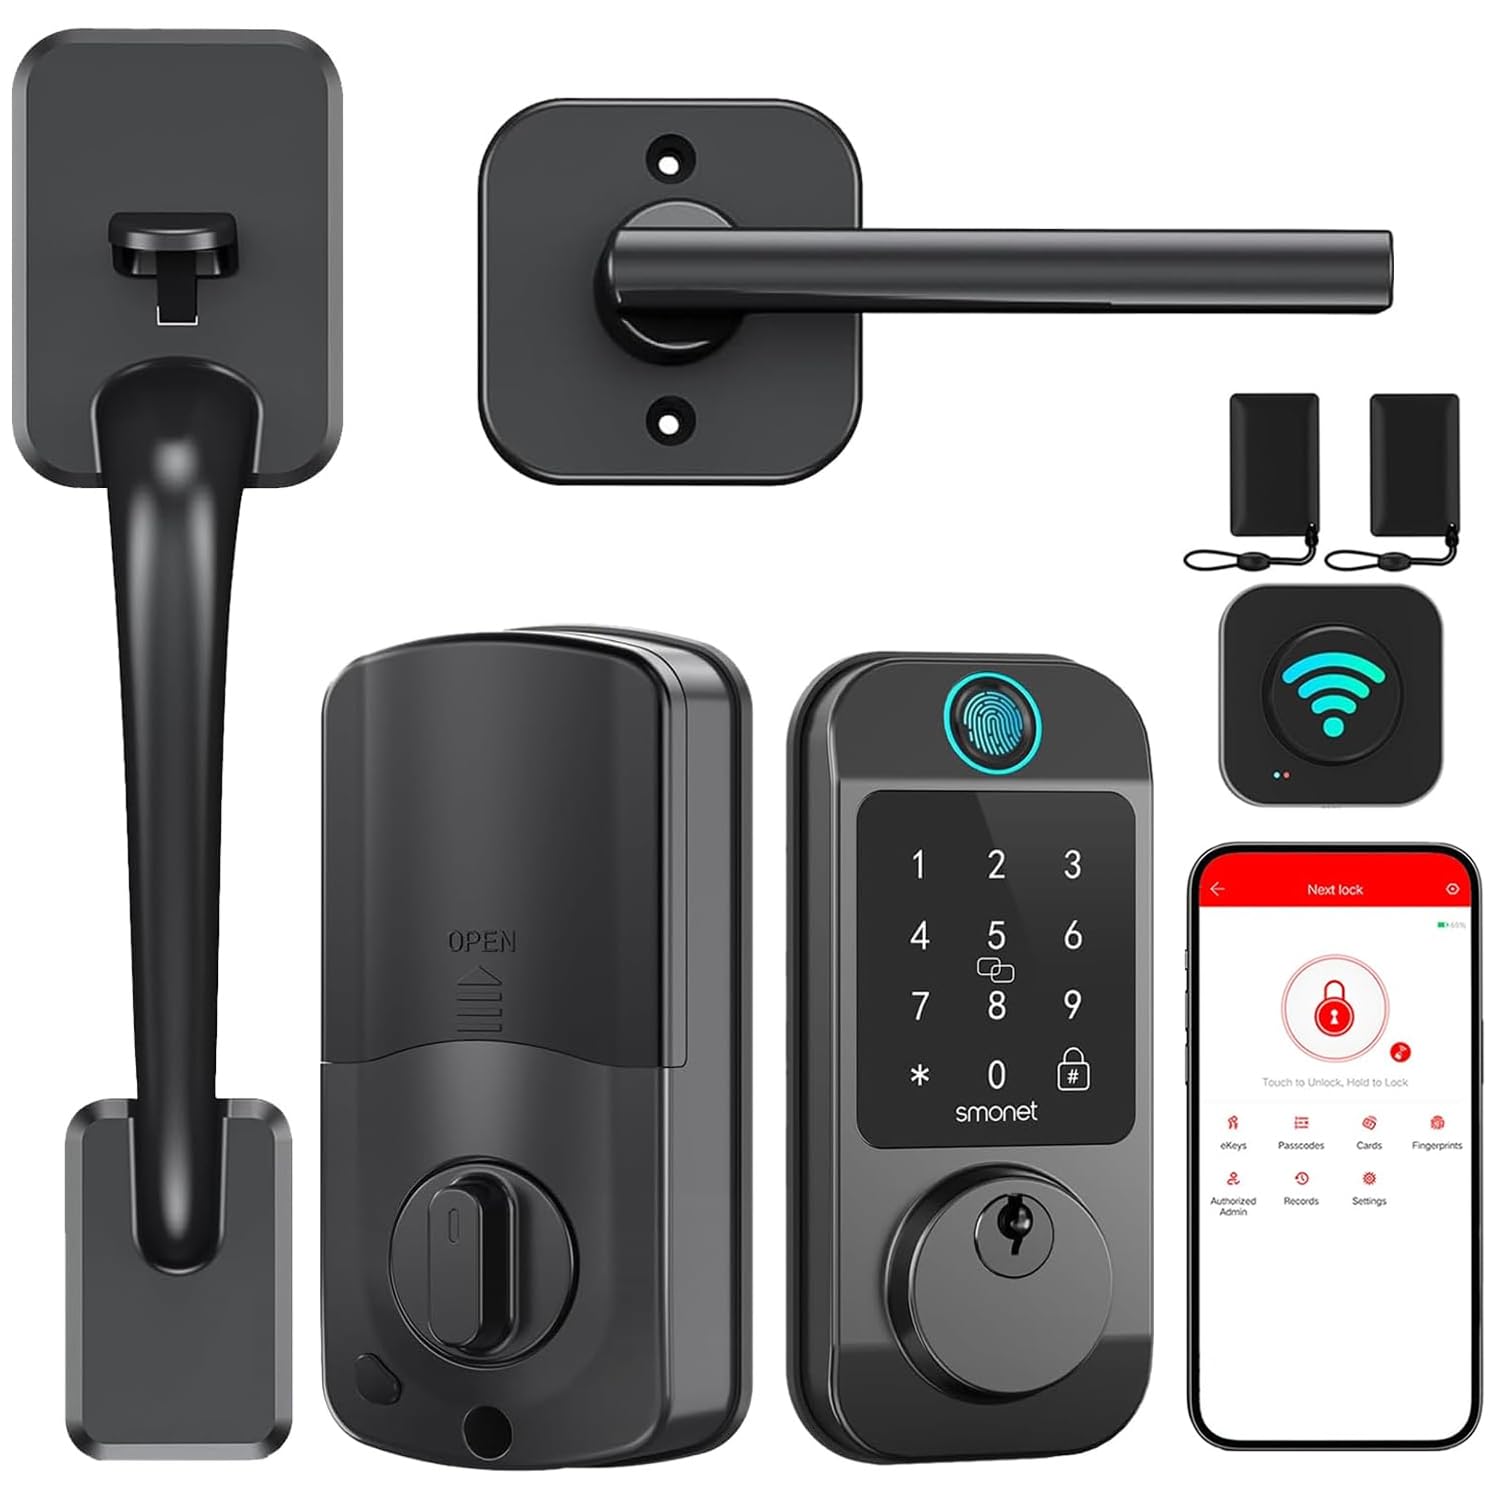
Image: A man receiving a one-time password on his phone, demonstrating the remote unlock feature for guests without distance limitations.
Opretholdelse
Batteristyring
The SMONET M9 lock is designed for long battery life. Monitor the real-time battery status through the 'Next Lock' app. When batteries are low, the lock will provide a low battery warning. In case of complete battery depletion, an emergency USB-C port is available on the exterior unit for temporary power using a power bank.

Image: Close-up of the SMONET M9 smart lock highlighting the Type C emergency charging port and a graphic indicating real-time battery status.
Rensning
Tør låsens yderflader af med en blød kludamp klud. Undgå at bruge slibende rengøringsmidler eller opløsningsmidler, da disse kan beskadige overfladen og de elektroniske komponenter.
Fejlfinding
If you encounter issues with your SMONET M9 smart deadbolt, consider the following common solutions:
- Låsen svarer ikke: Check battery levels. If low, replace batteries or use the emergency USB-C port.
- Fingeraftryk ikke genkendt: Sørg for, at din finger er ren og tør. Registrer dit fingeraftryk igen, hvis problemerne fortsætter.
- Keypad not working: Verify the passcode is correct. Ensure the keypad is clean and free from debris.
- Problemer med app-forbindelse: Ensure your phone's Bluetooth is on and the lock is within range. Check your WiFi connection and ensure the Hub is properly configured and connected to the internet.
- Automatisk låsning aktiveres ikke: Check the auto-lock settings in the app to ensure it is enabled and the timing is set correctly.
- Låsen føles stiv: Ensure all screws are tightened correctly and the lock is properly aligned with the door frame. Avoid over-tightening.
For further assistance, refer to the support information provided in the Warranty and Support section.
Specifikationer
| Feature | Detalje |
|---|---|
| Mærke | SMONET |
| Modelnummer | M9 |
| Låsetype | Biometrisk, Deadbolt |
| Særlige funktioner | Automatisk låsning, fingeraftryk, fjernbetjening, adgangskodeoplåsning |
| Kontrolmetode | App, berøring, stemme |
| Forbindelsesprotokol | Bluetooth, WiFi |
| Smart Home-kompatibilitet | Smart Home Compatible (Alexa) |
| Materiale | Metal |
| Varedimensioner (L x B x H) | 14 x 10 x 3 tommer |
| Farve | Sort |
| Antal enheder | 1.0 tæller |
Garanti og support
SMONET offers a 30-day purchase policy and a one-year quality assurance for the M9 WiFi Smart Deadbolt. If you experience any issues or require assistance, please contact SMONET customer service. Our professional customer service team is available to ensure your satisfaction and resolve any concerns promptly.
For support, please visit the official SMONET webwebstedet eller kontakt den forhandler, hvor produktet blev købt.