
1. Introduktion
The LIORQUE Visual Timer, Model TM12, is a versatile 60-minute countdown timer designed for various time management needs. Its visual display helps users of all ages understand the passage of time. This manual provides instructions for setup, operation, and maintenance to ensure optimal performance.

2. Produktfunktioner
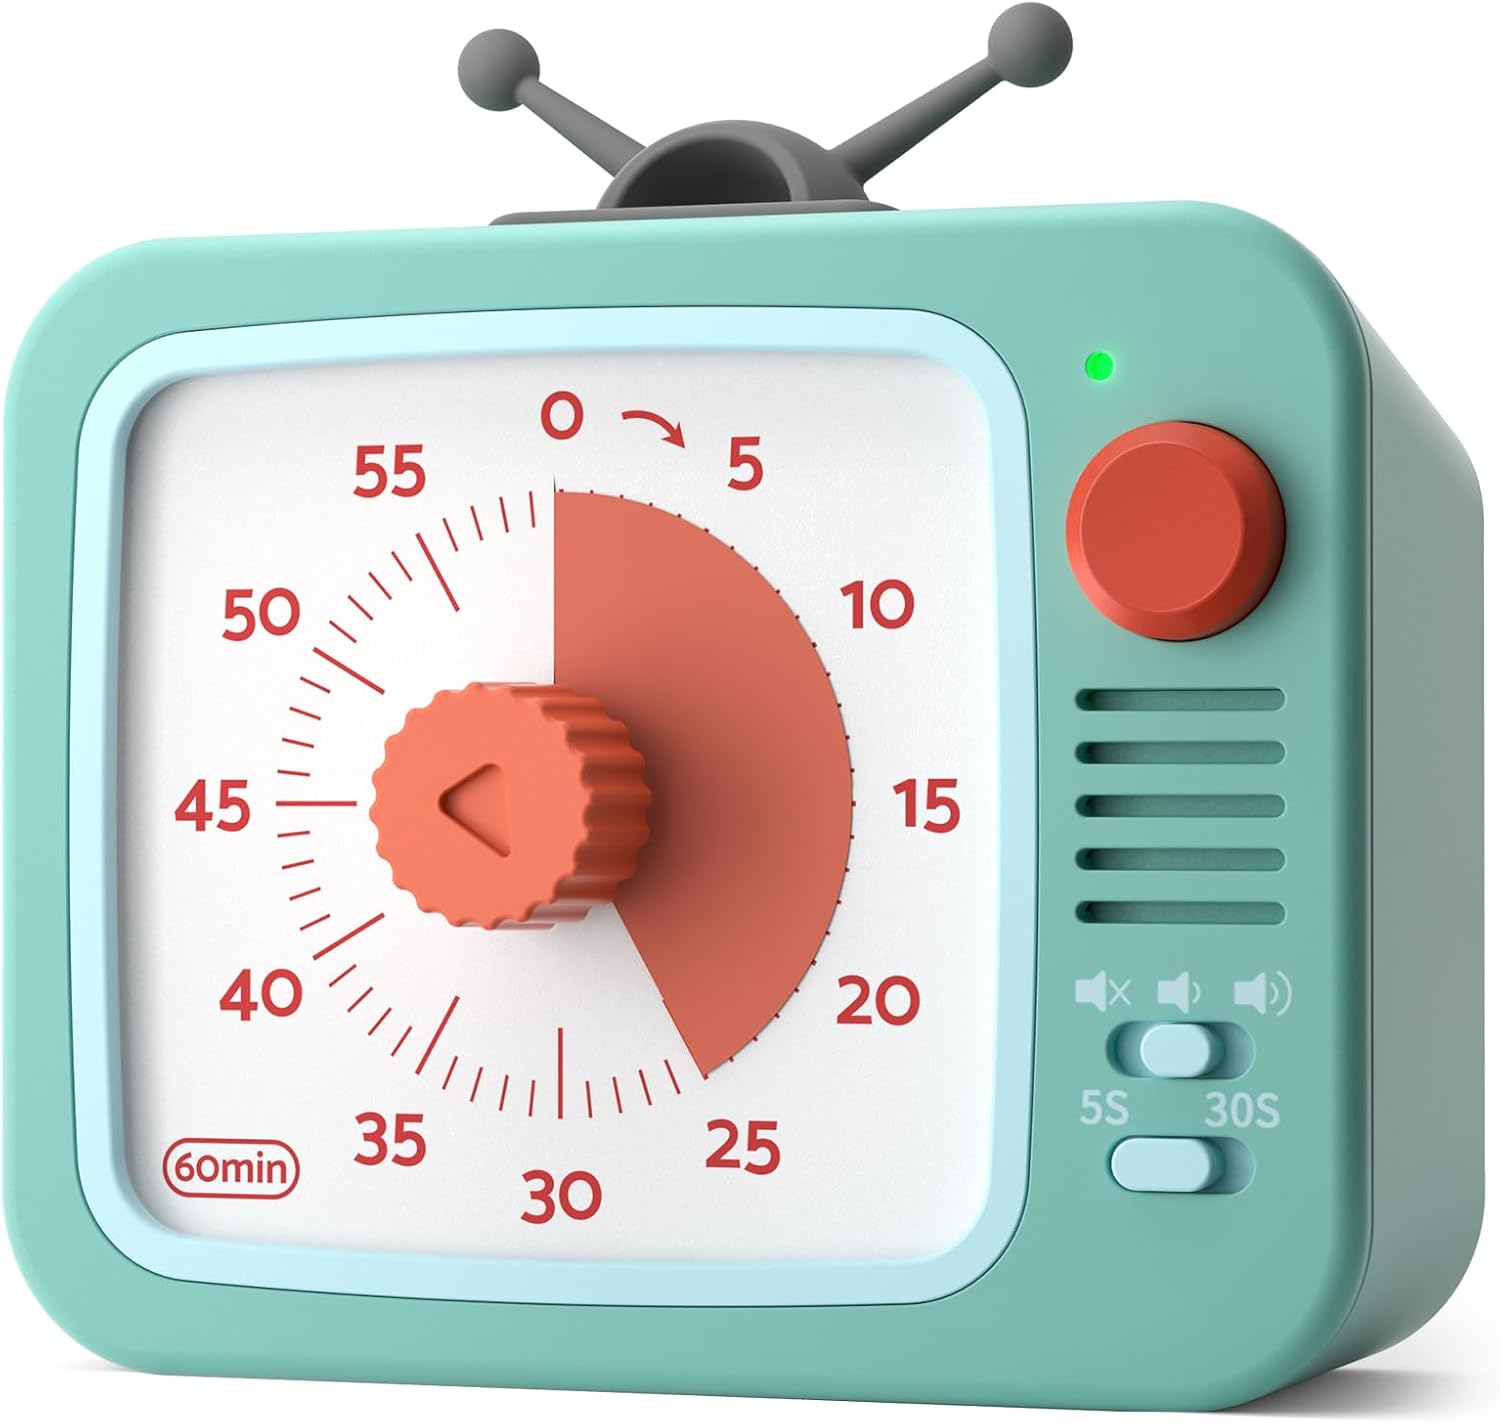
- 60-Minute Visual Countdown: A red disk visually recedes as time expires, providing a clear indication of remaining time without needing to read numbers.
- Pause funktion: Temporarily halt the countdown by pressing and holding the round button for 3 seconds. The indicator light changes from green to red. Press and hold again for 3 seconds to resume.
- Lydløs drift: Designed with a sophisticated internal structure to minimize ticking sounds, ensuring a distraction-free environment.
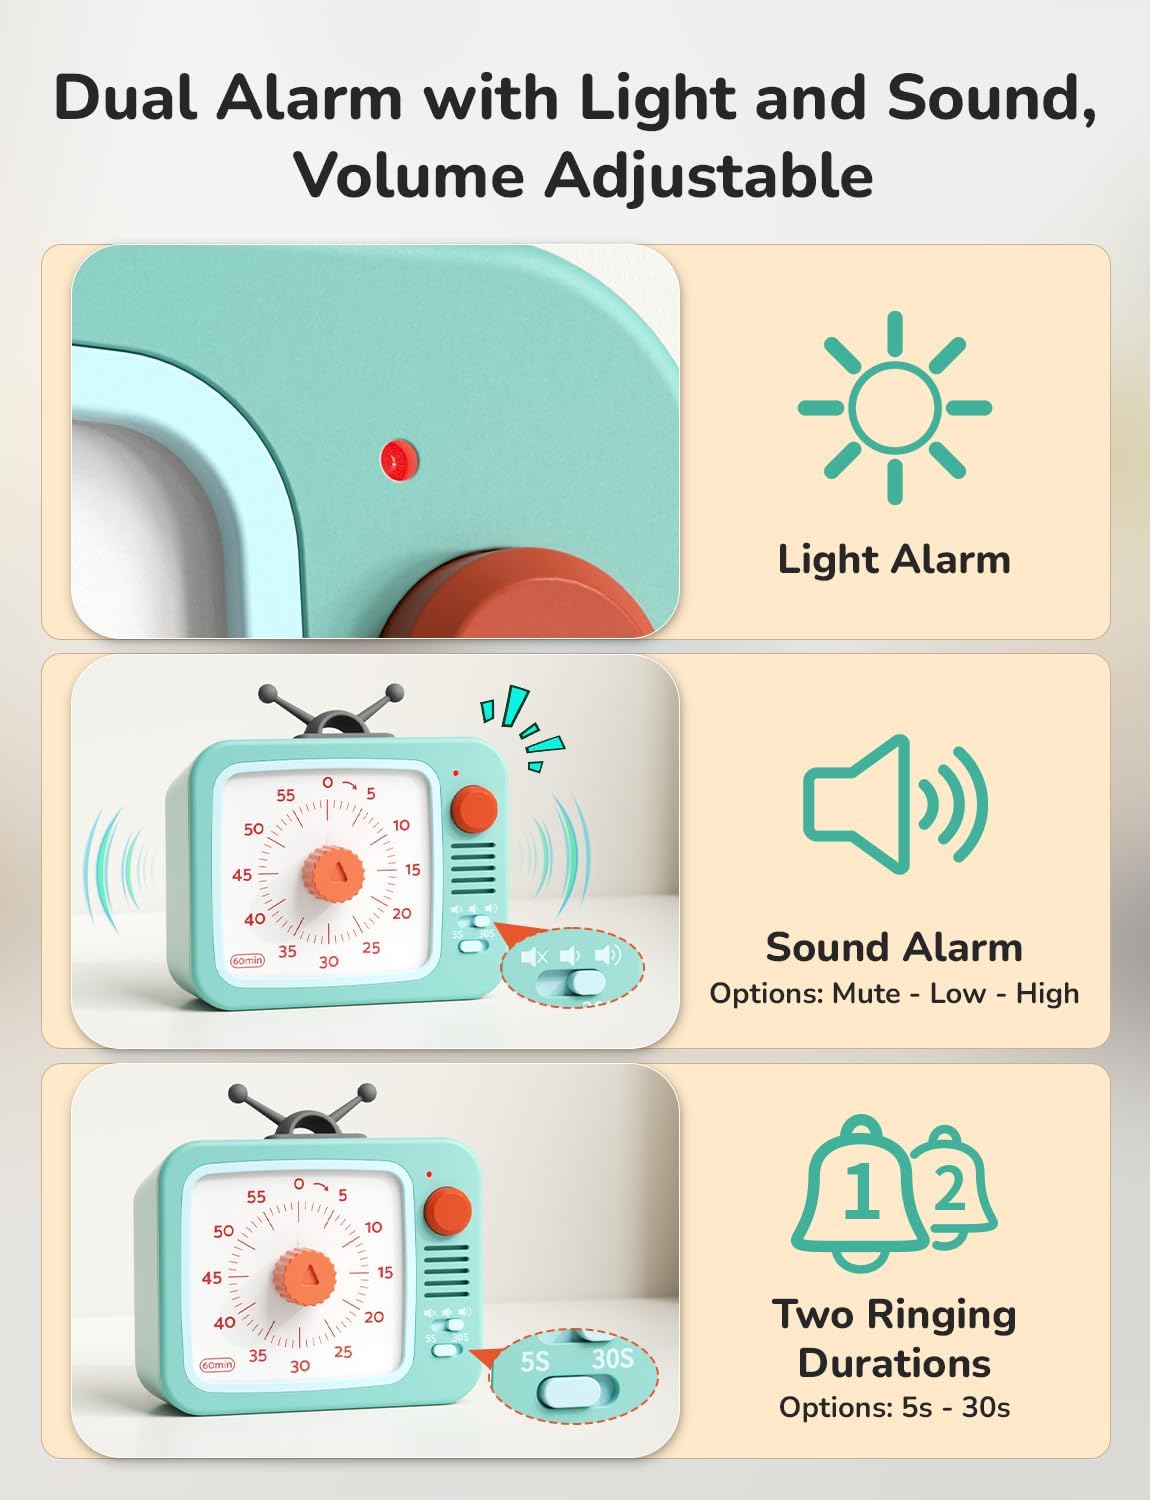
- Adjustable Alarm: Customize the alarm volume (Mute, Low, High) and duration (5 seconds, 30 seconds) using the switches on the side.
- Nem at bruge: Simply turn the central knob clockwise to increase time and counter-clockwise to decrease it.
- Flere placeringsmuligheder: Can stand freely, be wall-mounted, or magnetically attached to metal surfaces.
- Batteridrevet: Kører på 2 AAA-batterier (medfølger).
3. Opsætning
3.1 Batteriinstallation
- Find batterirummet på bagsiden af timeren.
- Åbn batterirummets dæksel.
- Insert 2 AAA batteries, ensuring correct polarity (+/-). The timer comes with batteries pre-installed; remove any protective tab if present.
- Luk batterirummets dæksel forsvarligt.
4. Betjeningsvejledning
4.1 Indstilling af timeren
- Turn the central red knob clockwise to increase the desired time. The red disk will expand to indicate the set duration.
- Turn the knob counter-clockwise to decrease the set time.
- The timer will begin counting down immediately once the knob is released. The red disk will gradually disappear as time elapses.

4.2 Pausefunktion
- During an active countdown, press and hold the round button on the top right for 3 seconds to pause the timer. The indicator light will change from green to red.
- To resume the countdown, press and hold the round button for another 3 seconds. The indicator light will change back from red to green.

4.3 Alarmindstillinger
- Lydstyrkejustering: Use the slide switch on the side to select between Mute, Low, or High alarm volume.
- Duration Adjustment: Use the toggle switch to select an alarm duration of either 5 seconds or 30 seconds.
- Stop af alarmen: When the timer reaches zero and the alarm sounds, briefly press the round button on the top right to stop the alarm. Alternatively, turn the knob clockwise slightly and then back to zero.
5. Placeringsmuligheder
The LIORQUE Visual Timer offers flexible placement to suit your needs:
- Stand Alone: Place the timer on any flat surface such as a desk, counter, or table.
- Vægbeslag: Utilize the integrated wall mount hole on the back to hang the timer on a hook or nail.
- Magnetisk fastgørelse: The timer features strong magnets on its back, allowing it to be securely attached to metallic surfaces like refrigerators or whiteboards.

6. Vedligeholdelse
- Rensning: Tør timeren af med en blød, tør klud. Brug ikke slibende rengøringsmidler, og nedsænk den ikke i vand.
- Udskiftning af batteri: When the timer's performance diminishes or the indicator light fails to illuminate, replace the 2 AAA batteries. Ensure proper disposal of old batteries according to local regulations.
- Opbevaring: Opbevar timeren et køligt og tørt sted, når den ikke er i brug i længere perioder.
7. Fejlfinding
- Timeren starter ikke: Ensure batteries are correctly installed and have sufficient charge. Remove any protective tab from new batteries.
- Alarmen lyder ikke: Check the volume switch to ensure it is not set to 'Mute'. Verify the alarm duration switch is set correctly.
- Unøjagtig timing: Ensure the knob is turned fully to the desired time and released. If issues persist, replace batteries.
8. Specifikationer
| Feature | Detalje |
|---|---|
| Modelnummer | TM12 |
| Farve | White+green |
| Materiale | Plast |
| Produktdimensioner | 4.33" D x 4.21" B x 2.24" H |
| Varens vægt | 150 gram (5.3 ounce) |
| Antal indstillinger | 5 (referring to alarm settings) |
| Batterier | 2 AAA batterier (medfølger) |
9. Garanti og support
For warranty information or technical support, please refer to the product packaging or contact LIORQUE customer service directly. Keep your purchase receipt for any warranty claims.