OutdoorMaster shark 3
OutdoorMaster Shark 3 Electric Paddle Board Pump User Manual
Model: Shark 3
Brand: OutdoorMaster
1. Introduktion og overview
This manual provides essential information for the safe and efficient operation of your OutdoorMaster Shark 3 Electric Paddle Board Pump. Please read this manual thoroughly before use and retain it for future reference.

Figure 1: The OutdoorMaster Shark 3 Electric Paddle Board Pump with its included nozzles and charging cables.
2. Sikkerhedsoplysninger
For at sikre sikker drift og forhindre skader skal følgende forholdsregler overholdes:
- Pumpen må ikke anvendes i våde omgivelser, og den må ikke nedsænkes i vand.
- Hold pumpen væk fra børn og kæledyr.
- Ensure proper ventilation during operation to prevent overheating. The pump features a built-in cooling system.
- Bloker ikke luftindtag eller -udtag under brug.
- Always set the correct pressure (PSI) before inflation to avoid over-inflation, which can damage your inflatable. The pump has an auto-off function.
- Brug kun de medfølgende eller godkendte opladningskabler og adaptere.
- Disconnect the pump from the power source when not in use or during cleaning.
3. Pakkens indhold
Bekræft at alle varer er til stede i din pakke:
- OutdoorMaster Shark 3 Electric SUP Pump
- Luftslange
- 8 Nozzles (various types for different inflatables)
- 12V/15.8V DC Car Power Cable
- USB Type-C opladerkabel
- Brugervejledning (dette dokument)

Figure 2: Included components: pump, hose, various nozzles, and charging cables.
4. Produktfunktioner
- Faster 3'50" Inflation: Inflates a 10.6FT | 15PSI paddle board in approximately 3 minutes and 50 seconds. Deflation in 1 minute and 20 seconds.
- 74 Wh Powerful Battery: Capable of inflating and deflating up to 4 boards (10.6FT | 15PSI) on a full charge.
- Dobbelt indgangsmuligheder: Supports 45W Type-C fast charging (fully charged in 1 hour 40 minutes) and 12V/15.8V DC input (compatible with Tesla and other vehicles). Can also serve as an emergency power bank.
- Max 20PSI & Auto Off: Allows setting a desired pressure up to 20 PSI. Automatically turns off when the target pressure is reached, preventing over-inflation. Real-time pressure monitoring via digital display.
- 8 dyser: Compatible with a wide range of inflatables including stand-up paddle boards, air beds, kayaks, kites, boats, and more.
- Indbygget kølesystem: Prevents overheating during extended use.
5. Opsætning
5.1 Opladning af pumpen
Before initial use, fully charge the pump. You have two charging options:
- Type-C hurtigopladning: Connect the provided USB Type-C cable to the pump's Type-C input port and a compatible 45W (or higher) USB-C power adapter (not included). The pump will fully charge in approximately 1 hour and 40 minutes.
- 12V/15.8V DC Input: Use the provided car power cable to connect the pump to your vehicle's 12V or 15.8V DC port. This is ideal for charging on the go or when a wall outlet is not available.

Figure 3: The pump supports both internal battery operation and direct power from a 12V/15.8V DC car port.
5.2 Montering af slange og dyse
- Identify the correct nozzle for your inflatable from the 8 included options.
- Attach the selected nozzle securely to one end of the air hose.
- For inflation, connect the other end of the air hose to the OPSTÅ port on the pump. For deflation, connect it to the Deflate port. Ensure a tight connection to prevent air leakage.

Figure 4: A selection of the 8 included nozzles, compatible with various inflatables.
6. Betjeningsvejledning
6.1 Inflation
- Tilslut slangen til OPSTÅ port on the pump and the appropriate nozzle to your inflatable's valve.
- Tryk på tænd / sluk-knappen (⏻) to turn on the pump. The digital display will illuminate.
- Use the '+' and '-' buttons to set your desired pressure (PSI). The maximum pressure is 20 PSI.
- Tryk på startknappen (▶) to begin inflation. The pump will operate in two stages: a high-volume stage followed by a high-pressure stage.
- The pump will automatically shut off once the preset pressure is reached.

Figure 5: The Shark 3 pump in action, demonstrating its quick inflation capability for paddle boards.

Figure 6: The digital display provides real-time pressure monitoring and indicates auto-off and auto-cooling features.
6.2 Deflation
- Tilslut slangen til Deflate port on the pump and the appropriate nozzle to your inflatable's valve.
- Tryk på tænd / sluk-knappen (⏻) to turn on the pump.
- Tryk på startknappen (▶) to begin deflation. The pump will actively extract air, allowing for compact storage of your inflatable.
- The pump will stop automatically when deflation is complete.
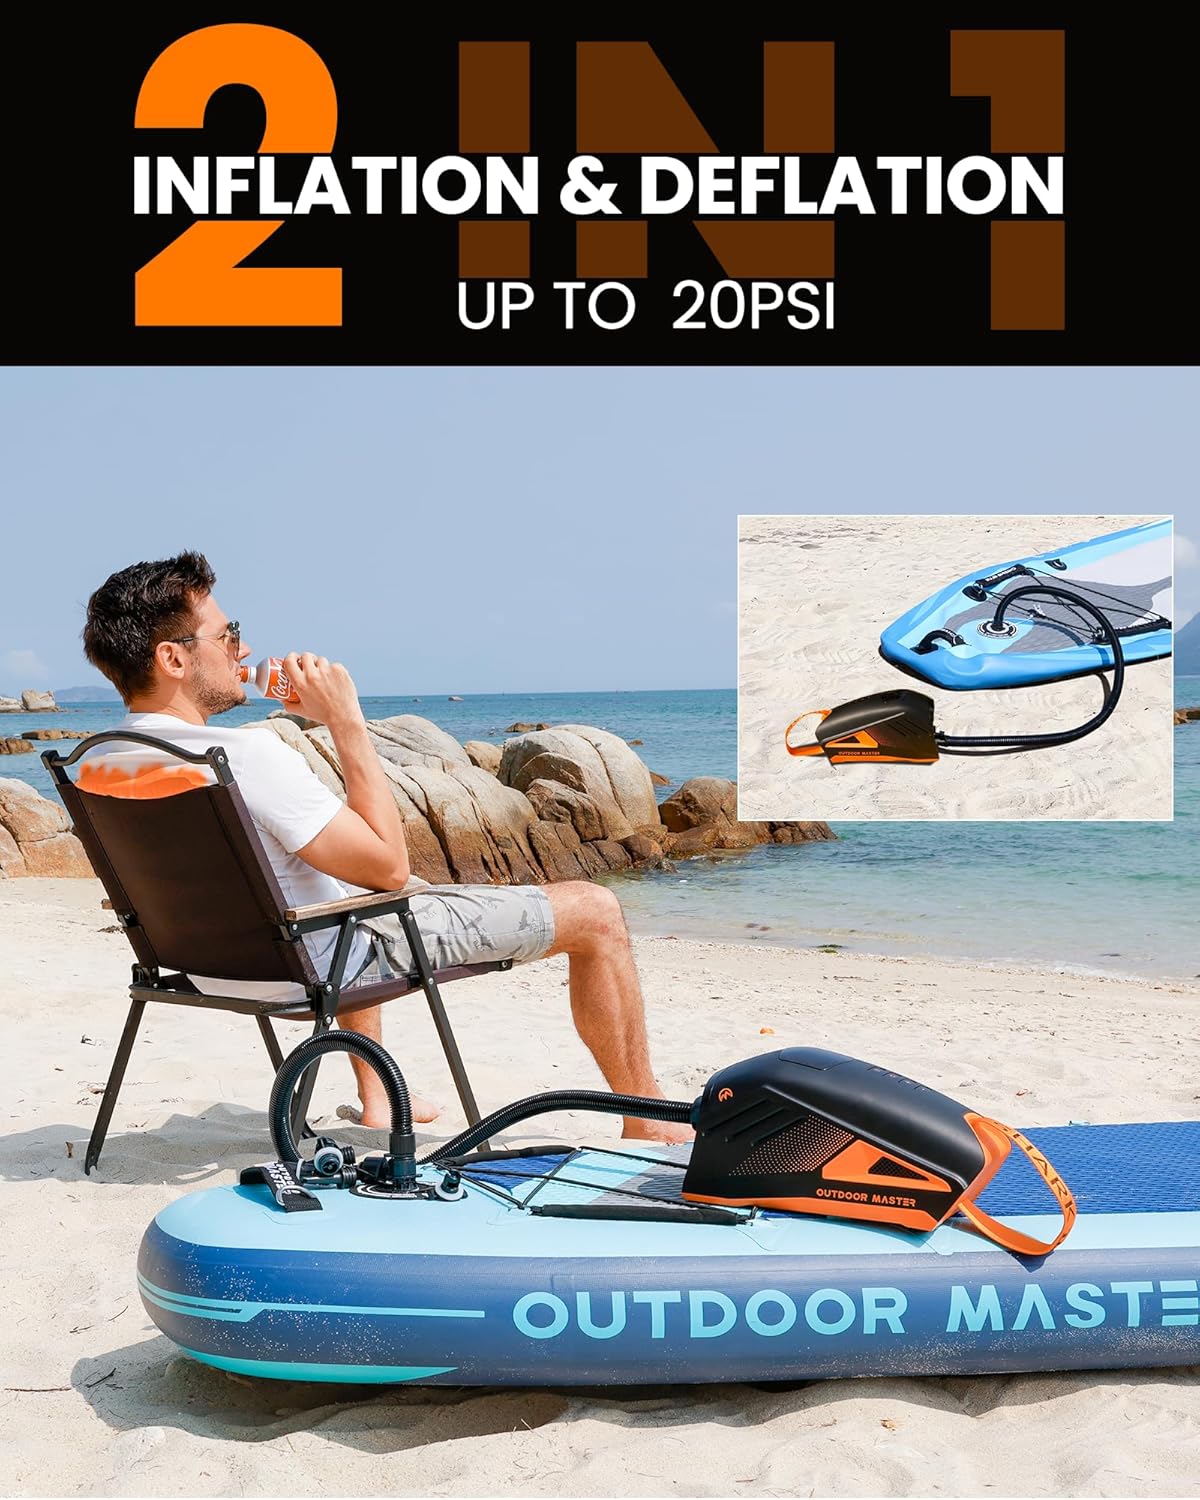
Figure 7: The pump offers both inflation and deflation capabilities for convenience.
7. Vedligeholdelse
- Rensning: Wipe the pump's exterior with a soft, dry cloth. Do not use abrasive cleaners or solvents.
- Opbevaring: Store the pump in a cool, dry place away from direct sunlight and extreme temperatures. Ensure the hose and nozzles are clean and dry before storage.
- Batteripleje: For optimal battery life, charge the pump fully before long-term storage and recharge it every 3-6 months.
- Ventilation: Regularly check that the air inlets and outlets are free from dust and debris to maintain efficient cooling.

Figure 8: The pump's auto-cooling feature helps prevent overheating during operation.
8. Fejlfinding
| Problem | Mulig årsag | Løsning |
|---|---|---|
| Pumpen tænder ikke. | Lavt batteri eller ingen strøm. | Charge the pump fully. Ensure the 12V DC cable is securely connected if using car power. |
| Pump inflates slowly or not to desired PSI. | Hose/nozzle not securely connected; air leakage; clogged air inlets/outlets. | Check all connections for tightness. Ensure the correct nozzle is used. Clear any obstructions from air inlets/outlets. |
| Pumpen overopheder og slukker. | Extended continuous use; blocked ventilation. | Allow the pump to cool down for at least 15-20 minutes. Ensure air inlets/outlets are clear. The auto-cooling system will help. |
| Digital display is difficult to read in sunlight. | Direkte sollysforstyrrelser. | Try to shade the display or adjust your viewvinkel. |
9. Specifikationer
| Specifikation | Værdi |
|---|---|
| Mærke | OutdoorMaster |
| Modelnavn | Haj 3 |
| Farve | black & orange |
| Materiale | Plast |
| Strømkilde | Batteridrevet, elektrisk |
| Maksimalt tryk | 20 pund pr. kvadrattomme (PSI) |
| Batterikapacitet | 74 Wh |
| Opladningsindgang | Type-C (45W Fast Charging), 12V/15.8V DC |
| Emne Pakke Dimensioner L x B x H | 13.65 x 10.65 x 8.5 tommer |
| Pakkevægt | 3.74 kilo |
| UPC | 198387032230 |
10. Garanti og support
The OutdoorMaster Shark 3 Electric Paddle Board Pump comes with a Et års garanti from the date of purchase. For warranty claims, technical support, or any inquiries, please visit the official OutdoorMaster store or contact their customer service directly.
Officiel mærkebutik: OutdoorMaster Store on Amazon