
1. Introduktion
Thank you for choosing the Gevi Electric Burr Coffee Grinder. This manual provides essential information for the safe and efficient operation, maintenance, and troubleshooting of your new appliance. Please read it thoroughly before first use and keep it for future reference.
2. Vigtige sikkerhedsinstruktioner
- Læs alle instruktioner før brug af apparatet.
- Nedsænk ikke apparatet, ledningen eller stikket i vand eller andre væsker.
- Træk stikket ud af stikkontakten, når det ikke er i brug, før du sætter dele på eller af, og før rengøring.
- Undgå kontakt med bevægelige dele.
- Brug ikke noget apparat med en beskadiget ledning eller stik, eller efter at apparatet ikke fungerer korrekt eller er blevet tabt eller beskadiget på nogen måde.
- Brug af tilbehør, der ikke anbefales eller sælges af producenten, kan forårsage brand, elektrisk stød eller personskade.
- Må ikke bruges udendørs.
- Lad ikke ledningen hænge ud over kanten af bordet eller bordpladen eller røre ved varme overflader.
- Kontroller bønnebeholderen for fremmedlegemer før brug.
- Dette apparat er kun til husholdningsbrug.
3. Produktet er slutview
The Gevi Electric Burr Coffee Grinder is designed for precision grinding, offering 35 settings for various brewing methods. It features a digital display for easy control and an anti-static design for mess-free operation.

Figure 1: Gevi Electric Burr Coffee Grinder with its main components visible.
Komponenter:
- Bean Hopper (8.5 oz capacity)
- Øvre Burr
- Grinds Container (4.6 oz capacity)
- Digital Control Panel (Cup Selection, Time Selection, Start/Stop)
- Portafilter Cradle (compatible with 51mm and 58mm portafilters)
- Rengøringsbørste
- Kaffe ske
4. Opsætning
- Pak kværnen ud: Fjern forsigtigt al emballage, og sørg for, at alle komponenter er til stede.
- Rengøring af komponenter: Wash the bean hopper, grinds container, and lids with warm, soapy water. Rinse thoroughly and dry completely before assembly.
- Installer bønnebeholderen: Place the bean hopper onto the top of the grinder base. Rotate it clockwise until it locks securely into place.
- Tilsæt kaffebønner: Fill the bean hopper with your desired amount of whole coffee beans. Do not overfill.
- Sikkert låg: Place the bean hopper lid firmly on top of the bean hopper.

Figure 2: Filling the bean hopper with coffee beans.
5. Betjening
5.1 Selecting Grind Settings
The Gevi grinder offers 35 precise grind settings, allowing you to customize your coffee for various brewing methods. Rotate the bean hopper to adjust the grind size:
- Settings 1-10 (Espresso): For very fine grounds suitable for espresso machines.
- Settings 11-25 (Drip/Pour Over): For medium grounds ideal for drip coffee makers and pour-over brewing.
- Settings 26-35 (French Press): For coarse grounds best for French press and cold brew methods.

Figure 3: Grind setting dial on the bean hopper.
Video 1: Demonstrating the Gevi Integrated Burr Coffee Grinder with its 35 grind settings.
5.2 Digital kontrolpanel
The digital display and control buttons allow for precise control over the grinding process.
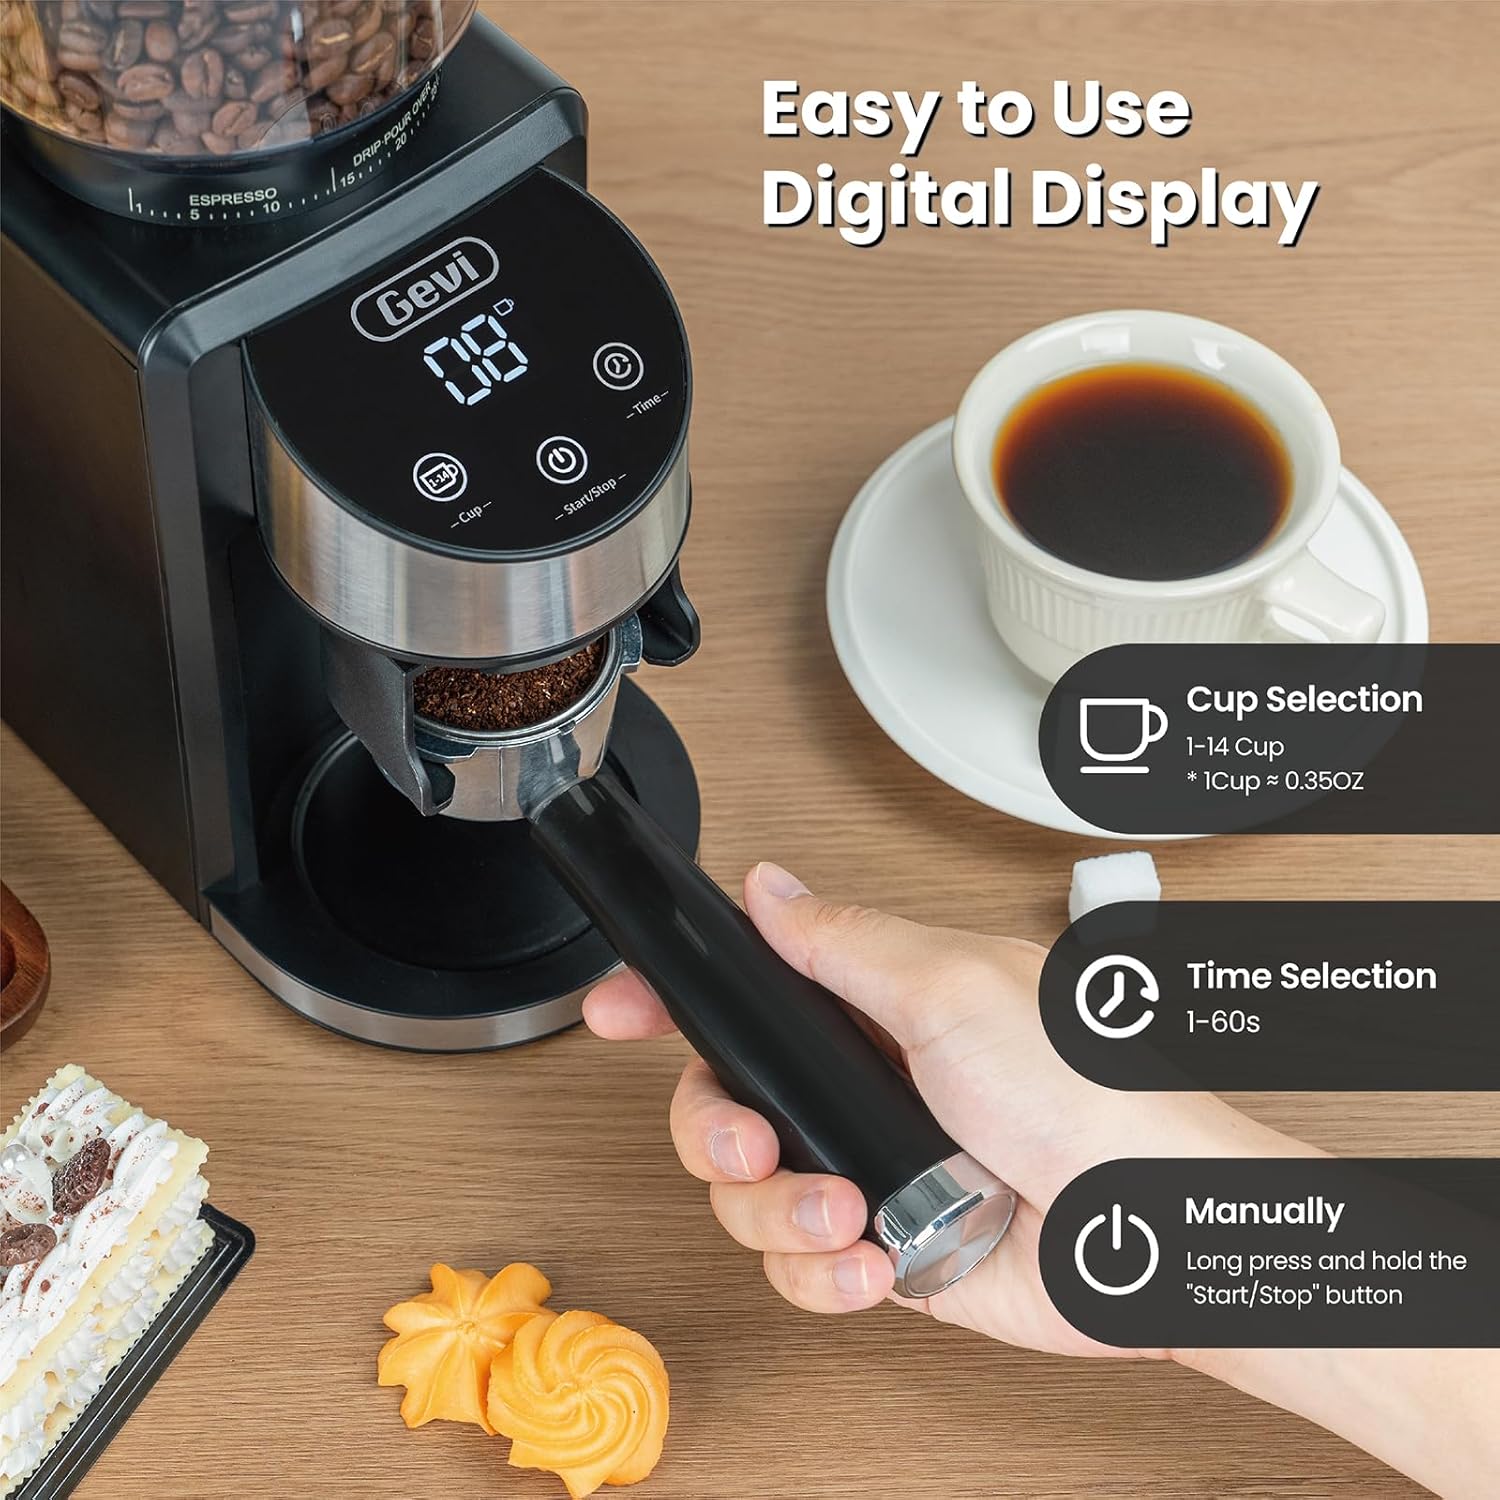
Figure 4: Digital control panel for cup and time selection.
- Cup Selection (1-14 cups): Press the 'Cup' button to select the desired number of cups. The grinder will automatically grind the appropriate amount of coffee.
- Time Selection (1-60 seconds): Press the 'Time' button to set the grinding duration in seconds. This allows for precise control over the amount of coffee ground.
- Start/Stop: Press the 'Start/Stop' button to begin or end the grinding process. You can also long-press this button for manual grinding.
5.3 Using the Portafilter Cradle
The grinder includes a portafilter cradle for direct grinding into your espresso machine's portafilter.

Figure 5: Portafilter cradle for direct grinding.
- Select the appropriate portafilter cradle (51mm or 58mm) for your portafilter.
- Indsæt dit portafilter i holderen.
- Place the portafilter with cradle under the grinding chute.
- Select your desired grind setting and cup/time, then press Start/Stop to begin grinding.
6. Vedligeholdelse
Regular cleaning ensures optimal performance and extends the life of your grinder. The anti-static design helps minimize mess.
6.1 Daglig rengøring
- Tag stikket ud af kværnen: Always ensure the grinder is unplugged before cleaning.
- Fjern bønnebeholder: Rotate the bean hopper counter-clockwise until it stops, then lift it off. Empty any remaining beans into an airtight container to preserve freshness.
- Fjern øvre grat: Lift the upper conical burr straight out from the grinding chamber.
- Rengør kværne: Use the provided cleaning brush to remove coffee grounds from both the upper and lower burrs.
- Clean Grinds Container: Empty and wash the grinds container and its lid with warm, soapy water. Rinse and dry thoroughly.
- Aftør udvendigt: Tør kværnen udvendigt af med adamp klæde. Brug ikke slibende rengøringsmidler.
- Saml igen: Once all parts are dry, reassemble the grinder by reversing the removal steps.

Figure 6: Detachable upper burr for easy cleaning.

Figure 7: Anti-static design for a cleaner grinding experience.
6.2 Cleaning Clogged Coffee Grounds
If you experience clogging, particularly with oily or dark roast beans, follow these steps:
Video 2: Instructions on how to clean clogged coffee grounds from the Gevi Coffee Grinder.
- Tag stikket ud af kværnen: Afbryd strømmen.
- Remove Bean Hopper and Upper Burr: Follow steps from Daily Cleaning.
- Clear Lower Burr: Use the cleaning brush to carefully dislodge any compacted coffee grounds around the lower burr.
- Tap the Grinder: Gently tap the back side of the grinder to help dislodge any remaining grounds from the chute into the grinds container.
- Saml og test igen: Reassemble the grinder and run a small amount of beans through it to ensure proper function.
7. Fejlfinding
If you encounter issues with your Gevi Electric Burr Coffee Grinder, refer to the following common problems and solutions:
- Kværnen tænder ikke:
- Sørg for, at netledningen er sat ordentligt i en fungerende stikkontakt.
- Check that the bean hopper is correctly installed and locked into place. The grinder has a safety mechanism that prevents operation if the hopper is not secured.
- Verify that the lid on the bean hopper is properly closed.
- No coffee grinding or inconsistent grind:
- Check if the bean hopper is empty.
- Inspect the burrs for any blockages or foreign objects. Clean the burrs as described in the Maintenance section.
- Ensure the grind setting is appropriate for the type of beans and desired fineness. Very fine settings with oily beans can sometimes cause clogging.
- Kværnen stopper under drift:
- The grinder may have an overheating protection feature. Allow it to cool down for a period before attempting to use it again.
- Check for clogs in the grinding chamber or chute.
- Excessive static or mess:
- While the grinder has an anti-static design, some static can still occur depending on environmental conditions and bean type. Ensure the grinds container is fully inserted.
- Lightly misting beans with water before grinding can help reduce static.
8. Specifikationer
| Feature | Specifikation |
|---|---|
| Mærke | gevi |
| Model | B0F31Z2HT7 |
| Farve | Sort |
| Materiale | Plast, rustfrit stål |
| Varens vægt | 5.92 pund |
| Dimensioner (L x B x H) | 7.8 cm L x 4.72 cm B x 11.85 cm H |
| Bønnebeholderkapacitet | 8.5 ounces (ca. 240 g) |
| Grinds Container Capacity | Ca. 130 g |
| Slibeindstillinger | 35 (Espresso, Drip, French Press) |
| Kop udvælgelse | 1-14 kopper |
| Tidsvalg | 1-60 sekunder |
| Wattage | 200 watt |
| Voltage | 120 volt |
| UPC | 767791886878 |
9. Garanti og support
Gevi is committed to delivering high-quality products. For warranty information, technical support, or any inquiries regarding your Gevi Electric Burr Coffee Grinder, please refer to the warranty card included with your product or contact Gevi customer service directly. Keep your purchase receipt as proof of purchase.


