
Indledning
This manual provides detailed instructions for the installation, operation, and maintenance of your Relaxdays Built-in Waste Bin. Designed for efficient waste separation, this system integrates seamlessly into your kitchen cabinet, offering a practical and space-saving solution. Please read these instructions carefully before assembly and use to ensure proper function and longevity of the product.
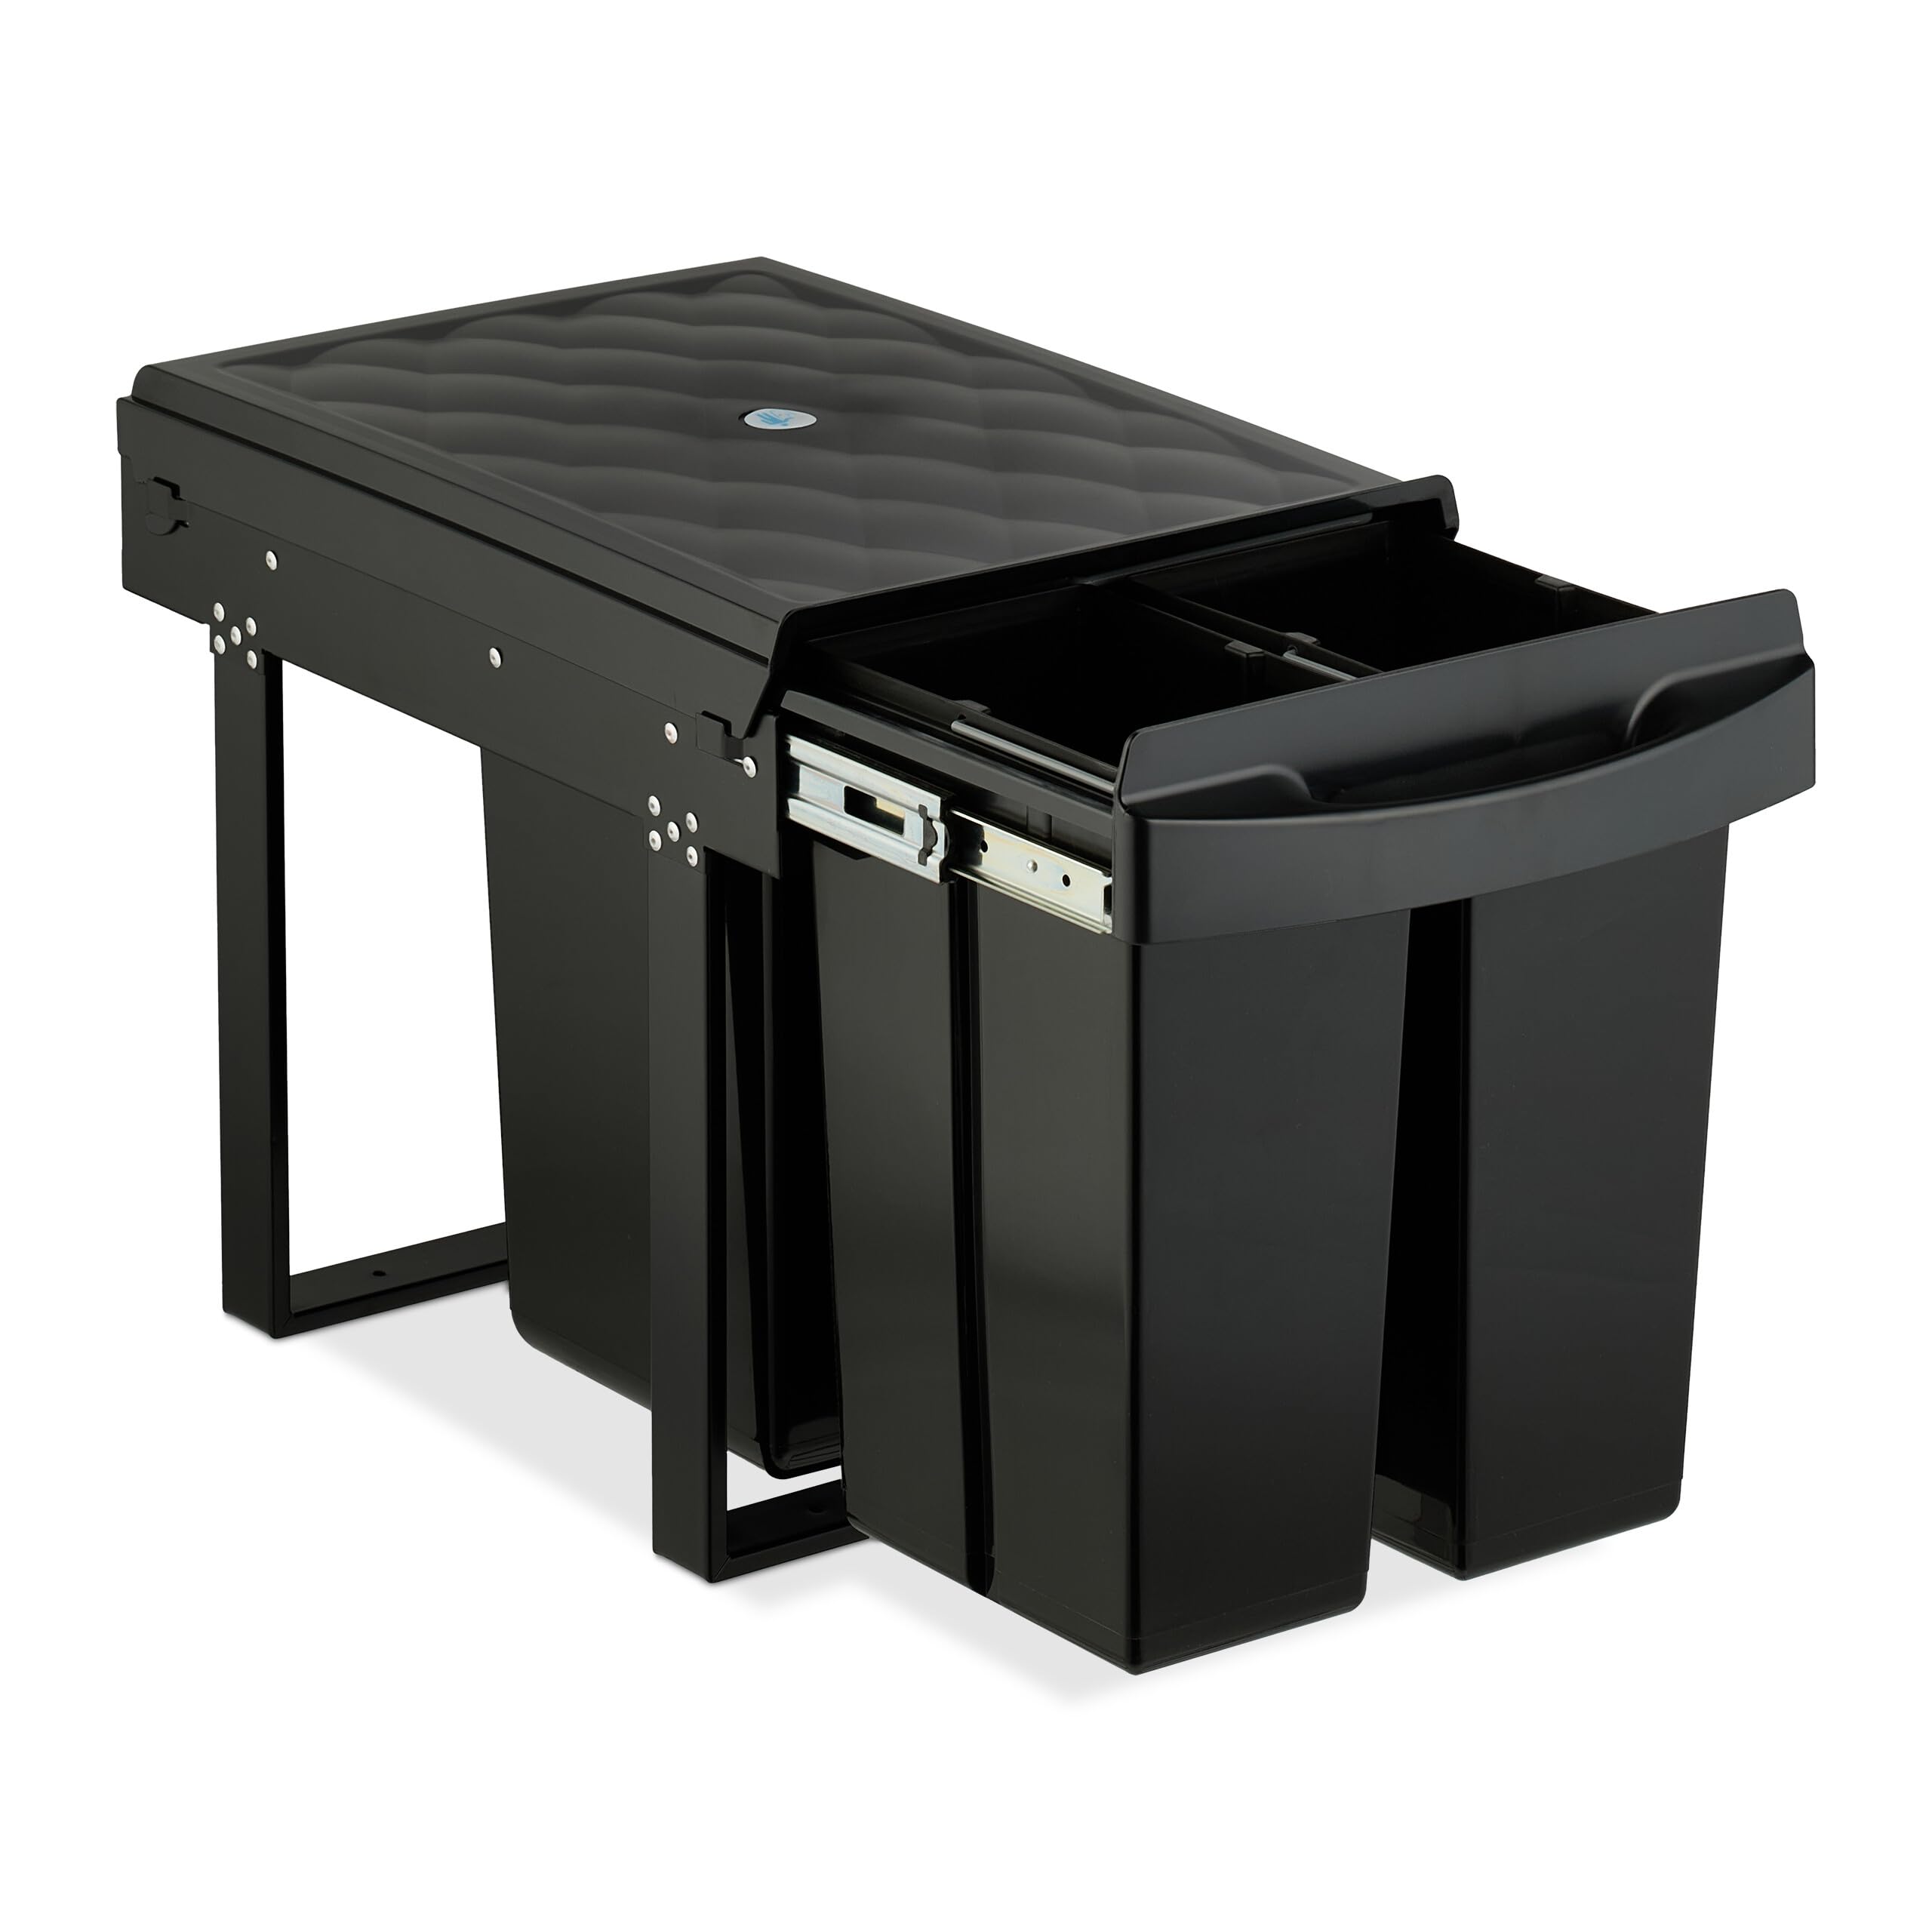
Billede: Overview of the Relaxdays Built-in Waste Bin, showing its three compartments and pull-out design.
1. Opsætning og installation
The Relaxdays Built-in Waste Bin is designed for installation inside a kitchen base cabinet. Ensure your cabinet has an interior width of at least 40 cm to accommodate the unit.
1.1. Pakkens indhold
- Waste bin unit with telescopic rail
- Inner bins (1x 20L, 2x 10L)
- Monteringsudstyr (skruer, skiver)
- Instruktionsmanual (dette dokument)
1.2. Nødvendigt værktøj
- Bore
- Skruetrækker (Phillips-skruetrækker anbefales)
- Målebånd
- Blyant
1.3. Installationstrin
- Forbered kabinettet: Clear the chosen base cabinet. Ensure the surface where the bin will be mounted is clean and level.
- Placer enheden: Place the waste bin unit inside the cabinet. Position it to allow for full extension of the telescopic rail without obstruction from the cabinet door or hinges. The unit should be placed against the back wall of the cabinet for optimal stability.
- Markér borepunkter: Using a pencil, mark the positions for the mounting screws through the pre-drilled holes in the base frame of the unit.
- Bor pilothuller: Carefully drill pilot holes at the marked positions. Ensure the drill bit size is appropriate for the provided screws to prevent splitting the cabinet material.
- Sikr enheden: Place the unit back into position, align the holes, and secure it firmly to the cabinet base using the provided screws and washers.

Image: Mounting hardware for securing the waste bin unit to the cabinet floor.
- Insert Inner Bins: Once the main unit is securely installed, place the inner bins into their designated compartments. The larger 20L bin typically goes into the main section, and the two 10L bins into the smaller sections.

Image: The waste bin unit installed neatly under a kitchen sink, demonstrating its space-saving design.
- Test funktionalitet: Gently pull the unit out and push it back in to ensure the telescopic rail operates smoothly.
2. Betjeningsvejledning
Your Relaxdays Built-in Waste Bin is designed for ease of use and efficient waste separation.
2.1. Pull-Out Mechanism
- To access the bins, gently pull the front handle of the unit. The telescopic rail allows for full extension, providing easy access to all compartments.
- To close, push the unit back into the cabinet until it is fully retracted.

Image: A user demonstrating the smooth pull-out action of the waste bin from a kitchen cabinet.
2.2. Waste Separation
- The unit features three inner bins: one 20L bin and two 10L bins. These are ideal for separating different types of waste such as organic waste, recyclables (paper, plastic), and general refuse.
- Utilize the different bin sizes and positions to suit your household's waste separation needs.

Billede: A view of the three distinct compartments, illustrating the capacity for waste separation.
2.3. Removing and Inserting Inner Bins
- To empty or clean an inner bin, simply lift it out of its compartment. The bins have integrated handles for easy removal.
- After emptying or cleaning, place the inner bin back into its compartment, ensuring it sits securely.
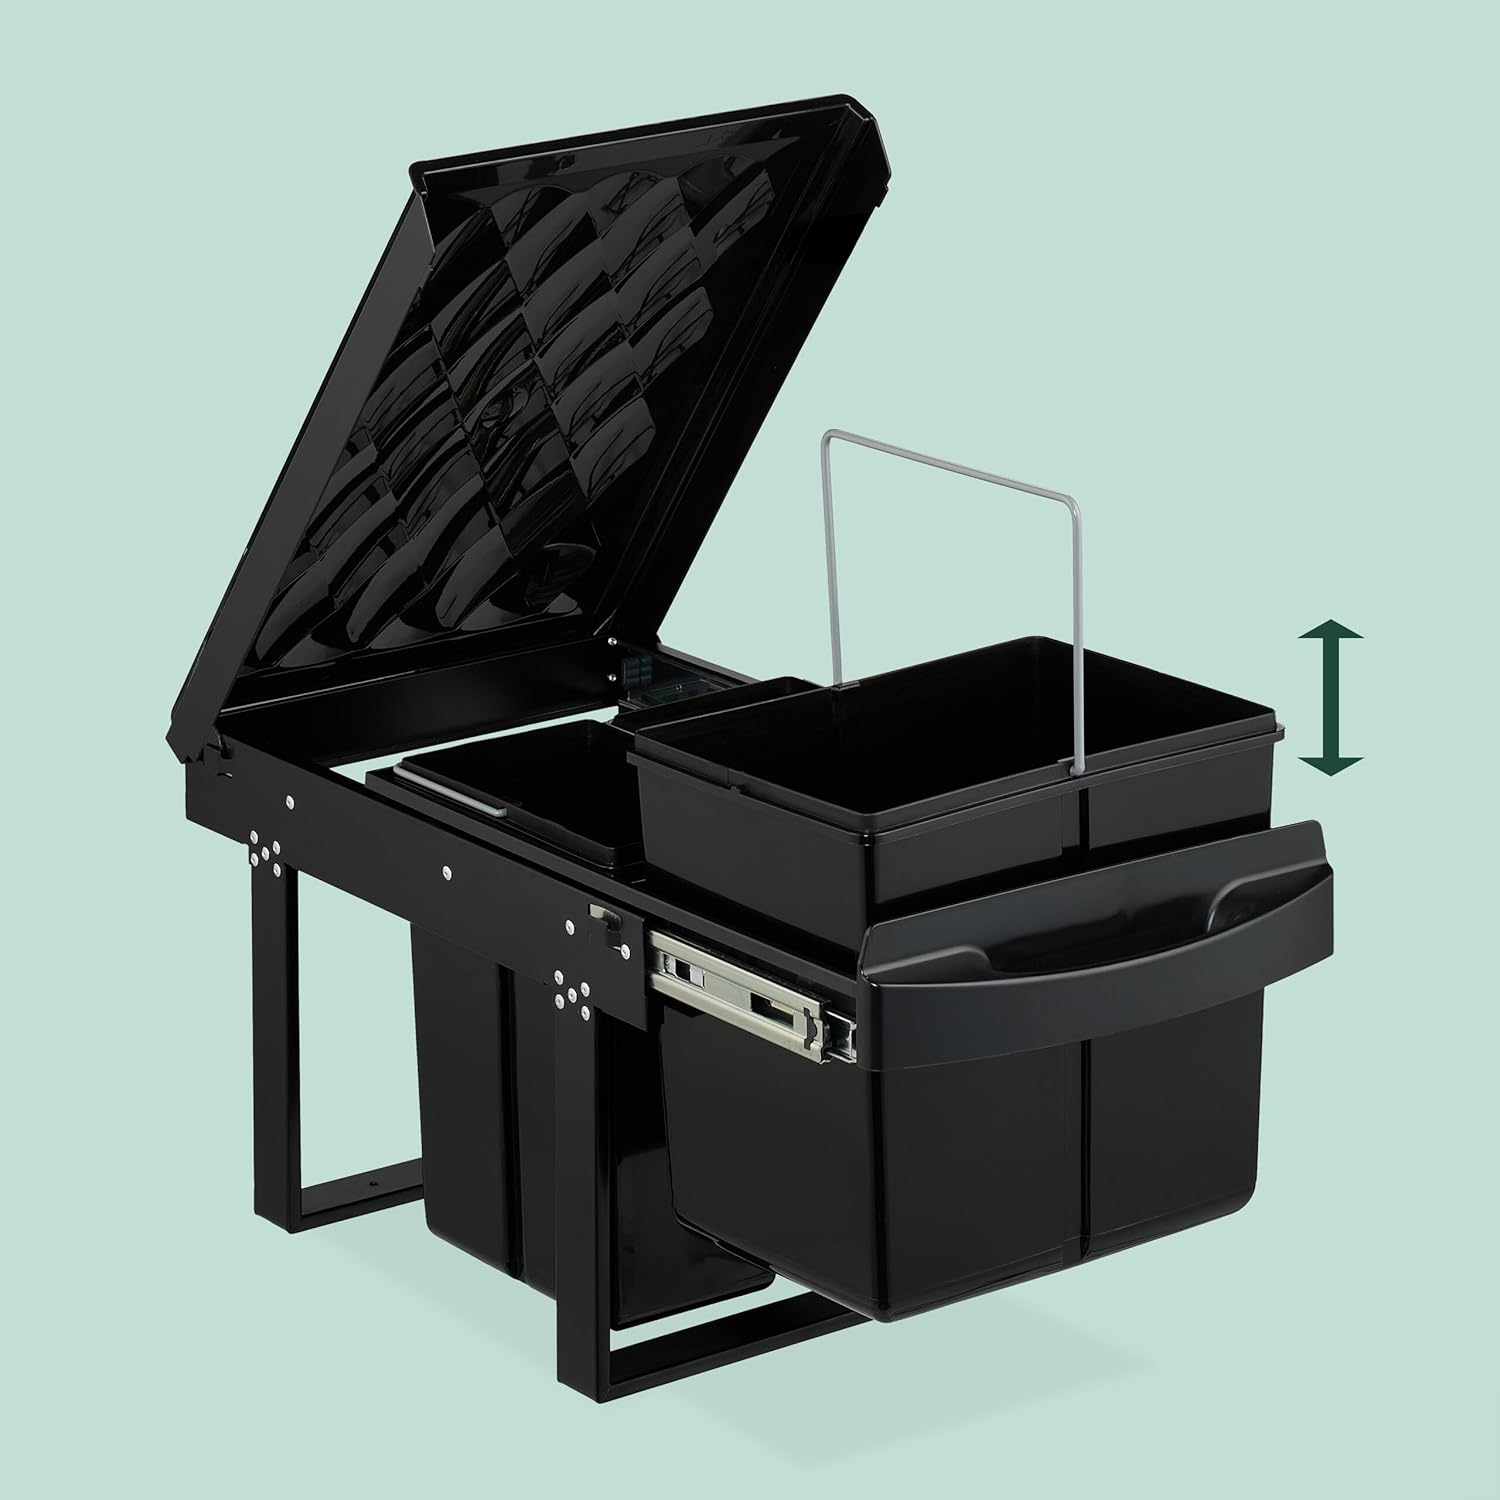
Image: One of the inner bins being lifted out, highlighting the ease of removal for emptying or cleaning.
3. Vedligeholdelse
Regular cleaning and maintenance will ensure the longevity and hygienic operation of your waste bin.
3.1. Cleaning the Inner Bins
- Empty the inner bins regularly.
- Wash the inner bins with warm soapy water. A mild household cleaner can be used for stubborn dirt.
- Rinse thoroughly and allow to air dry completely before placing them back into the unit.
- Avoid abrasive cleaners or scouring pads, as these can scratch the plastic surface.
3.2. Cleaning the Outer Unit and Lid
- Wipe the exterior of the unit and the lid with a damp klud og mildt rengøringsmiddel.
- Tør med en blød klud.
- The lid helps contain odors and can also serve as a small shelf for bin liners or cleaning accessories.
3.3. Telescopic Rail Care
- Periodically check the telescopic rail for any debris or obstructions.
- If the rail becomes stiff, wipe it clean and apply a small amount of silicone spray or a similar lubricant designed for metal slides. Do not use oil-based lubricants that can attract dust.
4. Fejlfinding
Her er løsninger på almindelige problemer, du kan støde på:
4.1. Bin Does Not Slide Smoothly
- Tjek for forhindringer: Ensure there are no items blocking the telescopic rail or the path of the bin inside the cabinet.
- Clean the Rail: Dust or debris can accumulate on the rail. Clean it as described in the Maintenance section (3.3).
- Lubricate the Rail: If cleaning doesn't help, apply a suitable lubricant to the telescopic slides.
- Bekræft installationen: Ensure the unit is securely mounted and level. Loose screws or an uneven installation can affect smooth operation.
4.2. Odors from the Bin
- Empty Regularly: Empty waste, especially organic waste, frequently.
- Rengør grundigt: Wash inner bins and the lid with warm soapy water and disinfect if necessary.
- Use Bin Liners: Always use appropriate bin liners to prevent direct contact of waste with the bins.
- Baking Soda: Place a small open container of baking soda at the bottom of the bin (under the liner) to absorb odors.
5. Produktspecifikationer
| Modelnummer | 10050787_1722 |
| Overordnede mål (H x B x D) | Ca.. 41.3 x 34 x 51.8 cm |
| Samlet kapacitet | 40 liter |
| Compartment Capacities | 1 x 20 Liters, 2 x 10 Liters |
| Vægt | Ca. 6.35 kg |
| Materiale | Plastic (50%), Steel (10%), Other Plastic (40%) |
| Farve | Sort |
| Åbningsmekanisme | Pull-out with telescopic rail |
| Minimum Cabinet Width (Interior) | 40 cm |

Billede: Side view dimensions of the waste bin, illustrating its height and depth, including the full extension.

Billede: Top og front view dimensions, indicating the width and overall footprint of the unit.
6. Garantioplysninger
This product comes with a standard manufacturer's warranty against defects in materials and workmanship. For specific warranty terms and conditions, please refer to the documentation provided at the time of purchase or contact Relaxdays customer support. Keep your proof of purchase for warranty claims.
7. Kundesupport
If you have any questions, require assistance with installation, or encounter issues not covered in this manual, please contact Relaxdays customer support. Contact information can typically be found on the product packaging or the official Relaxdays webwebsted.
For safety information, please refer to the provided PDF document: Sikkerhedsoplysninger (PDF)