
1. Opsætning
This section guides you through the initial setup of your Hisense 55U72Q PRO TV, from unboxing to first power-on.
1.1 Udpakning og første inspektion
Fjern forsigtigt alle komponenter fra emballagen. Kontroller, at alle dele er til stede:
- Hisense 55U72Q PRO Television
- Strømkabel
- Fjernbetjening
- Brugermanual
1.2 Montering af stativ eller vægmontering
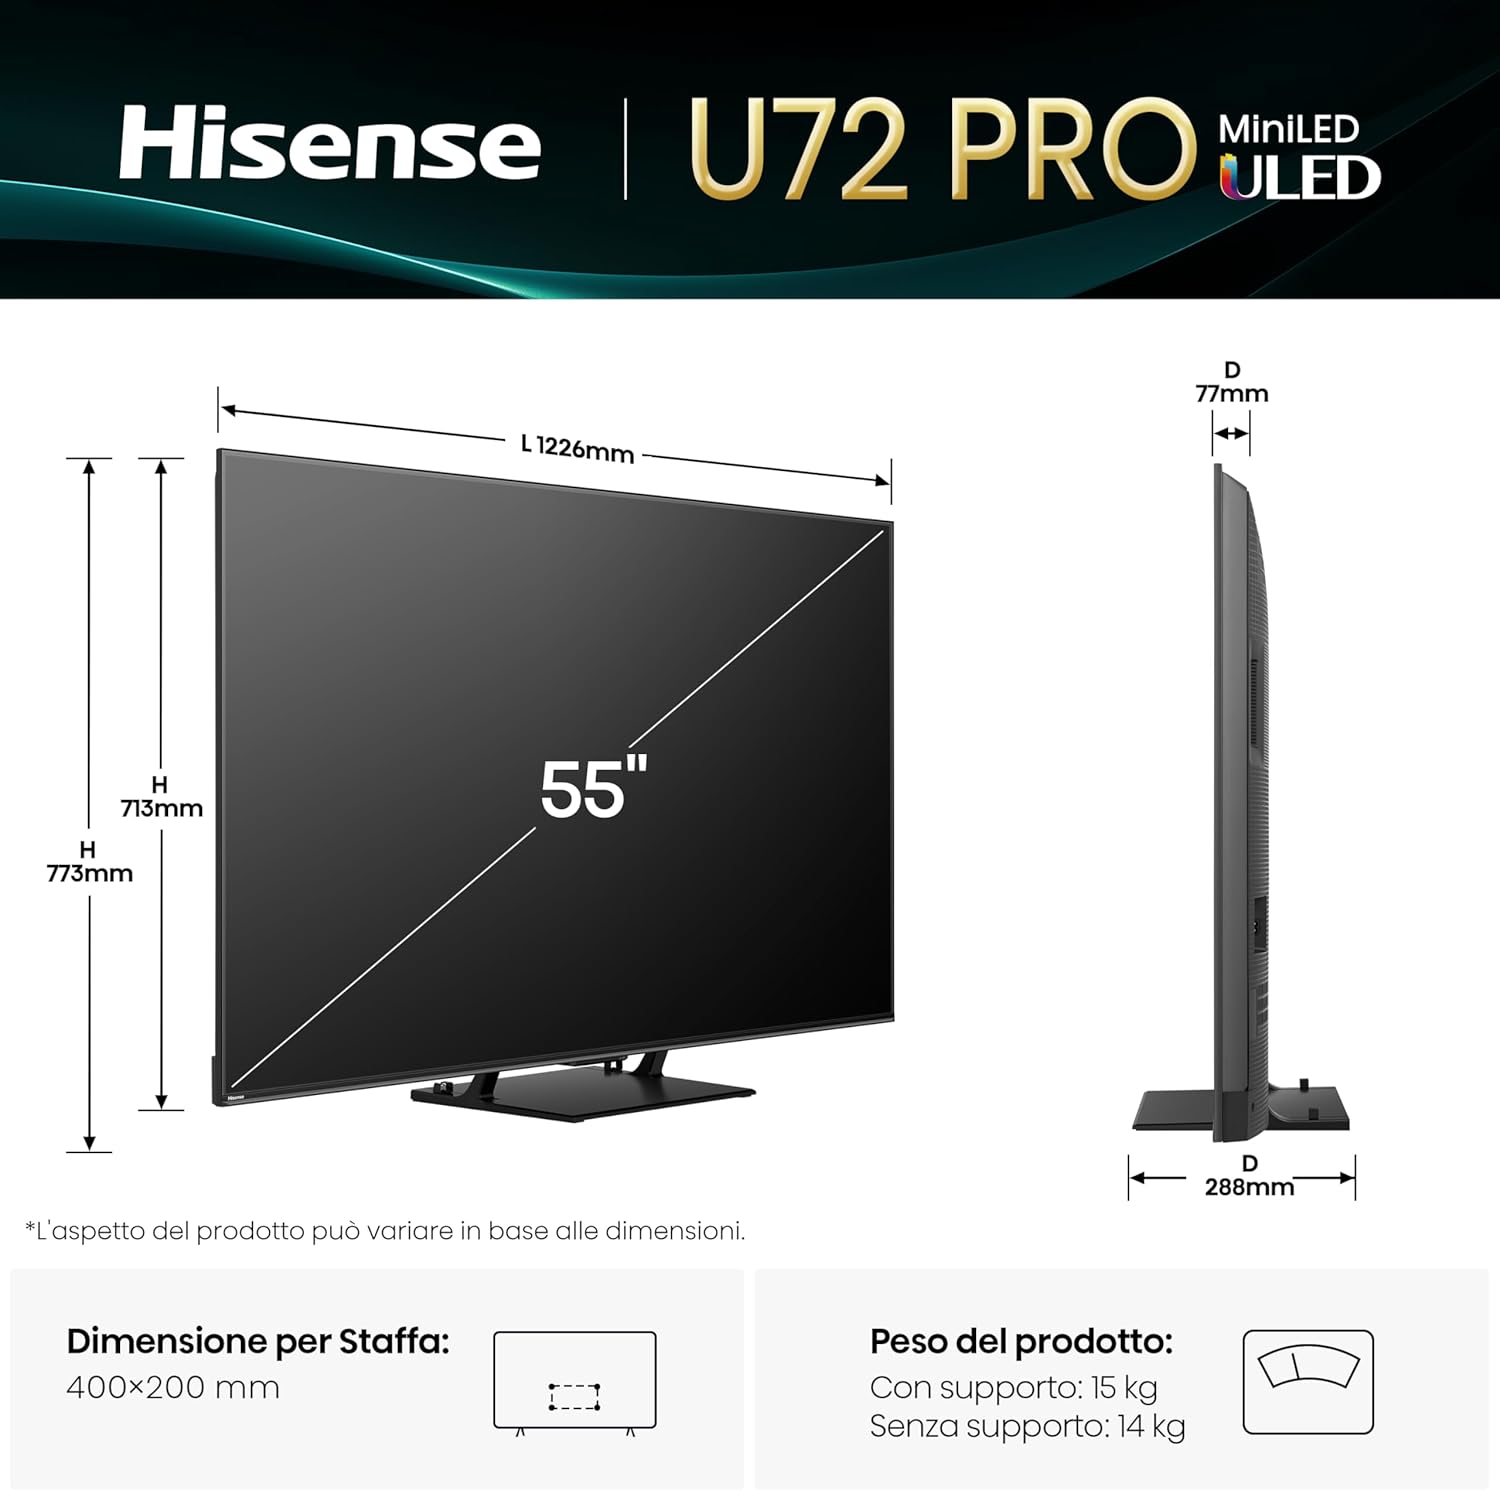
For stand installation, attach the included feet to the television using the provided screws. The process is designed for quick and easy assembly. If wall mounting, ensure you use a VESA-compatible bracket (VESA standard: 400 x 200 mm) and follow the bracket manufacturer's instructions.
1.3 Tilslutning af eksterne enheder
Connect your external devices to the appropriate ports on the back of the TV. The Hisense 55U72Q PRO features:
- HDMI-porte: 4 total, including HDMI 2.1 (eARC) and two additional HDMI 2.1 ports for high-bandwidth devices.
- USB-porte: 2 total (1x USB 2.0, 1x USB 3.0) for media playback or connecting accessories.
- Netværksforbindelse: Ethernet port for wired internet, built-in Wi-Fi for wireless connection.
- Lydudgange: 3.5mm audio jack and optical audio output for external sound systems.
- Antenne indgange: 2 ANT inputs for terrestrial or cable signals.
- Bluetooth: Til trådløse lydenheder eller andet kompatibelt tilbehør.

1.4 Første opstart og konfiguration
After connecting the power cable, press the power button on the remote control or TV. The TV will guide you through the initial setup process, including language selection, network connection (Wi-Fi or Ethernet), and channel scanning. The VIDAA U9 operating system facilitates a quick setup, often utilizing QR codes for easy internet connection.
2. Betjening af dit TV
Learn how to navigate your Hisense 55U72Q PRO TV and utilize its smart features.
2.1 Fjernbetjeningsfunktioner
The Hisense Eco Smart remote control offers intuitive navigation and advanced features:
- Stemmestyring: Use the built-in Alexa or VIDAA VOICE for hands-free commands.
- Hurtig adgangsknapper: Dedicated buttons for popular streaming services like Netflix, YouTube, Prime Video, Disney+, NOW, DAZN, and Paramount+.
- Eco Smart Design: The remote features solar charging and a USB-C port for convenient power.

2.2 Smart TV-funktioner (VIDAA U9)
Your TV runs on the VIDAA U9 operating system, providing access to over 1000 applications. The system is highly responsive, ensuring smooth navigation and quick app launches.
- Applikationsadgang: Browse and download a wide range of apps from the VIDAA store.
- Skærmspejling: Easily share content from your smartphone or computer using AirPlay 2, Google Cast, Miracast, or Smart View.
- Stemmeassistenter: Integrated Alexa Built-in and VIDAA VOICE for smart home control and content search.
2.3 Billed- og lydindstillinger
Optimer din viewing experience with various picture and sound modes:
- Billedtilstande: Choose from pre-set modes like Dynamic, Cinema, or Sport, or customize settings to your preference.
- Advanced Display Technologies: Benefit from Mini-LED PRO with Full Array Local Dimming, Quantum Dot technology for vibrant colors, and Anti-Reflection screen for reduced glare.
- HDR-understøttelse: Enjoy enhanced contrast and color with Dolby Vision IQ, HDR10+ Adaptive, and HLG formats.
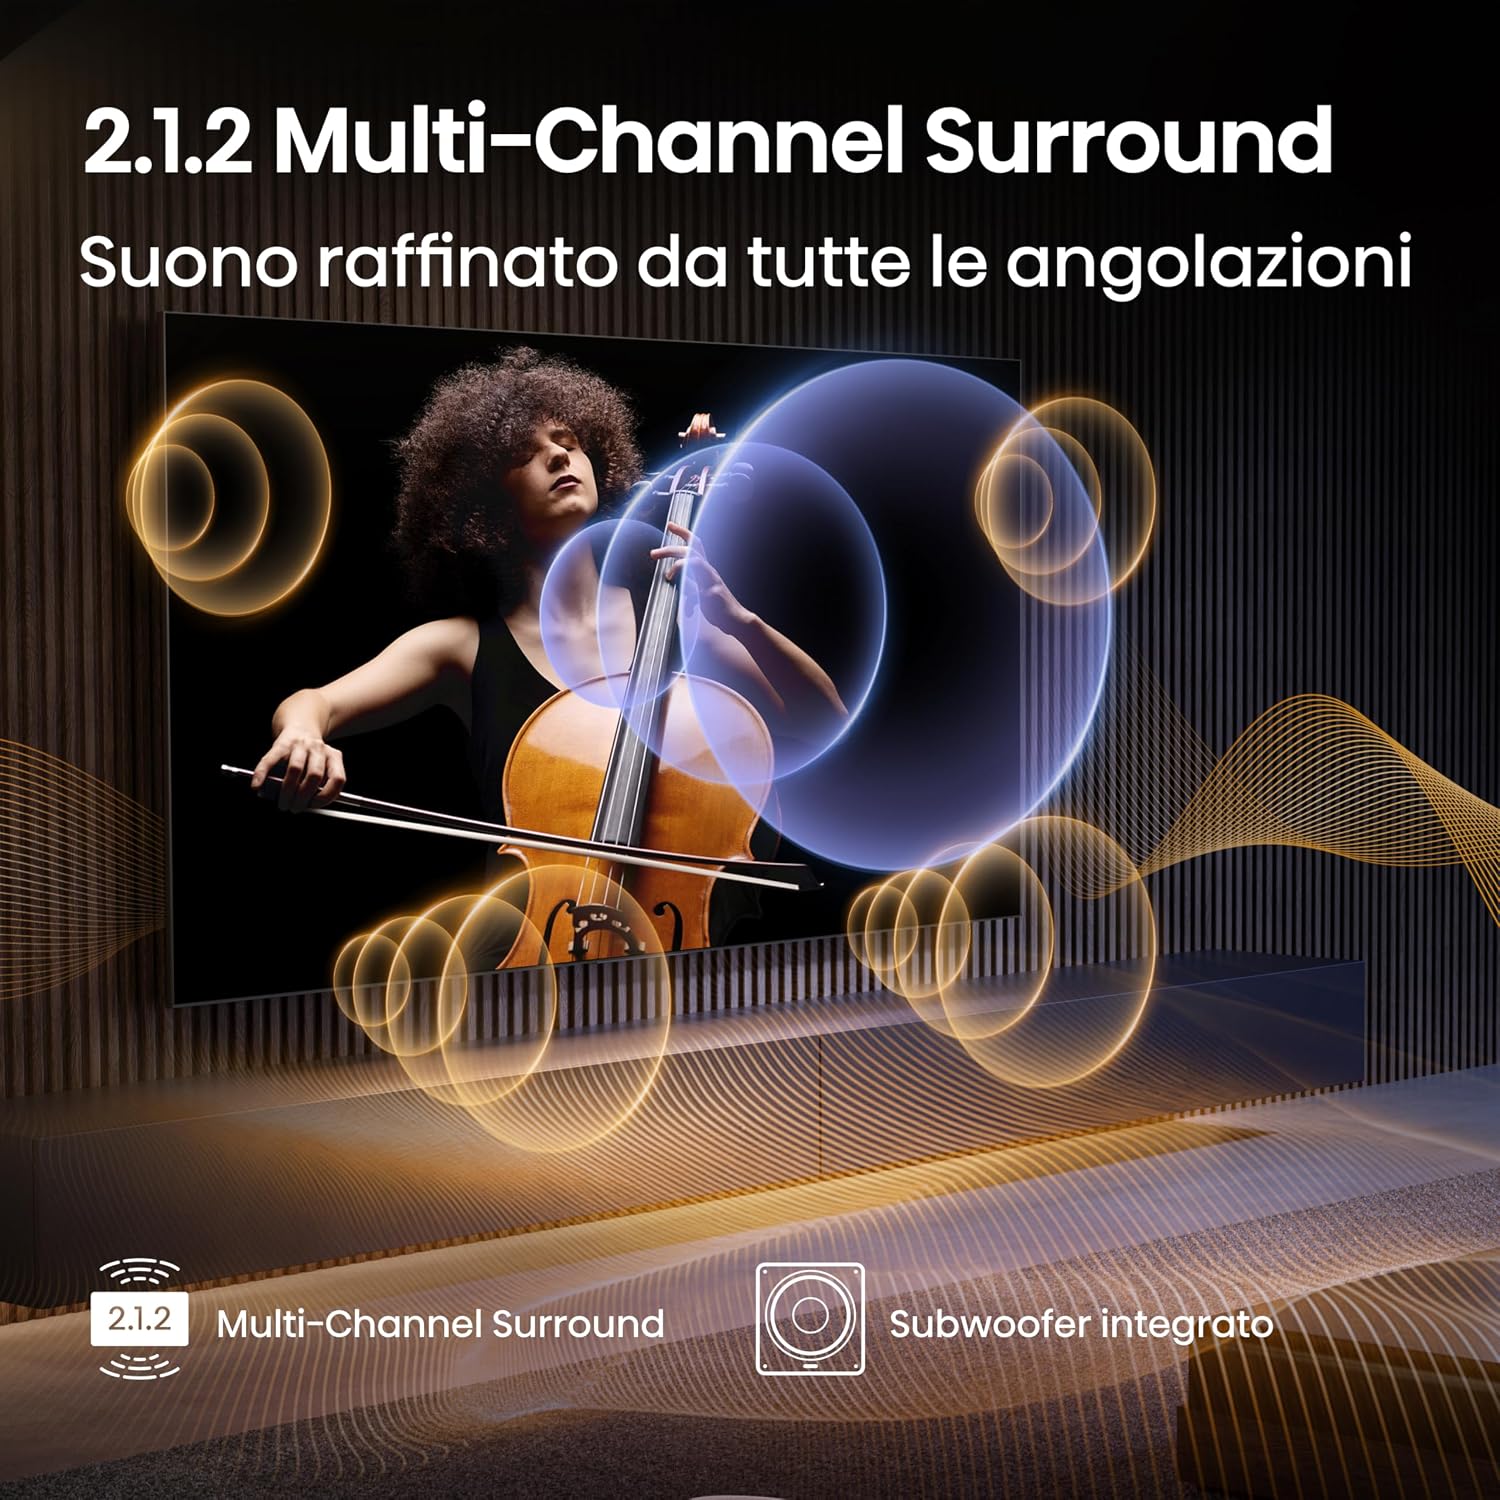
- Audio System: The integrated 2.1.2 multi-channel sound system with a subwoofer and Dolby Atmos delivers immersive audio.
- AI-forbedringer: The Hi-View AI Engine PRO and AI Chroma Light Sensor dynamically optimize image, sound, and energy based on content and environment.


2.4 Spilfunktioner
The Hisense 55U72Q PRO is designed for an optimal gaming experience:
- 165Hz spiltilstand Ultra: Provides native 165 Hz Variable Refresh Rate (VRR) for ultra-smooth gameplay.
- ALLM & AMD FreeSync Premium Pro: Ensures low input lag and tear-free gaming.

Short video demonstrating the smooth gameplay experience with the 165Hz Game Mode Ultra feature on the Hisense 55U72Q PRO TV.
3. Vedligeholdelse
Korrekt vedligeholdelse sikrer dit TV's levetid og optimale ydeevne.
3.1 Rengøring af tv'et
- Skærm: Tør forsigtigt skærmen af med en blød, tør og fnugfri klud. Ved genstridige mærker, tør letampRengør kluden med vand eller en specialiseret skærmrens (undgå skrappe kemikalier).
- Ramme og stativ: Brug en blød, tør klud til at rengøre TV-rammen og -foden.
- Fjernbetjening: Wipe with a soft, dry cloth. Ensure the solar panel is clean for efficient charging.
Tag altid stikket ud af stikkontakten før rengøring.
3.2 Softwareopdateringer
Your Hisense TV may receive periodic software updates to improve performance, add new features, or fix bugs. Ensure your TV is connected to the internet to receive these updates. The TV will typically prompt you when an update is available. Follow the on-screen instructions to complete the update process.
4. Fejlfinding
This section addresses common issues you might encounter with your Hisense 55U72Q PRO TV.
4.1 Ingen strøm
- Kontroller, om strømkablet er korrekt tilsluttet til både tv'et og stikkontakten.
- Sørg for, at stikkontakten fungerer ved at tilslutte en anden enhed.
- Prøv at trykke på tænd/sluk-knappen på selve tv'et, ikke kun på fjernbetjeningen.
4.2 Intet billede eller dårlig billedkvalitet
- Bekræft, at den korrekte inputkilde er valgt (f.eks. HDMI 1, antenne).
- Kontrollér alle kabelforbindelser (HDMI, antenne) for løse eller beskadigede.
- Juster billedindstillingerne (lysstyrke, kontrast, farve) i TV-menuen.
- Hvis du bruger en ekstern enhed, skal du sørge for, at den er tændt og fungerer korrekt.
4.3 Ingen lyd eller dårlig lydkvalitet
- Sørg for, at tv'et ikke er slået fra, og at der er skruet op for lydstyrken.
- Check audio output settings in the TV menu (e.g., internal speakers, optical, HDMI ARC).
- Hvis du bruger eksterne højttalere, skal du sørge for, at de er korrekt tilsluttet og tændt.
- Verify that the audio cables are securely connected.
4.4 Fjernbetjeningen reagerer ikke
- Sørg for, at der ikke er nogen forhindringer mellem fjernbetjeningen og tv'ets IR-sensor.
- Check if the remote's solar panel is receiving light or if it needs charging via USB-C.
- If the issue persists, try resetting the remote (refer to the full user manual for specific instructions).
4.5 Problemer med netværksforbindelse
- For Wi-Fi, ensure your router is on and functioning. Try restarting the router.
- Indtast din Wi-Fi-adgangskode igen i tv'ets netværksindstillinger.
- For Ethernet skal du sørge for, at kablet er korrekt tilsluttet til både tv'et og routeren.
- If problems persist, consult your internet service provider.
For more detailed troubleshooting steps, please refer to the comprehensive user manual included with your product.
5. Specifikationer
Key technical specifications for the Hisense 55U72Q PRO 55-inch Mini-LED 4K Smart TV.
| Feature | Specifikation |
|---|---|
| Modelnavn | TV Mini-LED 165Hz 55" 4K - 55U72Q PRO |
| Modelnummer | 55U72Q PRO |
| Skærmstørrelse | 55 tommer |
| Skærmteknologi | Mini-LED, kvantepunkt |
| Opløsning | 4K (3840x2160) |
| Opdateringshastighed | 165 Hz |
| Max Display Brightness | 1600 nit |
| Understøttelse af HDR-format | Dolby Vision IQ, HDR10+ Adaptive, HLG |
| Lydsystem | 2.1.2 with Subwoofer, 50W Max Output, Dolby Atmos |
| Operativsystem | VIDAA U |
| Forbindelse | Bluetooth, Ethernet, HDMI, USB, Wi-Fi |
| HDMI porte | 4 (including HDMI 2.1 with eARC) |
| USB-porte | 2 (1x USB 2.0, 1x USB 3.0) |
| VESA-monteringsstandard | 400 x 200 mm |
| Produktmål (med stativ) | 28.8P x 122.6L x 77.3H cm |
| Strømforbrug | 180 Watts (operating) |
| Energieffektivitetsklasse (SDR) | E |
| Energieffektivitetsklasse (HDR) | G |

6. Garanti og support
Oplysninger om dit produkts garanti og hvordan du får support.
6.1 Producentens garanti
The Hisense 55U72Q PRO TV comes with a 2 års producentgarantiDenne garanti dækker materiale- og fabrikationsfejl ved normal brug. Gem venligst din købsbevis i tilfælde af garantikrav.
6.2 Kundesupport
For technical assistance, troubleshooting beyond this manual, or warranty inquiries, please contact Hisense customer support. Refer to the contact information provided in your product packaging or visit the official Hisense webwebsted for din region.