1. Produktet er slutview
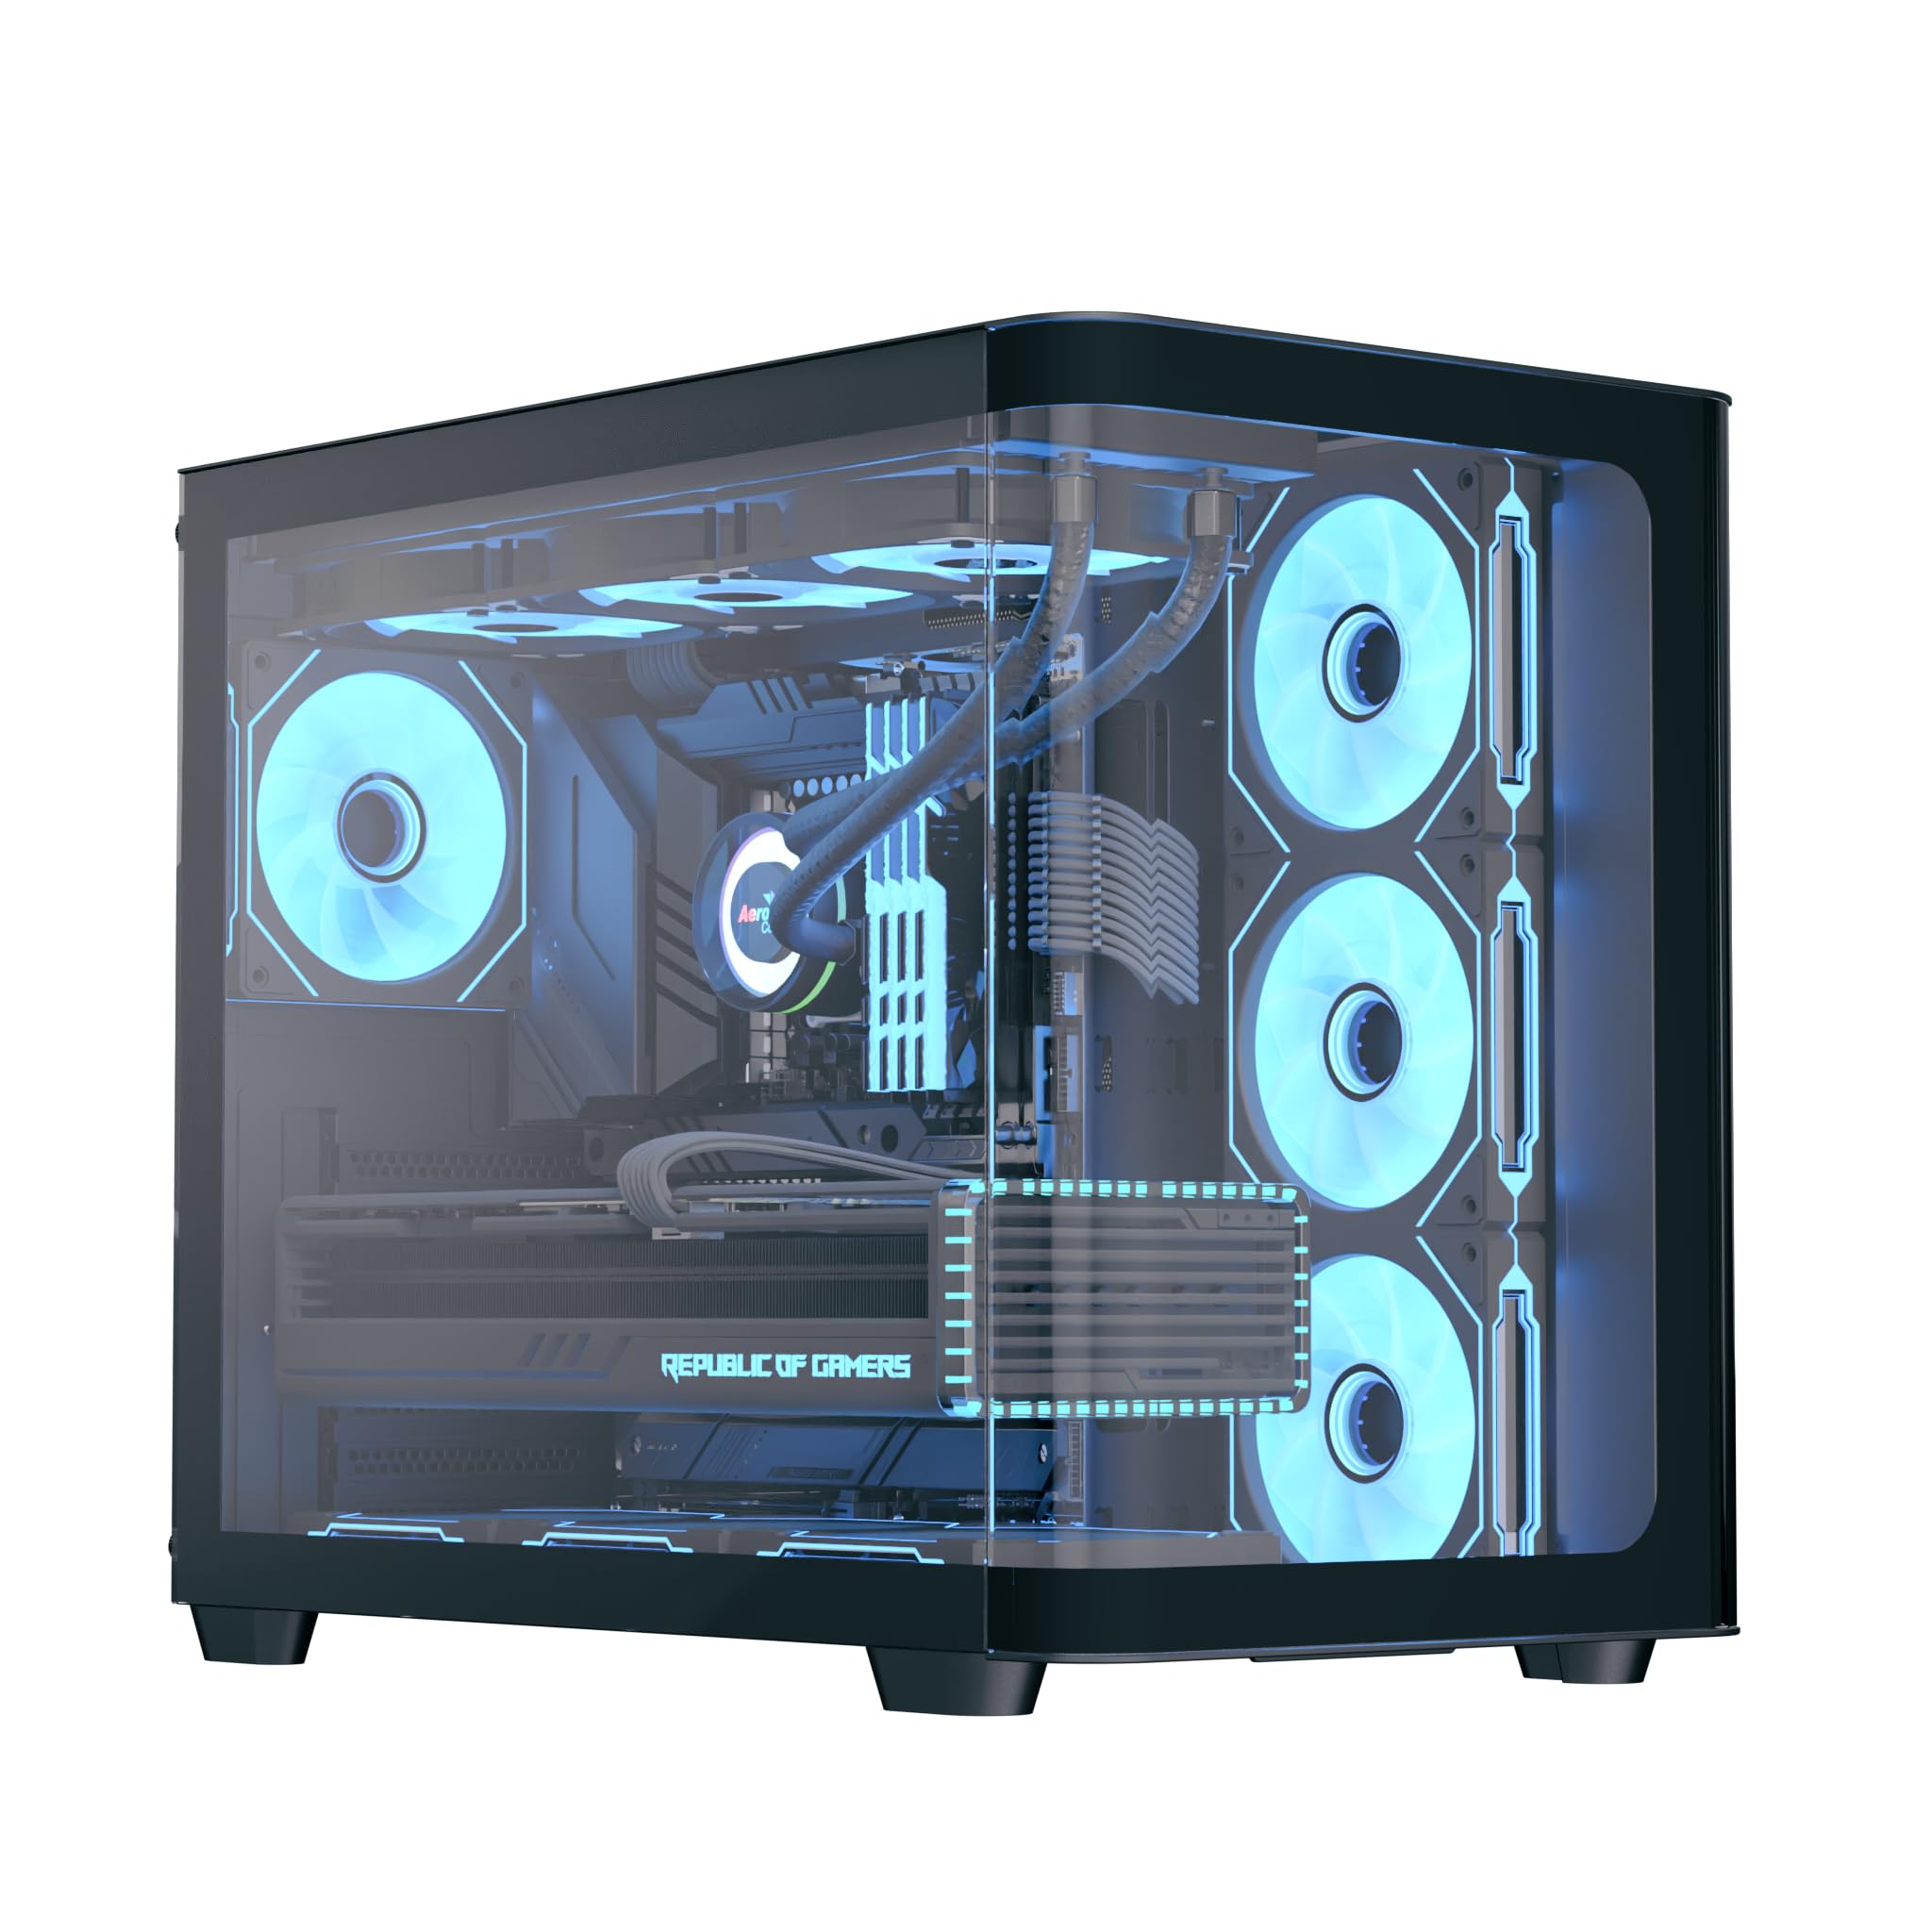
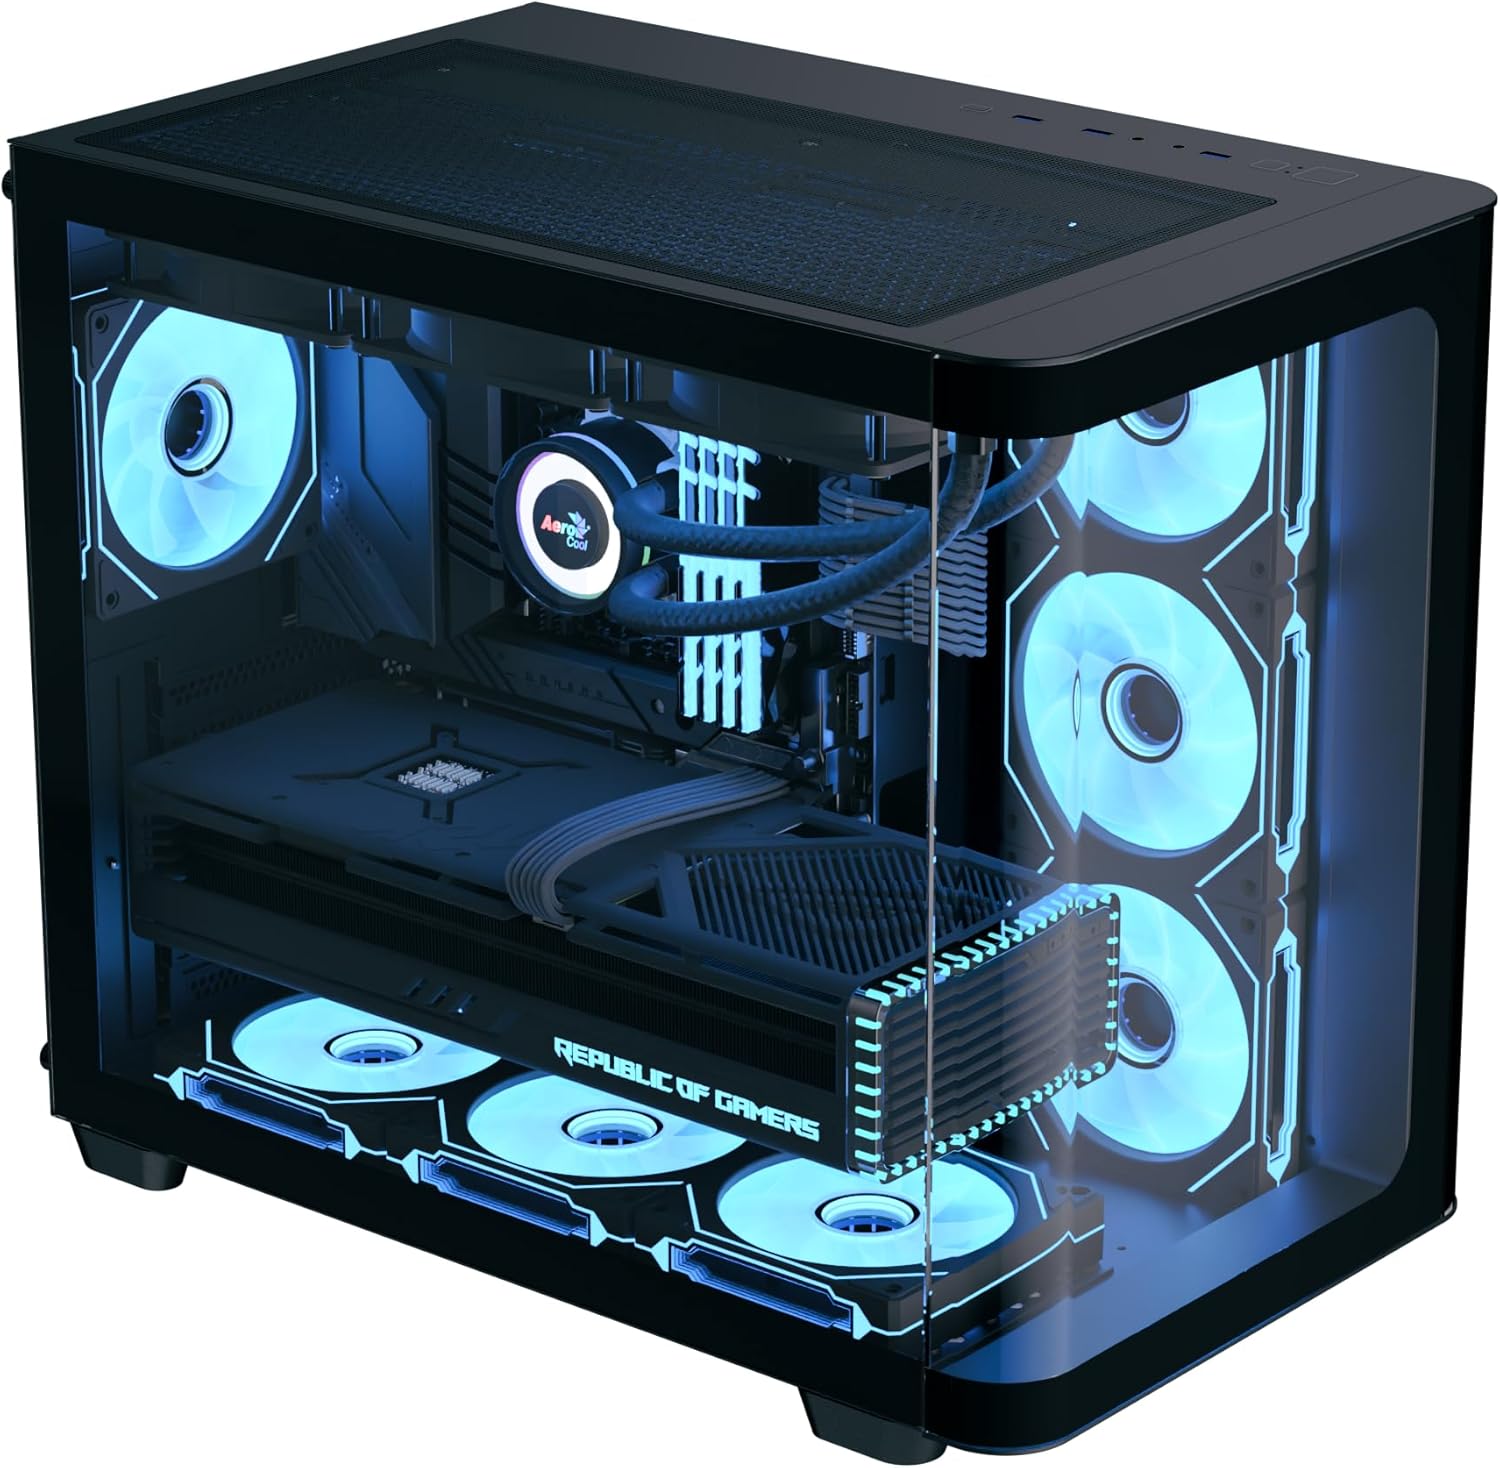
The AeroCool P500C is a mid-tower PC case designed with a dual-chamber layout. It features full tempered glass panels on the front and side, providing a clear view of internal components. The case includes four pre-installed ARGB fans, with three reverse-blade fans on the side and one standard fan at the rear, all featuring a "mirage" infinity mirror lighting effect. This case supports various cooling configurations, including air and liquid cooling systems up to 360mm radiators. It is compatible with ATX, micro-ATX, and mini-ITX motherboards, and accommodates high-end graphics cards up to 450mm in length and CPU coolers up to 162mm in height. Storage options include three SSD slots and two HDD drive bays. For ease of maintenance, the case is equipped with magnetic dust filters on the top and bottom.
2. Nøglefunktioner
- Mid-tower dual chamber design with full tempered glass front and side panels.
- Four pre-installed ARGB fans: three 12cm reverse-blade fans on the side and one 12cm fan at the rear.
- "Mirage" infinity mirror lighting effect on all included fans.
- Extensive cooling support for radiators up to 360mm (top and bottom) and up to 10 total fan slots.
- Compatibility with high-end graphics cards up to 450mm in length.
- Supports ATX, micro-ATX, and mini-ITX motherboards.
- Includes a 4-port PWM ARGB fan hub for centralized control.
- Equipped with top and bottom magnetic dust filters for easy maintenance.
3. Pakkens indhold
Kontroller venligst, at alle komponenter er til stede i pakken:
- AeroCool P500C Mid-Tower PC Case
- Four pre-installed 12cm ARGB fans (3 reverse-blade, 1 standard)
- 4-port PWM ARGB fan hub
- Accessory box with screws, standoffs, and cable ties
- Brugervejledning (dette dokument)
4. Opsætning og installation
This section provides general guidelines for installing components into your AeroCool P500C PC case. Always refer to the specific manuals for your motherboard, power supply, and other components for detailed installation instructions.
4.1 Forberedelse af sagen
- Fjern sidepaneler: Carefully remove the tempered glass side panel(s) by unscrewing the thumb screws and gently sliding them off. Place them on a soft, flat surface to prevent scratches.
- Tilbehørsboks: Find tilbehørsæsken inde i kabinettet, som indeholder alle nødvendige skruer og monteringsdele.
4.2 Installation af bundkort
- Installer standoffs: Ensure the correct standoffs are installed for your motherboard form factor (ATX, micro-ATX, mini-ITX). The P500C typically has pre-installed standoffs for ATX. Adjust as needed.
- Installer I/O-skjold: If your motherboard requires a separate I/O shield, install it into the rear opening of the case before mounting the motherboard.
- Monter bundkort: Carefully align your motherboard with the standoffs and I/O shield, then gently lower it into place. Secure it with the provided screws.
4.3 Installation af lagerenhed
The P500C supports three SSDs and two HDDs.
- 2.5" SSD'er: Mount 2.5" SSDs onto the dedicated SSD trays, typically located behind the motherboard tray or in the PSU shroud area. Secure with screws.
- 3.5" harddiske: Install 3.5" HDDs into the drive bays, usually found in the lower chamber. Slide the drives into the trays and secure them.
4.4 Installation af grafikkort (GPU)
Kabinettet understøtter grafikkort op til 450 mm i længden.
- Fjern PCIe-slotdæksler: Fjern de nødvendige PCIe-slotdæksler fra bagsiden af kabinettet, der svarer til din GPU's størrelse.
- Indsæt GPU: Align your graphics card with the PCIe slot on the motherboard and press firmly until it clicks into place. Secure it with screws.

4.5 Installation af kølesystem
The P500C supports up to 360mm radiators at the top and bottom, and a total of 10 fans.
- Radiatorer: Mount radiators to the designated top or bottom brackets using the appropriate screws.
- Yderligere blæsere: Install any additional fans in available slots (e.g., front, top, bottom, rear) as needed for optimal airflow.
- Fancenter: Connect the pre-installed fans and any additional ARGB/PWM fans to the included 4-port PWM ARGB fan hub. Connect the hub to your motherboard's ARGB header and a PWM fan header for control.
4.6 Kabelstyring
Brug kabelføringsudskæringerne og fastgørelsespunkterne bag bundkortbakken til at håndtere kabler. Dette forbedrer luftgennemstrømningen og æstetikken.
4.7 Forbindelser til frontpanel I/O
Connect the front panel cables (USB, audio, power switch, reset switch, LED indicators) to the corresponding headers on your motherboard. Refer to your motherboard manual for header locations.

5. Betjeningsvejledning
- Tænd: After all components are installed and cables connected, close the side panels. Connect your power supply to a wall outlet and flip the PSU switch to the ON position. Press the power button on the front panel of the case to start your system.
- ARGB-lysstyring: The pre-installed ARGB fans are connected to a 4-port PWM ARGB fan hub. If this hub is connected to your motherboard's ARGB header, you can control the lighting effects using your motherboard's RGB software (e.g., ASUS Aura Sync, MSI Mystic Light Sync, Gigabyte RGB Fusion, ASRock Polychrome Sync).
- Blæserhastighedskontrol: The PWM functionality of the fan hub allows your motherboard to control fan speeds based on system temperatures, optimizing cooling performance and noise levels.
6. Vedligeholdelse
Regelmæssig vedligeholdelse er med til at sikre optimal ydeevne og levetid for dine pc-komponenter.
- Støvfiltre: The AeroCool P500C is equipped with magnetic dust filters on the top and bottom. Regularly remove and clean these filters to prevent dust buildup inside the case, which can impede airflow and component cooling.
- Indvendig rengøring: Periodically open the case and use compressed air to remove dust from fans, heatsinks, and other components. Ensure the system is powered off and unplugged before cleaning.
- Kabelstyring: Kontroller jævnligt kabelføringen for at sikre, at ingen kabler blokerer luftstrømmen eller ventilatorens drift.
7. Fejlfinding
Hvis du støder på problemer, kan du overveje følgende almindelige fejlfindingstrin:
- Systemet tænder ikke:
- Ensure the power supply is properly connected to the wall outlet and the PSU switch is ON.
- Kontroller, at alle strømkabler (24-bens ATX, 8-bens CPU, PCIe-strøm) er korrekt tilsluttet til bundkortet og komponenterne.
- Kontroller, at kablet til strømafbryderen på frontpanelet er korrekt tilsluttet bundkortets header.
- Fans Not Spinning/ARGB Not Lighting Up:
- Confirm that the fans are properly connected to the fan hub.
- Ensure the fan hub is connected to a power source (e.g., SATA power) and the motherboard's ARGB/PWM headers.
- Check your motherboard's BIOS/UEFI settings or RGB software for fan control and lighting settings.
- Overophedningsproblemer:
- Verify that all case fans are spinning and oriented correctly for optimal airflow (intake/exhaust).
- Clean dust filters and internal components to ensure unrestricted airflow.
- Ensure CPU cooler and GPU fans are functioning correctly.
8. Specifikationer
| Feature | Specifikation |
|---|---|
| Mærke | AeroCool |
| Sagstype | Mid Tower |
| Modelnavn | P500C |
| Farve | Sort |
| Bundkort support | ATX, Micro ATX, Mini ITX |
| Forudinstallerede ventilatorer | 4 x 12cm ARGB (3 reverse-blade side, 1 rear) |
| Radiatorstøtte | Up to 360mm (Top, Bottom) |
| Max GPU-længde | 450 mm |
| Max CPU kølerhøjde | 162 mm |
| Drive Bays | 3 x 2.5" SSD, 2 x 3.5" HDD |
| I/O-porte | USB, Audio (specifics not detailed in source) |
| Varens vægt | 9.12 kilo |
| UPC | 810189570009 |
9. Garanti og support
The AeroCool P500C PC Case comes with a Begrænset garantiGem venligst din købsbevis i tilfælde af garantikrav.
For technical support, warranty inquiries, or further assistance, please visit the official AeroCool website or contact their customer service department. Contact information can typically be found on the AeroCool webwebstedet eller på produktemballagen.