1. Introduktion
This manual provides detailed instructions for the installation, operation, and maintenance of your ANNKE AU-DT81DX200-V1 4K 8-Channel Digital Video Recorder (DVR). This DVR is designed for security surveillance systems, offering 4K (8MP) high-definition live viewing and recording capabilities. It features advanced H.265+ video compression, AI human/vehicle detection, and supports various camera types for flexible integration.

Image 1.1: The ANNKE 4K 8CH DVR connected to a display, illustrating its 4K Ultra HD video capability.
2. Pakkens indhold
Verify that all items listed below are included in your package. If any items are missing or damaged, contact ANNKE customer support.
- 1x ANNKE 4K 8CH DVR with 2TB Hard Drive
- 1x 1.8 m HDMI-kabel
- 1x 1 m Ethernet-kabel
- 1x strømadapter
- 1 x USB mus
- 1x Brugermanual (dette dokument)
- 1x vægklistermærke

Image 2.1: Visual representation of all components included in the ANNKE 4K 8CH DVR package.
3. System overview
The ANNKE AU-DT81DX200-V1 DVR is a hybrid 5-in-1 system, supporting various camera technologies. It can operate in two primary modes:
- DVR-tilstand: Supports up to 8 BNC (TVI/AHD/CVI/CVBS) cameras and an additional 4 IP cameras.
- NVR-tilstand: Can be configured to support up to 12 IP cameras exclusively.
This flexibility allows for integration with existing analog systems while providing options for future IP camera expansion.
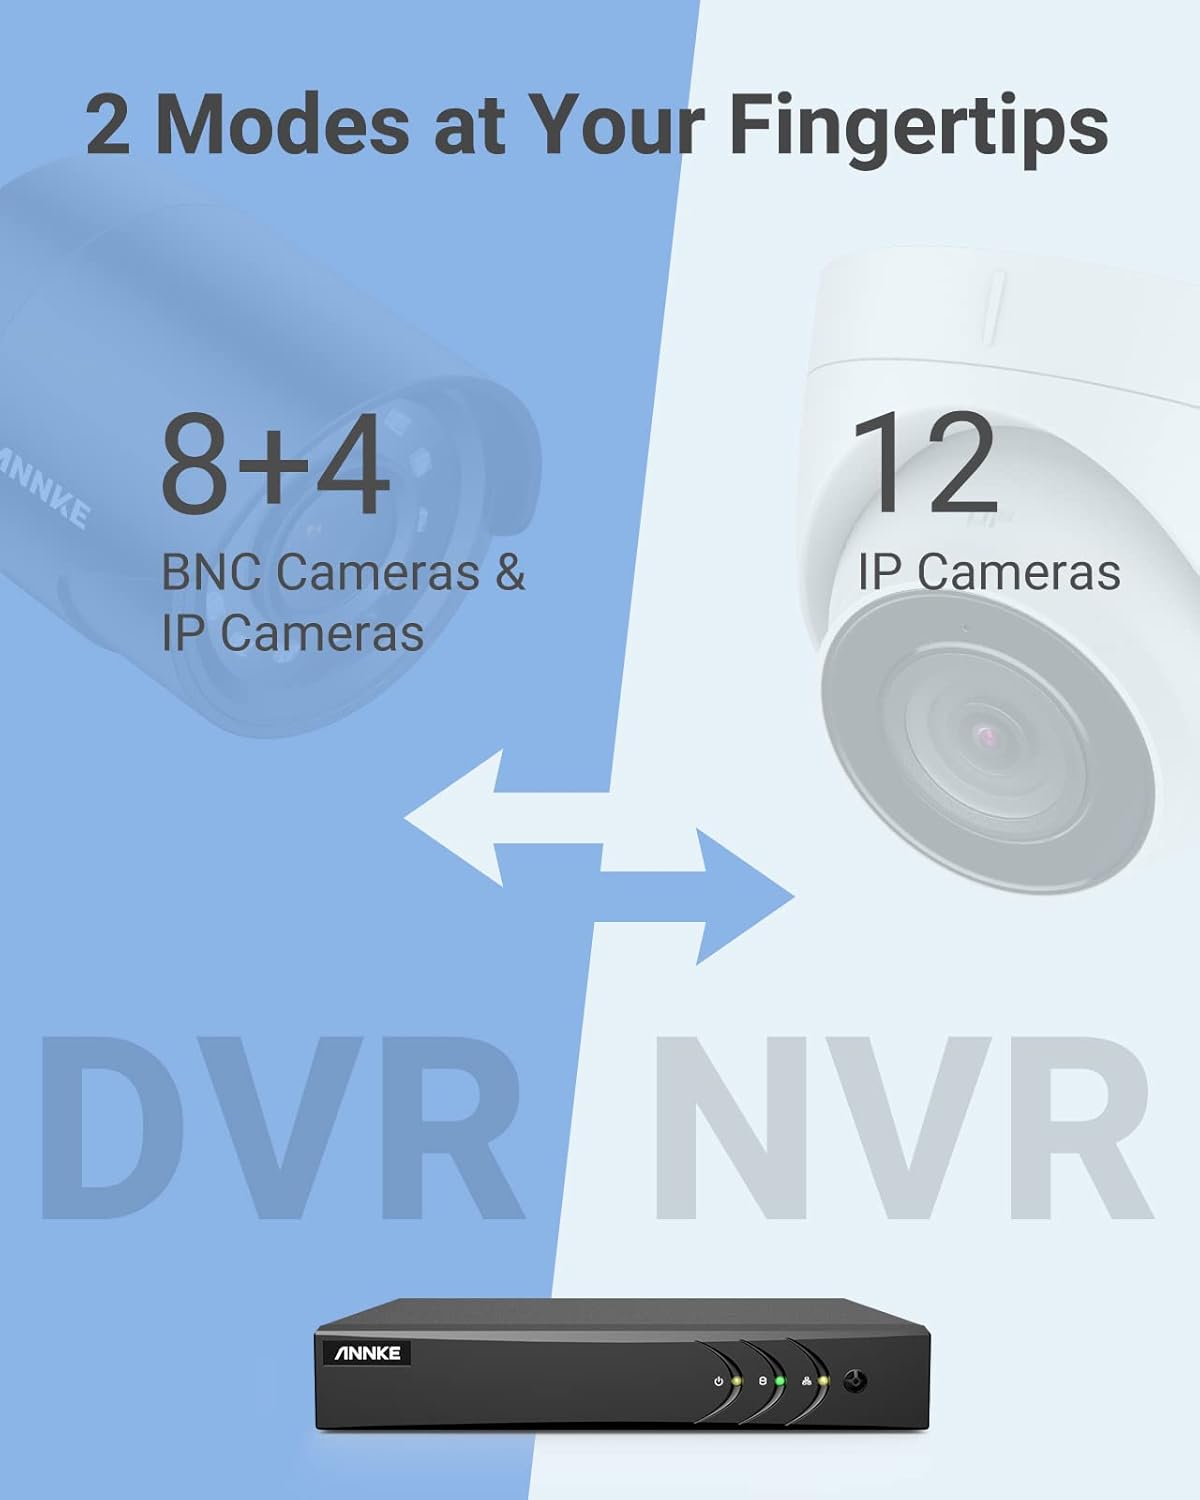
Image 3.1: Illustration of the DVR's dual operational modes, supporting both BNC and IP cameras or IP cameras exclusively.
4. Installationsvejledning
4.1 Fysisk opsætning
- Tilslut kameraer: Connect your security cameras to the BNC video input ports on the back of the DVR. For IP cameras, connect them to your network switch/router, and ensure the DVR is also connected to the same network via the Ethernet cable.
- Tilslut skærm: Connect a monitor to the DVR's HDMI or VGA output port using the provided HDMI cable or a VGA cable (not included).
- Tilslut USB-mus: Sæt USB-musen i en af USB-portene på DVR'en.
- Tilslut strøm: Tilslut strømadapteren til DVR'ens strømindgang, og sæt den derefter i en stikkontakt. DVR'en tænder automatisk.
4.2 Indledende konfiguration
Ved første opstart vil DVR'en guide dig gennem en indledende opsætningsguide. Følg instruktionerne på skærmen for at:
- Opret en stærk adgangskode til administratorkontoen.
- Konfigurer netværksindstillinger (DHCP anbefales til de fleste brugere).
- Indstil dato og klokkeslæt.
- Scan and add IP cameras if applicable.
5. Betjening af DVR
5.1 Live View
Efter den første opsætning vil DVR'en vise live-indholdet view from connected cameras. Use the USB mouse to navigate the interface. Right-click to access the main menu.
5.2 Optagelse
The DVR is pre-configured for continuous recording. You can customize recording schedules, motion-triggered recording, or alarm-triggered recording via the main menu under Optag > Planlæg.
5.3 Afspilning
Til review optaget footage:
- Fra live view, højreklik og vælg Afspilning.
- Select the desired camera(s) and date.
- Use the timeline to navigate through recordings. Events (like motion detection) are often marked on the timeline for quick access.

Image 5.1: The DVR's playback interface, demonstrating how to locate and review recorded events on a timeline.
6. Avancerede funktioner
6.1 AI-detektion af mennesker/køretøjer
The DVR incorporates deep learning-based motion detection 2.0, which can differentiate between human and vehicle movements. This significantly reduces false alarms caused by environmental factors such as leaves or light changes.
- Konfiguration: Enable and configure AI detection for each analog channel via the main menu under AI > Motion Detection 2.0.
- Smart Events: Supports line crossing and intrusion detection for specific areas.
- Advarsler: Configure the DVR to send app push notifications, email alerts, or trigger a buzzer when human or vehicle motion is detected.
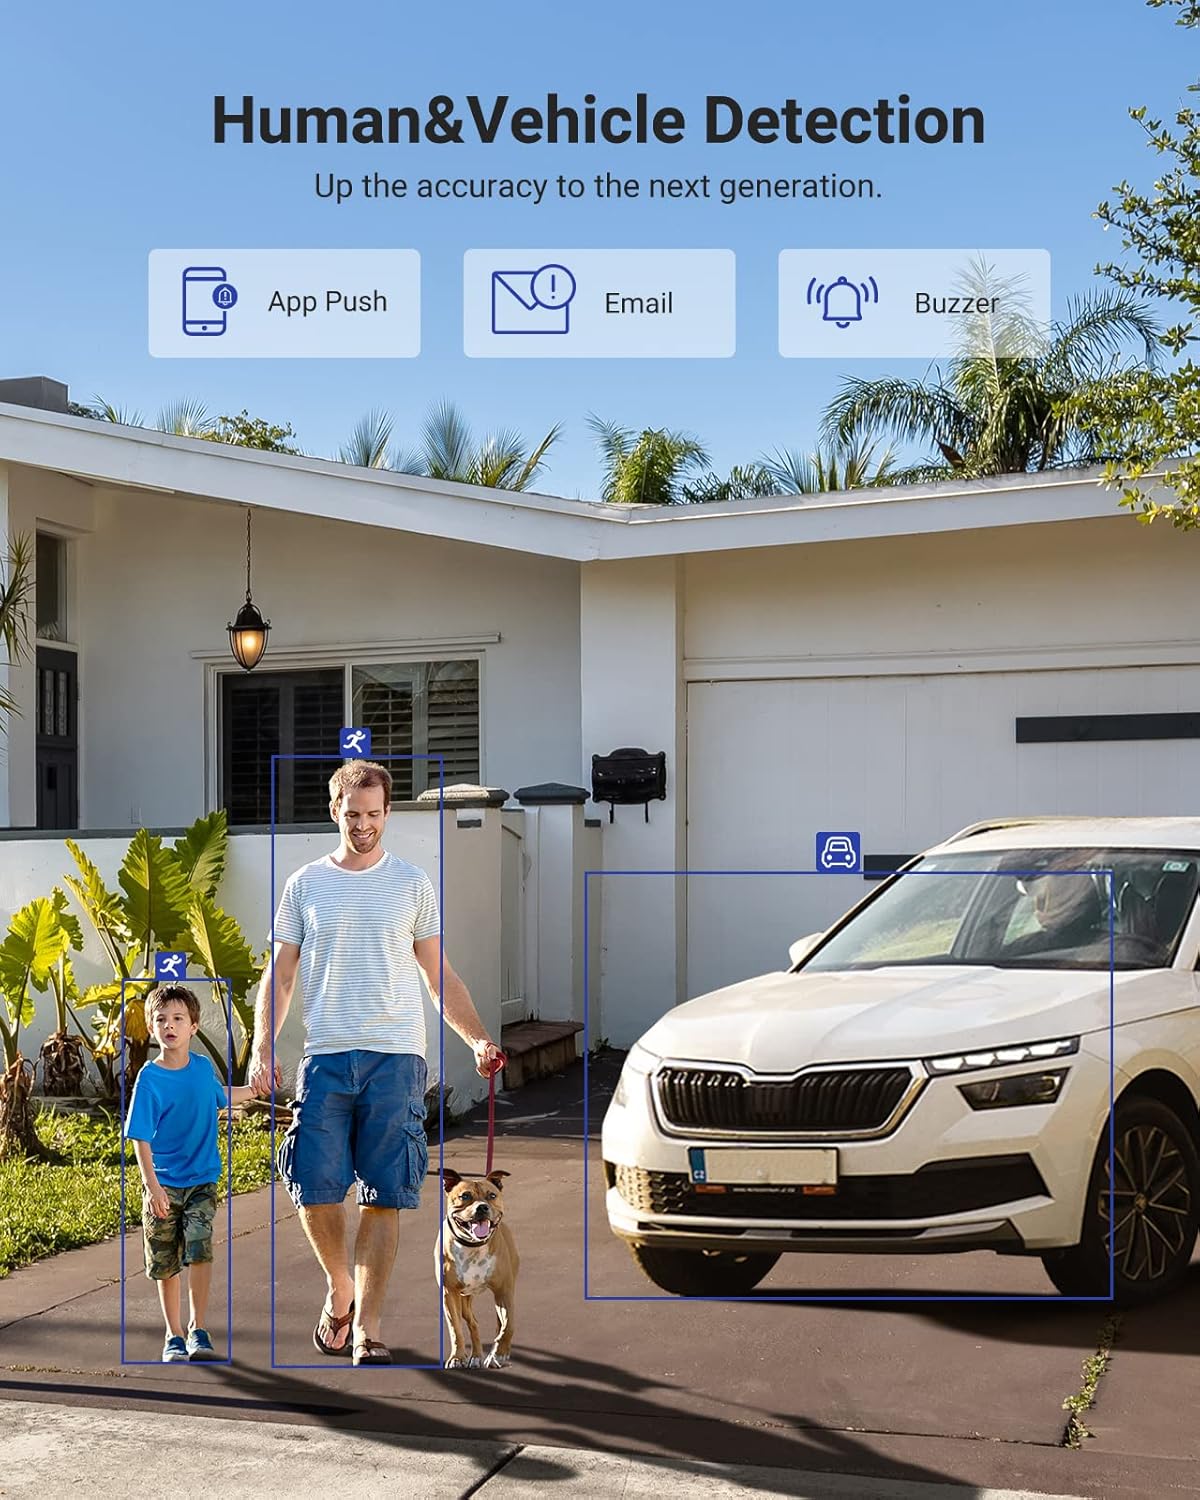
Image 6.1: Visual demonstration of the AI human and vehicle detection capability, showing how the system identifies and distinguishes between people and vehicles.
6.2 Fjernadgang
Access your DVR remotely from anywhere using the ANNKE Vision App or a web browser.
- ANNKE Vision-appen: Download the app from the App Store (iOS) or Google Play Store (Android). Register an account and add your DVR by scanning the QR code or entering its serial number.
- Web Browser: Access the DVR's web grænseflade ved at indtaste dens IP-adresse i en web browser på din computer.
- Kompatibilitet: The system is compatible with various devices including smartphones, tablets, laptops, and personal computers. It also supports integration with Alexa for voice control.

Image 6.2: Remote access via the ANNKE Vision App, showing compatibility with mobile devices and Alexa.
7. Video Management
7.1 H.265+ videokomprimering
The DVR utilizes advanced H.265+ video compression technology. This technology significantly reduces file sizes, saving up to 80% of storage space compared to H.264 compression, while maintaining video quality. This allows for longer recording durations on the same 2TB hard drive.

Image 7.1: Comparison illustrating the storage efficiency of H.265+ compression versus H.264.
8. Kompatibilitet
The ANNKE AU-DT81DX200-V1 is a versatile 5-in-1 hybrid DVR, designed to be compatible with a wide range of security cameras:
- HD TVI Input: Supports 8 MP@15 fps, 5 MP@20 fps, 3K@20 fps, 4 MP@30 fps.
- AHD Input: Supports 5 MP@20 fps, 4 MP@30 fps, 1080p@25 fps, 1080p@30 fps.
- HD CVI Input: Supports 4 MP@30 fps, 4 MP@25 fps, 1080p@25 fps, 1080p@30 fps.
- CVBS-input: Supports PAL/NTSC standards.
- IPC Input: Supports up to 8MP IP cameras.
This broad compatibility ensures that the DVR can integrate with both older analog cameras and modern IP cameras, providing a flexible upgrade path for existing surveillance systems.

Image 8.1: The DVR's compatibility with various camera technologies, including TVI, CVI, AHD, and IP cameras.
9. Specifikationer
| Feature | Specifikation |
|---|---|
| Mærke | ANNKE |
| Modelnummer | AU-DT81DX200-V1 |
| Forbindelsesteknologi | Kablet |
| Videooptagelsesopløsning | 4K (8 MP) |
| Antal kanaler | 8 (Analog) + 4 (IP) or 12 (IP) |
| Videokomprimering | H.265 Pro+/H.265 Pro/H.265/H.264+/H.264 |
| Supported Camera Types | TVI, AHD, CVI, CVBS, IPC |
| AI funktioner | Human Detection, Vehicle Detection, Line Crossing, Intrusion Detection |
| Hukommelseslagringskapacitet | 2 TB HDD (Up to 10 TB supported) |
| Fjernadgang | ANNKE Vision App, Web Browser |
| Kompatible enheder | Kameraer, bærbare computere, personlige computere, smartphones, tablets |
| Strømkilde | Elektrisk med ledning |
| Farve | Sort |
| Emnedimensioner | 17.13 x 12.4 x 3.86 tommer |
10. Vedligeholdelse
Regelmæssig vedligeholdelse sikrer optimal ydeevne og levetid for dit DVR-system.
- Rensning: Hold DVR'en fri for støv. Brug en blød, tør klud til at rengøre ydersiden. Brug ikke flydende rengøringsmidler.
- Ventilation: Sørg for, at DVR'en er placeret et godt ventileret område for at forhindre overophedning. Ventilationsåbningerne må ikke blokeres.
- Firmwareopdateringer: Tjek regelmæssigt den officielle ANNKE-medarbejder website for firmware updates. Keeping your DVR's firmware updated can improve performance, add new features, and enhance security.
- Data backup: Sikkerhedskopier regelmæssigt vigtige videofilertage til en ekstern lagerenhed.
- Harddiskens tilstand: The DVR's menu may offer options to check the health status of the installed hard drive. Monitor this periodically.
11. Fejlfinding
Dette afsnit omhandler almindelige problemer, du kan støde på med din DVR.
- Ingen videoudgang:
- Check HDMI/VGA cable connections to both the DVR and the monitor.
- Sørg for, at skærmen er indstillet til den korrekte inputkilde.
- Verify the DVR is powered on (power indicator light should be active).
- No Camera Display:
- Check camera power supply and video cable connections.
- For IP cameras, ensure they are on the same network as the DVR and properly added in the DVR's camera management settings.
- Verify camera compatibility with the DVR (refer to Section 8).
- Fjernadgang virker ikke:
- Sørg for, at DVR'en er forbundet til internettet.
- Check network settings on the DVR (e.g., DHCP enabled, correct IP address).
- Bekræft, at ANNKE Vision-appen er opdateret til den nyeste version.
- Ensure the DVR is properly added to your ANNKE Vision account.
- False Motion Alarms:
- Adjust the sensitivity of motion detection in the DVR settings.
- Utilize the AI Human/Vehicle Detection feature (Section 6.1) to filter out irrelevant movements.
- Define specific detection zones to exclude areas with frequent non-threatening movement.
If you continue to experience issues, please contact ANNKE customer support.
12. Garanti og support
ANNKE-produkter leveres typisk med en begrænset garanti. Se venligst garantikortet, der følger med din pakke, eller besøg den officielle ANNKE-side. webwebstedet for detaljerede garantivilkår og -betingelser, der er specifikke for din region.
For teknisk support, produktforespørgsler eller garantikrav, kontakt venligst ANNKE kundeservice via deres officielle website or the contact information provided in your product documentation. Have your model number (AU-DT81DX200-V1) and purchase details ready when contacting support.
ANNKE Officiel Webwebsted: www.annke.com