
1. Sikkerhedsinstruktioner
Please read all instructions carefully before using the KEENSTAR 20Bar Espresso Machine. Keep this manual for future reference.
- Sørg for, at apparatet er tilsluttet en jordet stikkontakt med den korrekte lydstyrke.tage.
- Maskinen, netledningen eller stikket må ikke nedsænkes i vand eller andre væsker.
- Hold børn og kæledyr væk fra apparatet under drift.
- Tag stikket ud af maskinen, når den ikke er i brug, og før rengøring.
- Betjen ikke maskinen med en beskadiget ledning eller stik.
- Use only medium-ground coffee (greater than 0.5mm) to prevent clogging and ensure proper extraction.
- Do not exceed the maximum water level indicated on the water tank.
- Ensure the portafilter is fully locked before starting the brewing process.
- Vær forsigtig ved håndtering af varme overflader og damp.
2. Produktet er slutview
2.1 Komponenter
The KEENSTAR 20Bar Espresso Machine includes the following main components:
- Kontrolpanel (berøringsskærm)
- Water Tank (37oz / 1.1 Liters)
- Dampknap
- Portafilterhåndtag
- Portafilter
- 1-Shot Filter Basket
- 2-Shot Filter Basket
- Koptallerken (opvarmet)
- Aftagelig drypbakke
- Steam Nozzle (Milk Frother)
- Kaffeske og Tamper
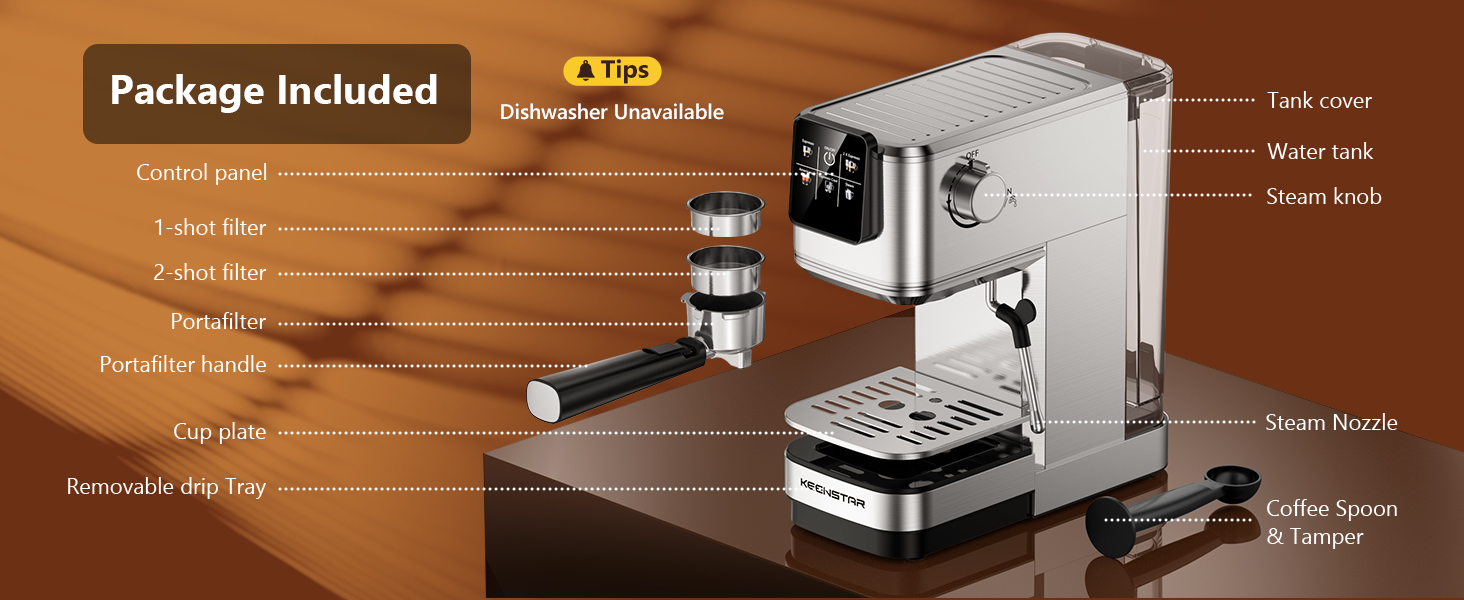
Figur 1: Overview of KEENSTAR Espresso Machine components.
2.2 Specifikationer
| Feature | Specifikation |
|---|---|
| Mærke | KEENSTAR |
| Modelnavn | JH-C5010E |
| Tryksystem | 20 bar professionel pumpe |
| Magt | 1350W |
| Vandtankkapacitet | 1.1 liter (37 oz) |
| Produktdimensioner | 11.8" D x 5.5" B x 12.6" H |
| Materiale | Rustfrit stål |
| Kaffe input type | Malet kaffe |
| Filtertype | Reusable (1-shot, 2-shot) |
| Særlige funktioner | Rapid Cold Brew, Touch Screen, Milk Frother, Fast Heating System, Pre-Soak Technology |

Figur 2: Product dimensions for the KEENSTAR Espresso Machine.
3. Opsætning
3.1 Indledende rengøring
Before first use, clean all removable parts (water tank, portafilter, filter baskets, drip tray) with warm soapy water. Wipe the exterior of the machine with a damp klæde.
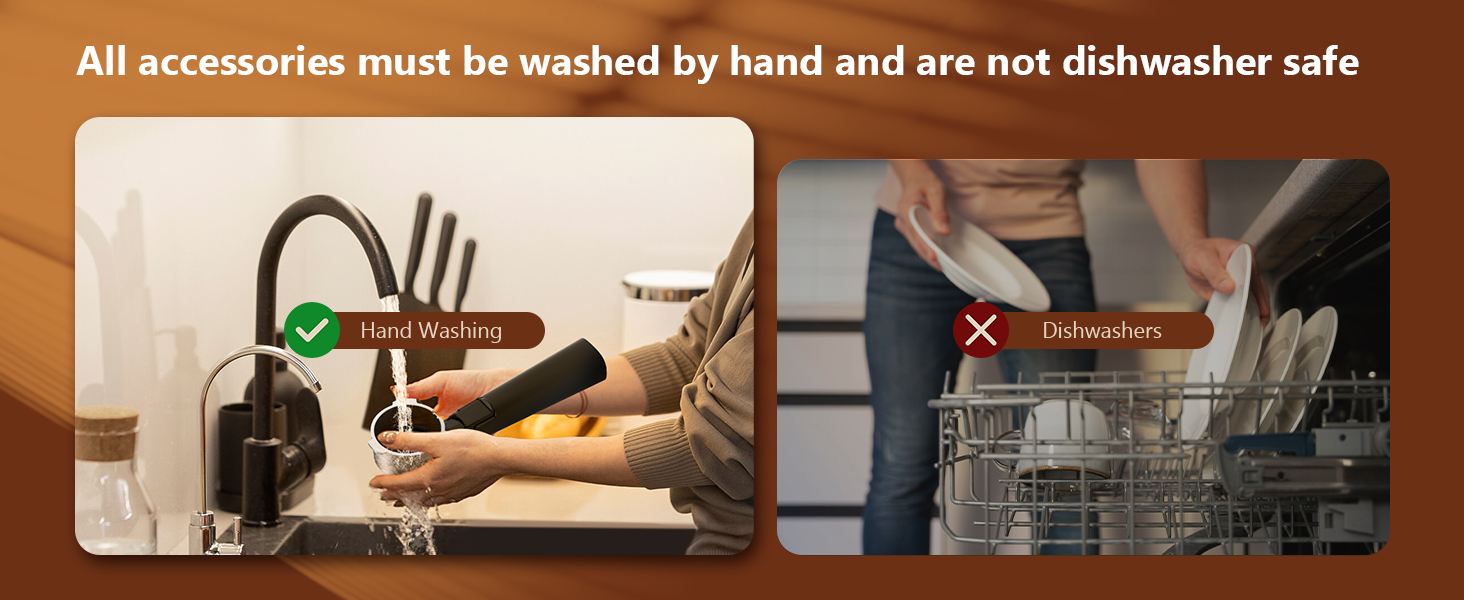
Figur 3: All accessories must be washed by hand and are not dishwasher safe.
3.2 Priming the Machine (Before Each Use)
To ensure optimal performance and drain air from the pipes, prime the machine before each use:
- Fill the water tank with fresh water and press the power button to turn on the machine.
- Drej dampknappen til "ON"-positionen.
- Vent, indtil vandet løber ud af dampdysen i en jævn strøm.
- Drej dampknappen til "OFF"-positionen.
- Sluk for kaffemaskinen.
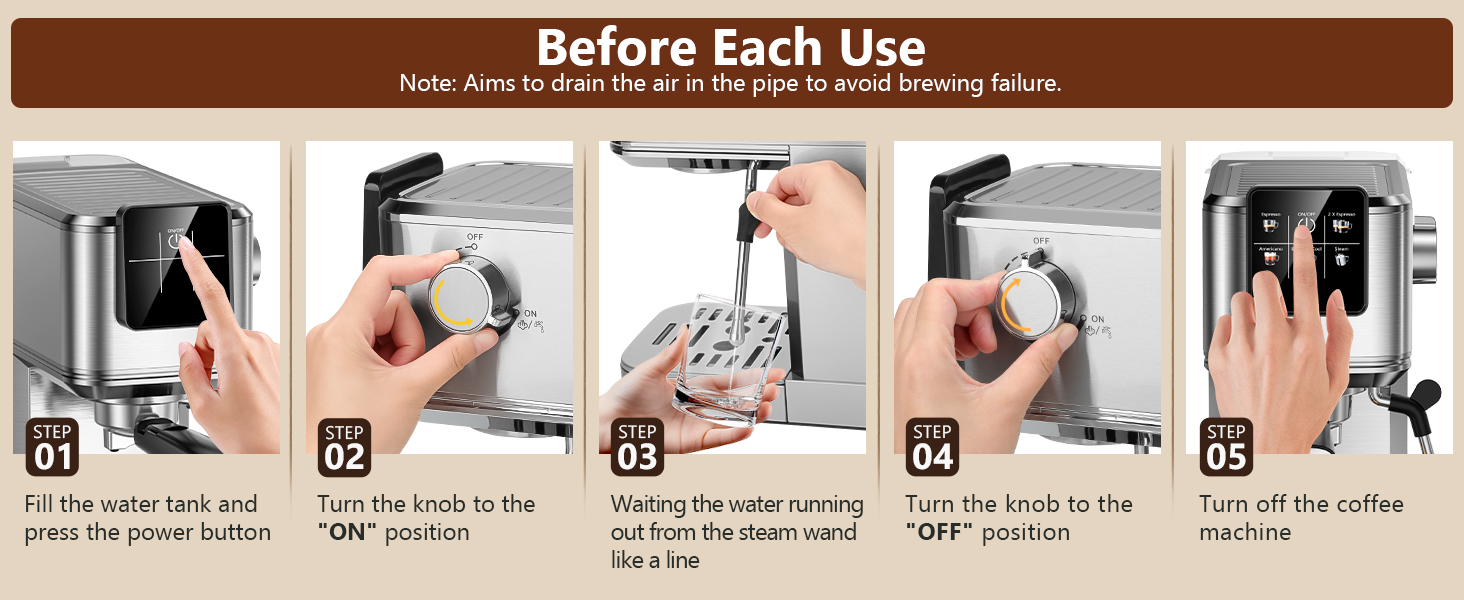
Figur 4: Steps for priming the machine before each use.
Note: Do not exceed the maximum water level (1200ml) in the water tank.
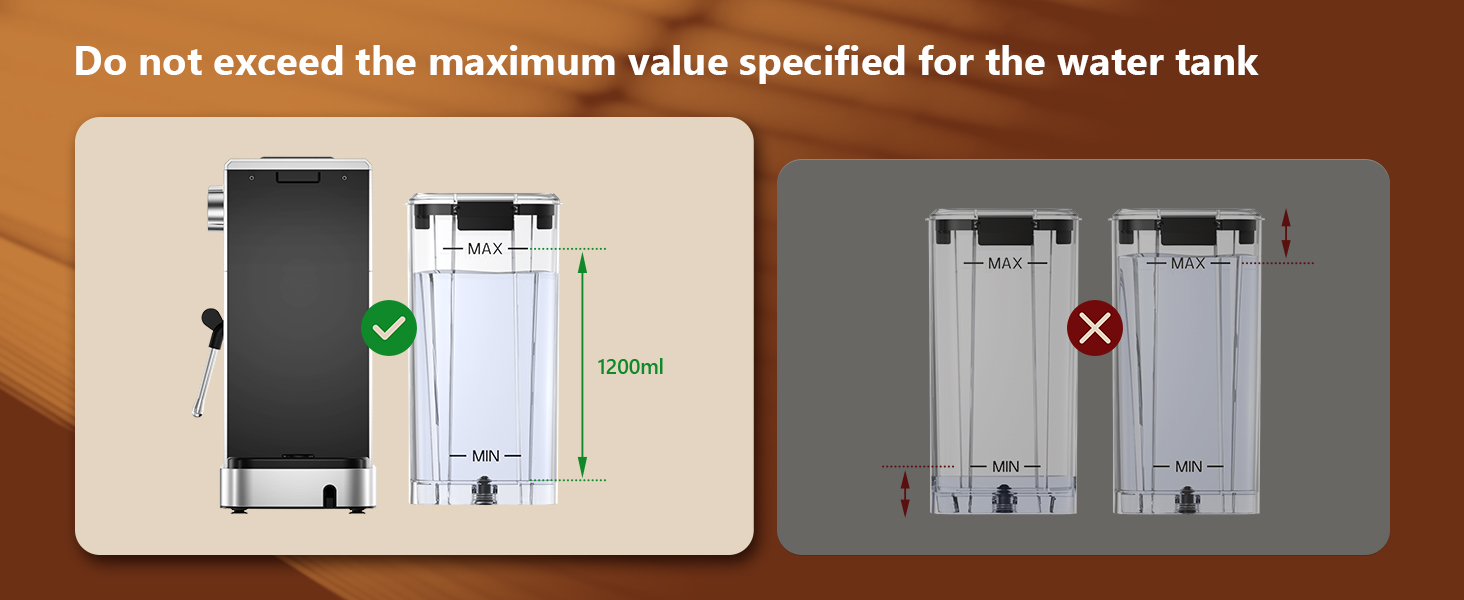
Figur 5: Illustration of correct water tank fill level.
4. Betjeningsvejledning
4.1 Fremstilling af espresso
Follow these steps to brew a perfect espresso:
- Fill the water tank and press the power button. The indicator will blink during preheating.
- Load the appropriate filter basket (1-shot or 2-shot) with medium-ground coffee (recommended >0.5mm) and tamp det fast.
- Place the portafilter into the machine and turn it to the right until it is fully locked. Place a cup underneath.
- Once the indicator light is steady (preheating complete), press the "Espresso" button for a single shot or "2 X Espresso" for a double shot.
- Maskinen brygger automatisk espressoen.

Figur 6: Trin-for-trin guide til at lave espresso.
Note: Ensure the steam knob is set to the "OFF" position before brewing coffee. The blinking indicator signifies preheating; it's ready to brew when steady.
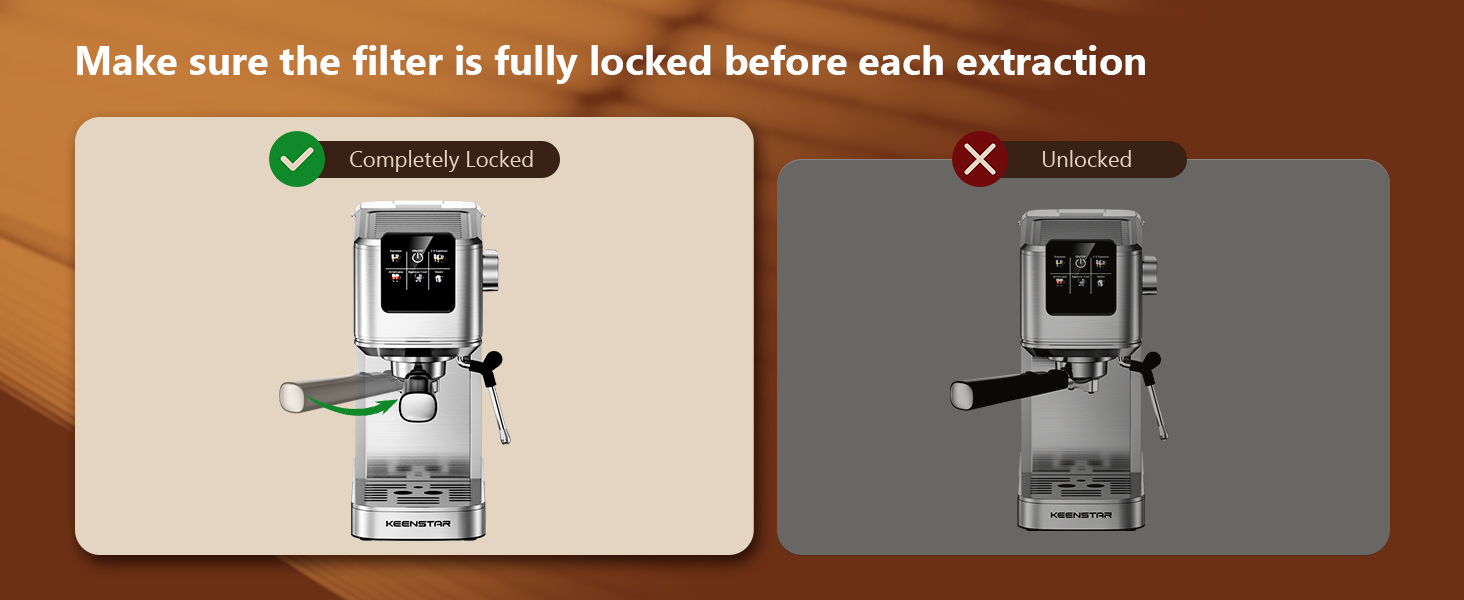
Figur 7: Correctly locking the portafilter before brewing.
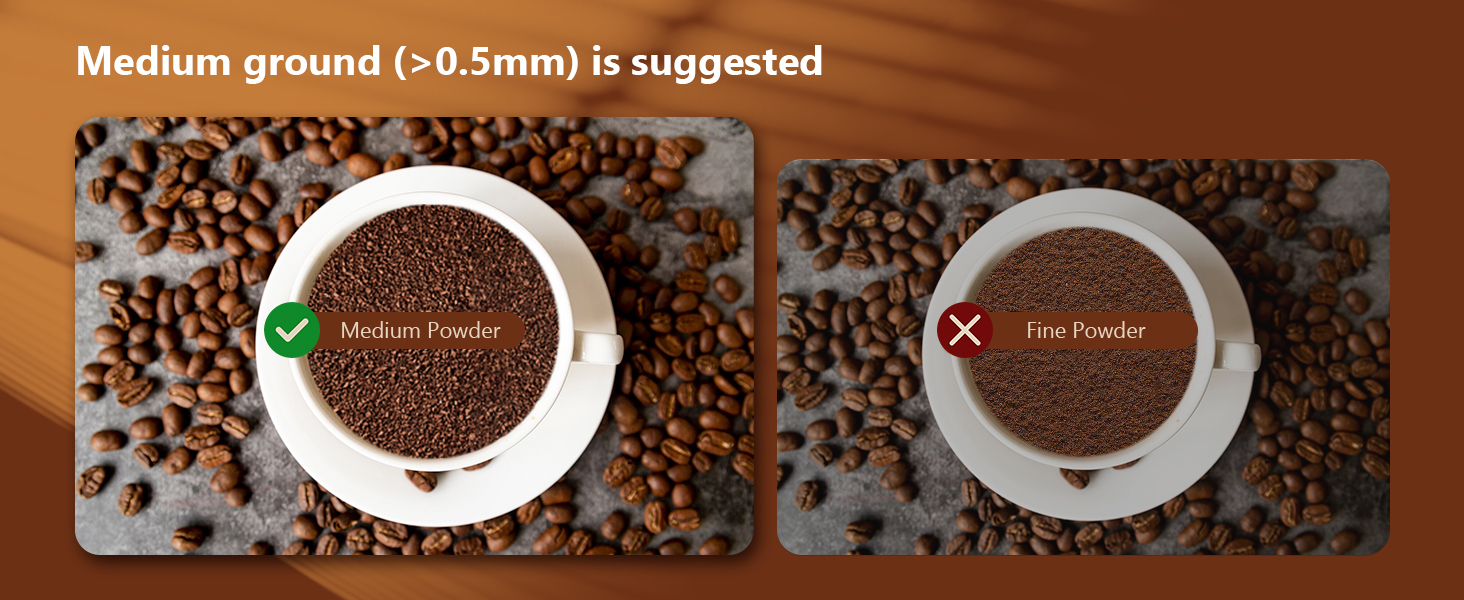
Figur 8: Medium ground coffee is recommended for optimal extraction.
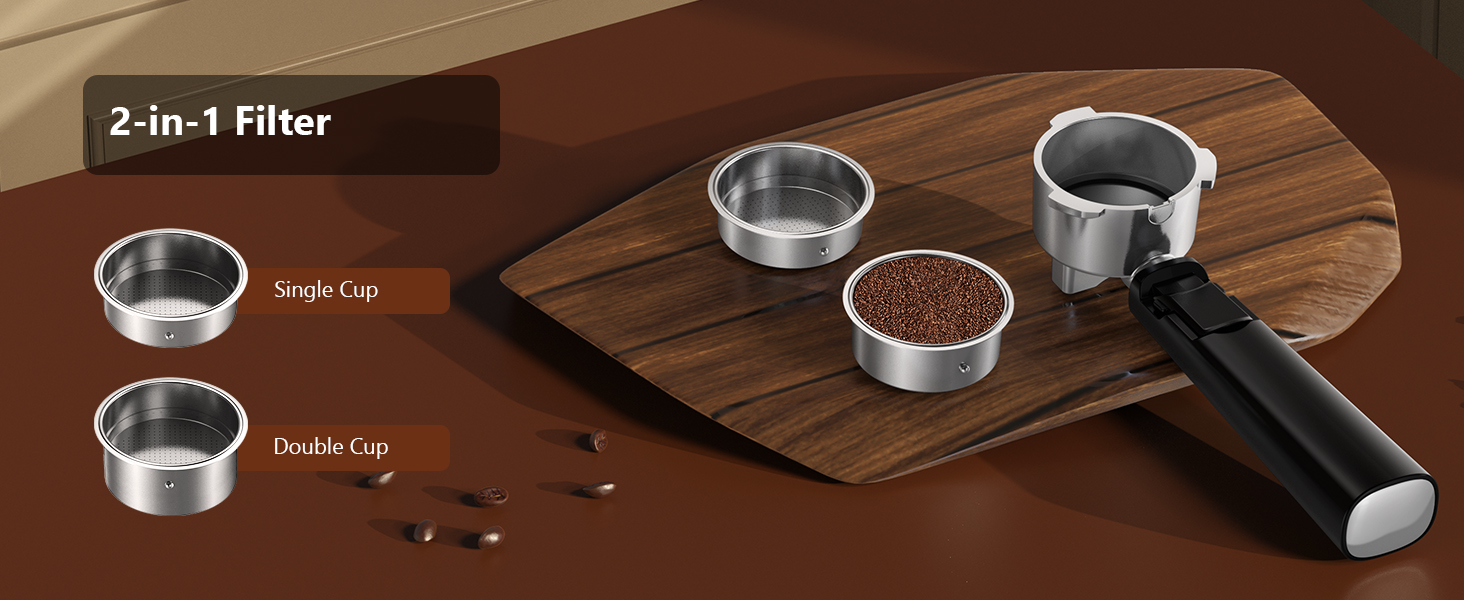
Figur 9: Use the appropriate 2-in-1 filter for single or double espresso shots.
4.2 Brygning af koldbrygget espresso
The machine features a rapid cold brew function:
- Fill the water tank 2/3 full with ice cubes, then add water.
- Prepare the portafilter with ground coffee as described for espresso.
- Press the "Espresso Cool" button on the touch screen.
- The machine will brew a smooth, fresh cold brew espresso in approximately 10 minutes.

Figur 10: Preparing cold brew espresso with ice in the water tank.
4.3 Mælkeskumning
Sådan laver du cremet mælkeskum til latte og cappuccino:
- Tryk på tænd/sluk-knappen for at tænde for maskinen.
- Press the "Steam" button on the touch screen to preheat the steam wand. The indicator will blink.
- Once preheating is complete (indicator steady), turn the steam knob to the "ON" position to release any residual water from the pipe.
- Insert the steam nozzle approximately 1 inch into a pitcher of cold milk.
- Gradually turn the steam knob until steam begins to emerge, frothing the milk to your desired texture.
- Turn the steam knob to "OFF" and clean the steam wand immediately after use.
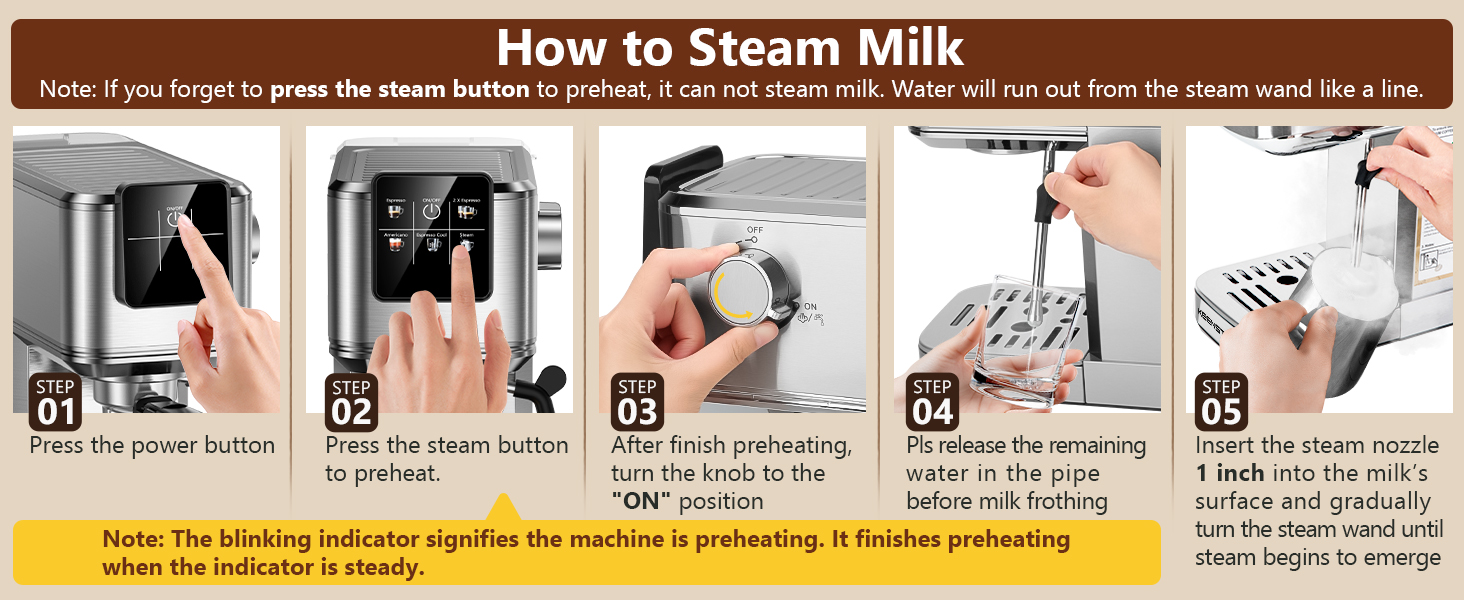
Figur 11: Detailed steps for frothing milk using the steam wand.
Note: If you forget to press the steam button to preheat, water will run out from the steam wand instead of steam.
5. Rengøring og vedligeholdelse
5.1 Daglig rengøring
- Drypbakke: Tøm og rengør den aftagelige drypbakke efter hver brug.
- Portafilter og filterkurve: Remove spent coffee grounds and rinse the portafilter and filter baskets thoroughly under running water.
- Dampstang: Tør dampdysen af umiddelbart efter opskumning af mælk med enamp klud for at forhindre mælkerester i at tørre ind. Aktiver kort dampfunktionen for at fjerne eventuelle interne blokeringer.
- Vandtank: Skyl vandtanken regelmæssigt og fyld den op med frisk vand.
- Ydre: Tør maskinens ydre af med en blød, damp klæde. Brug ikke slibende rengøringsmidler eller skuresvampe.

Figur 12: The removable drip tray simplifies cleaning.
5.2 Afkalkning
Regular descaling is essential to maintain machine performance and extend its lifespan. The frequency depends on water hardness and usage. Refer to the full product manual for detailed descaling instructions and recommended descaling solutions.
6. Fejlfinding
If you encounter issues with your KEENSTAR Espresso Machine, refer to the table below for common problems and solutions:
| Problem | Mulig årsag | Løsning |
|---|---|---|
| Der kommer ingen kaffe ud. | No water in tank; tank not properly seated; machine not primed; coffee too fine/tamped too hard; portafilter not locked. | Fill water tank; ensure tank is seated; prime the machine; use medium-ground coffee and tamp correctly; lock portafilter fully. |
| Kaffen brygger for langsomt eller drypper. | Coffee grounds too fine; too much coffee; machine needs descaling. | Brug grovere malingsgrad; reducer kaffemængden; afkalk maskinen. |
| Kaffen brygger for hurtigt. | Coffee grounds too coarse; not enough coffee; tamper for let. | Brug finere maling; øg kaffemængden;amp mere fast. |
| Dampstangen producerer ikke damp. | Steam button not pressed for preheating; steam wand clogged. | Press "Steam" button and wait for preheating; clean steam wand thoroughly. |
| Maskinen lækker vand. | Water tank not properly seated; drip tray full; portafilter not locked correctly. | Ensure water tank is secure; empty drip tray; lock portafilter firmly. |
If the problem persists after attempting these solutions, please contact KEENSTAR customer support.
7. Garanti og support
KEENSTAR offers the following support for your espresso machine:
- 30-dages pengene-tilbage-garanti: Hvis du ikke er tilfreds med dit køb, kan du returnere det inden for 30 dage for at få pengene tilbage.
- 1 års gratis udskiftning: The product is eligible for a free replacement within 1 year from the date of purchase for manufacturing defects.
- Livstids kundeservice efter aftale: KEENSTAR provides lifetime customer service to assist with any questions or issues you may encounter.
For warranty claims or technical assistance, please refer to the contact information provided with your product packaging or visit the official KEENSTAR webwebsted.