1. Produktet er slutview
This manual provides instructions for the ASD LED 36-inch Vanity Wall Mount Light Fixture (Model: A-LVF23-36D30CC-B). This linear light bar is designed for bathroom and vanity applications, offering adjustable color temperature (3CCT) and dimmable functionality. It is ETL Listed and Energy Star certified, ensuring safety and energy efficiency.

Figure 1: ASD LED 36-inch Vanity Light Fixture
Nøglefunktioner:
- Brilliant & Efficient: Delivers 3150 lumens from 30 watts, providing bright illumination while saving energy.
- 3 farvetemperaturer (3CCT): Select from 3000K (Warm White), 4000K (Cool White), or 5000K (Daylight) to suit your preference.
- Flicker-Free Dimming: Smoothly dims from 100% to 10% with most modern TRIAC dimmers (sold separately).
- Lang levetid: Rated for 50,000+ hours of consistent performance.
- Certified & Reliable: ETL Listed for safety and Energy Star for efficiency. Rated for damp steder.
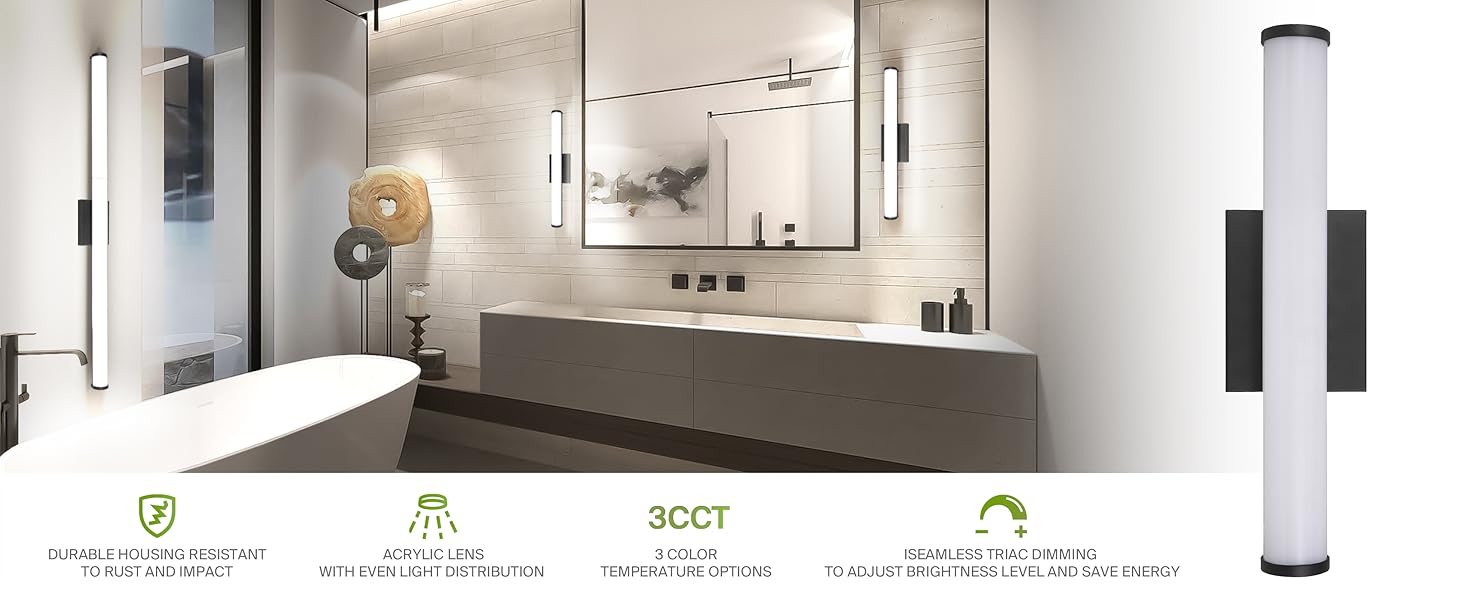
- Holdbart hus: Constructed with rust and impact-resistant materials.
- Akryl linse: Provides even light distribution without flickering or dark spots.
2. Sikkerhedsoplysninger
Please read and understand all instructions before beginning installation. Failure to do so may result in electric shock, fire, or other injuries that could be hazardous or fatal. Keep this manual for future reference.
- ADVARSEL: Risiko for elektrisk stød. Afbryd strømmen til sikringen eller strømafbryderen før installation eller servicering.
- All wiring connections must be in accordance with local and national electrical codes (NEC).
- Kontakt en kvalificeret elektriker, hvis du er usikker på installationsprocessen.
- Sørg for, at armaturet er korrekt jordet.
- Håndter ikke armaturet med våde hænder.
- Forsøg ikke at ændre armaturet på nogen måde.
- Denne lampe er klassificeret til damp locations. Do not submerge in water.
3. Hvad er der i æsken
Kontroller, at alle komponenter er til stede, før installationen påbegyndes:
- Lysarmatur (1)
- Monteringsplade (1)
- Skruer (til montering)
- Wire Nuts (for electrical connections)
4. Specifikationer
| Specifikation | Værdi |
|---|---|
| Modelnummer | A-LVF23-36D30CC-B |
| Størrelse | 36 tommer |
| Magt | 30W |
| Lysstyrke | 3150 lumen |
| Farvetemperatur (CCT) | 3000K / 4000K / 5000K (valgbar) |
| Voltage | 120V |
| Dæmpbar | Yes (TRIAC dimmers compatible) |
| CRI | 80.00 |
| Levetid | 50,000 timer |
| Materiale | Acrylic, Metal, Plastic, Stainless Steel |
| Slutte | Sort |
| Dimensioner | 4.5 cm L x 3 cm B x 36 cm H |
| Vægt | 2.1 pund |
| Certificeringer | ETL, Energy Star, cETL |
| Installationstype | Flush Mount, Wall Mount |

Figur 2: Produktspecifikationsdiagram
5. Installation
Follow these steps for proper installation. Ensure power is disconnected at the circuit breaker before starting.
- Forbered til installation: Pull the power supply wires out of the outlet box. Attach the mounting bracket to the outlet box (not included) using the mounting screws.
- Connect Wiring and Select CCT: Connect the wires: black to black, white to white, green to green. Secure the connections with wire nuts. Choose the desired color temperature (2700K, 3000K, 3500K, 4000K, or 5000K) by adjusting the switch position on the backside of the fixture.
- Sikre armaturet: Place the fixture body over the mounting bracket. Insert the fixture screws and tighten to secure the fixture body on the surface.

Figure 3: Mounting Bracket Installation

Figure 4: Wiring and CCT Selection
Figure 5: Fixture Attachment
For a full, detailed installation sheet, please refer to the official guide: Download den fulde installationsvejledning (PDF)
6. Betjeningsvejledning
Valg af farvetemperatur (3CCT)
The fixture allows you to choose between three color temperatures: 3000K (Warm White), 4000K (Cool White), and 5000K (Daylight). This selection is made via a switch located on the backside of the fixture during installation. Once installed, the chosen color temperature will remain active until manually changed by accessing the switch again.
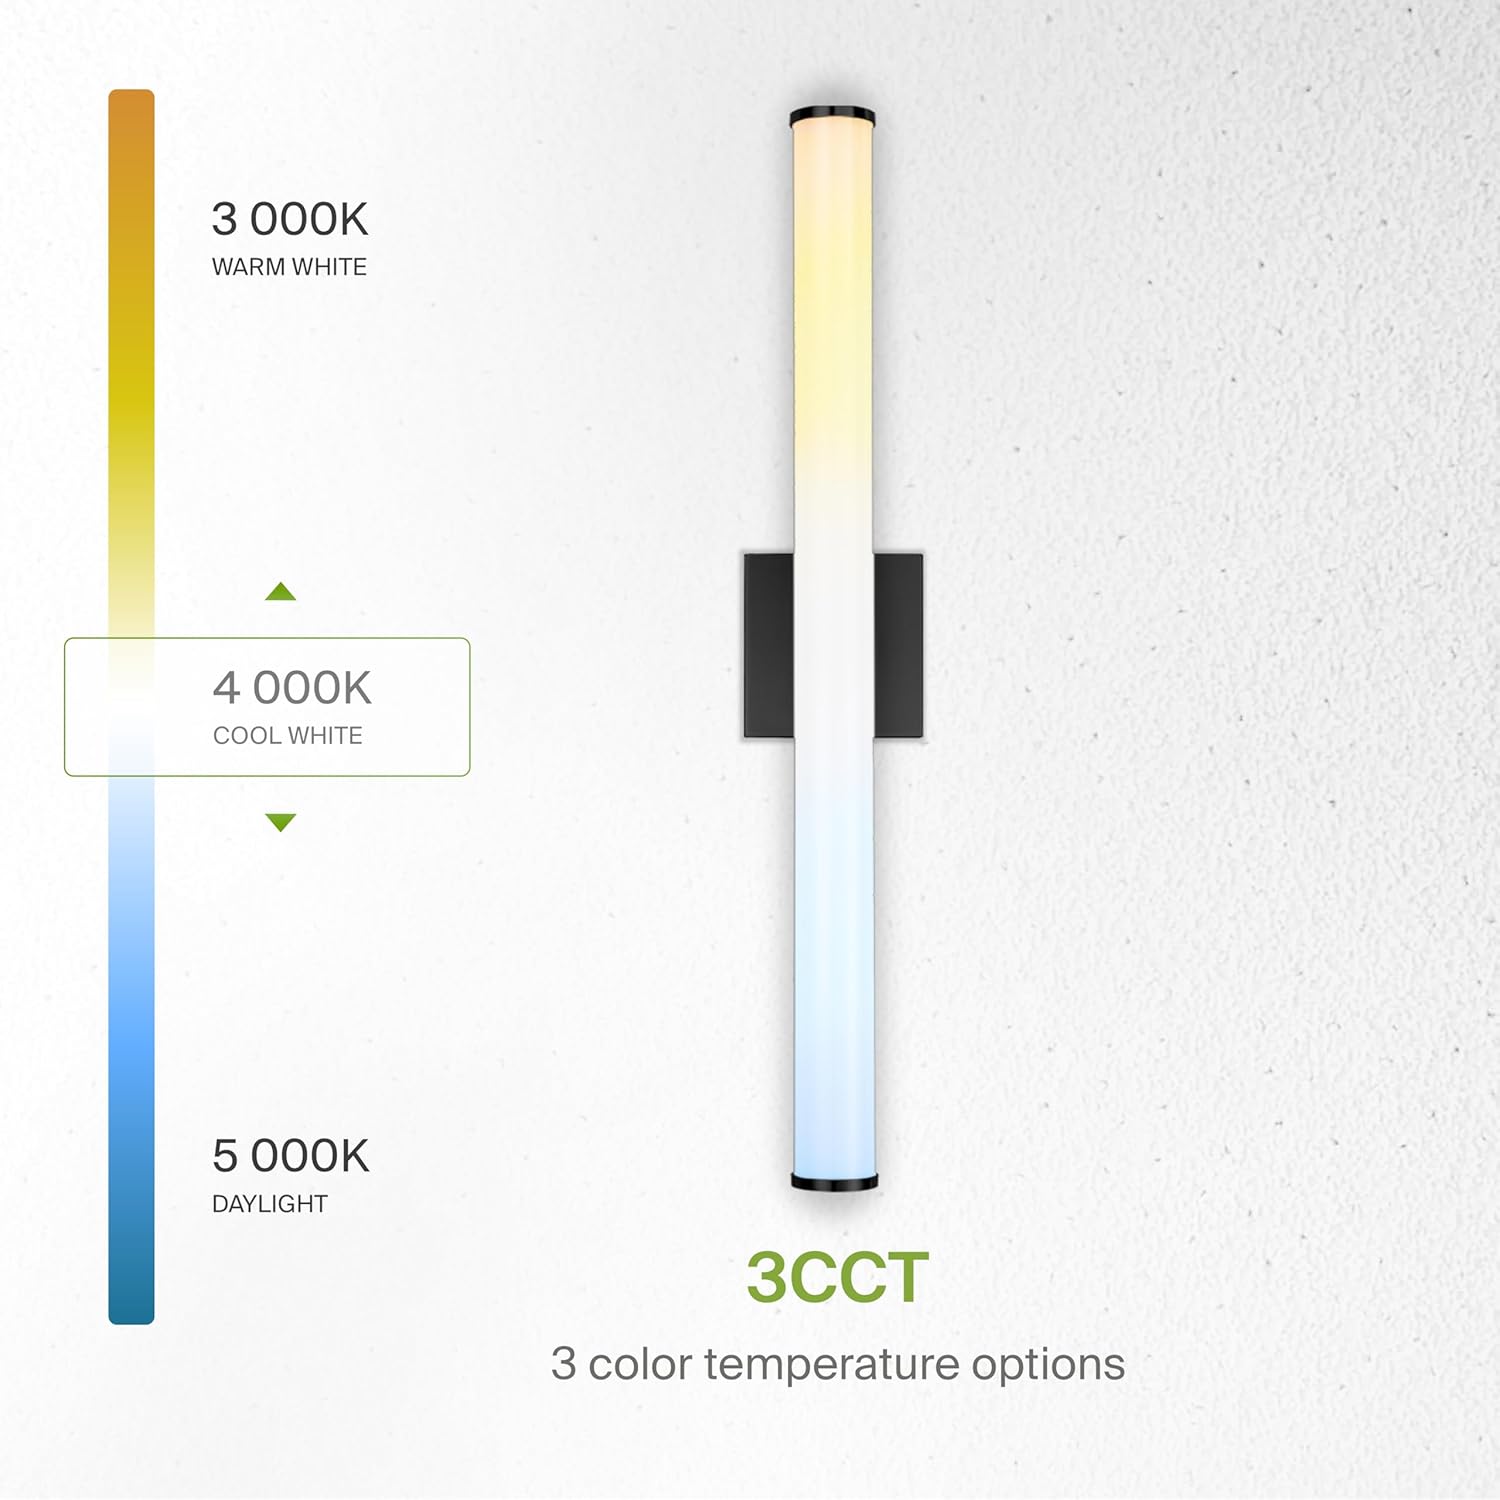
Figur 6: Farvetemperaturindstillinger
Dæmpningsfunktion
This fixture is designed to be dimmable from 100% down to 10% brightness. To utilize the dimming feature, you must connect the fixture to a compatible TRIAC dimmer switch (sold separately). Ensure the dimmer switch is rated for LED lighting to prevent flickering or damage.

Figure 7: Dimmable Light Output
Tænd/sluk
Operate the light fixture using a standard wall switch connected to the electrical circuit. Ensure the switch is compatible with the fixture's electrical requirements.
7. Vedligeholdelse
The ASD LED Vanity Light Fixture requires minimal maintenance. Follow these guidelines to ensure longevity and optimal performance:
- Rensning: Før rengøring skal du sørge for, at strømmen til armaturet er slukket ved afbryderen. Brug en blød, tør eller let fugtetamp klud til at tørre de udvendige overflader af. Brug ikke slibende rengøringsmidler, opløsningsmidler eller polermidler, da de kan beskadige finishen eller akryllinsen.
- Udskiftning af pære: This fixture uses integrated LED technology and does not require bulb replacement. The LEDs are designed to last for the entire lifespan of the product.
- Inspektion: Undersøg regelmæssigt armaturet for tegn på skader eller løse forbindelser. Hvis der findes problemer, skal strømmen afbrydes og en kvalificeret elektriker kontaktes.
8. Fejlfinding
Hvis du oplever problemer med din lampe, kan du se følgende almindelige problemer og løsninger:
| Problem | Mulig årsag | Løsning |
|---|---|---|
| Lyset tænder ikke | No power to the fixture; Loose wiring connection; Faulty switch or circuit breaker. | Check power supply at the circuit breaker. Ensure all wire connections are secure. Test the switch or circuit breaker. |
| Lyse flimrer | Inkompatibel lysdæmper; Løs ledningsforbindelse; Vol.tage udsving. | Ensure a TRIAC LED compatible dimmer is used. Check and secure all wiring connections. Consult an electrician for voltage problemer. |
| Forkert farvetemperatur | CCT switch set incorrectly during installation. | Disconnect power, access the CCT switch on the back of the fixture, and adjust to the desired setting. |
| Lyset er for svagt eller for stærkt | Dæmperindstilling; Forkert CCT-valg. | Adjust the dimmer switch. If not using a dimmer, ensure the CCT is set to a preferred brightness level. |
Hvis problemet fortsætter efter at have forsøgt disse løsninger, bedes du kontakte kundesupport.
9. Garanti og support
This ASD LED Vanity Light Fixture is backed by a 5 års problemfri garanti. This warranty covers defects in materials and workmanship under normal use. For warranty claims or technical assistance, please contact our friendly and responsive US-based support team.
For more information or to contact support, visit the official ASD Store: ASD Lighting Corporation Store
10. Produktapplikationer
The versatile design and adjustable lighting features of the ASD LED Vanity Light Fixture make it suitable for various indoor and covered outdoor applications, including:
- Badeværelser
- Soveværelser
- Gange
- Køkkener
- Over Mirrors
- Skabsbelysning
Bathroom Application

Bedroom Application

Hallway Application

Kitchen Application