
Indledning
Thank you for choosing the Princess 2600W Steam Iron. This powerful appliance is designed to make ironing efficient and effortless, featuring a ceramic soleplate, a 220 ml water tank, and various steam functions. Please read this manual carefully before first use to ensure safe operation and optimal performance. Keep these instructions for future reference.
Sikkerhedsinstruktioner
- Sørg altid for, at voltagDen strømstyrke, der er angivet på typeskiltet, stemmer overens med din strømforsyning.tage.
- Strygejernet, netledningen eller stikket må ikke nedsænkes i vand eller anden væske.
- Hold strygejernet utilgængeligt for børn og kæledyr.
- The soleplate of the iron can reach very high temperatures. Avoid direct contact with skin.
- Placer altid strygejernet på en stabil, varmebestandig overflade, når det ikke er i brug.
- Unplug the iron from the power outlet before filling or emptying the water tank, and when not in use.
- Do not operate the iron with a damaged cord or plug, or if the iron malfunctions or has been dropped or damaged.
- Efterlad aldrig strygejernet uden opsyn, mens det er tændt eller tilsluttet strømnettet.
- Use only distilled or demineralized water in the water tank to prevent limescale buildup.
Produkt overview
Familiarize yourself with the components of your Princess Steam Iron:
- Water Spray Nozzle: Til fugtning af genstridige folder.
- Vandpåfyldningsindløb: Til at tilsætte vand til tanken.
- Dampskudsknap: Leverer et kraftigt dampskud.
- Spray knap: Activates the water spray.
- Dampkontrolskyder: Adjusts continuous steam output (Dry, Min, Max).
- Håndtag: Ergonomisk greb for komfortabel brug.
- Temperaturkontrolskive: Vælger den passende temperatur til forskellige tekstiler.
- Indikatorlys: Illuminates when the iron is heating and turns off when the set temperature is reached.
- Strømledning: Tilslutter strygejernet til stikkontakten.
- Vandtank: Holds up to 220 ml of water.
- Keramisk strygesål: Smooth, scratch-resistant surface for effortless gliding.
- Selvrensende knap: For activating the self-cleaning function.
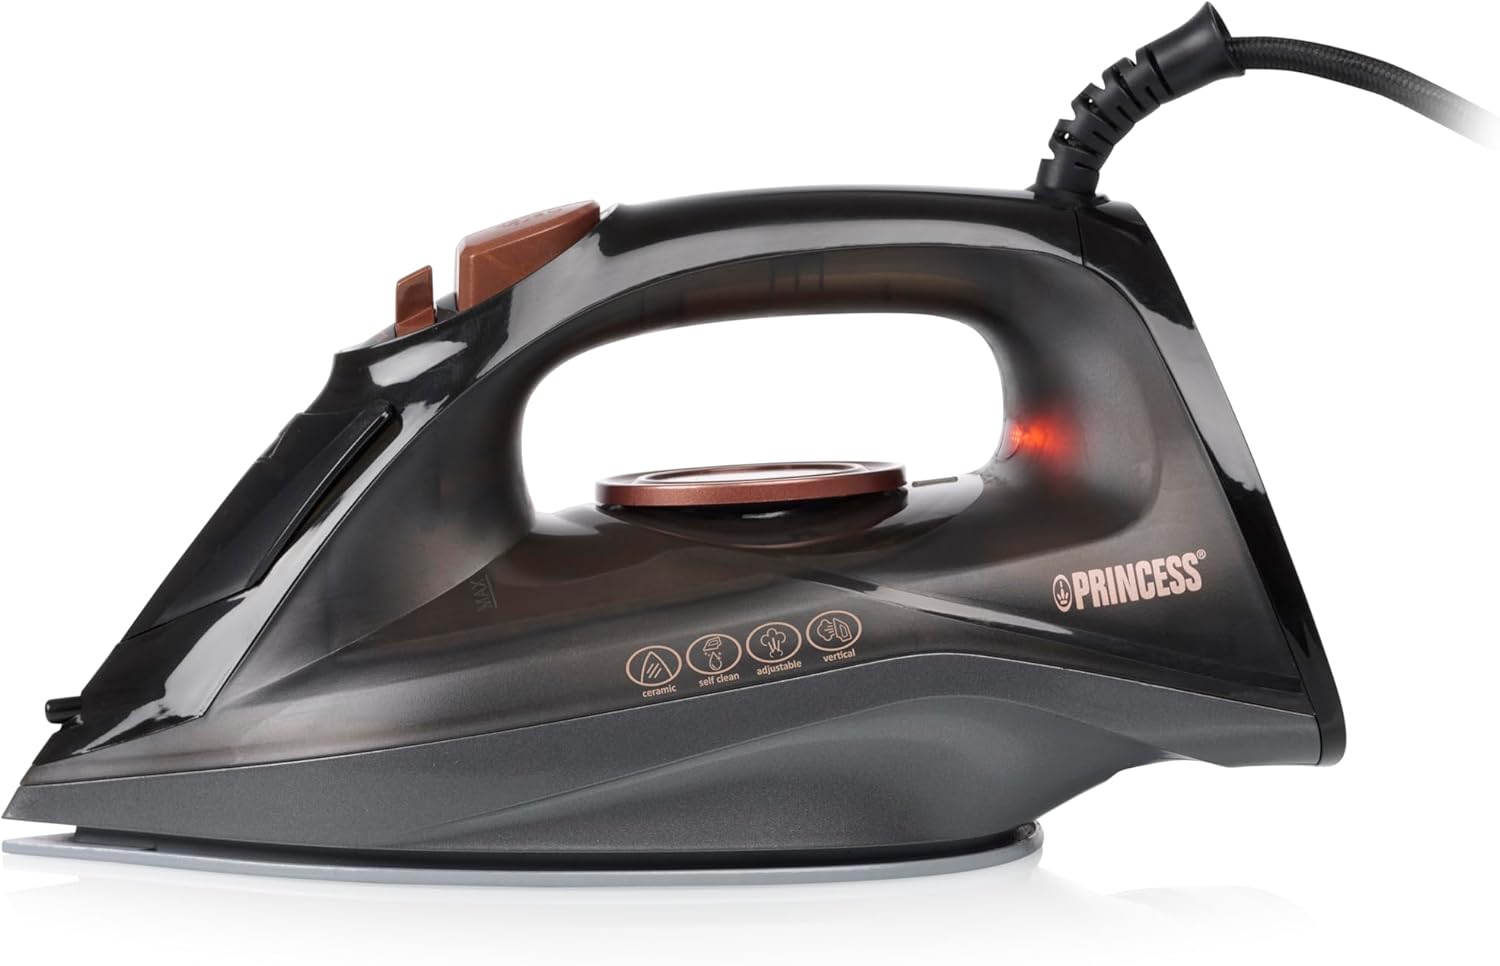
Billede: Side view of the Princess Steam Iron, showing its overall design and handle.

Billede: Top view of the Princess Steam Iron, highlighting the temperature control dial and various function icons.

Image: Close-up of the ceramic soleplate of the Princess Steam Iron, showing steam vents and 'Smooth Glide Scratch Resistant' text.
Opsætning
Før første brug
- Remove any labels, protective film, or stickers from the soleplate.
- It is normal for a slight odor or smoke to occur during the first few minutes of use as manufacturing residues burn off. This is harmless.
- Test the iron on an old piece of fabric to ensure no residue is transferred to your garments.
Fyldning af vandtanken
- Sørg for, at strygejernet er taget ud af stikkontakten.
- Set the steam control slider to the 'Dry' (no steam) position.
- Åbn vandpåfyldningsdækslet.
- Using the provided measuring cup, carefully pour distilled or demineralized water into the water tank up to the 'MAX' level indicator. Do not overfill.
- Luk vandpåfyldningsdækslet forsvarligt.
Betjeningsvejledning
Valg af temperatur
- Plug the iron into a suitable power outlet. The indicator light will illuminate.
- Drej temperaturkontrollen til den ønskede indstilling baseret på stoftypen. Se vaskeanvisningerne på dit tøj.
- The indicator light will turn off when the set temperature is reached, indicating the iron is ready for use. It will cycle on and off during ironing to maintain the temperature.
- Stofindstillinger:
- Low temperature: Synthetics, Silk
- Medium temperature: Wool
- High temperature: Cotton, Linen
Tørstrygning
- Ensure the water tank is empty or the steam control slider is set to the 'Dry' position.
- Vælg den passende temperatur til dit stof.
- Når indikatorlampen slukker, kan du begynde at stryge.
Dampstrygning
- Fill the water tank as described in the 'Setup' section.
- Set the temperature control dial to a steam-suitable setting (typically between 'Wool' and 'Linen' or higher). Steam is only generated at higher temperatures.
- Once the indicator light turns off, slide the steam control to the desired steam level (Min or Max). Continuous steam will be emitted from the soleplate.
- Ved genstridige folder, tryk på Steam Shot -knap for an extra burst of steam (80 g/min). Wait a few seconds between shots to allow the iron to reheat.
Lodret damp
- This function is ideal for removing creases from hanging clothes, curtains, or delicate fabrics.
- Fill the water tank and set the temperature to the maximum setting.
- Hold strygejernet lodret, et par centimeter væk fra stoffet.
- Tryk på Steam Shot -knap gentagne gange for at udløse dampudbrud.
Sprayfunktion
- The spray function can be used with or without steam.
- Tryk på Spray knap to emit a fine mist of water, which helps to dampen fabrics and ease crease removal.
Opretholdelse
Efter hver brug
- Tag stikket ud af strygejernet, og lad det køle helt af.
- Tøm eventuelt resterende vand ud af tanken for at forhindre kalkaflejringer.
- Tør strygesålen af med adamp cloth if necessary. Do not use abrasive cleaners or scouring pads.
- Tør strygejernets yderside af med en blød, tør klud.amp klæde.
Selvrensende funktion
The self-cleaning function helps to remove scale and impurities from the steam chamber and vents.
- Fyld vandtanken til 'MAX'-niveauet.
- Sæt stikket i strygejernet, og indstil temperaturkontrollen til den maksimale indstilling.
- Når indikatorlampen slukker, skal du tage stikket ud af strygejernet.
- Hold strygejernet vandret over en vask.
- Tryk og hold på Selvrensende knap (if available, otherwise use the steam shot button repeatedly while shaking gently). Hot water and steam will be expelled from the soleplate, carrying impurities with it.
- Fortsæt indtil vandtanken er tom.
- Plug the iron back in, let it heat up, and iron an old cloth to dry the soleplate.
Opbevaring
- Ensure the iron is completely cool and empty of water.
- Opbevar strygejernet oprejst på hælen på et sikkert og tørt sted.
Fejlfinding
| Problem | Mulig årsag | Løsning |
|---|---|---|
| Jern varmes ikke op. | Ikke tilsluttet; stikkontakt defekt; temperaturvælgeren er indstillet til 'OFF' eller for lav. | Kontroller strømforbindelsen; prøv en anden stikkontakt; juster temperaturknappen. |
| Ingen damp eller utilstrækkelig damp. | Water tank empty; temperature too low for steam; steam control set to 'Dry'; steam vents blocked. | Fill water tank; set temperature higher; adjust steam control; perform self-clean. |
| Vandlækage fra strygesålen. | Water tank overfilled; temperature too low for steam; steam control set to steam at low temperature. | Do not overfill; ensure temperature is high enough for steam; set steam control to 'Dry' for low temperatures. |
| Sålpladen klæber til stoffet. | Temperature too high for fabric; residue on soleplate. | Reduce temperature; clean soleplate with a damp cloth (when cool). |
Specifikationer
- Modelnummer: 01.322890.01.001
- Magt: 2600 watt
- Voltage: 230 volt
- Vandtankkapacitet: 220 ml
- Kontinuerlig damp: 25 g/min
- Dampskud: 80 g/min
- Materiale sålplade: Keramisk
- Særlige funktioner: Self-cleaning, Vertical Steam, Adjustable Thermostat
- Produktmål (L x B x H): 12 x 11 x 0.1 cm
- Varens vægt: 900 gram
- Oprindelsesland: Kina
Garanti og support
This Princess product comes with a standard manufacturer's warranty. For detailed warranty terms and conditions, please refer to the warranty card included with your purchase or visit the official Princess website. In case of any issues, questions, or if you require technical assistance, please contact Princess customer support. Have your model number (01.322890.01.001) and purchase details ready when contacting support.