
1. Introduktion og produktoversigtview
The GOOLOO A2 is a versatile 5-in-1 portable device designed for roadside emergencies and outdoor activities. It integrates a powerful car jump starter, a high-efficiency tire inflator, an SOS light, a bright LED illumination, and a mobile device charger. This manual provides detailed instructions for safe and effective use of your GOOLOO A2.

Image: The GOOLOO A2 unit, showcasing its compact design, integrated display, control buttons, jump starter ports, and air hose connection. Various air nozzles and a USB-C cable are also visible.
Nøglefunktioner omfatter:
- High-Efficient Jump Starter: 2500A peak current, capable of jump-starting vehicles with up to 8.0L gas or 6.0L diesel engines.
- Upgraded 150 PSI Cordless Air Compressor: Features smart preset auto shut-off and a turbocharged 35L/Min inflation rate for quick tire inflation.
- Emergency Lifesaver: Equipped with a bright LED light offering steady, SOS, and strobe modes, and functions as a power bank for mobile devices.
- Sikkerhedsfunktioner: Incorporates 10 built-in intelligent safety protections, including spark-proof technology and reverse polarity protection.
- Bærbart design: Kompakt og let for nem opbevaring og transport.
2. Pakkens indhold
Kontroller venligst, at alle varer er til stede i din pakke:
- 1 x GOOLOO A2 Portable Car Jump Starter with Tire Inflator
- 1 x Smart Jumper kabel
- 1 x USB-A til USB-C-kabel
- 1 x Pumperør (luftslange)
- 5 x Air Nozzles (British Valve Adapter, Short Tapered Nozzle, Presta Valve Adapter, Ball Needle Adapter, Long Tapered Nozzle)
- 1 x brugermanual
- 1 x bæretaske

Image: A visual representation of the GOOLOO A2 unit, its smart jumper cables, USB-C charging cable, air hose, various air nozzles, user manual, and carrying bag, all neatly arranged.
3. Opsætning og opladning
Before first use, ensure the GOOLOO A2 is fully charged. It comes with a built-in lithium polymer battery.
3.1 Indledende opladning
- Connect the provided USB-A to USB-C cable to the USB-C input port on the GOOLOO A2.
- Connect the other end of the USB-A cable to a 5V/2A USB wall adapter (not included) or a compatible USB port.
- The LED display will indicate the charging status. Charge until the battery indicator shows full.
Note: For optimal performance and battery longevity, it is recommended to fully charge the unit every 3-6 months if not in regular use.

Image: A diagram of the GOOLOO A2 unit, highlighting the LED display, power button, up/down buttons, setting button, LED button, USB-C input (5V/2A), USB-A output (5V/2.1A), aerated port, LED flashlight, and jump cable socket.
4. Betjeningsvejledning
4.1 Jumpstart af et køretøj
Ensure the GOOLOO A2 is sufficiently charged (at least 50% battery recommended) before attempting to jump start a vehicle.
- Tilslut jumperkabel: Insert the blue end of the smart jumper cable into the 12V jump cable socket on the GOOLOO A2 unit. Ensure a firm connection.
- Tilslut til batteri: Sæt den røde clamp (+) til den positive pol på køretøjets batteri og den sorte terminalamp (-) to the negative terminal. Ensure the clamps make good contact with the battery terminals.
- Tjek indikator: Observe the indicator light on the smart jumper cable.
- Solid grøn: Klar til at kickstarte.
- Konstant rød med bip: Reverse polarity detected. Disconnect clamps and re-attach correctly.
- Blinkende grønt: Batteri voltage too low. Press the "BOOST" button on the smart cable if available, then proceed.
- Start køretøj: Når indikatoren lyser konstant grønt, skal du starte din bils motor.
- Afbryde: As soon as the vehicle starts, remove the jumper clamps from the car battery, then disconnect the smart jumper cable from the GOOLOO A2 unit.

Image: The GOOLOO A2 unit connected to a car battery via its smart jumper cables, demonstrating the jump-starting process. The image highlights the 2500A peak current and compatibility with 12V, 8.0L gas, and 6.0L diesel engines.

Image: A three-step visual guide showing how to jump start a vehicle: 1. Insert the jumper cable into the unit. 2. Connect the red clamp til den positive batteripol og den sorte clamp to the negative. 3. Start the car engine when the light on the smart cable turns green.
4.2 Dækpumpe
The GOOLOO A2 features an intelligent tire inflator with auto shut-off.
- Fastgør luftslange: Screw the air hose securely onto the aerated port of the GOOLOO A2.
- Tilslut til dækventil: Attach the other end of the air hose to the tire valve stem. Ensure it is tightly screwed on to prevent air leakage.
- Tænd og vælg tilstand: Press the power button to turn on the unit. Use the "Setting" button (often represented by a gear icon or 'M') to cycle through inflation modes (Car, Motorcycle, Bicycle, Ball). The display will show the current pressure unit (PSI, BAR, KPA).
- Indstil måltryk: Use the "+" and "-" buttons to adjust the desired target pressure. The LCD display provides real-time pressure readings.
- Start inflation: Press the power button again to begin inflation. The compressor will automatically stop once the preset pressure is reached.
- Afbryde: Quickly unscrew the air hose from the tire valve and then from the GOOLOO A2 unit.
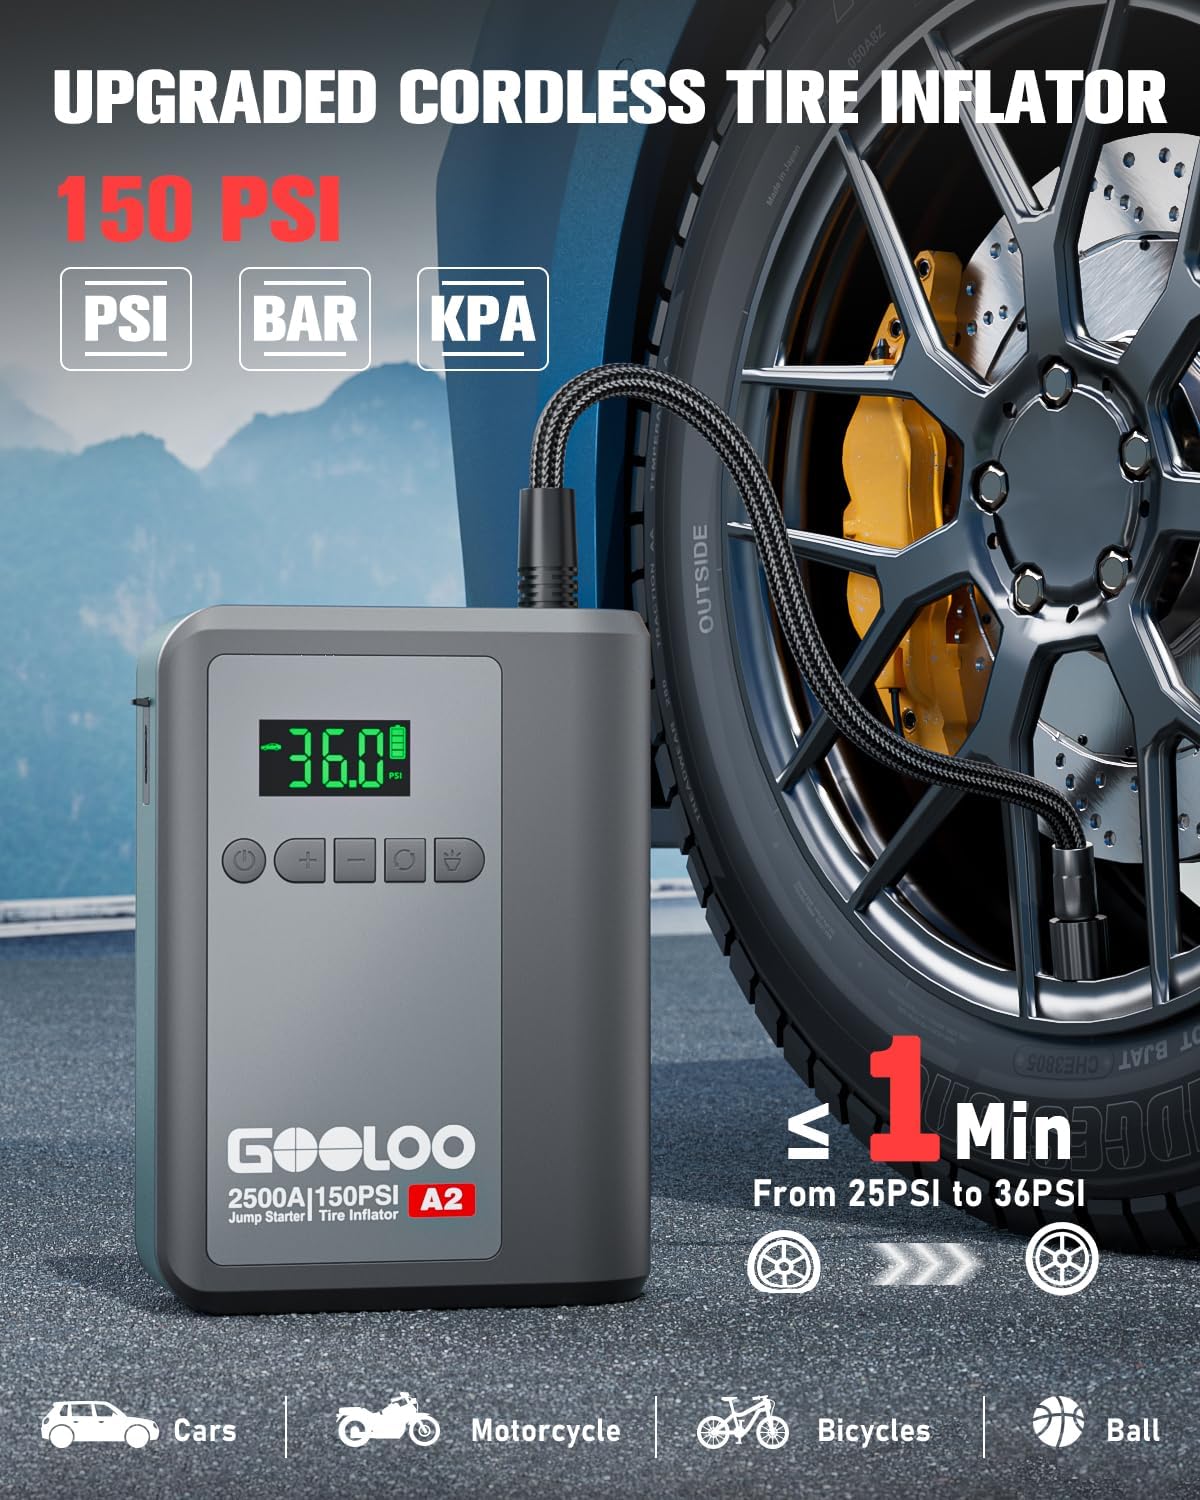
Image: The GOOLOO A2 unit connected to a car tire valve via its air hose, demonstrating the tire inflation process. The display shows "36.0" PSI, indicating the target pressure. The image highlights the 150 PSI capacity and quick inflation time.

Image: A four-step visual guide for tire inflation: 1. Attach the air hose and tighten it. 2. Press the mode button to choose the inflation mode. 3. Press the power button to start inflation. 4. Pull out the air hose when auto-stop occurs.
Note: Use the appropriate air nozzle for different inflatables (e.g., car tires, bicycle tires, sports balls).

Image: A visual guide showing the GOOLOO A2's capability to inflate various items, including car tires, motorcycle tires, bicycle tires, balls, and swimming rings, along with their recommended pressure ranges and adjustable ranges.
4.3 Powerbankens funktion
The GOOLOO A2 can charge your electronic devices on the go.
- Connect your device's charging cable to the USB-A output port (5V/2.1A) on the GOOLOO A2.
- Enheden vil automatisk begynde at oplade din enhed.

Image: A person sitting in a car, charging their smartphone using the GOOLOO A2 unit, demonstrating its function as a portable power bank. Icons below indicate compatibility with phones, iPads, headsets, laptops, cameras, and consoles.
4.4 LED-lysfunktioner
The integrated LED light provides illumination and emergency signaling.
- Press the "LED" button (often represented by a light bulb icon) to cycle through the light modes:
- Steady On (Spotlight): Til generel belysning.
- SOS-tilstand: Flashes the international SOS signal (three short, three long, three short flashes).
- Strobetilstand: Rapid flashing for warning or signaling.
- Press and hold the "LED" button to turn off the light.
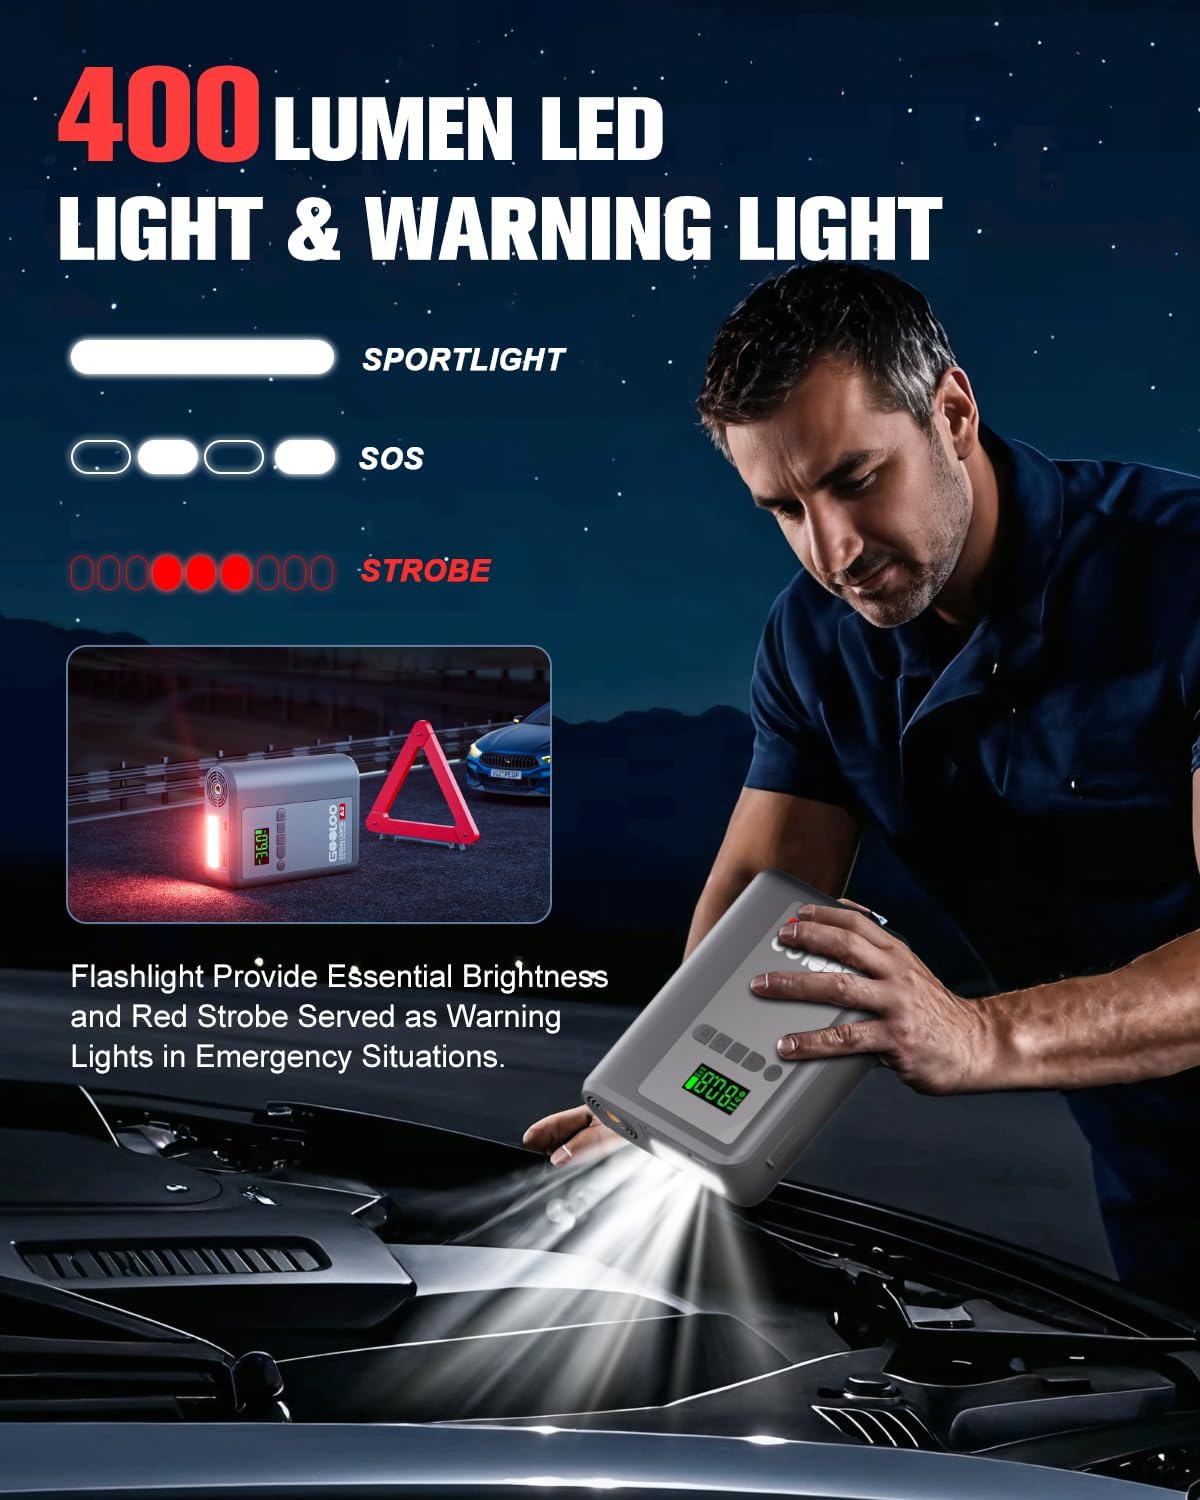
Image: A person using the GOOLOO A2's LED flashlight to illuminate a car engine bay at night, with a warning triangle in the background. The image illustrates the 400 lumen output and the spotlight, SOS, and strobe modes.
5. Vedligeholdelse og pleje
Proper maintenance ensures the longevity and reliability of your GOOLOO A2.
- Opbevaring: Store the unit in a cool, dry place away from direct sunlight and extreme temperatures. Use the provided carrying bag for protection.
- Opladning: Genoplad enheden hver 3.-6. måned, selvom den ikke er i brug, for at opretholde batteriets sundhed.
- Rensning: Tør enheden af med en blød, tør klud. Brug ikke skrappe kemikalier eller slibende rengøringsmidler.
- Undgå vand: Udsæt ikke enheden for vand eller overdreven fugt.
- Temperatur: The unit is designed to operate in temperatures from -20℃ to 60℃. Avoid using or storing outside this range.

Billede: En røntgenstil view of the GOOLOO A2 unit, illustrating its internal design for efficient battery heat dissipation, with blue air currents flowing through. This design helps ensure longer product life and reliable operation in varying temperatures (-20°C to 60°C).
6. Fejlfinding
If you encounter issues with your GOOLOO A2, refer to the following common problems and solutions:
| Problem | Mulig årsag | Løsning |
|---|---|---|
| Enheden tænder ikke. | Batteriet er afladet. | Oplad enheden helt. |
| Køretøjet starter ikke med startkabler. | Forkert klamp connection; Battery too dead; Vehicle issue. | Sørg for, at clamps are connected correctly (red to +, black to -). Check smart cable indicator. If battery is extremely low, use "BOOST" function if available. Consult a mechanic if vehicle still won't start. |
| Dækpumpen virker ikke eller er langsom. | Air hose not securely attached; Incorrect pressure setting; Unit battery low. | Ensure air hose is tightly screwed onto both the unit and tire valve. Verify target pressure. Charge the unit. |
| LED display is dim or unreadable in sunlight. | Direkte sollysgenskin. | The display is designed for sunlight readability, but extreme glare can still affect visibility. Try to shade the screen if possible. |
| Unit gets warm during use. | Normal operation during high power output (jump starting, inflating). | This is normal. The unit has built-in heat dissipation. If it becomes excessively hot or emits smoke, discontinue use immediately and contact support. |
If the problem persists after trying these solutions, please contact GOOLOO customer support.
7. Specifikationer
| Feature | Detalje |
|---|---|
| Model | A2 portable jump starter with tire inflator |
| Peak Output Current | 2500 Amps |
| Motorkompatibilitet | Op til 8.0 l benzin / 6.0 l diesel |
| Dækpumpetryk | Max 150 PSI |
| Produktdimensioner | 4.84" D x 1.97" B x 6.54" H |
| Varens vægt | 1.5 pund |
| Batteritype | Lithiumpolymer (1 påkrævet, inkluderet) |
| USB-C indgang | 5V/2A |
| USB-A-output | 5V/2.1A |
| Driftstemperatur | -20℃ til 60℃ (-4°F til 140°F) |
| LED lysudgang | 400 lumen |
8. Garanti og support
GOOLOO stands behind the quality of its products.
- Garantiperiode: The GOOLOO A2 comes with an 18-month warranty from the date of purchase.
- Returgaranti: A 30-day unconditional return guarantee is offered.
- Kundesupport: GOOLOO provides 24/7 customer support and lifetime technical support.
For warranty claims, technical assistance, or any inquiries, please contact GOOLOO customer service through their official website or the platform where you purchased the product. Please have your model number (A2) and purchase details ready.
You can visit the official GOOLOO store for more information: GOOLOO Official Store