
Indledning
Welcome to the XPG INVADER X MINI ATX Mid Tower PC Case instruction manual. This guide provides detailed information on the installation, operation, and maintenance of your new PC case. The INVADER X MINI is designed for compact, stylish, and powerful gaming rig builds, offering impressive compatibility with ATX motherboards and optimal airflow with five pre-installed ARGB fans.
Please read this manual thoroughly before beginning assembly to ensure proper installation and safe operation.
Pakkens indhold
Bekræft at alle komponenter er til stede i pakken:
- XPG INVADER X MINI PC Case
- Tilbehørsæske (skruer, kabelbindere, afstandsstykker osv.)
- Brugervejledning (dette dokument)
Sikkerhedsforanstaltninger
- Afbryd altid strømforsyningen fra stikkontakten, før du installerer eller fjerner komponenter.
- Håndter komponenterne forsigtigt for at undgå skader.
- Brug en antistatisk håndledsrem for at forhindre elektrostatisk udladning (ESD) på følsomme komponenter.
- Hold små dele og skruer væk fra børn.
Opsætning og installation
1. Forberedelse af sagen
Carefully remove the case from its packaging. Place it on a stable, flat surface. Remove the side panels by unscrewing the thumb screws at the rear of the case and sliding the panels off.

Billede: Forside view of the XPG INVADER X MINI PC case, showcasing its tempered glass panels and the vibrant ARGB fans. This view highlights the compact elegance and panoramic design.
2. Installation af bundkort
- Install the I/O shield into the motherboard tray opening from the inside of the case.
- Align your ATX motherboard with the pre-installed standoffs. Ensure the screw holes on the motherboard match the standoffs.
- Fastgør bundkortet med de medfølgende skruer.
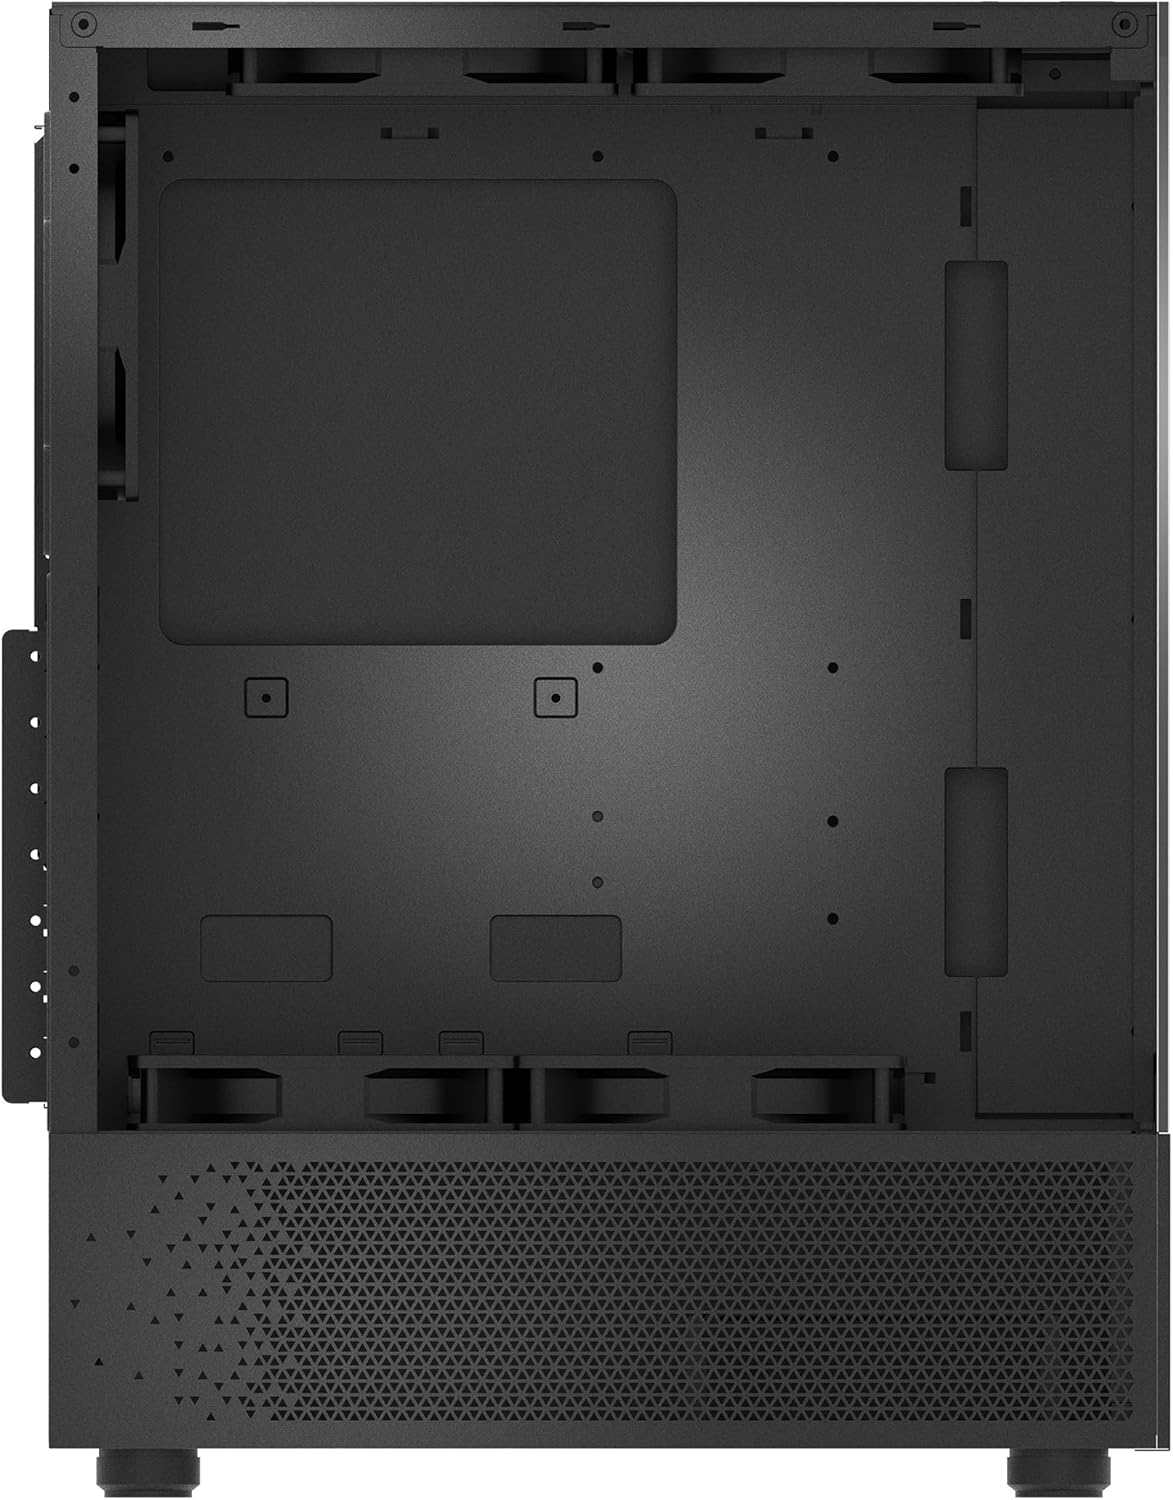
Billede: Intern view of the PC case, illustrating the spacious motherboard tray and various mounting points for components. This image helps visualize the layout for component installation.
3. Installation af strømforsyningsenhed (PSU)
The INVADER X MINI supports rear-mount power supplies. Slide your PSU into the designated compartment at the rear bottom of the case and secure it with screws from the outside.

Billede: Bagerste indvendige view of the PC case, highlighting the power supply mounting area and cable routing channels behind the motherboard tray. This demonstrates the design for clean cable management.
4. Installation af lagerdrev
Install 2.5" SSDs or 3.5" HDDs into the designated drive bays. Refer to the accessory box for specific mounting hardware.

Billede: Detaljeret intern view of the PC case, focusing on the drive bays and fan mounting locations. This helps users identify where to install storage devices and additional cooling.
5. Installation af grafikkort (GPU) og udvidelseskort
Fjern de nødvendige PCIe-slotdæksler fra bagsiden af kabinettet. Indsæt dit grafikkort eller andre udvidelseskort i bundkortets PCIe-slots, og fastgør dem med skruer.

Image: Rear exterior view of the PC case, showing the PCIe expansion slots, the rear exhaust fan, and the I/O panel cutout. This view is crucial for installing expansion cards and connecting peripherals.
6. Kabelforvaltning
Udnyt kabelføringsudskæringerne og fastgørelsespunkterne bag bundkortbakken til at håndtere kablerne pænt. Dette forbedrer luftgennemstrømningen og æstetikken.

Image: Side internal view of the PC case, illustrating the pre-installed ARGB fans and the internal layout for component placement. This perspective helps in planning component installation and cable routing.
7. Connecting Front Panel I/O
Connect the front panel cables (USB, audio, power switch, reset switch, LED indicators) to the corresponding headers on your motherboard. Refer to your motherboard manual for exact pin layouts.

Image: Top-down internal view of the PC case, showing the top fan mounts and the overall internal structure. This view is useful for understanding top-mounted radiator or fan installations.
Betjening af pc-kabinettet
Tænder
Once all components are installed and cables are connected, replace the side panels. Connect your monitor, keyboard, mouse, and power cable to the PC. Press the power button on the front panel of the case to turn on your system.
ARGB-blæserstyring
The XPG INVADER X MINI comes with five pre-installed ARGB fans. These fans can be controlled via your motherboard's ARGB software (if compatible) or a dedicated ARGB controller (if included or purchased separately). Refer to your motherboard manual or ARGB controller instructions for specific lighting effects and synchronization.
Opretholdelse
Rengøring af støvfilter
The case is equipped with dust filters to prevent dust buildup inside. Regularly clean these filters (typically located at the top, front, and bottom) by removing them and gently brushing or washing them with water. Ensure they are completely dry before re-installing.
Generel rengøring
Brug en blød, damp cloth to wipe down the exterior of the case. Avoid abrasive cleaners or solvents that may damage the finish or tempered glass panels.
Fejlfinding
- Systemet tænder ikke: Ensure all power cables (24-pin ATX, 8-pin CPU, GPU power) are securely connected. Check the power switch connection to the motherboard. Verify the PSU is switched on.
- Fans Not Spinning/ARGB Not Lighting Up: Check fan power connections to the motherboard or fan controller. Ensure ARGB headers are correctly connected and software is configured.
- Ingen skærmoutput: Confirm the graphics card is properly seated in its PCIe slot and has adequate power. Ensure the monitor cable is connected to the graphics card, not the motherboard's integrated graphics ports (unless using integrated graphics).
- Overophedning: Verify all fans are spinning correctly and are oriented for optimal airflow (intake/exhaust). Ensure CPU cooler and GPU fans are functioning. Clean dust filters.
Specifikationer
| Feature | Specifikation |
|---|---|
| Mærke | XPG |
| Serie | INVADER X MINI |
| Modelnummer | CJ11533856 |
| Sagstype | Mid Tower |
| Bundkort kompatibilitet | ATX |
| Dimensioner (LxBxH) | 14.13 x 8.27 x 18.11 tommer |
| Varens vægt | 12.54 pund (5.7 kilo) |
| Farve | Sort |
| Materiale | Plastik, hærdet glas |
| Forudinstallerede ventilatorer | 5 x ARGB Fans |
| Afkølingsmetode | Luft |
| Strømforsyningsmonteringstype | Bageste beslag |
Garanti og support
XPG products are designed and manufactured to the highest quality standards. For information regarding warranty coverage, please refer to the warranty card included with your product or visit the official XPG webwebsted.
For technical support, troubleshooting assistance, or to inquire about replacement parts, please contact XPG customer service through their official webwebstedet eller kontaktoplysningerne i dit produkts dokumentation.
Please have your product model number (INVADER X MINI) and serial number ready when contacting support.