
Ortur LU2-10A
Ortur LU2-10A 10000mW Laser Module Instruction Manual
Model: LU2-10A
1. Introduktion
This manual provides essential information for the safe and effective use of your Ortur LU2-10A 10000mW Laser Module. Please read these instructions carefully before installation and operation. This laser module is designed for high-precision engraving and cutting with Ortur Laser Engravers.
2. Pakkens indhold
Bekræft, at alle nedenstående komponenter er til stede i din pakke:

Billede: Detaljeret view of all components included in the Ortur LU2-10A Laser Module package, such as the laser module, laser shield, air assist, various screws, cables, and tools.
- LU2-10A Laser Module
- Laser Shield
- Air Assist
- Supportblok
- Skyder
- OUC2.0
- Small Coupling
- 24V 2A strømadapter
- Dedicated LaserWire
- Luftrør
- Rørforbindelse
- Normal Adapter Cable
- Laser Backboard
- M3x5mm Screws*6 (Used for Slider)
- Thumb Screws*2
- M3x8mm Screws*4 (Used for OLM2S2)
- M3x12mm Screws*4 (Used for OLM2)
- Kabelbinder*10
- M3 Gasket*1
- Skruenøgle
- Linse
- Luftstrømsregulator
- OLM2/S2 OUC Exclusive Adapter Cable
3. Opsætning og installation
This section guides you through the assembly and installation of the LU2-10A Laser Module onto your Ortur Laser Engraver. Ensure the engraver is powered off and disconnected from the power source before beginning installation.
3.1. Installation Tutorial Video
Video: A detailed installation tutorial for the Ortur Laser Master 2 Pro S2 LU2-10A, demonstrating step-by-step assembly and connection procedures.
3.2. Laser Module Installation Steps
- Attach the laser module to the engraver's carriage.
- Secure the laser module using the provided thumbscrews.
- Insert the 5-pin terminal of the dedicated laser line into the laser module's port.
- Connect the other end of the laser line to the appropriate port on the engraver's control board.
- Install the laser shield onto the laser module to ensure eye protection during operation.
- Connect the air assist hose to the air intake port on the laser module and to an external air pump (not included).

Image: The Ortur LU2-10A Laser Module actively cutting a piece of wood, demonstrating its operational capability.
4. Betjeningsvejledning
The Ortur LU2-10A Laser Module offers powerful and precise capabilities for various materials.
4.1. Nøglefunktioner
- Bred kompatibilitet: Compatible with Ortur Laser Master 2, Ortur Laser Master 2 S2, Ortur Laser Master 2Pro S2, and Ortur Laser Master 3 Laser Engravers.
- Materialets alsidighed: Engrave and cut acrylic, metal, wood, stainless steel, glass, ceramics, leather, food, paper, fabric, and more.
- Kraftig output: True 10000mW laser output for effective cutting and engraving.
- Høj præcision: Compressed spot size of 0.05mm x 0.1mm for detailed work.
- Høj effektivitet: Lightweight design (235g) allows for engraving speeds up to 15000mm/min.
- Dual Fan Cooling: Optimized cooling system ensures stable long-term operation without overheating.
- Stabil drift: 24V electrical system and high-quality cables support 24 hours of uninterrupted, consistent engraving.
4.2. Graverings- og skærefunktioner
The LU2-10A module is capable of cutting various materials with significant thickness:
- Up to 30mm acrylic.
- Up to 20mm wood.

Image: An internal diagram illustrating how two 5.5W laser beams are combined using light combing lenses to achieve a true 10W output with a precise 0.05 x 0.1mm compressed spot.

Image: The Ortur LU2-10A Laser Module highlighting its air intake for cooling and its lightweight design (only 235g), contributing to high engraving speeds.

Billede: En gennemsigtig view of the Ortur LU2-10A Laser Module, showing the internal arrangement of two 5.5W lasers combining to form a single 10W output beam.

Image: The Ortur LU2-10A Laser Module featuring its built-in air assist system, with an example showing a cleaner cut (labeled "Ours") compared to a cut without air assist (labeled "Other").
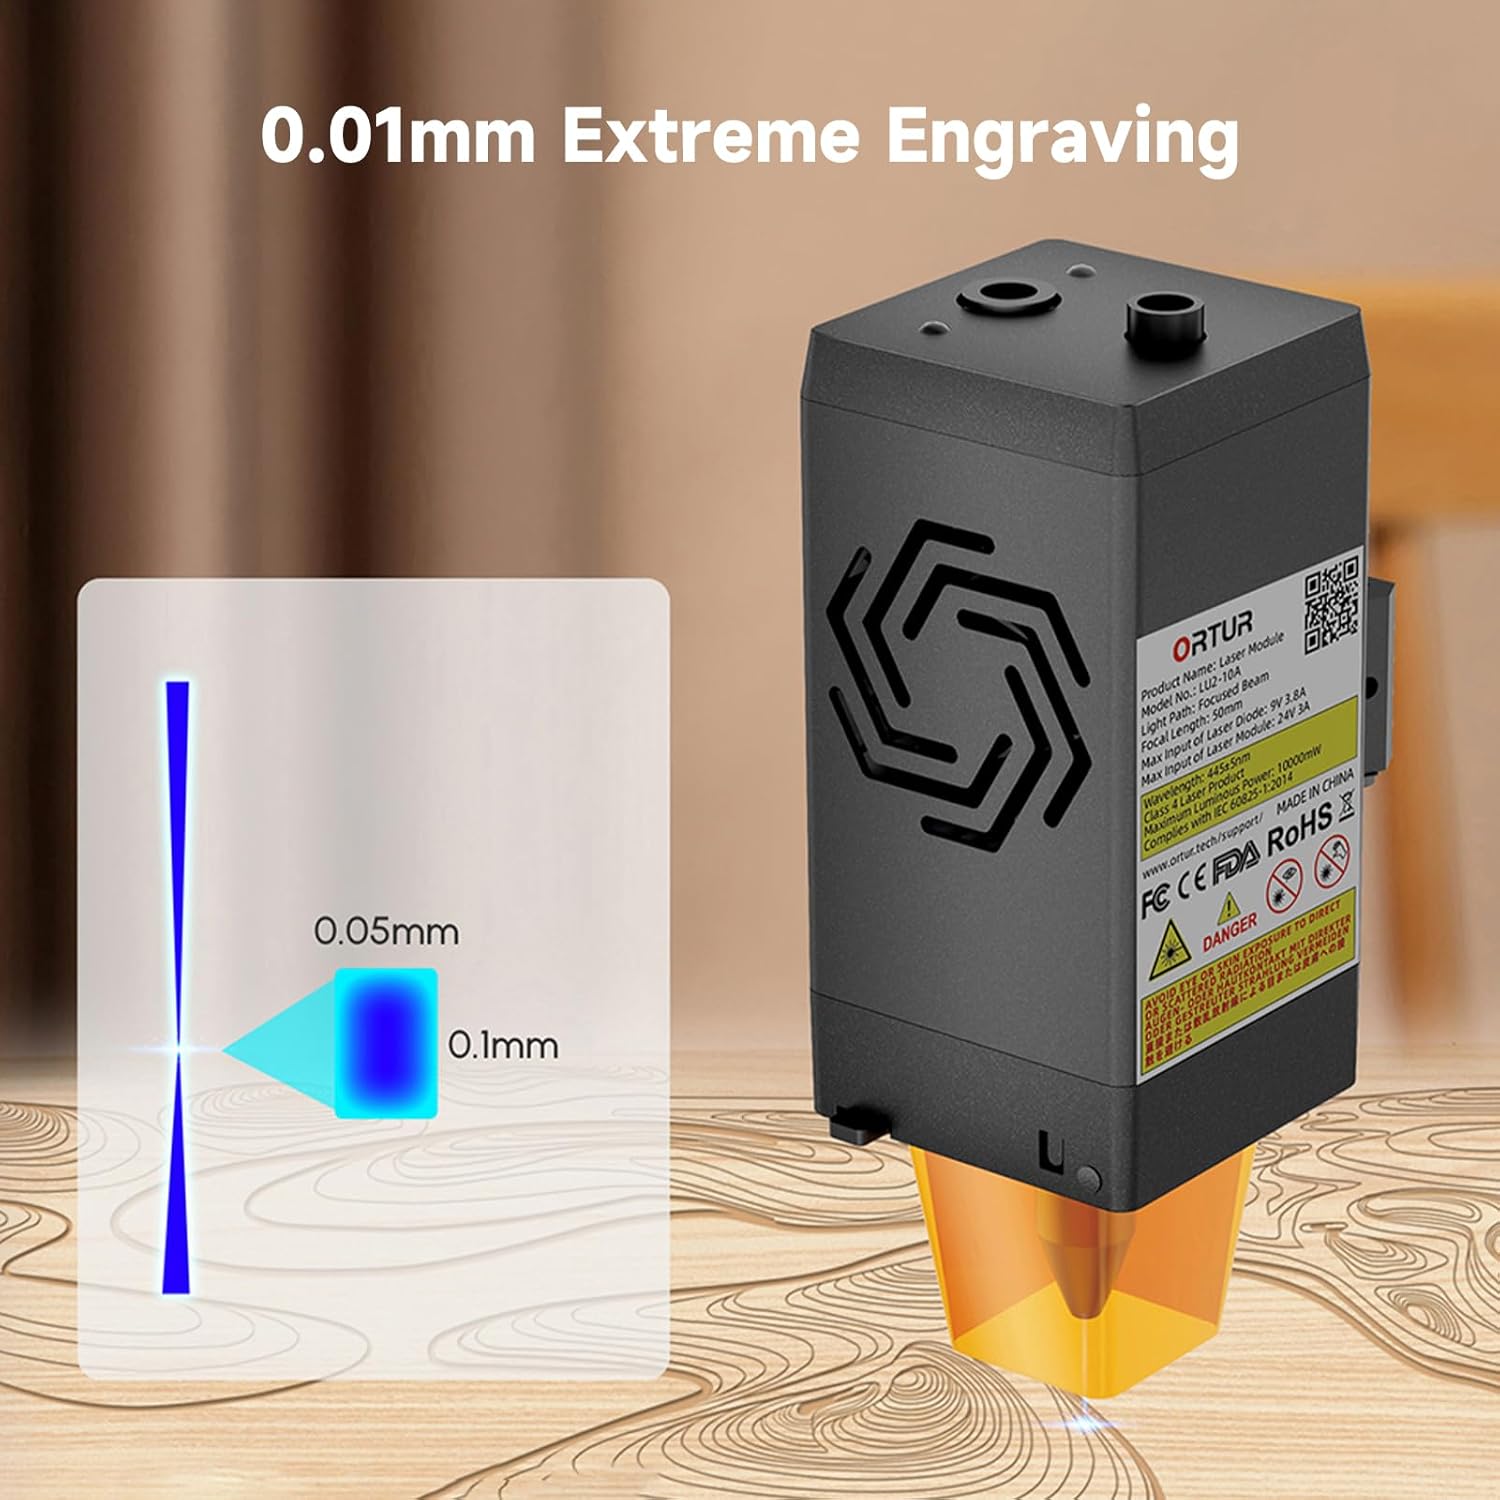
Image: A visual representation of the laser's compressed spot, showing its dimensions of 0.05mm x 0.1mm, which enables extreme precision in engraving.
5. Vedligeholdelse
Regular maintenance ensures optimal performance and extends the lifespan of your laser module.
- Rengøring af linser: Periodically clean the laser lens with a soft, lint-free cloth and appropriate lens cleaning solution to prevent residue buildup that can affect laser performance.
- Lufthjælpsdyse: Ensure the air assist nozzle is clear of debris to maintain effective airflow during cutting and engraving.
- Køleventilatorer: Check the dual cooling fans for dust accumulation and clean them gently to ensure proper heat dissipation.
- Kabelinspektion: Regularly inspect all cables for any signs of wear, damage, or loose connections.
6. Fejlfinding
This section addresses common issues you might encounter with your Ortur LU2-10A Laser Module.
| Problem | Mulig årsag | Løsning |
|---|---|---|
| Laseren udløses ikke eller har svagt output. |
|
|
| Inconsistent engraving/cutting results. |
|
|
| Luftassistancen fungerer ikke. |
|
|
7. Specifikationer
| Feature | Detalje |
|---|---|
| Produktdimensioner | 4.72 x 1.97 x 1.73 tommer |
| Varemodelnummer | Ortur-LaserMaster2-ProS2 (LU2-10A variant) |
| Varens vægt | 1.54 pund |
| Laser udgangseffekt | 10000 mW (10 W) |
| Komprimeret punktstørrelse | 0.05 mm x 0.1 mm |
| Graveringshastighed | Op til 15000 mm/min |
| Kølesystem | Dual Fan Cooling |
| Elektrisk System | 24V |
| Kompatibilitet | Ortur Laser Master 2, 2 S2, 2Pro S2, 3 |
8. Garanti og support
For warranty information, technical support, or further assistance, please refer to the official Ortur webwebstedet eller kontakt deres kundeservice direkte. Behold din købskvittering som købsbevis.
Official Ortur Webwebsted: www.ortur.net
Ask a question about this manual
Ask about setup, troubleshooting, compatibility, parts, safety, or missing instructions. Manuals+ will review the question and use this page’s manual context to help answer it.