Red Dot Sight Mount Plate for Sig Sauer P226 P220 P224 P225 P228 P229 SP2022, Metal Base, RMR SENTRY,Frenzy MOS MOJ Comp
Brugermanual til monteringsplade til rødpunktsigte
Model: Red Dot Sight Mount Plate for Sig Sauer P226 P220 P224 P225 P228 P229 SP2022, Metal Base, RMR SENTRY,Frenzy MOS MOJ Compatible,SRO,Holosun 407C 507C
1. Introduktion og overview
This manual provides essential information for the installation, operation, and maintenance of your Red Dot Sight Mount Plate. This metal base optic mount plate is designed to facilitate the secure attachment of various red dot sights to compatible Sig Sauer firearm models.
The mount plate is engineered for a precise fit, enhancing shooting accuracy and target acquisition by allowing the integration of modern red dot optics onto your firearm.
2. Kompatibilitet
This mount plate is specifically designed for the following Sig Sauer full-sized pistol models:
- Sig Sauer P226
- Sig Sauer P220
- Sig Sauer P224
- Sig Sauer P225
- Sig Sauer P228
- Sig Sauer P229
- Sig Sauer SP2022
It is compatible with various red dot optics, including but not limited to:
- RMR (Note: Some users report compatibility issues with RMRcc footprint. This plate is designed for standard RMR footprint.)
- SKILDVAGT
- SRO
- Holosun 407C
- Holosun 507C
- Vanvid
- MOS
- MOJ
Important Note on RMR Compatibility: While listed as compatible, some user feedback indicates that this plate may align more closely with the RMRcc (compact) footprint rather than the standard RMR footprint. Please verify your optic's footprint before installation to ensure proper fitment. An incorrect footprint may result in the optic not seating correctly or the plate being slightly too long/narrow for certain RMR models.
3. Pakkens indhold
Når du åbner pakken, skal du kontrollere, at alle komponenter er til stede og ubeskadigede:
- 1x Red Dot Sight Mount Plate
- 1x Unbrakonøgle (til installation)
- Mounting Screws (pre-installed or separate, verify quantity)
4. Opsætning og installation
Follow these steps carefully to install the Red Dot Sight Mount Plate onto your firearm. Always ensure your firearm is unloaded and safe before beginning any installation or maintenance procedures.
4.1 Sikkerhed først
- Ensure the firearm is unloaded. Visually and physically check the chamber and magazine well.
- Point the firearm in a safe direction.
- Engage the safety mechanism if available.
- Bær passende øjenbeskyttelse.
4.2 Installationstrin
- Prepare the Firearm: If your firearm has a rear sight that needs to be removed to accommodate the mount plate, carefully remove it according to your firearm's manufacturer instructions. Some models may require a sight pusher tool.

Image: The mount plate positioned above a Sig Sauer P226 slide, demonstrating its intended placement.
- Position the Mount Plate: Carefully align the Red Dot Sight Mount Plate with the dovetail slot or mounting area on your firearm's slide. Ensure the plate sits flush and securely.

Billede: Bund view of the mount plate, illustrating the base designed to fit the firearm's slide.
- Secure the Mount Plate: Use the provided screws and Allen wrench to secure the mount plate to the firearm. Tighten the screws evenly and firmly, but do not overtighten, as this can strip threads or damage the plate/firearm. Refer to your firearm's manual for specific torque specifications if available.
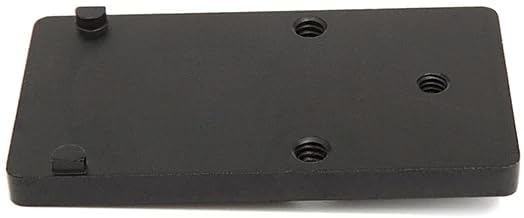
Billede: Top view of the Red Dot Sight Mount Plate, showing the screw holes for attaching a red dot optic.

Image: The Red Dot Sight Mount Plate alongside an Allen wrench, typically used for installation.
- Mount the Red Dot Sight: Once the mount plate is securely attached, place your compatible red dot sight onto the plate. Ensure the sight's footprint aligns perfectly with the plate's mounting holes.
- Secure the Red Dot Sight: Use the screws provided with your red dot sight (or appropriate screws if included with the plate) to attach the sight to the mount plate. Tighten these screws according to the red dot sight manufacturer's specifications. Apply a small amount of non-permanent thread locker (e.g., blue Loctite) to the screws for added security, if recommended by your optic's manufacturer.
- Funktionskontrol: After installation, perform a function check of your firearm to ensure all mechanisms operate correctly and safely. Do not attempt to fire the weapon until a thorough function check is complete.
5. Betjeningsvejledning
Once the red dot sight is securely mounted to the plate and firearm, the primary operation involves zeroing the optic and using it for aiming.
5.1 Zeroing Your Red Dot Sight
Refer to the instruction manual provided with your specific red dot sight for detailed zeroing procedures. Generally, this involves firing a series of shots at a target and adjusting the sight's windage and elevation until the point of impact matches the point of aim at a desired distance.
5.2 Brug
With the red dot sight zeroed, you can now use it for faster target acquisition and improved accuracy. Always follow safe firearm handling practices.
6. Vedligeholdelse
Proper maintenance ensures the longevity and reliable performance of your mount plate.
- Rensning: Periodically clean the mount plate with a soft, dry cloth to remove dirt, dust, and debris. Avoid using harsh chemicals or abrasive materials that could damage the finish.
- Inspektion: Regularly inspect the mount plate and all screws for any signs of loosening, wear, or damage. Ensure all screws remain tight.
- Opbevaring: Store the mount plate and firearm in a clean, dry environment, protected from extreme temperatures and humidity.
7. Fejlfinding
If you encounter issues with your Red Dot Sight Mount Plate, consider the following common solutions:
- Mount Plate Feels Loose:
- Ensure the mounting screws securing the plate to the firearm are properly tightened.
- Verify that the plate is correctly seated in the firearm's dovetail or mounting area.
- Red Dot Sight Feels Loose on Plate:
- Check the screws securing the red dot sight to the mount plate. Tighten them according to the optic manufacturer's specifications.
- Consider using a small amount of non-permanent thread locker (e.g., blue Loctite) on the optic mounting screws to prevent loosening from recoil.
- Red Dot Sight Does Not Fit the Plate:
- Verify that your red dot sight has a compatible footprint (e.g., RMR, SENTRY, SRO, Holosun 407C/507C, Frenzy, MOS, MOJ).
- As noted in the compatibility section, some RMR models (specifically RMRcc) may have a slightly different footprint than the standard RMR. Ensure your optic matches the plate's intended footprint.
- Difficulty Zeroing Optic / Optic Not Holding Zero:
- Ensure both the mount plate and the red dot sight are securely fastened. Any movement will affect zero.
- Check for any damage to the mount plate or the firearm's slide that might prevent a stable mount.
8. Specifikationer
| Feature | Detalje |
|---|---|
| Mærke | Generisk |
| Modelnavn | Red Dot Sight Mount Plate for Sig Sauer P226 P220 P224 P225 P228 P229 SP2022, Metal Base, RMR SENTRY,Frenzy MOS MOJ Compatible,SRO,Holosun 407C 507C |
| Materiale | Metal |
| Farve | Sort |
| Varens vægt | 30 gram |
| Kompatible enheder | Handgun (Sig Sauer P226, P220, P224, P225, P228, P229, SP2022) |
| Monteringstype | Bundplade |
| Emne Pakke Dimensioner | 0.6 x 0.5 x 0.2 tommer |
9. Garanti og support
9.1 Garantioplysninger
This product is eligible for return and exchange within one month of purchase. Please retain your proof of purchase for any warranty claims.
9.2 Kundesupport
For further assistance, technical support, or inquiries regarding your Red Dot Sight Mount Plate, please contact the seller or manufacturer through the platform where the product was purchased. Provide your order details and a clear description of the issue for prompt support.