
Indledning
Thank you for choosing the AMZASA Crystal White Chandelier. This manual provides essential information for the safe and proper installation, operation, and maintenance of your new lighting fixture. Please read all instructions carefully before beginning installation and retain this manual for future reference.
Sikkerhedsoplysninger
WARNING: RISK OF ELECTRIC SHOCK. Disconnect power at the circuit breaker or fuse box before installation or servicing. Improper installation can result in electric shock or fire.
- Alle elektriske forbindelser skal være i overensstemmelse med lokale forskrifter og bestemmelser, National Electric Code (NEC) og ANSI/NFPA 70-1999.
- Kontakt en kvalificeret elektriker, hvis du er usikker på installationsprocessen.
- Brug sikkerhedsbriller og handsker under installationen.
- Sørg for, at monteringsfladen kan bære armaturets vægt.
- Overskrid ikke det maksimale wattage specificeret for pærerne.
- Hold brandfarlige materialer væk fra lysarmaturet.
Hvad er der i æsken
Carefully unpack all components and check against the list below. If any parts are missing or damaged, contact customer support immediately.
- Chandelier Frame with Wiring
- Ceiling Canopy and Mounting Hardware
- Chain for Hanging
- Glass Decorative Dish (A Glass)
- Crystal Pendants (Various sizes and styles: A, B, C, D, E, F, G)
- Trådmøtrikker
- Wrench for Assembly

Image: All chandelier components, including the frame, crystals, and mounting hardware, laid out for inventory before assembly.
Opsætning og installation
Følg disse trin for korrekt installation. Det anbefales at være to personer til installationen på grund af armaturets størrelse og vægt.
Step 1: Prepare the Mounting Plate
Secure the mounting plate to the ceiling junction box. Ensure it is firmly attached to support the chandelier's weight. The mounting plate should be installed first, using two bolts to hold the weight of the chandelier, ensuring a good base.
Video: This video demonstrates the initial steps of chandelier installation, focusing on securing the base plate to the ceiling. It shows how to attach the base plate and connect the main support for the chandelier.
Step 2: Assemble the Chandelier Frame
Assemble the main body of the chandelier. This involves attaching the arms to the central column and securing them with the provided wrench. Ensure all connections are tight.
Video: This video provides a detailed guide on assembling the chandelier frame, including attaching the arms and securing components. It also shows the process of attaching the glass decorative dish and various crystal types.
Step 3: Attach Glass Decorative Dish and Crystals
Attach the glass decorative dish (A Glass) to the central column. Then, begin attaching the crystal strands (B, C, D, E, F, G) to the chandelier arms and the central column as shown in the diagrams and video. Inventory all crystals before installation for faster assembly.
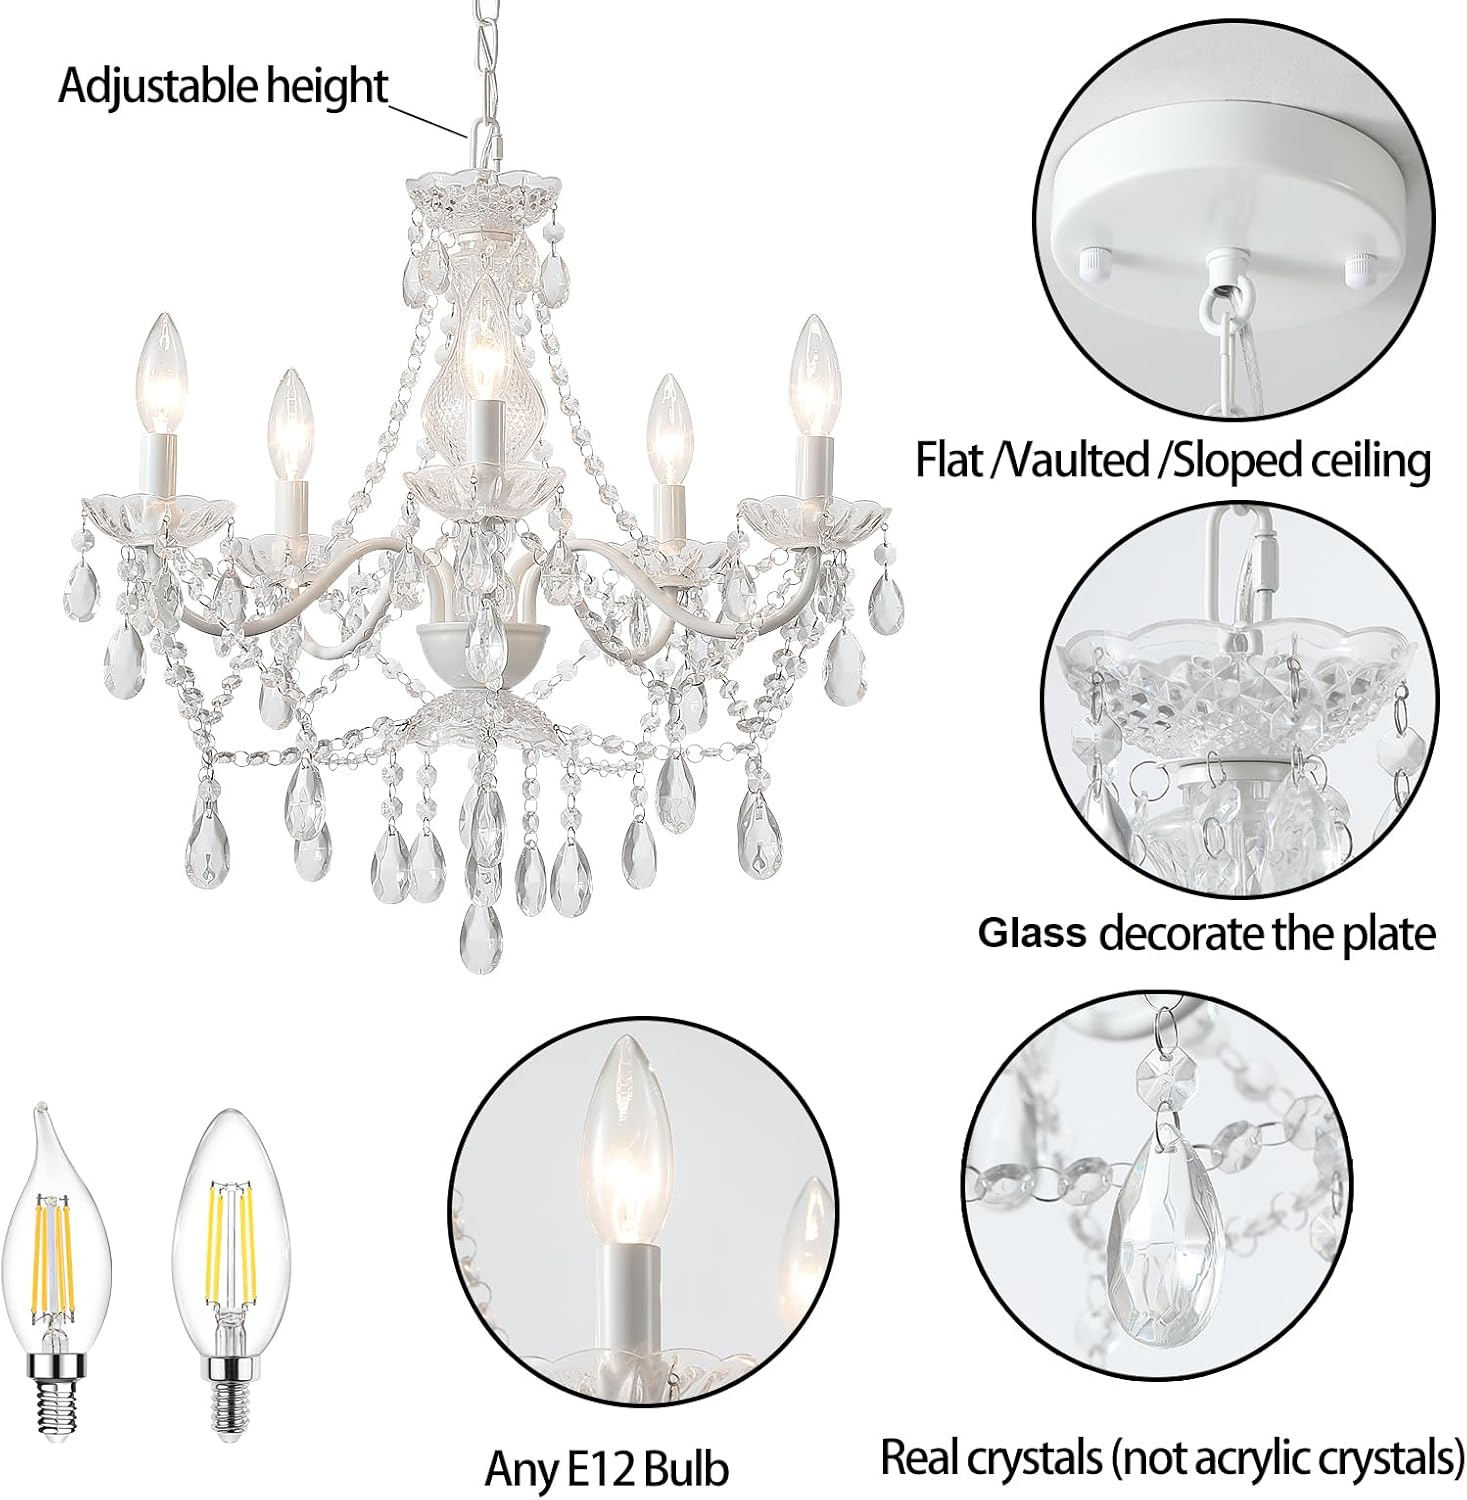
Billede: Et nærbillede view of the chandelier's central column, showing the glass decorative dish, bulb sockets, and the attachment points for the crystal strands. This image highlights the real crystal quality.
Trin 4: Elektriske ledninger
Connect the chandelier's wires to the household electrical wires. Connect the ground wire (usually bare copper or green) to the ground screw on the mounting plate. Connect the neutral wire (white) to the white household wire and the live wire (black) to the black household wire using wire nuts. Ensure all connections are secure.
Step 5: Secure the Ceiling Canopy
Once wiring is complete, carefully push the ceiling canopy up against the ceiling, covering the junction box and wiring. Secure it with the provided screws or nuts.
Trin 6: Installer pærer
Install 5 x 40W E12 (Dimmable) bulbs (not included) into the sockets. Do not exceed the maximum wattage.

Image: A side-by-side comparison of the chandelier in its 'off' state and fully illuminated, demonstrating the light output.
Operation
This chandelier is designed for indoor use and operates on 110 Volts. It requires 5 E12 base bulbs, with a maximum wattage of 40 watts per bulb. The fixture is dimmable, but bulbs and dimmer switches are not included and must be purchased separately. The control method is touch, typically referring to a wall switch connected to the fixture.
The adjustable height feature allows for customization to suit various ceiling heights, including sloped or vaulted ceilings. If a longer chain is required for higher ceilings, please contact customer support.
Opretholdelse
To maintain the beauty and longevity of your chandelier, follow these simple maintenance guidelines:
- Rensning: Disconnect power before cleaning. Use a soft, dry cloth to wipe the metal frame. For the crystals, a soft, damp cloth with a mild glass cleaner can be used. Avoid abrasive cleaners or harsh chemicals that may damage the finish or crystals.
- Udskiftning af pære: Always disconnect power before replacing bulbs. Allow bulbs to cool completely before touching. Replace with E12 base bulbs, not exceeding 40 watts.
- Regelmæssig inspektion: Periodically check all connections and hanging components to ensure they are secure.
Fejlfinding
If you encounter any issues with your chandelier, refer to the following common problems and solutions:
- Lyset tænder ikke:
- Kontroller om strømmen er tændt ved afbryderen.
- Ensure bulbs are correctly installed and not burnt out.
- Kontroller, at alle ledningsforbindelser er sikre.
- Flimrende lys:
- Ensure bulbs are fully screwed into their sockets.
- Tjek for løse ledningsforbindelser.
- If using a dimmer, ensure it is compatible with the bulbs.
- Chandelier hangs unevenly:
- Verify the mounting plate is level and securely installed.
- Adjust the chain links to balance the fixture.
Kontakt kundesupport, hvis problemet fortsætter.
Specifikationer
| Feature | Detalje |
|---|---|
| Mærke | AMZASA |
| Modelnavn | AS9027-5WH |
| Farve | Hvid |
| Materiale | Crystal, Glass, Iron |
| Stil | Land rustik |
| Lysarmatur Form | Lysekrone |
| Værelsestype | Bedroom, Dining Room, Entryway, Kids Room, Storage Room |
| Produktdimensioner | 20.87"L x 19.7"W x 79.9"H (Adjustable Height) |
| Indendørs/Udendørs brug | Indendørs |
| Strømkilde | Elektrisk med ledning |
| Installationstype | Planforsænket montering, delvist planforsænket montering |
| Særlige funktioner | Justerbar højde, dæmpbar |
| Kontrolmetode | Berøring (via vægkontakt) |
| Lyskildetype | Halogen, Incandescent, LED (E12 base) |
| Antal lyskilder | 5 |
| Voltage | 110 volt |
| Wattage | 40 watt (maks. pr. pære) |
| Lysstyrke | 2400 lumen (i alt, med anbefalede pærer) |
| Montering påkrævet | Ja |
| Varens vægt | 8.47 pund |
Kundesupport
Should you have any issues during the installation or purchase process, our customer support team is here to help. Simply send us a message, and we'll respond promptly to assist you.
For further assistance, please refer to the contact information provided with your purchase or visit the AMZASA store online.