JACK A4B Computerized Sewing Machine User Manual
Model: A4B
Indledning
This manual provides comprehensive instructions for the safe and efficient operation, setup, and maintenance of your JACK A4B Computerized Sewing Machine. Please read this manual thoroughly before using the machine to ensure proper function and to prevent damage or injury. Keep this manual accessible for future reference.
Vigtige sikkerhedsinstruktioner
Når du bruger et elektrisk apparat, skal grundlæggende sikkerhedsforanstaltninger altid følges, herunder følgende:
- Læs alle instruktioner, før du bruger denne symaskine.
- Hold fingrene væk fra alle bevægelige dele. Der kræves særlig forsigtighed omkring symaskinens nål.
- Brug altid den rigtige stingplade. Den forkerte plade kan få nålen til at knække.
- Brug ikke bøjede nåle.
- Træk eller skub ikke i stoffet under syning. Dette kan afbøje nålen og få den til at knække.
- Sluk symaskinen, når du foretager justeringer i nåleområdet, f.eks. trådning af nålen, skift af nål, trådning af spolen eller skift af trykfoden.
- Træk altid stikket til symaskinen ud af stikkontakten, når du fjerner dæksler, smører, eller når du foretager andre brugerservicejusteringer, der er nævnt i instruktionsmanualen.
- Tab eller indsæt aldrig nogen genstand i nogen åbning.
- Må ikke bruges udendørs.
- Må ikke anvendes, hvor der anvendes aerosolprodukter (spray), eller hvor der indgives ilt.
Pakkens indhold
Bekræft, at alle nedenstående varer er inkluderet i din pakke:
- Symaskine
- Brugermanual
- Strømledning

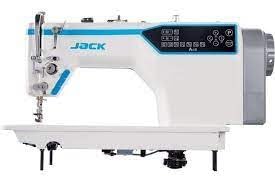
Image: The main unit of the JACK A4B Computerized Sewing Machine, showing its white and blue design with control panel.
Opsætningsinstruktioner
- Udpakning: Carefully remove the sewing machine and all accessories from the packaging. Retain packaging for future transport or storage.
- Placering: Place the machine on a stable, flat surface. Ensure there is adequate space around the machine for comfortable operation.
- Strømtilslutning: Connect the provided power cord to the machine's power input and then to a suitable electrical outlet. Ensure the power switch is in the OFF position before connecting.
- Foot Pedal (if applicable): Connect the foot pedal to its designated port on the machine.
- Indledende trådning: Refer to the threading diagrams (not provided in this text, but would be in a full manual) for proper upper thread and bobbin threading.

Billede: En side view of the JACK A4B sewing machine, highlighting its robust construction and design.
Betjening af maskinen
The JACK A4B is designed for ease of use, offering a range of features to enhance your sewing experience.
Nøglefunktioner:
- Alsidig: Suitable for a wide range of projects.
- Brugervenlig kontrol: Intuitive control panel with easy-to-use dials and buttons.
- Justerbar stinglængde og -bredde: Customize stitch settings for various fabrics and projects.
- Automatisk nåletråder: Simplifies the threading process, saving time and effort.
Grundlæggende betjening:
- Tænd: Flip the power switch to the ON position. The control panel will illuminate.
- Vælg søm: Use the control panel buttons to select your desired stitch pattern. Refer to the display for current stitch settings.
- Juster indstillinger: Modify stitch length and width as needed using the dedicated controls.
- Start med at sy: Placer stoffet under trykfoden. Sænk trykfodsarmen. Tryk forsigtigt på fodpedalen for at begynde at sy.
- Stop med at sy: Release the foot pedal to stop. Raise the presser foot lever and remove your fabric.

Billede: En detaljeret view of the control panel and needle area of the JACK A4B, showing the digital display and buttons for stitch selection and adjustments.
Vedligeholdelse og pleje
Regelmæssig vedligeholdelse sikrer din symaskines levetid og optimale ydeevne.
- Rensning: Regularly clean lint and dust from the bobbin case, feed dogs, and tension discs using a small brush or vacuum cleaner. Always unplug the machine before cleaning.
- Oliering: Refer to the machine's specific oiling points (if indicated in a full manual) and apply a small amount of sewing machine oil as recommended.
- Udskiftning af nåle: Change the needle frequently, especially when working with different fabrics or if the needle shows signs of wear or bending.
- Opbevaring: Når maskinen ikke er i brug, skal den dækkes til for at beskytte den mod støv. Opbevares tørt og køligt.
Billede: En front view of the JACK A4B sewing machine, illustrating its compact and functional design.
Fejlfinding Guide
Dette afsnit omhandler almindelige problemer, du kan støde på. Ved mere komplekse problemer bedes du kontakte kundesupport.
| Problem | Mulig årsag | Løsning |
|---|---|---|
| Maskinen starter ikke | Power cord not connected; Power switch off; Foot pedal not connected. | Check power connections; Ensure switch is ON; Connect foot pedal securely. |
| Springet søm over | Incorrect needle; Bent needle; Improper threading; Fabric too thick/thin. | Use correct needle type/size; Replace needle; Re-thread machine; Adjust tension or use appropriate needle/foot. |
| Trådbrud | Improper threading; Incorrect tension; Damaged needle; Poor quality thread. | Re-thread machine; Adjust tension; Replace needle; Use good quality thread. |
| Stoffet fremføres ikke | Presser foot not lowered; Feed dogs obstructed; Stitch length set to zero. | Lower presser foot; Clean feed dogs; Adjust stitch length. |
Produktspecifikationer
| Feature | Detalje |
|---|---|
| Mærke | Jack |
| Modelnummer | A4B |
| Type | Computeriseret symaskine |
| Varens vægt | 30 kg |
| Produktdimensioner | 30D x 50B x 35H Centimeter |
| Farve | White And Blue |
| Fremstillingsår | 2023 |
| Inkluderede komponenter | Power Cord, Sewing Machine, User Manual |
Garanti og support
For garantioplysninger og kundesupport henvises til den dokumentation, der fulgte med dit køb, eller kontakt producenten direkte. Gem din købsbevis i tilfælde af garantikrav.