
1. Introduktion
Tak for købetasing the MLWSHR Digital LED Alarm Clock Model 8808. This device combines a digital alarm clock with a thermo-hygrometer, offering dual alarms, snooze function, date and year display, 12/24 hour switch, weekday settings, Daylight Saving Time (DST) functionality, auto-dimmable display with three brightness levels, and a convenient 5V1A USB output for charging other devices. Please read this manual carefully to ensure proper use and maintenance of your new alarm clock.
2. Sikkerhedsoplysninger
- Hold enheden væk fra vand og miljøer med høj luftfugtighed.
- Udsæt ikke enheden for ekstreme temperaturer eller direkte sollys i længere perioder.
- Use only the provided USB Type-C cable for power.
- Forsøg ikke selv at skille enheden ad eller reparere den. Kontakt kundesupport, hvis der opstår problemer.
- Ensure proper ventilation when using the USB output to charge other devices.
3. Pakkens indhold
- MLWSHR Digital LED Alarm Clock Model 8808
- USB Type-C strømkabel
- Brugermanual
4. Produktet er slutview
Gør dig bekendt med hovedkomponenterne og betjeningselementerne på dit vækkeur.
This image displays the front of the MLWSHR Digital LED Alarm Clock, highlighting the time display, weekday indicators, temperature in Celsius, humidity percentage, and dual alarm icons. It also points to the Daylight Saving Time (DST) indicator.

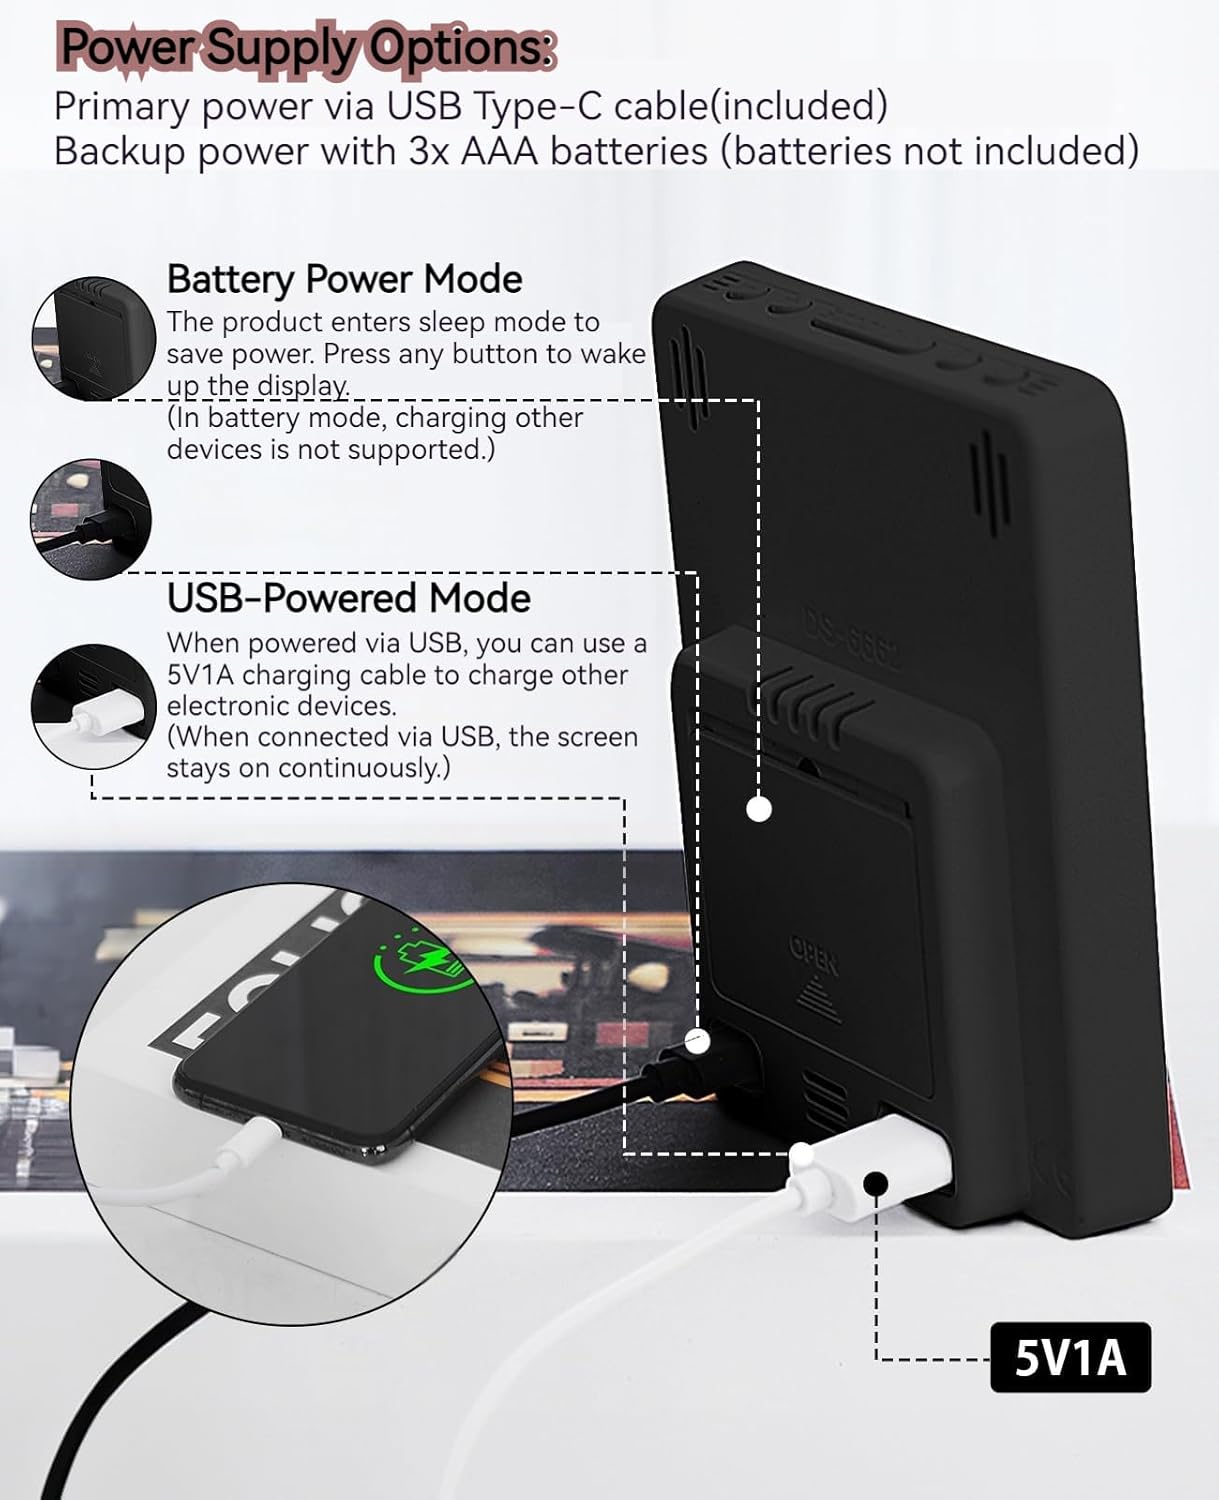
This image illustrates the side and back of the alarm clock, detailing the USB Type-C input for primary power, the battery compartment for 3x AAA backup batteries (not included), and the USB-A output (5V1A) for charging other devices. It also shows the control buttons located on the top edge.
Kontrolelementer:
- SET -knap: Enters setting mode for time, date, and alarms.
- UP (+) Button: Increases values during setting, adjusts brightness.
- DOWN (-) Button: Decreases values during setting, adjusts brightness.
- SNOOZE/LIGHT-knap: Activates snooze, adjusts display brightness.
- ALARM 1-knap: Activates/deactivates Alarm 1, enters Alarm 1 setting.
- ALARM 2-knap: Activates/deactivates Alarm 2, enters Alarm 2 setting.
- 12/24HR Button: Skifter mellem 12-timers og 24-timers tidsformater.
- °C/°F knap: Skifter mellem temperaturvisning i Celsius og Fahrenheit.
5. Opsætning
5.1 Strømforsyning
The MLWSHR Digital LED Alarm Clock can be powered in two ways:
- Primary Power (USB Type-C): Connect the provided USB Type-C cable to the clock's input port and plug the other end into a 5V1A USB power adapter (not included). When powered via USB, the display will remain continuously on.
- Backup Power (3x AAA Batteries): Insert 3 AAA batteries (not included) into the battery compartment on the back of the clock. In battery-only mode, the display will enter sleep mode to conserve power. Press any button to temporarily activate the display. Note that the USB output for charging other devices is not supported when operating on battery power alone.
5.2 Indstilling af starttidspunkt og dato
After connecting power, the clock will typically display a default time. To set the correct time and date:
- Tryk og hold på SÆT -knappen i 3 sekunder for at gå ind i tidsindstillingstilstand. Timecifrene blinker.
- Brug OP (+) or NED (-) knapper for at justere timen.
- Trykke SÆT igen for at bekræfte timetallet og gå videre til minutindstilling. Minuttiffrene vil blinke.
- Brug OP (+) or NED (-) knapper for at justere minutterne.
- Fortsæt med at trykke SÆT to cycle through and set the Year, Month, and Day using the OP (+) or NED (-) knapper til justering.
- Når du har indstillet dagen, skal du trykke på SÆT en sidste gang for at afslutte indstillingstilstanden.
6. Betjeningsvejledning
6.1 Skift mellem 12/24 timers format
Tryk på 12/24 timer button to toggle between 12-hour (with AM/PM indicator) and 24-hour time formats.
This video demonstrates various features of the MLWSHR Digital LED Alarm Clock, including the time, temperature, humidity, weekday display, auto/manual brightness adjustment, 12/24 hour switch, and the easy-to-use buttons and USB-C input/USB-A output.
6.2 Indstilling af alarmer (Alarm 1 og Alarm 2)
The clock features two independent alarms. Each alarm can be set for specific days of the week (Monday-Friday, Monday-Saturday, or Monday-Sunday).

This image illustrates the dual alarm functionality, showing how each alarm can be customized to ring on specific days of the week: Monday to Friday, Monday to Saturday, or every day. It highlights the alarm icons and weekday indicators on the display.
- Tryk på ALARM 1 or ALARM 2 button to select the desired alarm. The alarm icon will appear on the display.
- Tryk og hold den valgte ALARM button for 3 seconds to enter alarm setting mode. The hour digits will flash.
- Brug OP (+) or NED (-) knapper for at justere alarmtiden.
- Tryk på ALARM knappen igen for at bekræfte timeindstillingen og gå videre til minutindstillingen.
- Brug OP (+) or NED (-) knapper til at justere alarmens minutter.
- Tryk på ALARM button again to set the alarm frequency (e.g., Mon-Fri, Mon-Sat, Mon-Sun). Use OP (+) or NED (-) at vælge.
- Tryk på ALARM button one last time to exit alarm setting mode.
- For at tænde eller slukke en alarm skal du blot trykke på den tilsvarende knap ALARM 1 or ALARM 2 button briefly. The alarm icon will appear (ON) or disappear (OFF) from the display.
6.3 Snooze -funktion
When an alarm sounds, you can activate the snooze function for a temporary delay.

This image shows the clock's snooze button and how it functions. When the alarm rings, a brief press of the snooze button will delay the alarm for 5 minutes. Holding the button for more than two seconds will turn off the alarm for that day.
- Når alarmen ringer, skal du trykke på SNOOZE / LYS button briefly. The alarm will pause and ring again after 5 minutes.
- To turn off the alarm for the current day, press and hold the SNOOZE / LYS button for more than 2 seconds, or press any other button (except SNOOZE / LYS).
6.4 Justering af lysstyrke
The clock features an auto-dimmable display and three manual brightness levels.
- Automatisk dæmpbar: The built-in light sensor automatically adjusts the display brightness based on ambient light conditions. This is the default setting.
- Manuel lysstyrke: Tryk kort på SNOOZE / LYS button to cycle through 3 manual brightness levels (L-01, L-02, L-03).
- To return to auto-dimmable mode, continue pressing the SNOOZE / LYS button until 'L-AU' appears on the display.
6.5 Thermometer & Hygrometer
The clock displays indoor temperature and humidity levels.

This image highlights the temperature and humidity readings on the clock's display. It also provides guidance on ideal humidity levels and suggests actions (humidifier/dehumidifier) if levels are too low or too high. The temperature detection range is 23°F to 122°F (-5°C to 50°C) with an error margin of ±2°F.
- Temperaturenhedskontakt: Tryk på ° C / ° F button to switch between Celsius and Fahrenheit temperature display.
- The temperature range is 23°F to 122°F (-5°C to 50°C) with an error margin of ±2°F.
- The humidity measurement error is within ±5%.
6.6 USB Power Output (5V1A)
The clock features a USB-A output port (5V1A) that can be used to charge other electronic devices.

This image demonstrates the use of the clock's USB-A output port to charge a smartphone. The clock provides a 5V1A output, making it a convenient charging station. This feature is only available when the clock is powered via its USB Type-C input.
- Connect your device's charging cable to the USB-A output port on the back of the alarm clock.
- Ensure the alarm clock is powered via its USB Type-C input for this feature to function. The USB output is not active when the clock is running on battery power alone.
6.7 Sommertid (DST)
The clock supports Daylight Saving Time adjustment.
- To activate or deactivate DST, press and hold the DST button (if available, or refer to the SET button sequence for DST in specific models). The DST indicator will appear or disappear.
7. Vedligeholdelse
- Rengør uret med en blød, tør klud. Brug ikke slibende rengøringsmidler eller opløsningsmidler.
- If the clock will not be used for an extended period, remove the AAA batteries to prevent leakage.
- Keep the USB ports free from dust and debris.
8. Fejlfinding
| Problem | Mulig årsag | Løsning |
|---|---|---|
| Display is off or intermittent. | Running on battery power in sleep mode, or no power. | Press any button to activate display in battery mode. Connect USB Type-C cable for continuous display. Check USB power source. |
| USB output not charging devices. | Clock is running on battery power, or USB cable is faulty. | Ensure the clock is connected to primary USB Type-C power. Try a different USB cable. |
| Alarmen lyder ikke. | Alarmen er ikke aktiveret eller indstillet forkert. | Check if the alarm icon is displayed. Re-set the alarm time and frequency. |
| Temperaturaflæsningen er unøjagtig. | Environmental factors or sensor error. | Allow time for the sensor to stabilize. Ensure the clock is not near heat sources or vents. Note the ±2°F error margin. |
| Kan ikke indstille tid/dato. | Not in setting mode, or buttons are unresponsive. | Press and hold the SET button for 3 seconds. Ensure the clock has stable power. |
9. Specifikationer
- Mærke: MLWSHR
- Modelnummer: 8808
- Skærmtype: LED
- Strømkilde: USB Type-C (5V1A) / 3x AAA Batteries (backup)
- Produktdimensioner: 3.54 cm B x 4.72 cm H
- Funktioner: Dual Alarms, Snooze, Thermo-Hygrometer, Date & Year Display, 12/24 Hour Switch, Weekdays, DST, Auto Dimmable (3 levels), USB Output (5V1A)
- Materiale: Eco-friendly Plastic
- Indendørs/udendørs brug: Indendørs
10. Garanti og support
The MLWSHR Digital LED Alarm Clock Model 8808 comes with a 2-års garanti fra købsdatoen. Denne garanti dækker fabrikationsfejl og funktionsfejl under normal brug.
For technical support, warranty claims, or any questions regarding your product, please contact MLWSHR customer service through the retailer's platform or visit our official website for contact information. Please have your purchase receipt and model number ready when contacting support.