
1. Introduktion
This manual provides important information regarding the installation, operation, and maintenance of your GBC iSnatch Carbon Monoxide (CO) Detector. Please read this manual thoroughly before using the device and retain it for future reference.
Carbon monoxide is a colorless, odorless, and tasteless gas that can be fatal. This detector is designed to monitor CO levels and alert you to potentially dangerous concentrations, helping to protect your household.
This CO detector complies with the EN50291-1 standard, ensuring its suitability for household use.
2. Sikkerhedsoplysninger og advarsler
Vigtig: This device is designed to detect carbon monoxide gas. It is not designed to detect smoke, fire, or other gases. It is not a substitute for proper maintenance of fuel-burning appliances, including ventilation and exhaust systems.
- Do not paint the detector. Paint can clog the sensor openings and interfere with the detector's ability to detect CO.
- Bloker ikke ventilationsåbningerne på detektoren.
- Test the detector regularly using the test button.
- Replace batteries promptly when the low battery warning is indicated.
- Må ikke installeres i områder med høj luftfugtighed, ekstreme temperaturer eller meget støv.
- Opbevares utilgængeligt for børn.
3. Pakkens indhold
Bekræft at alle varer er til stede i pakken:
- GBC iSnatch Carbon Monoxide Detector (Model 64051105)
- Brugermanual
4. Produktet er slutview
The GBC iSnatch Carbon Monoxide Detector features a compact design with an integrated LCD display and indicator lights for easy monitoring.
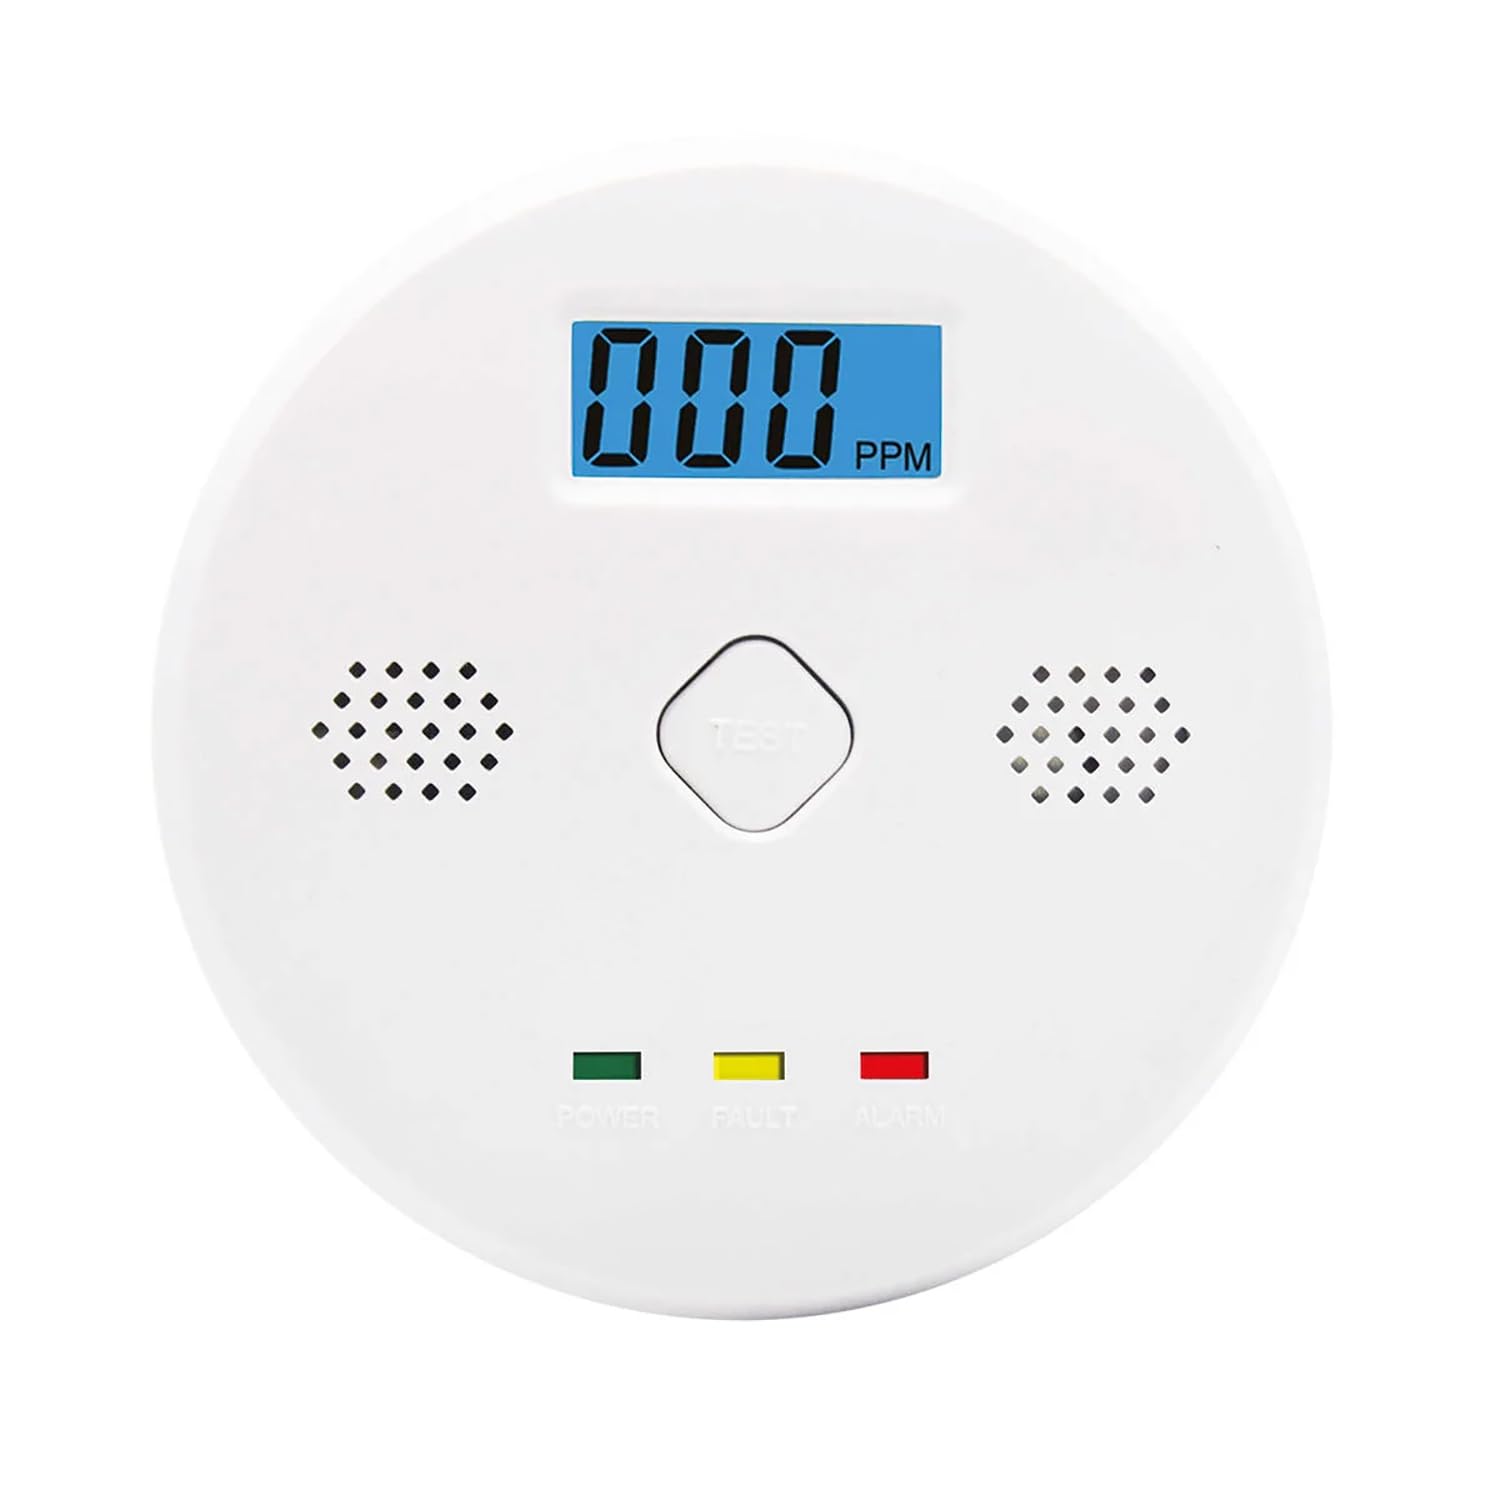
Figur 1: Front view of the GBC iSnatch Carbon Monoxide Detector. It features a central digital display showing PPM (parts per million) of CO, a 'TEST' button, and three indicator lights at the bottom: 'POWER' (green), 'FAULT' (yellow), and 'ALARM' (red). Speaker grilles are visible on both sides of the display.
- LCD-skærm: Shows real-time CO concentration in PPM (Parts Per Million).
- Test knap: Used to verify the sensor and alarm functionality.
- Strømindikator (grøn LED): Illuminates when the device is powered on and functioning correctly.
- Fault Indicator (Yellow LED): Illuminates to indicate a fault or low battery condition.
- Alarm Indicator (Red LED): Flashes when a CO alarm condition is detected.
- 85 dB Siren: Emits a loud audible alarm during a CO event.
5. Opsætning og installation
5.1 Batteriinstallation
The detector operates on 1 x 9V battery (not included). Ensure the battery is installed correctly before use.
- Locate the battery compartment cover on the back of the detector.
- Åbn batterirummet.
- Isæt et 9V batteri, og overhold den korrekte polaritet (+/-).
- Luk batterirummets dæksel forsvarligt.
- Upon successful battery installation, the detector will perform a self-test, and the green POWER LED should illuminate.
5.2 Valg af installationssted
For optimal ydeevne og sikkerhed skal du overveje følgende, når du vælger en placering:
- Installer mindst én CO-detektor på hver etage i dit hjem, især i nærheden af soveområder.
- Place the detector at a height where it can be easily seen and heard, typically at eye level or higher.
- Avoid installing near fuel-burning appliances (furnaces, water heaters, stoves) to prevent nuisance alarms from normal operation.
- Do not install in direct sunlight, near windows or doors, or in areas with strong drafts, as this can affect sensor accuracy.
- Maintain a distance of at least 1.5 meters (5 feet) from any cooking or heating appliance.

Figur 2: Example installation of the CO detector on a wall in a kitchen area, demonstrating a suitable mounting height.
5.3 Montering af detektoren
Once you have selected an appropriate location:
- Marker den ønskede monteringsposition på væggen.
- Bor to huller på de markerede steder.
- Sæt vægdyvler (hvis nødvendigt) i de borede huller.
- Screw the mounting screws into the wall, leaving a small gap for the detector to hang.
- Align the mounting slots on the back of the detector with the screws and slide the detector down to secure it.
- Ensure the detector is firmly attached to the wall.
6. Betjeningsvejledning
6.1 Tænd
After battery installation, the detector will automatically power on. The green POWER LED will light up, and the LCD display will show "0 PPM" or cycle through a brief startup sequence.
6.2 Normal drift
During normal operation, the green POWER LED will remain steadily lit, and the LCD display will show "0 PPM" if no CO is detected, or the current CO concentration if present.
6.3 Testfunktion
It is recommended to test the detector weekly to ensure proper functionality.
- Press and hold the "TEST" button located on the front of the detector.
- The detector will emit a series of loud beeps (85 dB siren), and the red ALARM LED will flash. The LCD display may show a test value.
- Release the button. The detector should return to normal operation.
- If the detector does not respond as described, refer to the Troubleshooting section.
7. Alarm Conditions and Actions
The detector is designed to alarm at specific CO concentrations and durations as per EN50291-1:
- 50 PPM: Alarm inden for 60-90 minutter.
- 100 PPM: Alarm inden for 10-40 minutter.
- 300 PPM: Alarm inden for 3 minutter.
When a CO alarm occurs:
- The 85 dB siren will sound repeatedly.
- The red ALARM LED will flash rapidly.
- The LCD display will show the detected CO concentration in PPM.
Hvad skal man gøre, hvis alarmen lyder:
- Evacuate Immediately: Move everyone, including pets, to fresh air outdoors.
- Do Not Re-enter: Gå ikke ind i området igen, før CO-kilden er blevet identificeret og udbedret, og området er blevet grundigt ventileret.
- Call Emergency Services: Contact your local emergency services or fire department.
- Identificér kilde: After the area is safe, have a qualified technician inspect all fuel-burning appliances and chimneys for proper operation and ventilation.
8. Vedligeholdelse
8.1 Regelmæssig testning
Test the detector weekly by pressing the "TEST" button as described in Section 6.3.
8.2 Udskiftning af batteri
The detector will indicate a low battery condition by flashing the yellow FAULT LED and possibly emitting a chirp sound. Replace the 9V battery immediately when this occurs. Refer to Section 5.1 for battery installation instructions.
8.3 Rengøring
Rengør detektoren regelmæssigt for at forhindre støvophobning i at påvirke dens ydeevne.
- Brug en blød, damp klud til at tørre detektorens yderside af.
- Do not use cleaning agents, solvents, or abrasive materials.
- Do not spray air fresheners, hairspray, or other aerosols near the detector.
- Gently vacuum around the sensor openings to remove dust.
9. Fejlfinding
| Problem | Mulig årsag | Løsning |
|---|---|---|
| Detektoren tænder ikke. | No battery or incorrect battery installation. | Install a fresh 9V battery, ensuring correct polarity. |
| Yellow FAULT LED flashes / Chirping sound. | Lavt batteri. | Udskift 9V-batteriet med det samme. |
| Alarm sounds without visible CO source. | False alarm due to interference or sensor issue. | Ventilate the area. If alarm persists, evacuate and contact emergency services. Ensure detector is not near sources of fumes or high humidity. |
| Test button does not activate alarm. | Faulty sensor or internal malfunction. | Ensure battery is fresh. If problem persists, the unit may need replacement. |
10. Specifikationer
| Modelnummer | 64051105 |
| Mærke | GBC |
| Sensortype | Elektrokemisk kulilte |
| Strømkilde | 1 x 9V batteri |
| Alarmvolumen | 85 dB ved 1 meter |
| Alarm Thresholds (PPM) | 50 PPM (60-90 min), 100 PPM (10-40 min), 300 PPM (within 3 min) |
| Vise | LCD, real-time CO concentration |
| Produktdimensioner | 9.6 x 9.6 x 3.5 cm (3.78 x 3.78 x 1.38 tommer) |
| Vægt | 200 g (0.44 lbs) |
| Overholdelse | EN50291-1 |
| Materiale | Plast |
11. Garanti og support
For garantioplysninger eller teknisk support henvises til kontaktoplysningerne fra din forhandler eller producentens officielle webwebstedet. Behold din købskvittering som købsbevis.
This product is designed for a specific lifespan. It is recommended to replace the CO detector after 7-10 years from the manufacturing date, or as indicated by the device's end-of-life signal, to ensure continued accuracy and reliability.