
1. Introduktion
Welcome to the Rollei Compactline Pocket Digital Camera user manual. This guide provides essential information for setting up, operating, maintaining, and troubleshooting your new digital camera. Please read this manual carefully before using the camera to ensure optimal performance and longevity.
The Rollei Compactline Pocket is a compact and lightweight digital camera designed for ease of use, making it suitable for beginners, children, and teenagers. It features a 50-megapixel sensor for high-resolution photos and records videos in 2.7K quality. Its 16x digital zoom allows for flexible framing, and its webcam functionality enhances versatility.
2. Pakkens indhold
Bekræft, at alle nedenstående varer er inkluderet i din kamerapakke:
- Rollei Compactline Pocket Digital Camera
- Genopladeligt lithium-ion batteri
- Håndledsrem
- USB-C kabel
- Beskyttende pose
- Instruktionsmanual (dette dokument)

Image 2.1: Contents of the Rollei Compactline Pocket package, including the camera, battery, wrist strap, USB-C cable, and protective pouch.
3. Kamera overview
3.1 Foran View

Billede 3.1: Forside view of the Rollei Compactline Pocket digital camera, showing the lens, flash, and Rollei branding.
The front of the camera features the lens, which is capable of 16x digital zoom, and an integrated flash for low-light conditions.
3.2 bag View og kontroller

Billede 3.2: Bagside view of the Rollei Compactline Pocket digital camera, displaying the 2.4-inch IPS screen and control buttons.
The rear of the camera houses the 2.4-inch IPS display and various control buttons:
- W/T Button: Controls the digital zoom (Wide/Telephoto).
- OK knap: Confirms selections and acts as a shutter button in some modes.
- Retningsknapper: Naviger i menuer og indstillinger.
- DISP-knap: Ændrer visningsoplysninger.
- Menu-knap: Accesses the camera's main menu.
3.3 Top og side Views
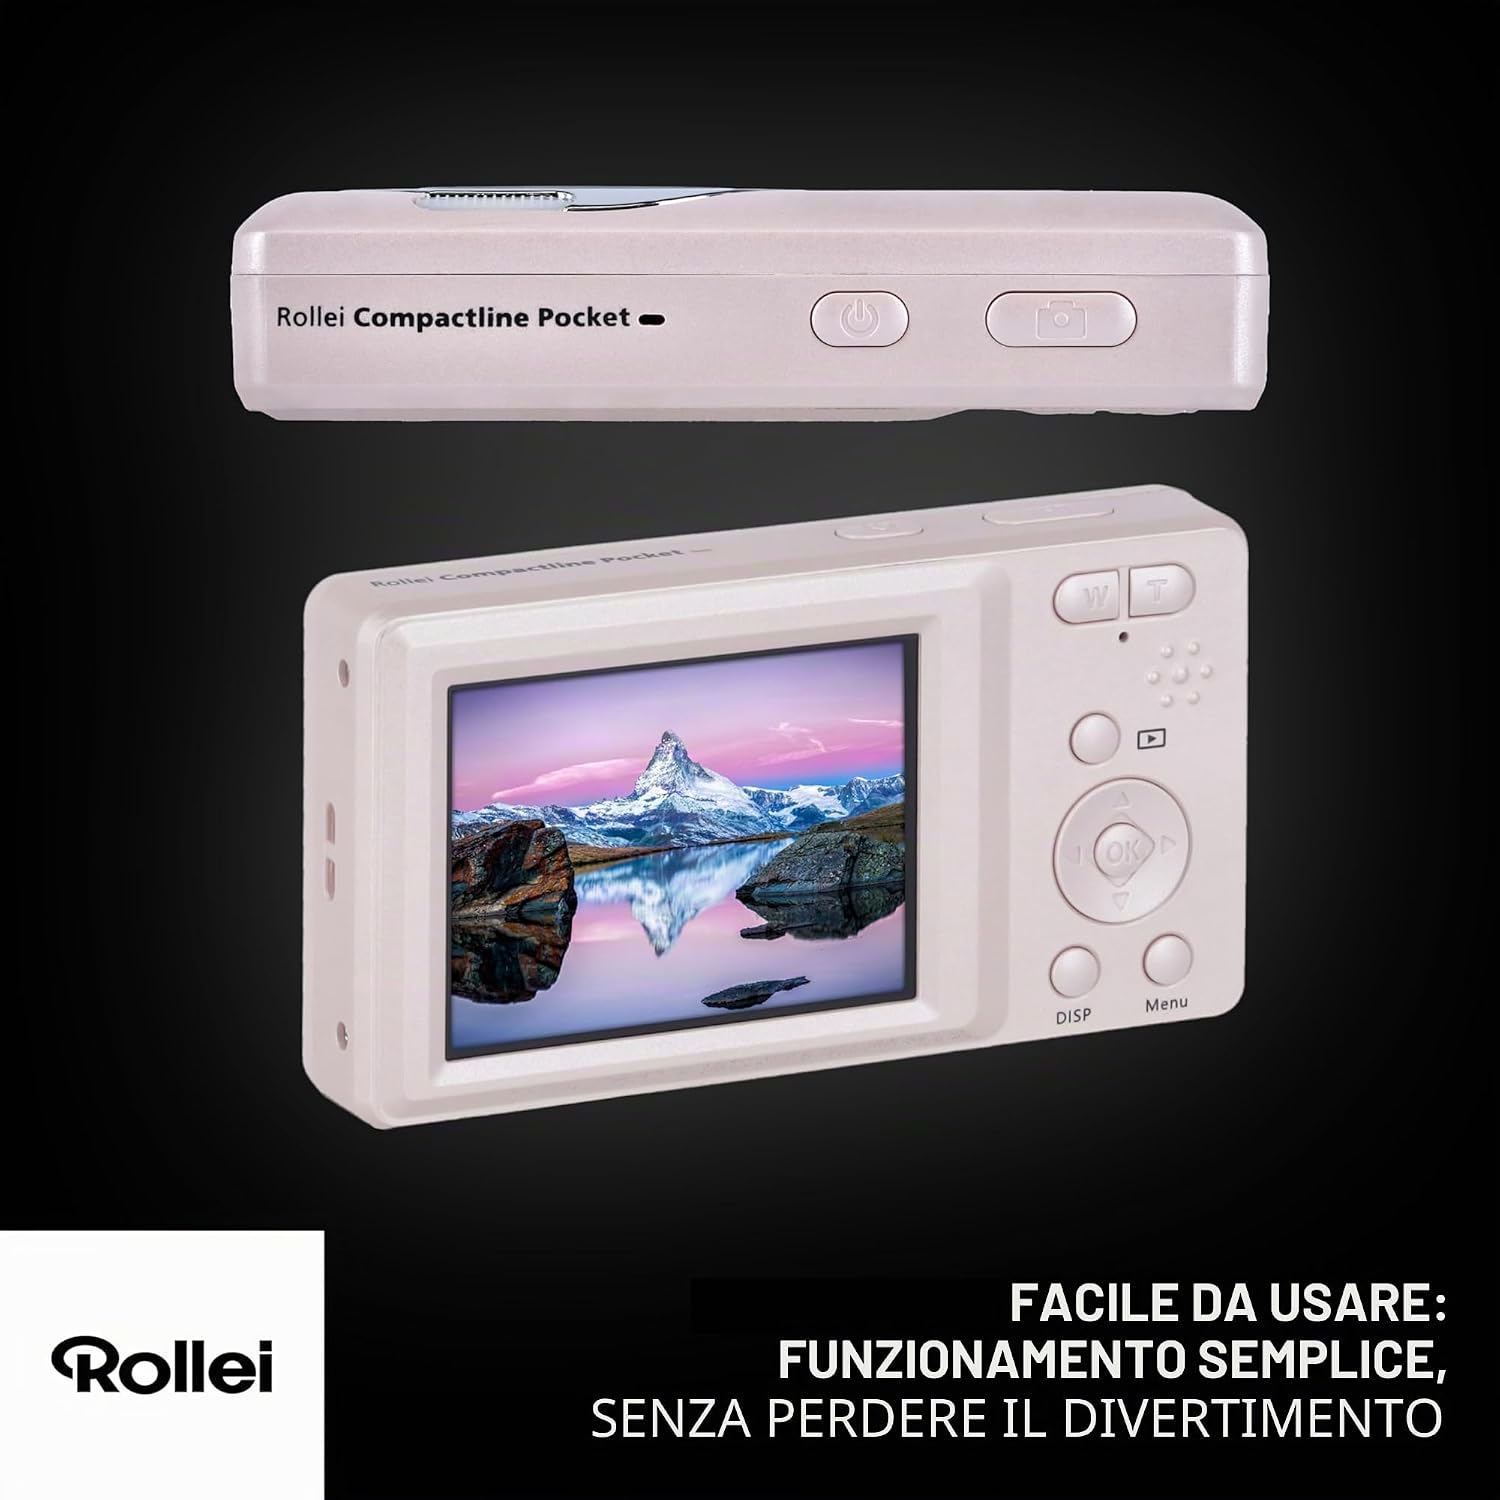
Image 3.3: Top and back view of the Rollei Compactline Pocket digital camera, showing the power button, shutter button, and USB-C port.
The top of the camera typically includes the power button and the main shutter button. The side of the camera features the USB-C port for charging and data transfer, and a slot for the wrist strap.
4. Opsætning
4.1 Isætning af batteriet
- Find batteridækslet på bunden eller siden af kameraet.
- Skub låsen for at åbne dækslet.
- Insert the provided Lithium-ion battery, ensuring the correct orientation according to the polarity indicators (+/-).
- Luk batteridækslet, indtil det klikker sikkert på plads.
4.2 Indsættelse af et SD-kort
The camera requires an SD card (not included) to store photos and videos.
- Find SD-kortstikket, normalt i nærheden af batterirummet.
- Isæt SD-kortet med metalkontakterne vendt mod kameraets forside, indtil det klikker på plads.
- For at fjerne det, tryk forsigtigt på kortet, indtil det springer ud.
4.3 Opladning af batteriet
- Connect the small end of the USB-C cable to the camera's USB-C port.
- Connect the larger end of the USB-C cable to a USB power adapter (not included) or a computer's USB port.
- Opladningsindikatorlampen lyser. Den slukker eller skifter farve, når opladningen er færdig.
4.4 Fastgørelse af håndledsremmen
Thread the wrist strap through the designated loop on the side of the camera to prevent accidental drops.
5. Betjening af kameraet
5.1 Tænd/sluk
Press and hold the Power button (usually on the top of the camera) for a few seconds to turn the camera on or off.
5.2 Optagelse af billeder
- Tænd kameraet.
- Komponer dit billede ved hjælp af den 2.4-tommer store skærm.
- Brug W/T buttons to adjust the 16x digital zoom.
- Press the Shutter button (or OK button) halfway to focus, then press fully to capture the image.

Image 5.1: A user holding the camera, demonstrating its compact size and the effect of its 16x digital zoom on distant subjects.
5.3 Optagelse af videoer
- Tænd kameraet.
- Switch to video recording mode (refer to the on-screen menu if necessary).
- Press the Shutter button (or OK button) to start recording.
- Tryk på udløserknappen igen for at stoppe optagelsen.

Image 5.2: The camera positioned to capture a scene, illustrating its use for recording videos in various settings.
5.4 Webcam Funktionalitet
Kameraet kan bruges som en webkamera til videoopkald eller livestreaming.
- Tilslut kameraet til din computer med USB-C-kablet.
- On the camera screen, select "PC Camera" mode when prompted.
- Din computer burde genkende kameraet som en webkamera. Vælg det i din videokonference- eller streamingsoftware.
5.5 Overførsel Files
Sådan overfører du billeder og videoer til din computer:
- Tilslut kameraet til din computer med USB-C-kablet.
- On the camera screen, select "MSDC" (Mass Storage Device Class) mode when prompted.
- The camera's SD card will appear as a removable drive on your computer.
- Kopier det ønskede files til din computer.
5.6 Afspilningstilstand
Til view optagne billeder og videoer:
- Tænd kameraet.
- Press the Playback button (often indicated by a triangle icon) to enter playback mode.
- Use the directional buttons to navigate through your media.
- Tryk på OK knap til view et billede eller afspil en video.
6. Vedligeholdelse
6.1 Rengøring af kameraet
- Brug en blød, tør klud til at rengøre kamerahuset.
- Brug en specialklud og -opløsning til linsen og skærmen for at undgå ridser.
- Brug ikke skrappe kemikalier eller slibende materialer.
6.2 Pleje af batterier
- Oplad batteriet helt inden første brug.
- Undgå at udsætte batteriet for ekstreme temperaturer.
- If the camera will not be used for an extended period, remove the battery and store it in a cool, dry place.
6.3 Opbevaring
- Store the camera in its protective pouch when not in use.
- Keep the camera in a dry environment, away from dust and direct sunlight.
7. Fejlfinding
| Problem | Mulig årsag | Løsning |
|---|---|---|
| Kameraet tænder ikke. | Batteriet er afladet eller isat forkert. | Oplad batteriet. Sørg for, at batteriet er isat med den korrekte polaritet. |
| Kan ikke tage billeder/optage videoer. | SD-kortet er fuldt, låst eller ikke isat. | Insert an SD card. Check if the SD card is locked (slide switch on card). Delete unnecessary fileeller brug et nyt kort. |
| Billeder er slørede. | Camera shake, dirty lens, or incorrect focus. | Hold the camera steady. Clean the lens. Ensure the camera has focused before fully pressing the shutter. |
| Computeren genkender ikke kameraet. | Incorrect USB mode selected or faulty cable. | Ensure "MSDC" or "PC Camera" mode is selected on the camera. Try a different USB port or cable. |
| Blitzen virker ikke. | Blitzen er deaktiveret, eller batteriet er lavt. | Check flash settings in the menu. Charge the battery. |
8. Specifikationer
| Feature | Detalje |
|---|---|
| Modelnavn | Compactline lomme |
| Modelnummer | 10860 |
| Billedopløsning | Op til 50 MP |
| Video opløsning | 2.7K (2160p) |
| Digital Zoom | 16x |
| Optisk zoom | 1x |
| Vise | 2.4-tommer IPS-skærm |
| Sensor Technology | CMOS |
| Billedstabilisering | Optisk |
| File Formater | JPEG (photos), MP4 (videos) |
| Lagermedier | SD-kort (medfølger ikke) |
| Forbindelse | USB-C |
| Batteritype | Lithium-ion |
| Dimensioner (DxBxH) | 11P x 9L x 7H cm |
| Vægt | 100 gram |
| Særlige funktioner | 16x Digital Zoom, 2.7K Video, Webcam Function, Face/Smile Recognition, Anti-shake, Integrated Flash |
9. Garanti og support
9.1 Producentens garanti
The Rollei Compactline Pocket Digital Camera comes with a 2 års producentgarantiDenne garanti dækker materiale- og fabrikationsfejl ved normal brug. Gem venligst din købsbevis i tilfælde af garantikrav.
9.2 Kundesupport
For technical assistance, troubleshooting beyond this manual, or warranty inquiries, please visit the official Rollei website or contact their customer service department. Contact information can typically be found on the Rollei webwebstedet eller på produktemballagen.
