1. Introduktion
Welcome to the user manual for your Emerson CKSS7071 Sunrise Smartset Alarm Clock Radio. This device is designed to enhance your daily routine with its unique features, including a sunrise simulation, soothing sound options, Bluetooth connectivity, and an 8-color dimmable LED display. Please read this manual thoroughly to understand the full functionality and ensure proper use and care of your new alarm clock radio.
Video 1: Overview of the Emerson CKSS7071 Sunrise Smartset Alarm Clock Radio. This video demonstrates the key features and design of the product.
2. Vigtige sikkerhedsoplysninger
- Læs alle instruktioner, inden du betjener apparatet.
- Gem disse instruktioner til fremtidig reference.
- Brug ikke dette apparat i nærheden af vand.
- Rengør kun med en tør klud.
- Bloker ikke ventilationsåbninger. Installer i overensstemmelse med producentens anvisninger.
- Må ikke installeres i nærheden af varmekilder såsom radiatorer, varmeapparater, komfurer eller andre apparater (inklusive ampløftere), der producerer varme.
- Beskyt netledningen mod at blive trådt på eller klemt, især ved stik, stikkontakter og det sted, hvor de kommer ud af apparatet.
- Brug kun tilbehør/tilbehør specificeret af producenten.
- Træk stikket ud af dette apparat under tordenvejr, eller når det ikke skal bruges i længere perioder.
- Overlad al service til kvalificeret servicepersonale. Service er påkrævet, når apparatet er blevet beskadiget på nogen måde, såsom strømforsyningsledning eller stik er beskadiget, væske er blevet spildt, eller genstande er faldet ind i apparatet, apparatet har været udsat for regn eller fugt, ikke fungerer normalt , eller er blevet droppet.
3. Pakkens indhold
Kontroller, at alle varer er til stede, når du åbner pakken:
- Emerson CKSS7071 Sunrise Smartset Alarm Clock Radio
- AC strømadapter
- Brugermanual
4. Produktet er slutview
4.1 Foran View

Billede 1: Front view of the alarm clock, featuring the digital time display and the sunrise simulation light panel.
The front of the unit features the main 1.2-inch LED time display and the large circular light panel for sunrise simulation and ambient lighting. Indicators for AM/PM, Alarm 1/2, and Bluetooth status are also visible.
4.2 Side View (Kontroller)
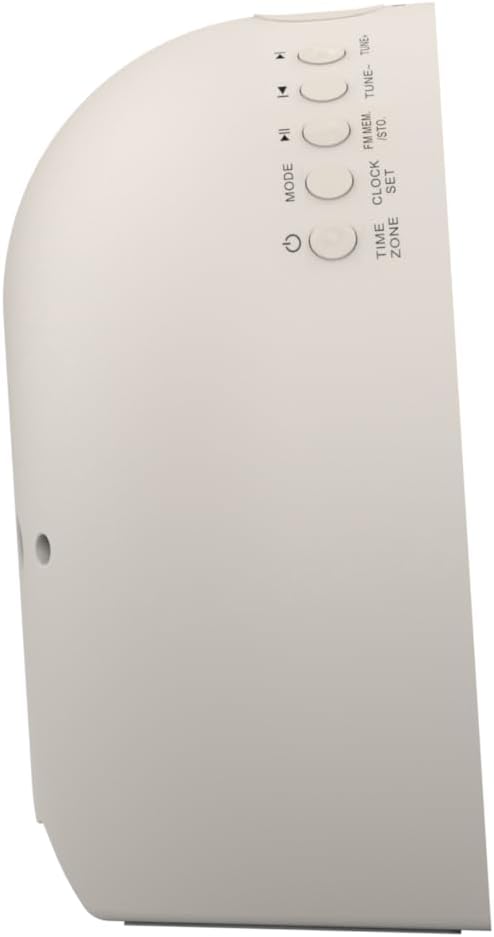
Billede 2: Side view of the alarm clock, highlighting the control buttons for various functions.
The side panel houses the primary control buttons, including Power, Mode, Clock Set, Time Zone, Tune/Skip, and Volume controls. These buttons are used for setting time, alarms, and navigating audio functions.
4.3 bag View

Billede 3: Bag view of the alarm clock, showing the speaker grille and power connection port.
The rear of the unit features the main speaker grille and the power input port for connecting the AC adapter.
5. Opsætning
5.1 Strømtilslutning
- Plug the AC power adapter into the DC IN jack located on the back of the unit.
- Plug the other end of the adapter into a standard wall outlet (AC 100-240V, 50/60Hz).
- Enheden tændes automatisk.
5.2 SmartSet Automatic Time Setting
The SmartSet system automatically sets the correct time and date as soon as you plug in the unit. It also maintains time and alarm settings during power disruptions or outages, provided the button cell battery is installed.
5.3 Installation af batteribackup
A button cell battery (CR2032, included) is required for battery backup. This ensures that time and alarm settings are retained during a power outage.
- Find batterirummet i bunden af enheden.
- Åbn batterirummets dæksel.
- Insert one CR2032 button cell battery, ensuring the correct polarity (+/-).
- Luk batterirummets dæksel forsvarligt.
6. Betjeningsvejledning
6.1 Manuel indstilling af uret
- Tryk og hold på UR SÆT knap. Timecifrene vil blinke.
- Brug TUNE -/+ knapperne for at justere timetallet. Tryk på UR SÆT for at bekræfte.
- Minuttiffrene vil blinke. Brug TUNE -/+ knapperne for at justere minutterne. Tryk på UR SÆT for at bekræfte.
- Fortsæt denne proces for at indstille år, måned og dag.
- Trykke UR SÆT igen for at afslutte tidsindstillingstilstanden.
6.2 Indstilling af alarmer (Alarm 1 og Alarm 2)
The unit features dual alarms. Follow these steps for each alarm:
- Tryk og hold på ALARM 1 or ALARM 2 knappen. Alarmtimecifrene blinker.
- Brug TUNE -/+ knapperne for at justere alarmens time. Tryk på den respektive ALARM knappen for at bekræfte.
- The alarm minute digits will flash. Use the TUNE -/+ buttons to adjust the alarm minutes. Press the respective ALARM knappen for at bekræfte.
- Select the alarm source (Buzzer, FM Radio, or Soothing Sound). Press the respective ALARM knappen for at bekræfte.
- Juster alarmens lydstyrke ved hjælp af VOL -/+ knapper. Tryk på de respektive ALARM knappen for at bekræfte.
- The alarm is now set. The alarm indicator (AL1 or AL2) will appear on the display.
6.3 Solopgangssimulering
The sunrise simulation feature gradually brightens the light panel before your set alarm time, mimicking a natural sunrise to gently wake you.
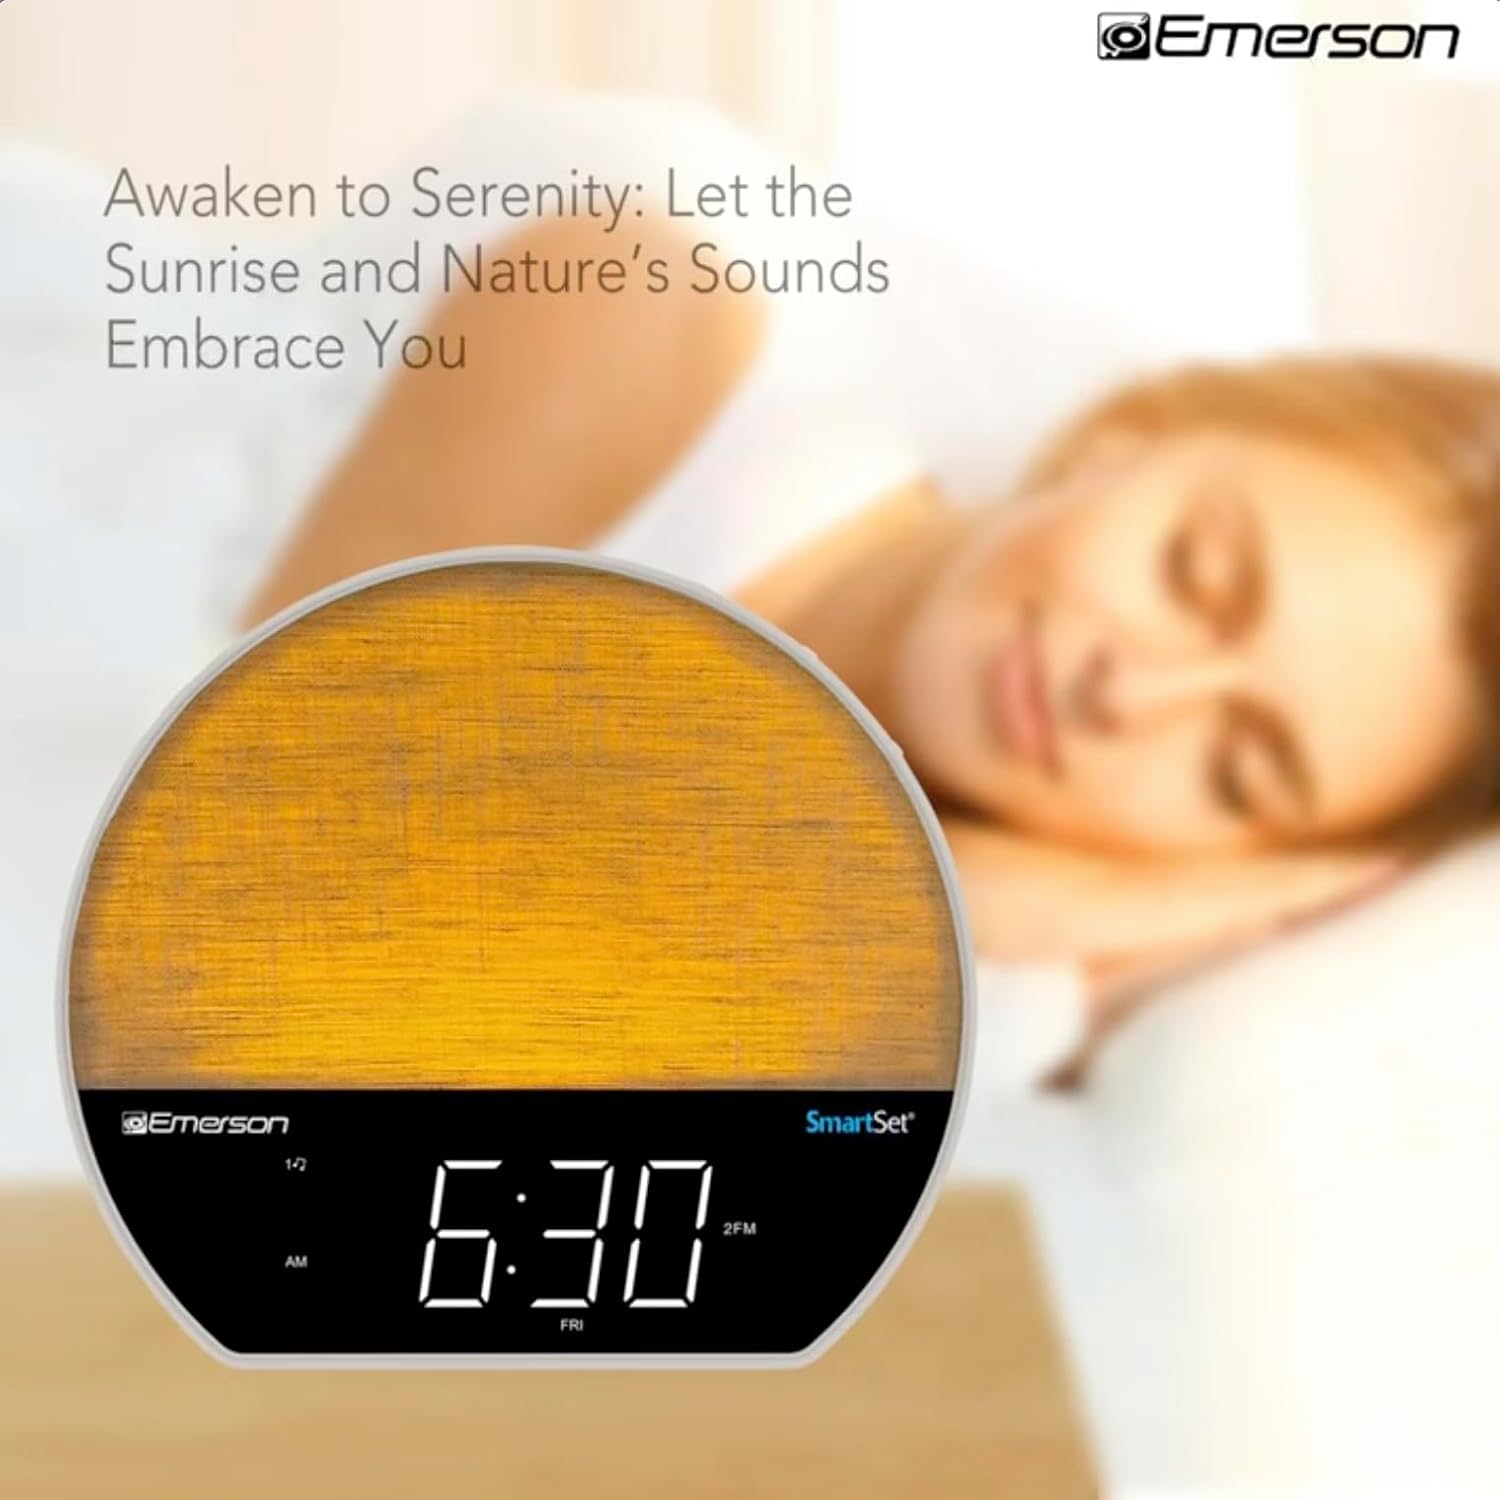
Billede 4: The alarm clock simulating a sunrise with a warm, increasing lysintensitet.
To activate, ensure the sunrise option is selected during alarm setup. The light will begin to brighten 30 minutes before the alarm sounds.
6.4 Soothing Sounds and White Noise
The unit includes 6 soothing sounds and white noise to help with relaxation or waking up.
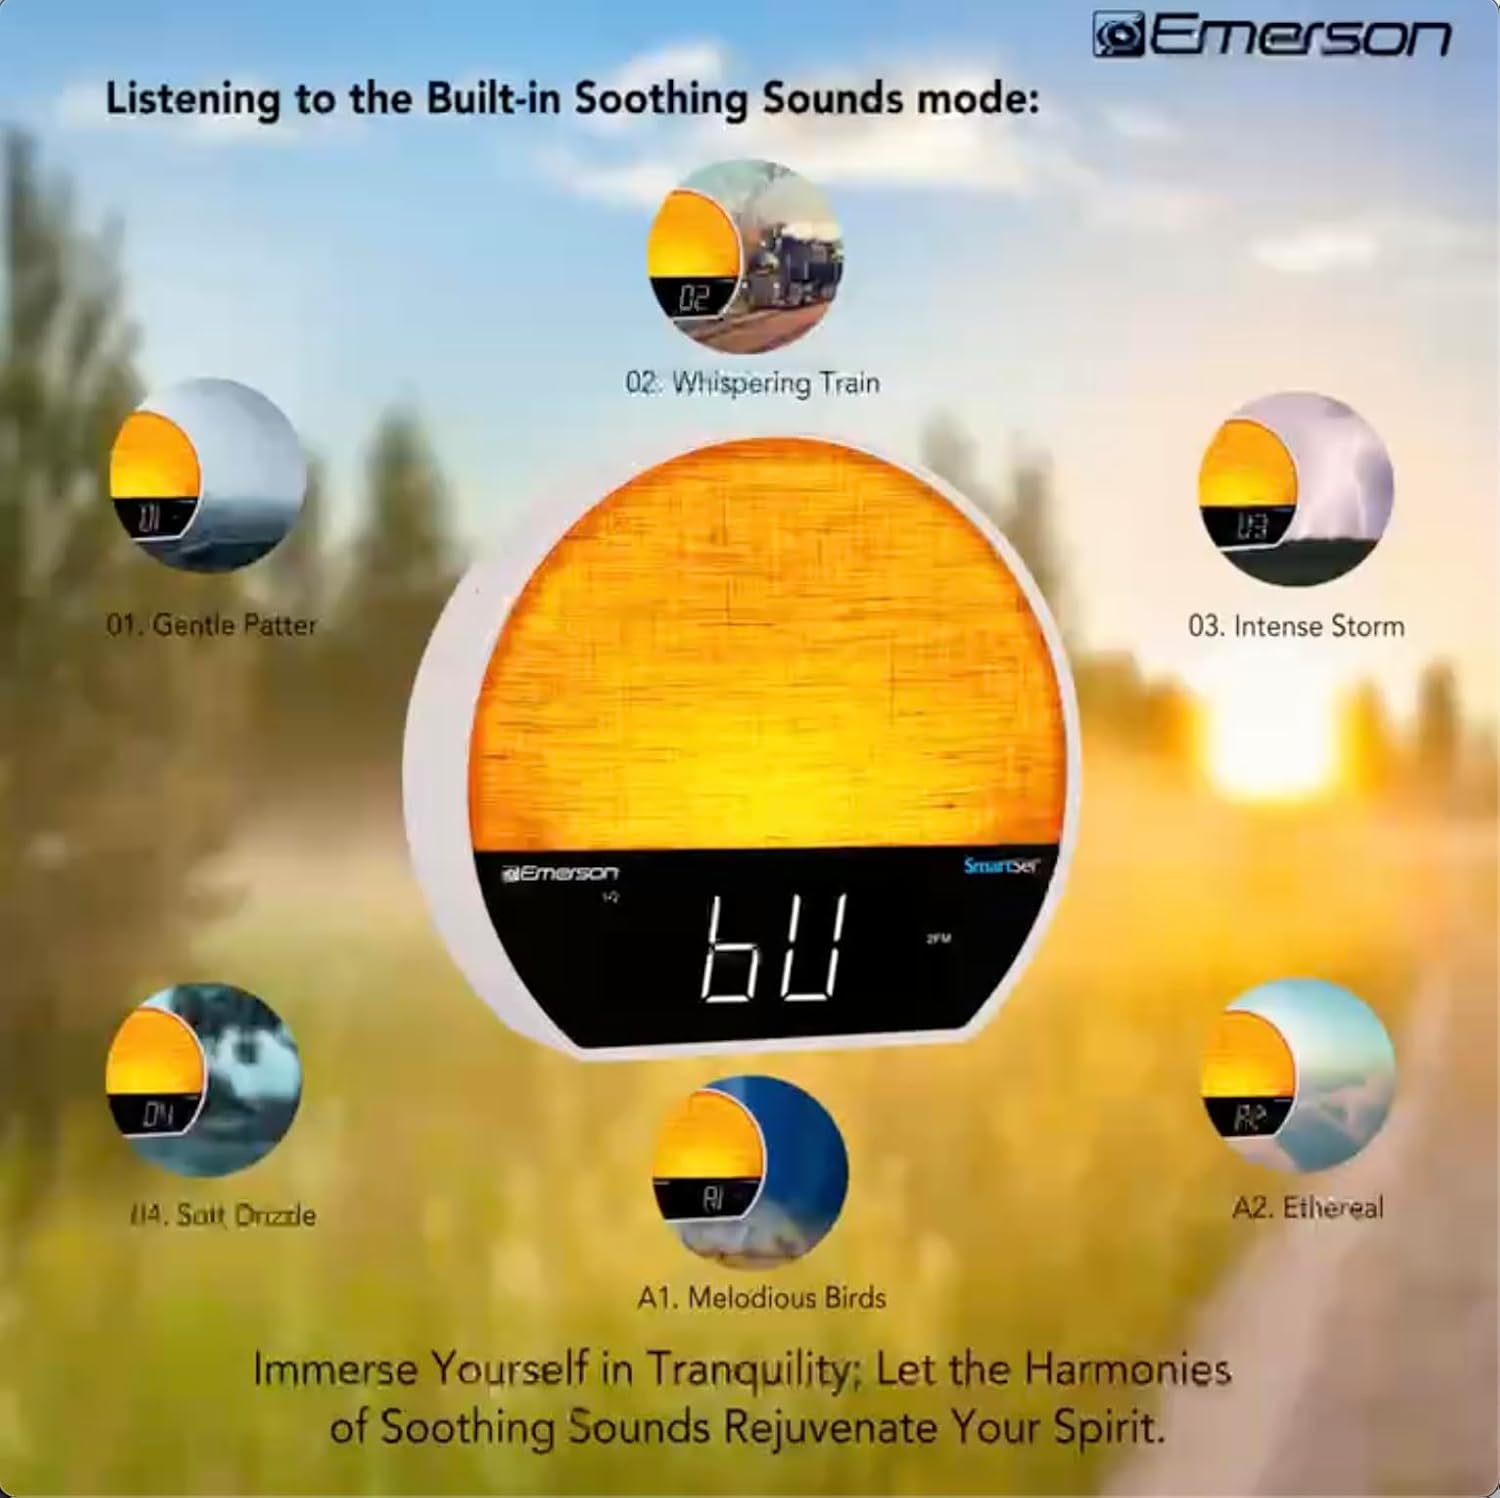
Billede 5: Visual representation of the six soothing sound modes available on the alarm clock.
- Tryk på MODE button repeatedly until the Soothing Sound mode is selected.
- Brug TUNE -/+ buttons to cycle through the available sounds (e.g., Gentle Patter, Whispering Train, Intense Storm, Soft Drizzle, Melodious Birds, Ethereal, White Noise).
- Juster lydstyrken ved hjælp af VOL -/+ knapper.
6.5 Bluetooth-højttalerfunktion
Tilslut din smartphone eller anden Bluetooth-aktiveret enhed for at streame lyd trådløst.

Billede 6: The alarm clock in Bluetooth mode, paired with a mobile device for audio streaming.
- Tryk på MODE button until 'BT' appears on the display, indicating Bluetooth mode.
- On your device, enable Bluetooth and search for 'Emerson CKSS7071'.
- Select the device to pair. A confirmation tone will sound upon successful pairing.
- Du kan nu afspille lyd fra din enhed via vækkeurets højttaler.
6.6 FM-radiofunktion
Stil ind på dine yndlings FM-radiostationer.
- Tryk på MODE knappen, indtil 'FM' vises på displayet.
- Tryk på TUNE -/+ buttons briefly to manually tune to a station.
- Tryk og hold på TUNE -/+ knapperne for automatisk at scanne efter den næste tilgængelige station.
- For at gemme en station skal du trykke på og holde FM MEM knappen indtil det forudindstillede nummer blinker. Brug TUNE -/+ for at vælge et forudindstillet nummer, og tryk derefter på FM MEM igen for at gemme.
6.7 LED Decor and Dimmer Control
Customize the ambient light with 8 different colors and adjust the brightness.

Billede 7: The alarm clock demonstrating its 8-color dimmable LED decor options.
- Tryk på LYS button to cycle through the 8 available colors or turn the light off.
- To adjust the brightness of the LED decor light, press and hold the LYS button. The brightness will cycle through 5 levels. Release the button at your desired brightness.
6.8 Styring af displaydæmper
Adjust the brightness of the 1.2-inch LED time display.

Billede 8: The alarm clock illustrating the five distinct levels of display luminescence.
Tryk på DIMMER button (often combined with another function, refer to button labels) to cycle through 4 levels of display brightness (Bright, Moderate, Dim, Faint).
6.9 Sleep Timer
Set a timer for the audio to automatically turn off after a specified duration.

Billede 9: The alarm clock set for a sunset sleep timer, providing a harmonious end to the day.
- While audio is playing (FM or Soothing Sound), press the SOVE knap.
- Tryk gentagne gange på SOVE button to cycle through available sleep timer durations (e.g., 15, 30, 60, 90 minutes, or OFF).
- The audio will automatically turn off after the selected time.
6.10 Snooze -funktion
Når en alarm lyder, skal du trykke på SLUM button (usually a large button on top) to temporarily silence the alarm for a few minutes. The alarm will sound again after the snooze period.
7. Vedligeholdelse
7.1 Rengøring
- Tag altid stikket ud af stikkontakten før rengøring.
- Brug en blød, tør klud til at rengøre de udvendige overflader.
- Brug ikke flydende rengøringsmidler, slibende rengøringsmidler eller kemiske spraymidler, da disse kan beskadige finishen.
7.2 Udskiftning af batteri
Hvis tids- og alarmindstillingerne ikke bevares under et strømafbrydelsetage, the button cell backup battery may need to be replaced. Follow the instructions in section 5.3 to replace the CR2032 battery.
8. Fejlfinding
| Problem | Mulig årsag | Løsning |
|---|---|---|
| Enheden tænder ikke. | Strømadapteren er ikke tilsluttet eller defekt. | Sørg for, at AC-adapteren er korrekt tilsluttet enheden og en fungerende stikkontakt. |
| Tids-/alarmindstillinger mistet efter strømafbrydelsetage. | Backupbatteriet er dødt eller ikke installeret. | Install or replace the CR2032 button cell battery (see section 5.3). |
| Alarmen lyder ikke. | Alarmen er ikke aktiveret, eller lydstyrken er for lav. | Ensure the alarm is set and activated (AL1/AL2 indicator on). Increase alarm volume. |
| Bluetooth-enheden kan ikke parres. | Unit not in Bluetooth mode or device too far. | Ensure the unit is in Bluetooth mode ('BT' displayed). Move your device closer to the unit. Try unpairing and re-pairing. |
| Dårlig FM-radiomodtagelse. | Antennen er ikke strakt ud, eller der er interferens. | Extend the FM wire antenna fully and reposition it for better reception. Avoid placing near other electronic devices. |
| Skærmen er for lys/mørket. | Display dimmer setting needs adjustment. | Tryk på DIMMER button to cycle through brightness levels (see section 6.8). |
9. Specifikationer
| Feature | Detalje |
|---|---|
| Modelnummer | CKSS7071 |
| Strømkilde | AC 100-240V, 50/60Hz (via AC-adapter) |
| Batteri backup | 1 x CR2032 Button Cell Battery (included) |
| Display Type | 1.2-inch LED Display |
| Bluetooth version | V5.4 |
| Beroligende lyde | 6 Nature Sounds + White Noise |
| LED Decor Colors | 8 Dimmable Colors |
| Produktmål (B x D x H) | 7.09 cm x 3.15 cm x 6.37 cm |
| Vægt | Ikke specificeret |
10. Garantioplysninger
Emerson products are manufactured to the highest quality standards. This product is covered by a limited warranty against defects in materials and workmanship for a period of one (1) year from the original date of purchase. This warranty does not cover damage caused by misuse, accident, unauthorized modification, or normal wear and tear. Proof of purchase is required for all warranty claims. Please retain your receipt.
11. Kundesupport
If you have any questions, require assistance, or experience issues with your Emerson CKSS7071 Sunrise Smartset Alarm Clock Radio, please contact our customer support team.
- Webwebsted: Visit the official Emerson webwebsted for ofte stillede spørgsmål og supportressourcer.
- E-mail: Se din produktemballage eller den officielle webwebsted for kundeservice e-mailkontakt.
- Telefon: Se din produktemballage eller den officielle webhjemmeside for kundeservice telefonnumre.
Please have your model number (CKSS7071) and proof of purchase ready when contacting support.