1. Introduktion
Thank you for choosing the Olucia Shivani Round Bathroom Ceiling Light. This manual provides essential information for the safe installation, operation, and maintenance of your new light fixture. Please read these instructions carefully before installation and retain them for future reference.
The Olucia Shivani is a functional and stylish lighting solution designed for bathrooms. Its IP44 rating ensures splash water resistance, making it suitable for damp miljøer.
2. Sikkerhedsoplysninger
WARNING: Electrical shock hazard. Always disconnect power at the main circuit breaker before installation, maintenance, or cleaning.
- Installationen skal udføres af en kvalificeret elektriker eller en kompetent person i overensstemmelse med lokale el-forskrifter.
- Sørg for, at forsyningen voltage matcher voltage specified on the product label (220-240V).
- Do not modify the light fixture in any way. Unauthorized modifications may void the warranty and create safety hazards.
- Do not install the fixture on surfaces that are not structurally sound or cannot support its weight.
- Keep the fixture away from direct water jets, despite its IP44 rating.
- Bortskaf emballagematerialer på en ansvarlig måde.
- This product contains an integrated LED light source that is not user-replaceable.
3. Pakkens indhold
Kontroller venligst, at alle komponenter er til stede og ubeskadigede:
- 1 x Olucia Shivani Round Bathroom Ceiling Light (Model 1020003)
- Monteringsudstyr (skruer, vægdyvler)
- Brugermanual

Billede: Forside view of the Olucia Shivani Round Bathroom Ceiling Light, showcasing its sleek black frame and white diffuser.
4. Specifikationer
| Mærke | Olucia |
| Modelnummer | 1020003 |
| Dimensioner (diameter x højde) | 21 cm x 2.8 cm |
| Vægt | 1 kg |
| Farve | Sort |
| Materiale | Plast |
| Lyskilde | Integreret LED |
| Strømforbrug | 8 watt |
| Lys temperatur | 3000K (varm hvid) |
| Lumen output | 800 lm |
| IP-vurdering | IP44 (Splash Water Resistant) |
| Dæmpbar | Ingen |
| Tilslutning Voltage | 220-240V |
| Energimærke | F |
| Strømkilde | DC |
5. Opsætning og installation
5.1 Før du begynder
- Sørg for, at strømforsyningen til installationsområdet er afbrudt ved hovedafbryderen.
- Gather necessary tools: screwdriver, drill, drill bits, wire strippers, pencil, measuring tape.
- Read all instructions thoroughly before proceeding with installation.
5.2 Installationstrin
- Pak armaturet ud: Carefully remove the ceiling light from its packaging. Inspect for any damage.
- Separate the Mounting Base: The light fixture consists of a main body and a separate mounting base. Gently twist or unclip the main body from the mounting base. Refer to the 'Open' and 'Close' indicators on the base if present.
- Markér borepunkter: Hold the mounting base against the ceiling at your desired installation location. Use a pencil to mark the positions for drilling holes. Ensure the base is level.
- Bor huller og isæt vægdyvler: Drill holes at the marked positions using an appropriate drill bit for your ceiling material. Insert the provided wall plugs into the drilled holes.
- Tilslut ledninger: Pass the electrical wires from the ceiling through the central opening of the mounting base. Connect the wires to the terminal block on the light fixture's base:
- Connect the Live (L) wire (usually brown or black) to the terminal marked 'L'.
- Connect the Neutral (N) wire (usually blue) to the terminal marked 'N'.
- Connect the Earth/Ground (E) wire (usually green/yellow) to the terminal marked with the earth symbol (⚡).
- Sikker monteringsbase: Attach the mounting base to the ceiling using the provided screws. Ensure it is firmly secured.
- Fastgør lysarmatur: Align the main body of the light fixture with the secured mounting base. Gently push and twist or clip the main body onto the base until it is securely fastened.
- Gendan strøm: Once the installation is complete and all connections are secure, restore power at the main circuit breaker. Test the light fixture.
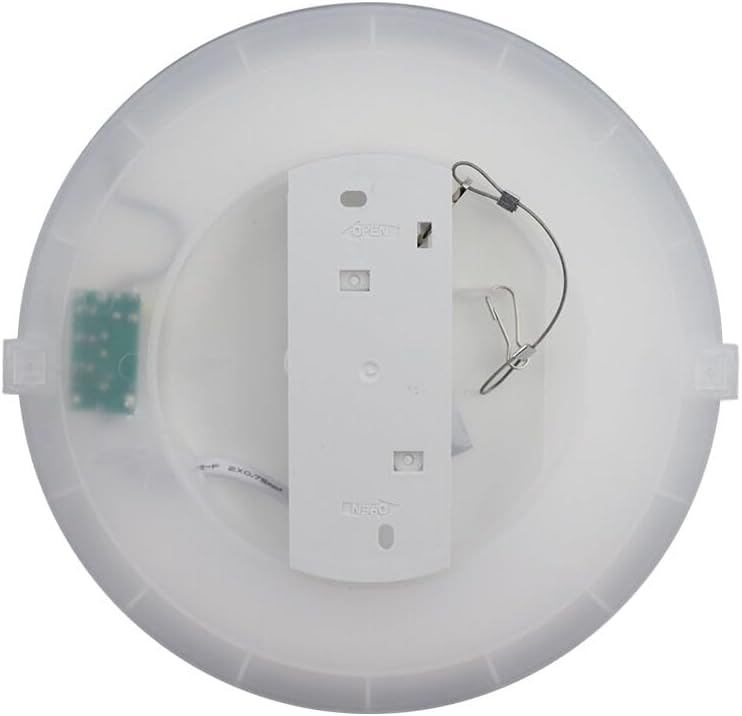
Billede: Bagside view of the Olucia Shivani ceiling light, showing the detachable mounting base and the internal wiring compartment. Note the 'Open' and 'Close' markings for detaching the base.
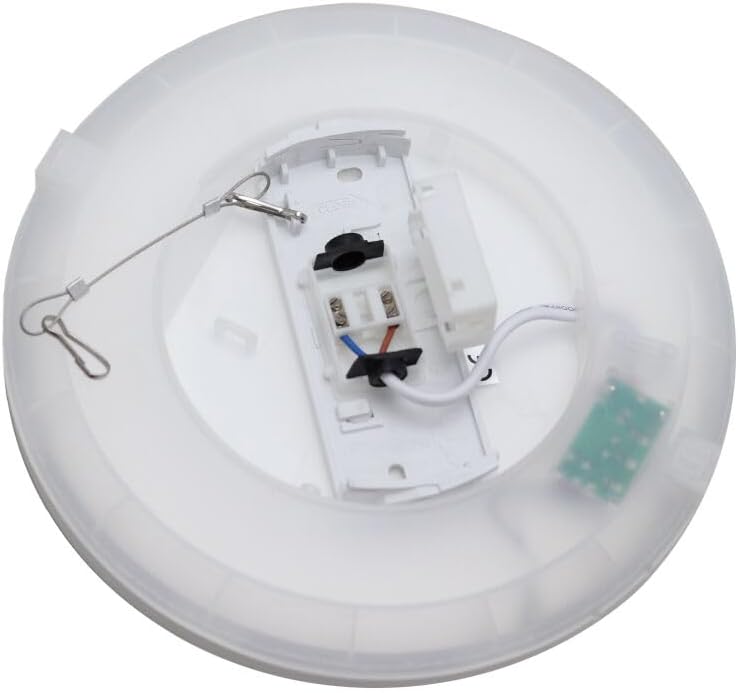
Image: Close-up of the internal wiring connections on the Olucia Shivani ceiling light's mounting base. The terminal block clearly shows connections for Live, Neutral, and Earth wires.
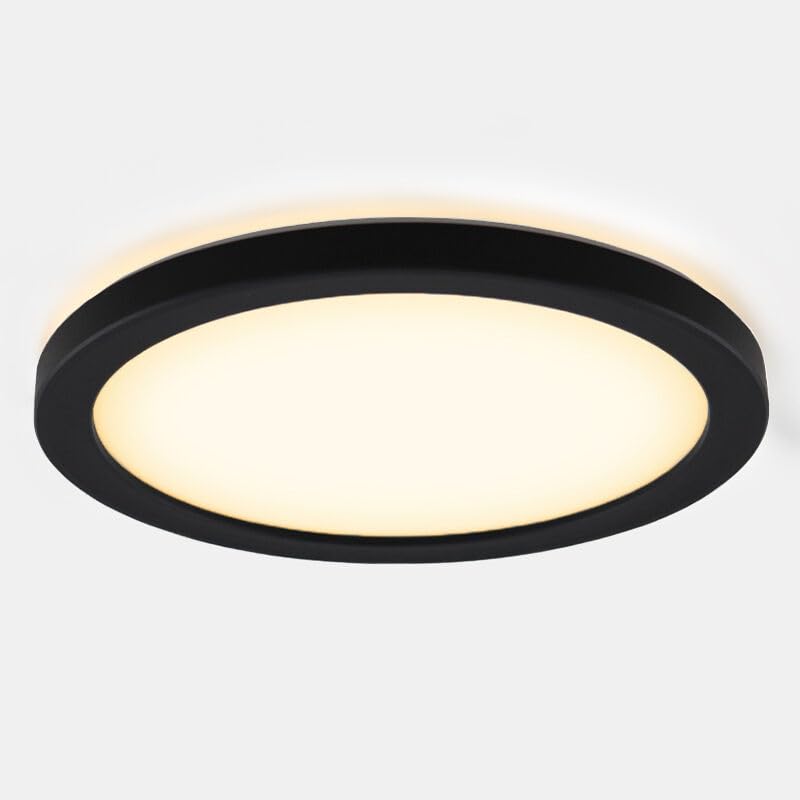
Image: The Olucia Shivani Round Bathroom Ceiling Light fully installed and illuminated in a modern bathroom setting, demonstrating its flush-mount design.
6. Betjeningsvejledning
The Olucia Shivani Round Bathroom Ceiling Light is operated via a standard wall switch connected to its power supply. Simply toggle the wall switch to turn the light ON or OFF.
- This fixture is not dimmable. Do not connect it to a dimmer switch, as this may damage the integrated LED.
- The integrated LED provides a warm white light at 3000K.
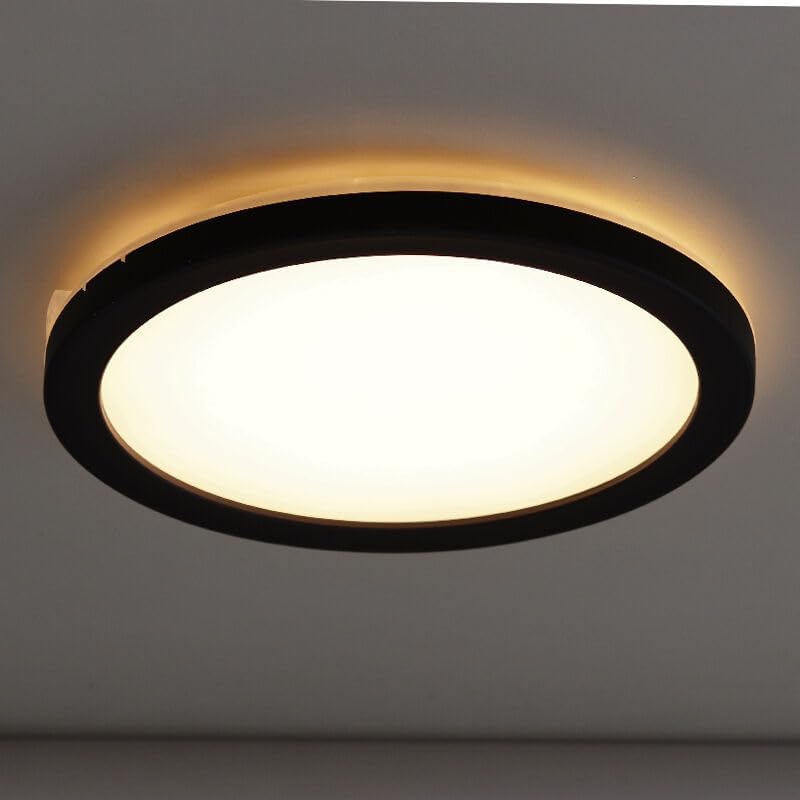
Billede: View of the Olucia Shivani ceiling light from below, showing the even distribution of warm white light from its diffuser.
7. Vedligeholdelse
To ensure the longevity and optimal performance of your Olucia Shivani ceiling light, follow these simple maintenance guidelines:
- Rensning: Afbryd altid strømmen før rengøring. Brug en blød, tør eller let fugtet klud.amp cloth to wipe the surface of the fixture. Do not use abrasive cleaners, solvents, or harsh chemicals, as these can damage the finish and diffuser.
- Ingen dele, der kan serviceres af brugeren: The LED light source is integrated and not designed to be replaced by the user. Attempting to open or repair the fixture may void the warranty and pose a safety risk.
- Inspektion: Kontrollér regelmæssigt armaturet for tegn på skader eller løse forbindelser. Hvis der findes problemer, skal strømmen afbrydes og en kvalificeret elektriker kontaktes.
8. Fejlfinding
If you encounter any issues with your Olucia Shivani ceiling light, please refer to the table below for common problems and their solutions:
| Problem | Mulig årsag | Løsning |
|---|---|---|
| Lyset tænder ikke | Ingen strømforsyning Løs ledningsforbindelse Defekt vægkontakt | Kontroller afbryderen, og sørg for, at strømmen er genoprettet. Kontroller, at alle ledningsforbindelser er sikre (med strømmen slukket). Test the wall switch with another appliance or consult an electrician. |
| Lyset flimrer eller er svagt | Ustabil strømforsyning Løs ledningsforbindelse Incompatible dimmer switch (if mistakenly used) | Ensure stable power supply. If issues persist, consult an electrician. Kontroller alle ledningsforbindelser (med strømmen afbrudt). Ensure the light is not connected to a dimmer switch. |
| Lys laver summende lyd | Løse ledninger Incompatible electrical component | Disconnect power and check all wiring connections. If buzzing persists, consult a qualified electrician. |
Hvis problemet fortsætter efter at have forsøgt disse løsninger, bedes du kontakte kundesupport eller en kvalificeret elektriker.
9. Garanti og support
9.1 Garantioplysninger
The Olucia Shivani Round Bathroom Ceiling Light comes with a to års garanti from the date of purchase. This warranty covers defects in materials and workmanship under normal use. It does not cover damage caused by improper installation, misuse, accidents, unauthorized repairs, or normal wear and tear.
Gem venligst dit købsbevis for garantikrav.
9.2 Kundesupport
For technical assistance, warranty claims, or any questions regarding your Olucia Shivani ceiling light, please contact your retailer or the Olucia customer service department. Contact details can typically be found on the retailer's webwebstedet eller din købsdokumentation.
Når du kontakter support, bedes du have dit modelnummer (1020003) og købsbevis klar.