
Indledning
This manual provides detailed instructions for the installation, operation, and maintenance of your Loocam 2MP 1080p HD 4-in-1 Bullet Wired Security Camera. This versatile camera is designed for both indoor and outdoor surveillance, featuring 80ft IR night vision and IP66 weatherproof construction. It is compatible with various DVR systems including TVI, AHD, CVI, and CVBS formats.
Pakkens indhold
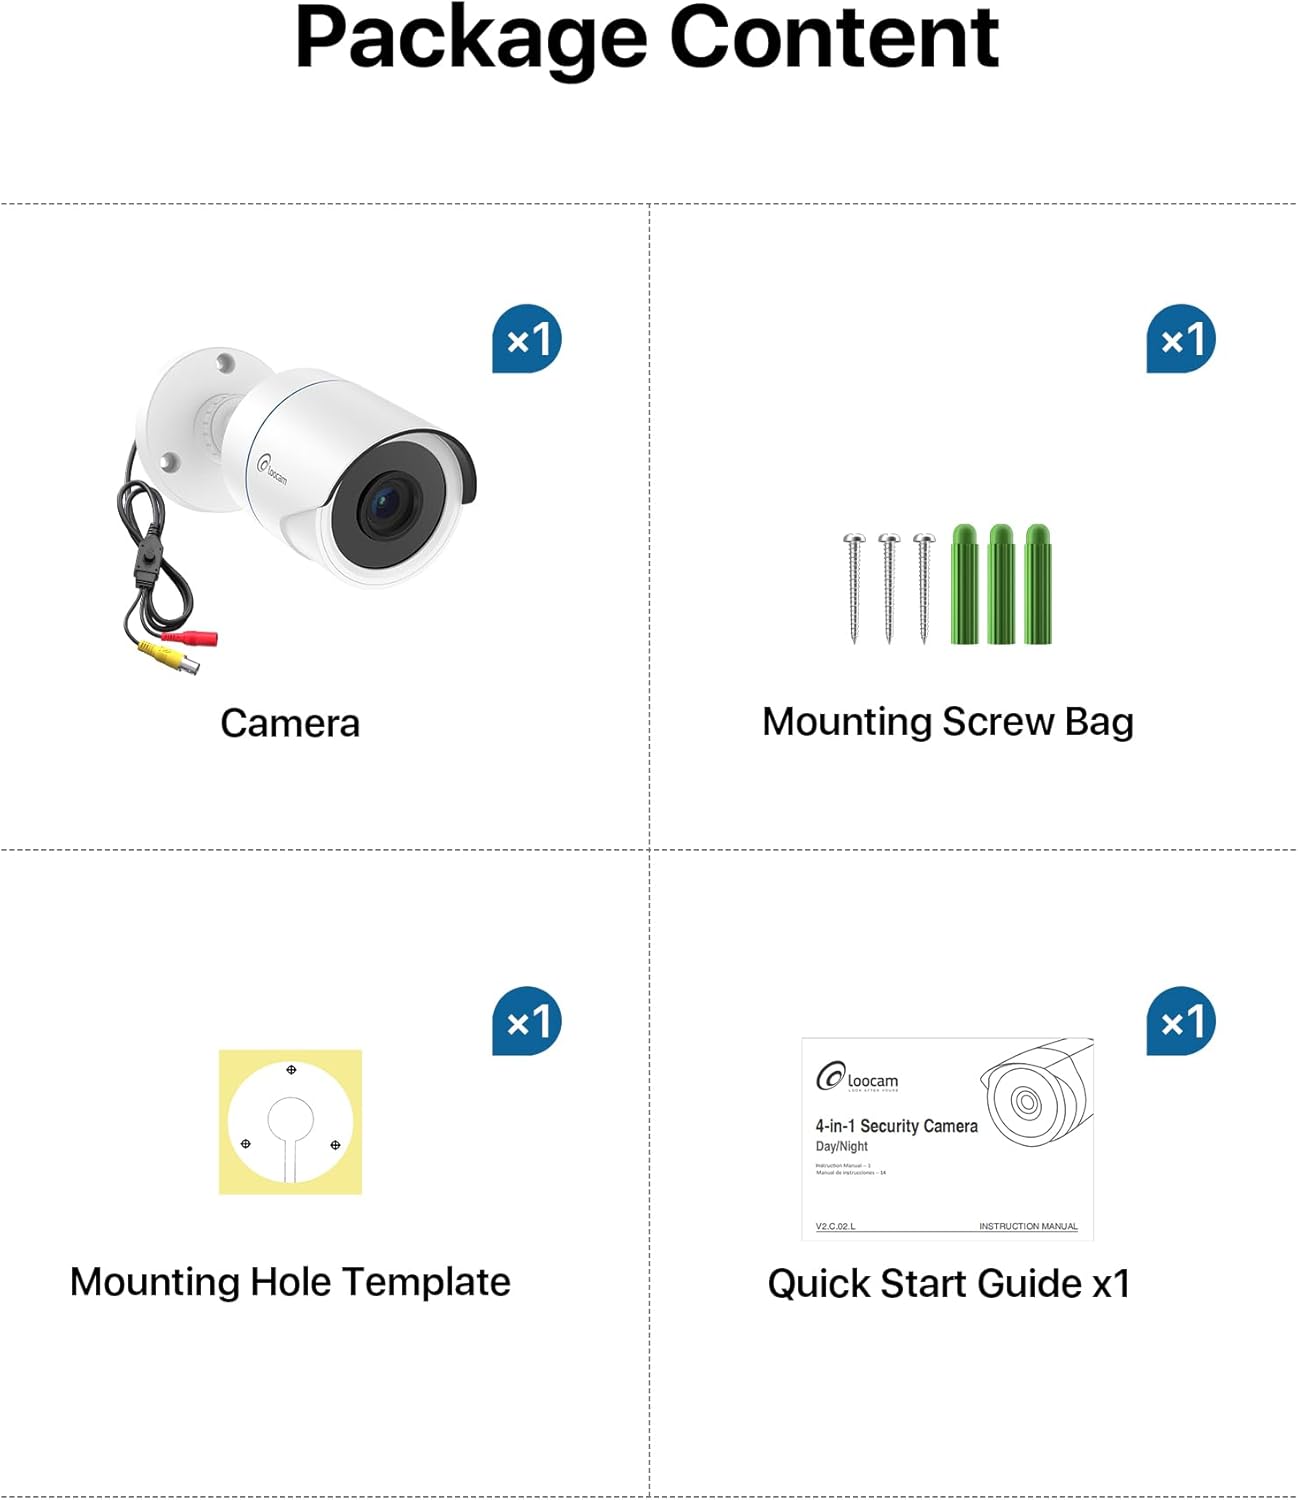
Kontroller venligst, at alle nedenstående varer er inkluderet i din pakke:
- 1x Loocam 1080p Camera
- 1x Monteringsskruepose
- 1x skabelon til monteringshul
- 1x hurtigstartguide
Specifikationer
| Feature | Detalje |
|---|---|
| Mærke | Loocam |
| Modelnavn | L1C-124C4-WNS |
| Anbefalede anvendelser | Indendørs Sikkerhed, Udendørs Sikkerhed |
| Forbindelsesteknologi | Kablet |
| Særlige funktioner | HD Resolution, Night Vision, Weather Proof |
| Indendørs/Udendørs brug | Indendørs, Udendørs |
| Kompatible enheder | Digital videooptager |
| Monteringstype | Loftmontering |
| Farve | Hvid |
| Form | Kugle |
| Vandtæt vurdering | IP66 |
| Strømkilde | Elektrisk med ledning |
| Videooptagelsesopløsning | 1080p |
| Night Vision Range | 80 fod |
| Antal IR LED'er | 24 |
| Viewi vinkel | 90 grader |
| Emnedimensioner | 5.78 x 2.74 x 2.5 tommer |
Opsætning
Follow these steps to set up your Loocam security camera.
Camera Output Mode Conversion
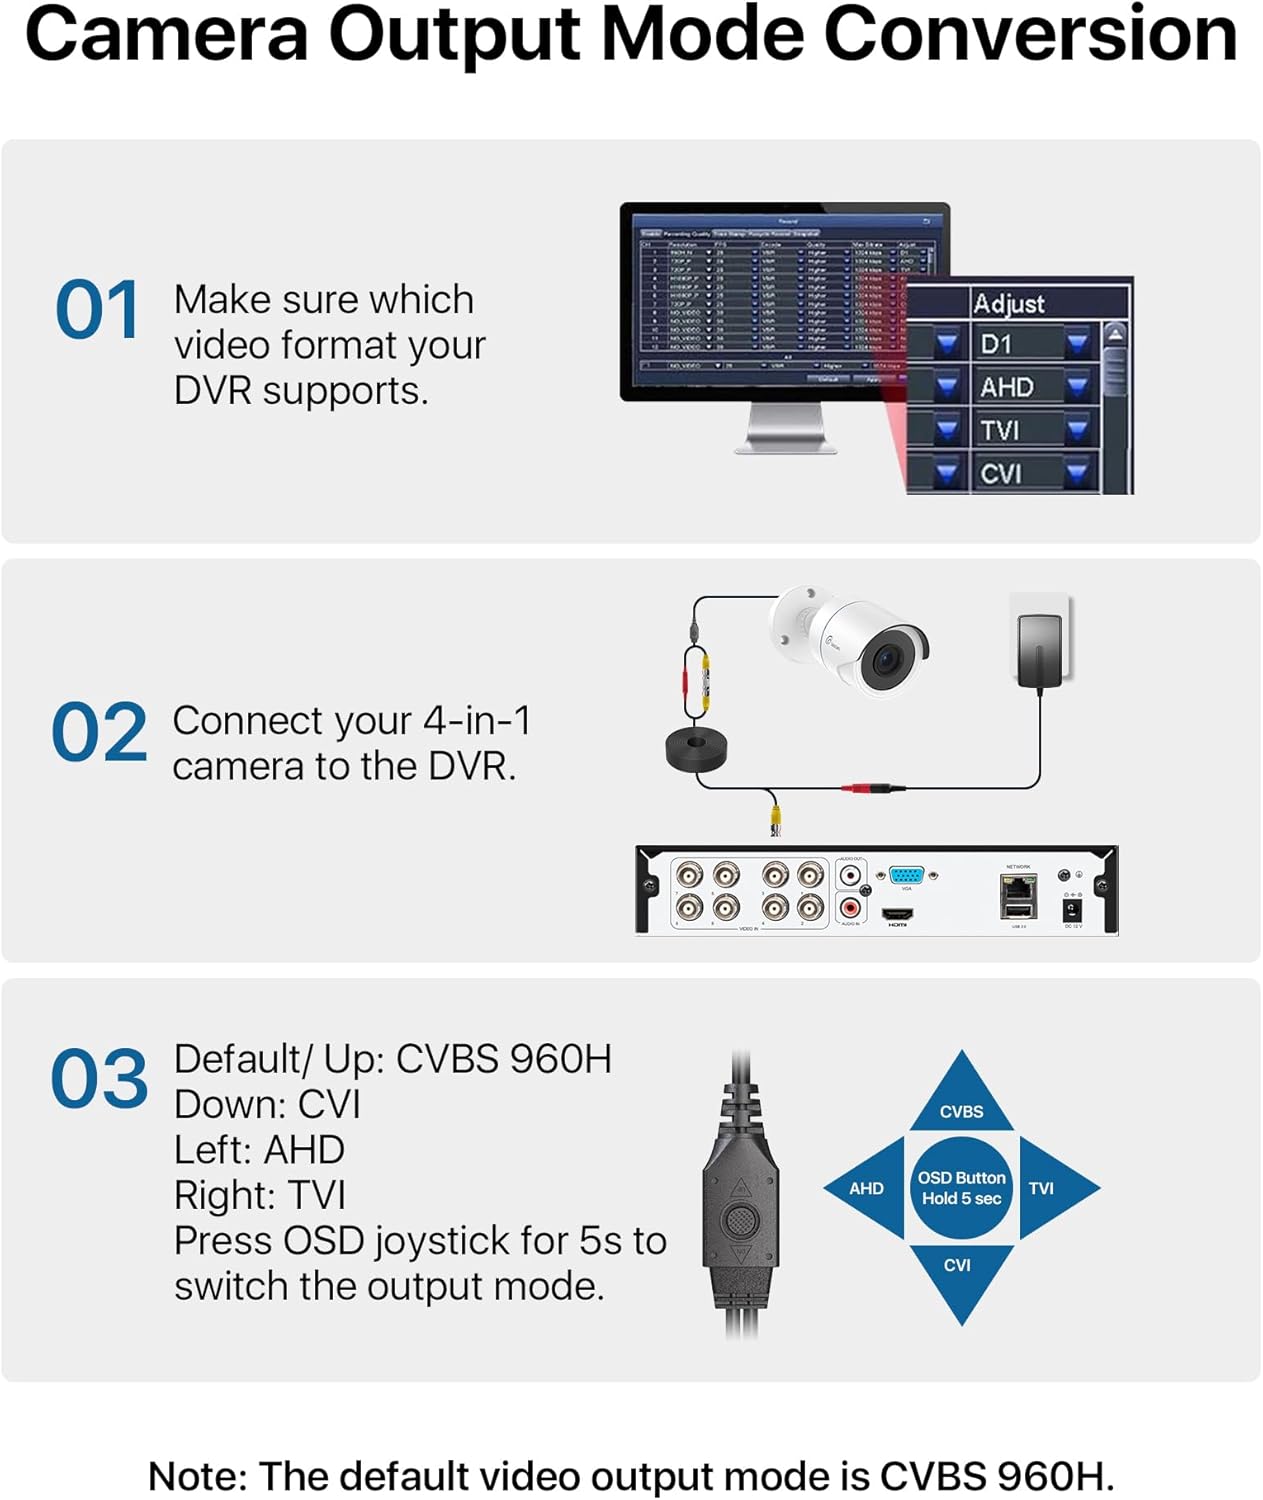
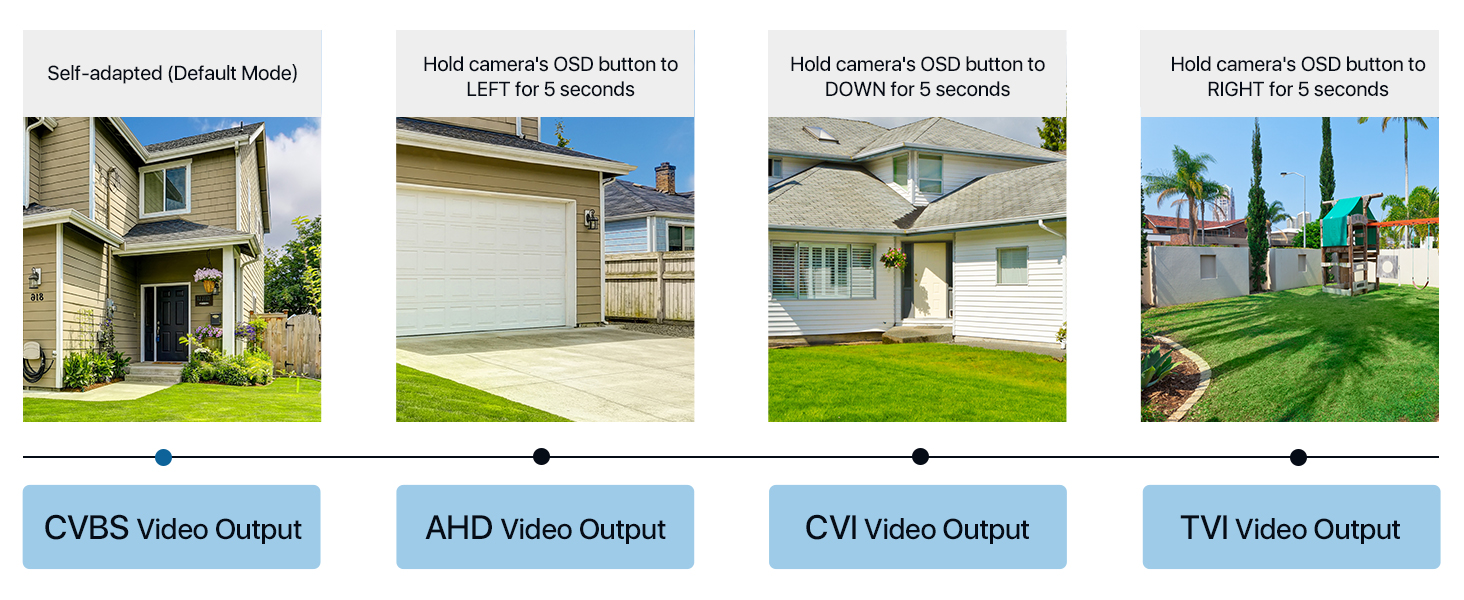
Your Loocam 4-in-1 camera supports TVI, AHD, CVI, and CVBS video output modes. The default mode is CVBS 960H. It is crucial to match the camera's output mode to your DVR's supported mode for proper functionality. Use the OSD joystick on the camera's connection cable to switch modes.


Video Tutorial: Connecting to DVR
Video: This tutorial demonstrates how to connect your Loocam 1080p 4-in-1 camera to a DVR system and switch between video modes using the OSD button.
Video Tutorial: Installation Guide
Video: This video provides a comprehensive guide on how to connect and install your Loocam 1080p 4-in-1 camera, including physical mounting and cable connections.
Connecting to the DVR
Connect the camera's video output to the DVR's video input using a BNC cable. Ensure the power supply is connected to the camera. If using multiple cameras, a 1-to-4 power splitter may be required (not included).

Fysisk installation
The camera features an adjustable 3-axis bracket for flexible positioning. Use the provided mounting hole template and screws to securely fix the camera to your desired indoor or outdoor location. The IP66 weatherproof rating ensures durability in various environmental conditions.

Betjening af kameraet
HD Resolution and Night Vision
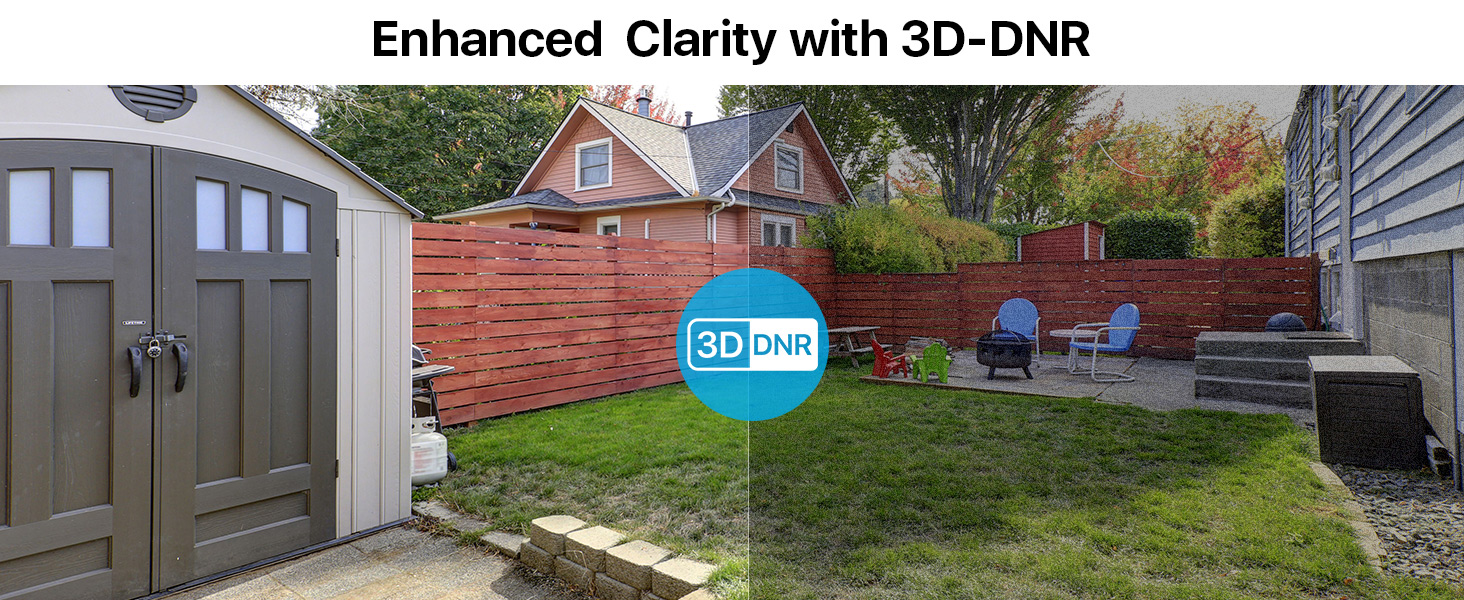
The Loocam camera delivers 1080p HD video with a 2.0MP sensor, capturing clear and detailed images. Equipped with 24 built-in IR LEDs, it provides up to 80 feet of night vision, ensuring continuous surveillance in low-light conditions.


Opretholdelse
To ensure optimal performance and longevity of your Loocam security camera, follow these maintenance guidelines:
- Rensning: Tør regelmæssigt kameralinsen og huset af med en blød klud.amp cloth to remove dust and dirt. Avoid using harsh chemicals or abrasive materials that could damage the finish or lens.
- Vejrbeskyttelse: The camera has an IP66 weatherproof rating, making it resistant to dust and water jets. However, for extreme weather conditions, consider additional protective measures to extend its lifespan.
- Kabelinspektion: Periodically check all cables and connections for any signs of wear, damage, or loose connections. Secure any loose cables to prevent accidental disconnections or damage.
- Firmwareopdateringer: Check the Loocam official webwebstedet eller din DVR-producents website for any available firmware updates for your camera or DVR system. Keeping software updated can improve performance and security.
Fejlfinding
If you encounter issues with your Loocam security camera, refer to the following common troubleshooting tips:
- No Image on DVR:
- Ensure the camera's output mode (TVI, AHD, CVI, CVBS) matches your DVR's input mode. Use the OSD joystick on the camera cable to switch modes (refer to the "Camera Output Mode Conversion" section).
- Verify all cable connections (video and power) are secure and properly seated.
- Check if the power adapter is functioning correctly and providing power to the camera.
- Test the camera with a different DVR input port or a known working camera to isolate the issue.
- Dårlig billedkvalitet:
- Clean the camera lens to remove any smudges, dust, or debris.
- Sørg for, at kameraet er fokuseret korrekt (hvis det kan justeres).
- Kontrollér for forhindringer i kameraets synsfelt view.
- Verify that the camera's output resolution is supported by your DVR and display.
- Nattesynsproblemer:
- Ensure there are no strong light sources directly pointing at the camera, which can interfere with IR illumination.
- Check if the IR LEDs are visibly glowing red in the dark (they should).
- Verify that the IR-Cut filter is switching correctly between day and night modes.
Garanti og support
Loocam is committed to providing high-quality products and excellent customer service. Your Loocam 2MP 1080p HD 4-in-1 Bullet Wired Security Camera comes with the following:
- 30-dages pengene-tilbage-garanti og gratis returnering: Hvis du ikke er tilfreds med dit køb, kan du returnere det inden for 30 dage for at få pengene tilbage.
- 2-års begrænset garanti: This product is covered by a 2-year limited warranty against manufacturing defects.
- Livsvarig teknisk support: Loocam offers lifetime technical support to assist you with any questions or issues you may encounter.
- Prompt Online Assistance: Access prompt online assistance for quick resolutions to your queries.
For yderligere hjælp, besøg venligst Loocam Store on Amazon eller kontakt vores kundesupportteam.