1. Vigtige sikkerhedsinstruktioner
Please read all instructions carefully before using the Genesis Designs GM1-B massage chair. Retain this manual for future reference.
- Elektrisk sikkerhed: Ensure the power cord is securely connected to a grounded outlet. Do not operate the chair with a damaged cord or plug. Keep the power cord away from heated surfaces.
- Medicinske tilstande: Consult a physician before use if you have medical conditions, are pregnant, have a pacemaker, or are undergoing medical treatment. Discontinue use if you experience discomfort.
- Børn og kæledyr: Keep children and pets away from the massage chair, especially during operation. This appliance is not intended for use by persons with reduced physical, sensory, or mental capabilities unless supervised.
- Korrekt brug: Use the chair only for its intended purpose as described in this manual. Do not stand on or place heavy objects on the chair. Avoid prolonged use in one area to prevent over-stimulation.
- Miljø: Brug ikke stolen i damp or wet environments. Keep it away from direct sunlight and heat sources.
2. Produktet er slutview
The Genesis Designs GM1-B is a smart full-body massage chair designed for comprehensive relaxation and therapeutic massage. It features advanced 2D SL-Track rollers, zero gravity recline, voice activation, Bluetooth connectivity, and targeted heating.
Nøglefunktioner:
- 2D SL-Track Rollers: Provides massage from the neck down to the glutes, following the natural curve of your spine.
- Zero Gravity Function: Reclines the chair to distribute body weight evenly, reducing pressure on the spine and enhancing relaxation.
- Stemmeaktivering: Control various functions using simple voice commands.
- Bluetooth -højttalere: Connect your personal device to enjoy audio during your massage.
- Heated Lumbar Function: Gentle heat therapy for the lower back to soothe muscles.
- Airbagmassage: Compression massage for shoulders, arms, waist, legs, and feet.
- Fodruller: Targeted massage for the soles of your feet.
- Flere programmer: 12 auto pre-programmed modes and 6 manual massage techniques.
- Tablet Remote Control & Quick Start Buttons: Intuitive control options for ease of use.
- USB opladningsport: Convenient charging for your mobile devices.
Komponenter:
- Massage Chair Main Unit
- Handheld Tablet Remote Control
- Strømledning
Figur 2.1: Forside view of the Genesis Designs GM1-B Smart Full Body Massage Chair.

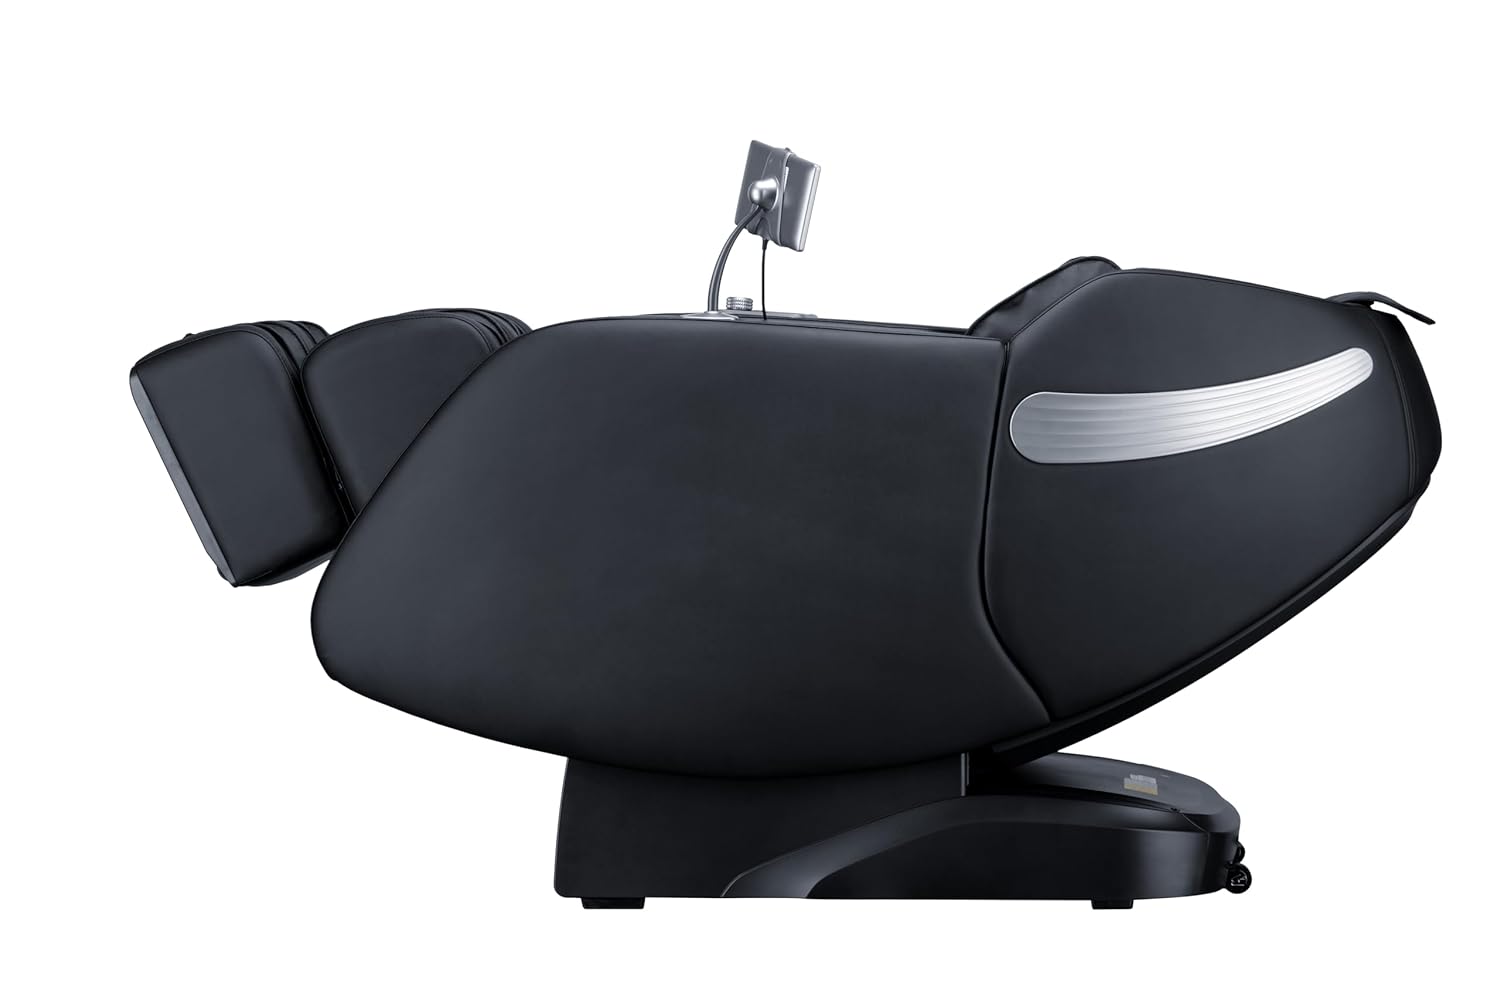
Figur 2.2: Side view of the Genesis Designs GM1-B Smart Full Body Massage Chair.

Figure 2.3: Key features of the GM1-B Massage Chair.
3. Opsætning
The Genesis Designs GM1-B massage chair requires minimal assembly. Follow these steps to prepare your chair for use.
3.1 Udpakning og placering
- Carefully remove all packaging materials from the chair.
- Place the massage chair on a flat, stable surface. Ensure there is sufficient space around the chair for reclining, especially for the zero gravity function.
- Avoid placing the chair in direct sunlight or near heat sources.

Figur 3.1: Eksample of chair placement in a room.
3.2 Strømtilslutning
- Locate the power input port on the back or bottom of the chair.
- Connect the power cord securely to the chair and then plug it into a standard grounded electrical outlet.
- Sørg for, at tænd/sluk-knappen (hvis den er monteret) er i 'OFF'-positionen, før du tilslutter den.
3.3 Tablet Remote Control Setup
- Connect the handheld tablet remote control to its designated port or stand on the chair.
- Ensure the tablet is charged or connected for power if it is not battery-operated.

Figure 3.2: Handheld tablet remote control.
4. Betjeningsvejledning
Familiarize yourself with the control methods to fully utilize your massage chair's features.
4.1 Tænd/sluk
- Press the power button on the quick start panel (right armrest) or the tablet remote to turn the chair on.
- Press again to turn off the chair. The chair will return to its upright position.
4.2 Using the Tablet Remote Control
The tablet provides detailed control over all massage functions.
- Automatiske programmer: Select from 12 pre-programmed massage modes tailored for different needs (e.g., relaxation, recovery, sleep).
- Manual Techniques: Choose from 6 massage techniques (e.g., Kneading, Tapping, Shiatsu) and adjust intensity, speed, and roller width.
- Målrettet massage: Select specific body areas for massage (e.g., neck, back, lumbar, feet).
- Airbag Control: Adjust the intensity of airbag compression for shoulders, arms, waist, legs, and feet.
- Varme funktion: Activate or deactivate the lumbar heating.
- Ingen tyngdekraft: Adjust the recline angle to one of the zero gravity positions.
4.3 Hurtigstartknapper
Located on the right armrest, these buttons offer quick access to essential functions:
- Tænd/sluk
- Zero Gravity Recline
- Auto Program Start/Stop
- Legrest Up/Down
4.4 Stemmeaktivering
To use voice control, ensure the feature is enabled via the tablet. Speak clearly and directly towards the chair's microphone.
- Activation Phrase: Say "Hello, Genesis" or a similar designated phrase to activate voice control.
- Kommandoer: Follow with commands such as "Start auto massage," "Recline to zero gravity," "Increase intensity," "Turn on heat," or "Stop massage."
4.5 Bluetooth-forbindelse
- Activate Bluetooth on your personal device (smartphone, tablet).
- On your device, search for available Bluetooth devices and select "Genesis Massage Chair" (or similar name).
- Once paired, audio from your device will play through the chair's built-in speakers.
4.6 Nul tyngdekraftsfunktion
The zero gravity feature elevates your legs above your heart, promoting circulation and deeper relaxation.
- Press the Zero Gravity button on the tablet or quick start panel.
- The chair will recline to a preset zero gravity position. You may have options to adjust to different levels of recline.

Figure 4.1: Zero Gravity recline progression.
4.7 Fodmassage
The footrest features rollers and airbags for comprehensive foot and calf massage.
- The legrest can extend up to 6.25 inches to accommodate different user heights. Adjust manually or via the tablet.
- Foot rollers will activate during foot massage programs or can be manually controlled.

Figure 4.2: Footrest with foot rollers.
5. Vedligeholdelse
Proper care ensures the longevity and optimal performance of your massage chair.
5.1 Rengøring
- Ydre: Wipe clean the leather and plastic surfaces with a soft, damp klud. Brug ikke slibende rengøringsmidler, opløsningsmidler eller stærke kemikalier.
- Indre: Periodically vacuum any dust or debris from crevices.
- Sørg for, at stolen er frakoblet stikket, inden rengøring.
5.2 Opbevaring
- When not in use for extended periods, unplug the chair and store it in a cool, dry place away from direct sunlight.
- Avoid placing heavy objects on the chair during storage.
6. Fejlfinding
If you encounter issues with your massage chair, refer to the following common problems and solutions.
| Problem | Mulig årsag | Løsning |
|---|---|---|
| Stolen tænder ikke. | Power cord not connected; Power switch off; Outlet malfunction. | Ensure power cord is securely plugged in. Check if the main power switch is on. Test the outlet with another device. |
| Massagerullerne bevæger sig ikke. | Program not selected; Safety sensor activated. | Select an auto program or manual massage technique. Ensure no obstructions are blocking the rollers. |
| Stemmestyringen svarer ikke. | Voice activation disabled; Microphone obstructed; Incorrect commands. | Check tablet settings to ensure voice activation is enabled. Speak clearly and ensure no objects are covering the microphone. Refer to the manual for correct commands. |
| Bluetooth parrer ikke. | Bluetooth not enabled on device; Chair not in pairing mode; Interference. | Ensure Bluetooth is active on your device. Restart both the chair and your device. Move closer to the chair. |
| Stolen laver usædvanlige lyde. | Normal operational sounds; Loose component; Obstruction. | Some mechanical sounds are normal. Check for any loose parts or foreign objects. If the noise is persistent or loud, discontinue use and contact support. |
7. Specifikationer
Detailed technical specifications for the Genesis Designs GM1-B massage chair.
| Feature | Detalje |
|---|---|
| Modelnummer | GM1-B |
| Produktmål (opretstående) | 57.67 x 29.72 x 44.33 tommer (L x B x H) |
| Product Dimensions (Zero Gravity) | 66.33 x 29.72 x 38.77 tommer (L x B x H) |
| Varens vægt | 165 pund |
| Materiale Type | Leather (Upholstery), Foam (Fill), Metal (Frame) |
| Massagespor | 2D SL-Track |
| Massage teknikker | 6 Manual Techniques, 12 Auto Programs |
| Legrest Extension | Op til 6.25 tommer |
| Strømforsyning | Standard AC (Voltage not specified, refer to product label) |
| Certificeringer | ETL Certificeret |
| Påkrævet samling | No (Minimal setup required) |

Figure 7.1: Chair dimensions in upright and zero gravity positions.
8. Garanti og support
For warranty information, product support, or service inquiries, please refer to the warranty card included with your purchase or contact Genesis Designs customer service directly. Contact details are typically available on the manufacturer's official webhjemmeside eller gennem din forhandler.
Please have your model number (GM1-B) and purchase date available when contacting support.