1. Vigtige sikkerhedsinstruktioner
Læs venligst alle instruktioner omhyggeligt, inden du bruger dette apparat. Manglende overholdelse af disse instruktioner kan resultere i elektrisk stød, brand eller alvorlig personskade.
- Rør ikke ved varme overflader. Brug håndtag eller knopper.
- For at beskytte mod elektrisk stød må ledning, stik eller apparat ikke nedsænkes i vand eller anden væske.
- Tæt opsyn er nødvendigt, når et apparat bruges af eller i nærheden af børn.
- Træk stikket ud af stikkontakten, når det ikke er i brug, og før rengøring. Lad det køle af, før du sætter dele på eller af.
- Betjen ikke noget apparat med en beskadiget ledning eller stik, eller efter at apparatet ikke fungerer korrekt eller er blevet beskadiget på nogen måde.
- Brug af tilbehør, der ikke er anbefalet af apparatets producent, kan forårsage skader.
- Må ikke bruges udendørs.
- Lad ikke ledningen hænge ud over kanten af bordet eller bordpladen eller røre ved varme overflader.
- Må ikke placeres på eller i nærheden af en varm gas- eller elektrisk brænder eller i en opvarmet ovn.
- Der skal udvises ekstrem forsigtighed ved flytning af et apparat, der indeholder varm olie eller andre varme væsker.
- Sæt altid stikket i apparatet først, og sæt derefter ledningen i stikkontakten. For at afbryde forbindelsen skal du slukke for en vilkårlig knap og derefter tage stikket ud af stikkontakten.
- Brug ikke apparatet til andet end tilsigtet brug.
- For store fødevarer eller metalredskaber må ikke sættes i en brødristerovn, da de kan skabe brand eller risiko for elektrisk stød.
- Der kan opstå brand, hvis ovnen er dækket eller rører brændbart materiale, herunder gardiner, gardiner, vægge og lignende, når den er i drift.
- Placer ikke andre materialer end producentens anbefalede tilbehør i denne ovn, når den ikke er i brug.
- Placer ikke følgende materialer i ovnen: papir, pap, plastik eller lignende materialer.
- Dæk ikke krummebakken eller nogen del af ovnen med metalfolie. Dette vil forårsage overophedning af ovnen.
2. Produktet er slutview
This 22L tabletop electric mini oven is designed for household baking and toasting. It features adjustable temperature control, a 120-minute timer, and a three-layer baking position for versatile cooking.

Figur 1: Forside view of the 22L Tabletop Electric Mini Oven with food cooking inside.

Figure 2: Dimensions of the oven: 421mm (width), 252mm (depth), 273mm (height).
3. Opsætning
3.1 Udpakning
- Carefully remove the oven and all packaging materials from the box.
- Remove any protective films or stickers from the oven surfaces.
- Kontroller for eventuelle skader under transporten. Hvis produktet er beskadiget, må det ikke anvendes, og du skal kontakte kundesupport.
3.2 Placering
- Placer ovnen på en stabil, flad og varmebestandig overflade.
- Sørg for tilstrækkelig ventilation omkring ovnen (mindst 10 cm frihøjde til alle sider).
- Placer ikke ovnen i nærheden af brandfarlige materialer såsom gardiner eller vægge.
- Sørg for, at netledningen ikke er blokeret eller klemt.
3.3 Før første brug
- Wash the baking tray, wire rack, and crumb tray in warm, soapy water. Rinse and dry thoroughly.
- Tør ovnen af indvendigt og udvendigt med adamp klæde.
- To eliminate any manufacturing odors, operate the oven empty for approximately 15 minutes at 200°C (400°F). Ensure the area is well-ventilated during this process.
4. Betjeningsvejledning
4.1 kontroller overview
The oven features three mechanical control knobs:
- Øverste knap: Temperature Control (0-250°C)
- Midterste knap: Function Selector (Controls upper/lower heating elements)
- Nederste knap: Timer (0-120 minutter)

Figure 3: Temperature control knob, adjustable from 70°C to 250°C.

Figure 4: Timer knob, adjustable from 0 to 120 minutes.
4.2 Forvarmning af ovnen
- Place the wire rack or baking tray in the desired position.
- Drej temperaturkontrolknappen til den ønskede temperatur.
- Turn the Timer knob to the desired preheating time (e.g., 10-15 minutes). The power indicator light will illuminate.
- Once the preheating time has elapsed, the oven is ready for use.
4.3 Baking and Roasting
This oven offers three-layer baking positions and independent temperature control for upper and lower heating tubes.

Figure 5: The 22L capacity oven features three distinct baking positions for versatile cooking.
- Preheat the oven as described above.
- Carefully place your food on the baking tray or wire rack into the desired baking position. Use oven mitts.
- Select the appropriate temperature using the Temperature Control knob (0-250°C).
- Use the Function Selector knob to choose between upper heating, lower heating, or simultaneous upper and lower heating, depending on your recipe's requirements. This allows for precise control over browning and cooking.
- Set the cooking time using the Timer knob (0-120 minutes). The oven will automatically shut off and ring a bell when the timer expires.
- Monitor food through the wide view vindue.

Figure 6: The wide viewing window allows for easy monitoring of food changes during cooking.
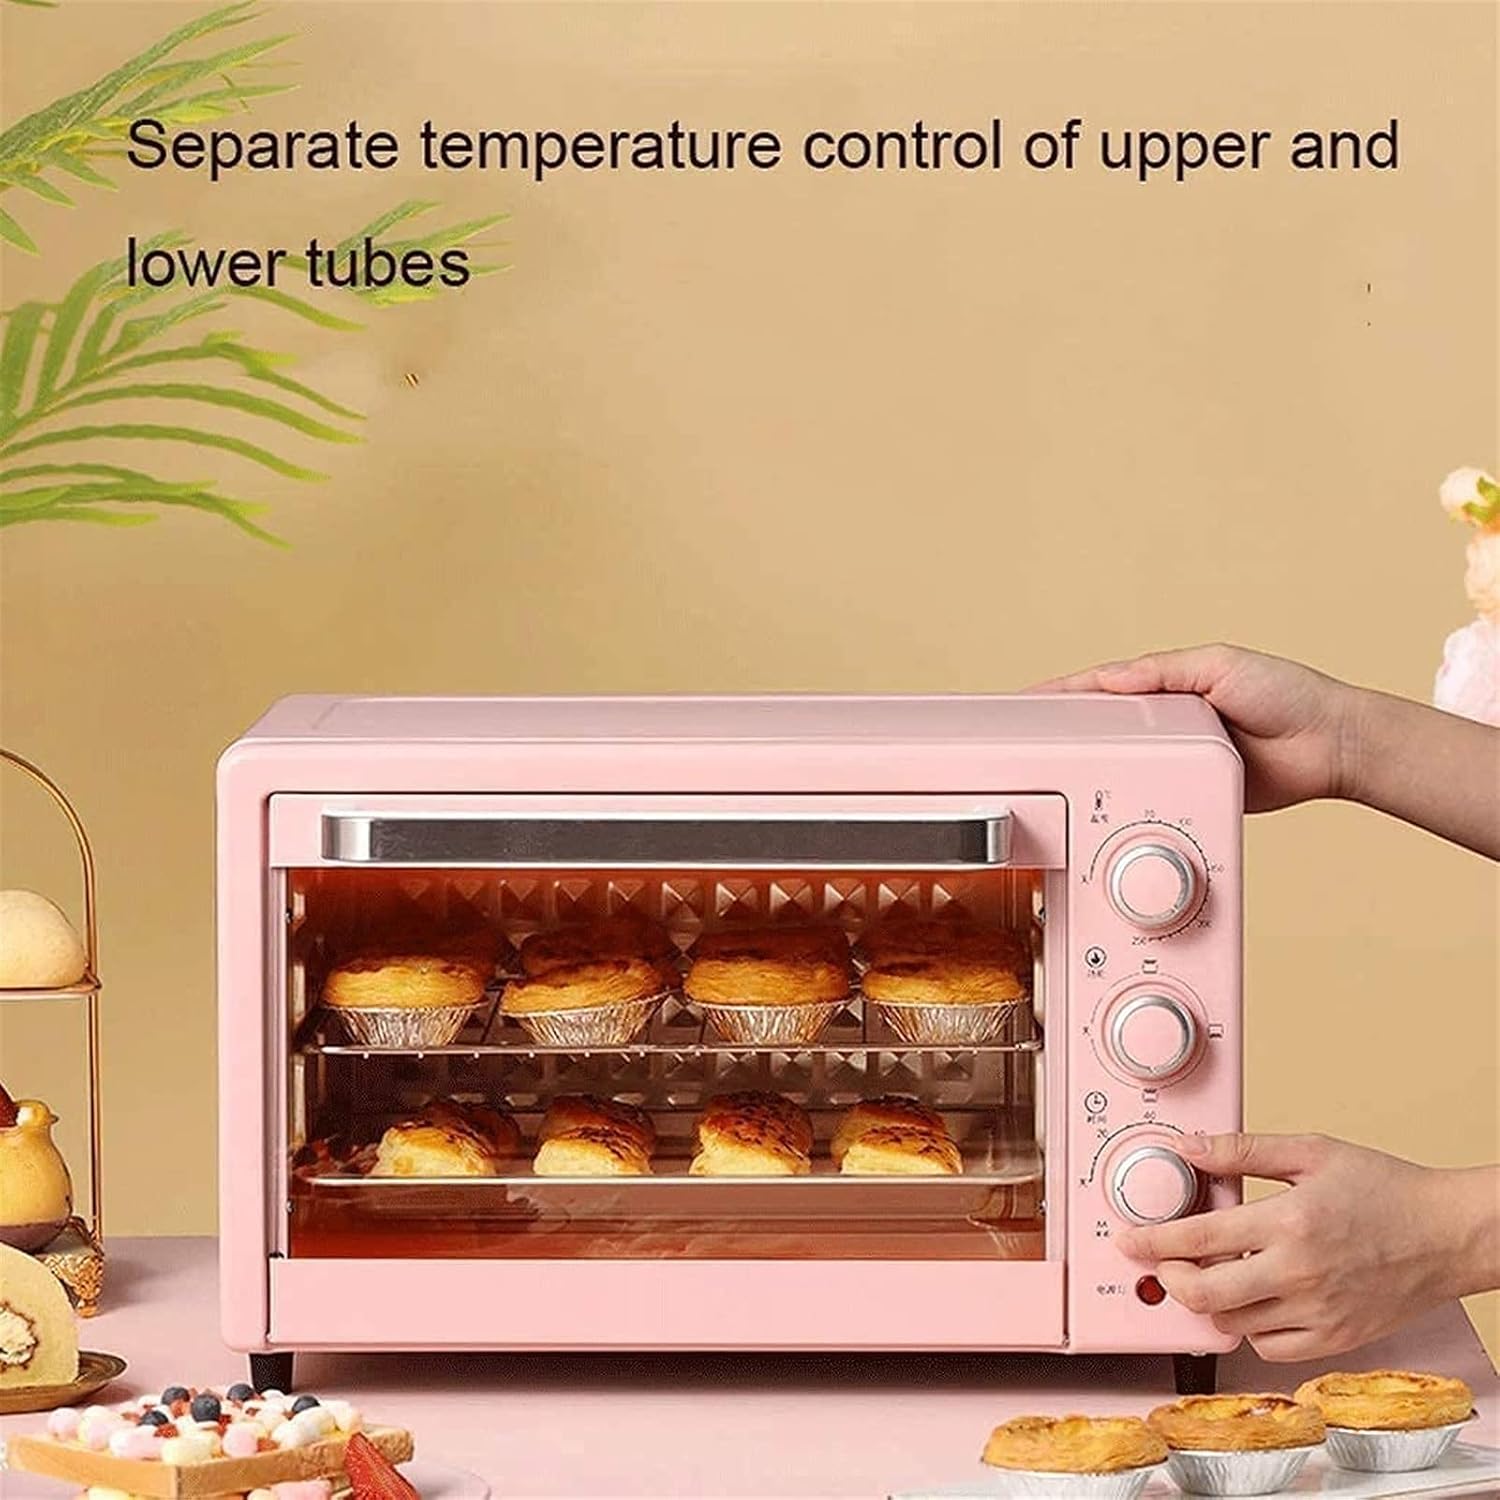
Figure 7: The oven features separate temperature control for upper and lower heating tubes, enabling precise cooking.
5. Vedligeholdelse og rengøring
5.1 Generel rengøring
- Tag altid stikket ud af stikkontakten, og lad ovnen køle helt af, inden den rengøres.
- Nedsænk ikke ovnens kabinet, ledning eller stik i vand eller anden væske.
- Tør det udvendige af med adamp klud og mildt rengøringsmiddel. Brug ikke slibende rengøringsmidler eller skuresvampe.
5.2 Cleaning Interior and Accessories
- Remove the baking tray, wire rack, and crumb tray. Wash them in warm, soapy water. For stubborn stains, soak them before cleaning.
- De indvendige vægge kan tørres af med snavs.amp cloth and mild detergent. Avoid touching the heating elements.
- Ensure all parts are thoroughly dry before reassembling and storing the oven.

Figure 8: The oven door features a three-layer safety explosion-proof glass for enhanced durability and safety, including a transparent layer, tempered glass layer, and oil-proof cleaning layer.
6. Fejlfinding
Hvis du støder på problemer med din ovn, bedes du se følgende almindelige problemer og løsninger:
- Ovnen tænder ikke:
- Sørg for, at netledningen er korrekt tilsluttet en fungerende stikkontakt.
- Check if the timer knob is set to a cooking duration. The oven will not operate if the timer is at "OFF" or "0".
- Kontroller, at afbryderen ikke er udløst.
- Maden tilberedes ikke jævnt:
- Ensure the oven is preheated to the correct temperature.
- Check that the correct heating function (upper, lower, or both) is selected for your recipe.
- Roter maden halvvejs gennem tilberedningen for et mere jævnt resultat.
- Ensure there is adequate space around the food for heat circulation.
- Smoke or unusual odor during first use:
- This is normal during the initial use as manufacturing oils burn off. Ensure good ventilation. If it persists after the first few uses, discontinue use and contact support.
7. Specifikationer
| Feature | Specifikation |
|---|---|
| Model | 22L miniovn |
| Kapacitet | 22 liter |
| Nominel voltage | 110V-240V/50Hz |
| Nominel effekt | 1300W |
| Temperaturområde | 0-250°C (Controllable) |
| Bagetimer | 0-120 Minutes with Bell Ring and Auto Shut Off |
| Heating Tube Material | Stainless Steel (4 tubes) |
| Liner materiale | Galvanized Sheet |
| Kontrolmetode | Mekaniske knapper |
| Dimensioner (B×D×H) | 421 mm × 252 mm × 273 mm |
| Dør stil | Dropdown dør |
8. Garanti og support
8.1 Begrænset garanti
This product comes with a limited warranty against defects in materials and workmanship. Please refer to the warranty card included with your purchase or contact the retailer for specific warranty terms and conditions. Keep your proof of purchase for warranty claims.
8.2 Kundesupport
For technical assistance, troubleshooting, or parts replacement, please contact the retailer where you purchased the product. If purchased directly from the manufacturer, refer to the contact information provided in your packaging or on their official webwebsted.