
1. Vigtige sikkerhedsinstruktioner
Please read all instructions carefully before using the Teesa Steam Mop TSA5051. Keep this manual for future reference.
- Sørg altid for, at apparatet er taget ud af stikkontakten, før du fylder vandtanken eller udfører vedligeholdelse.
- Lad ikke dampmoppen være uden opsyn, mens den er tændt.
- Hold børn og kæledyr væk fra apparatet under drift.
- Brug kun destilleret eller demineraliseret vand i tanken for at forhindre mineralophobning.
- Ret ikke dampen mod mennesker, dyr eller elektriske apparater.
- Avoid using the steam mop on unsealed hardwood floors or surfaces that are sensitive to heat and moisture.
- Always attach a cleaning pad before operating the steam mop.
- Hvis netledningen er beskadiget, skal den udskiftes af producenten, dennes serviceagent eller lignende kvalificerede personer for at undgå en fare.
2. Produktet er slutview og komponenter
Familiarize yourself with the parts of your Teesa Steam Mop TSA5051 before assembly and operation.

Figur 2.1: Fully assembled Teesa Steam Mop TSA5051, front view.

Figur 2.2: Side view of the steam mop, showing the handle and power cord wrap.
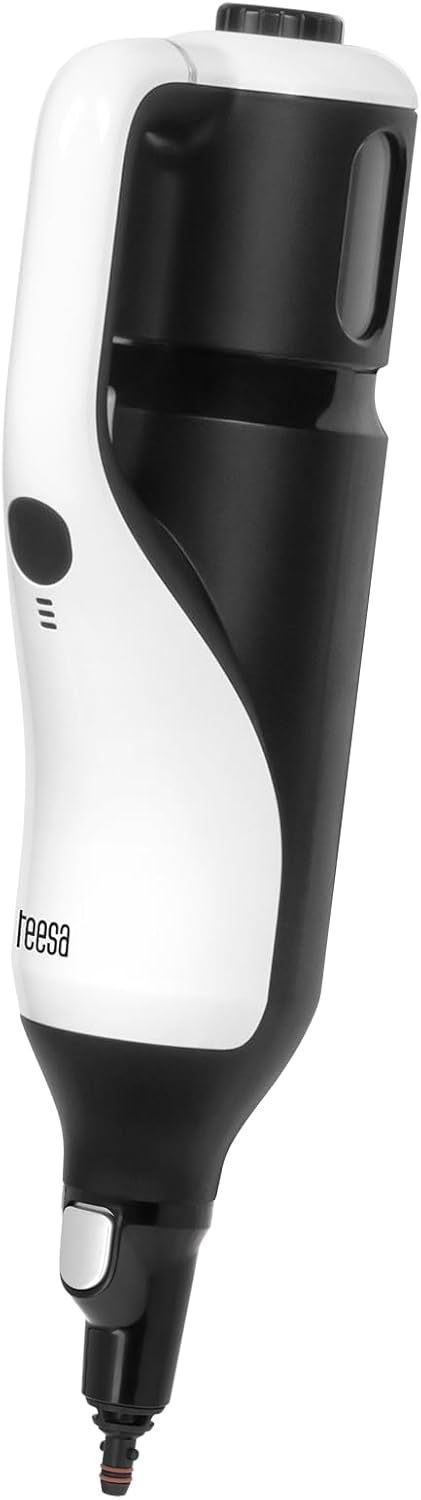
Figur 2.3: The detachable handheld steam unit.

Figur 2.4: Illustration of detaching the handheld unit from the main body.
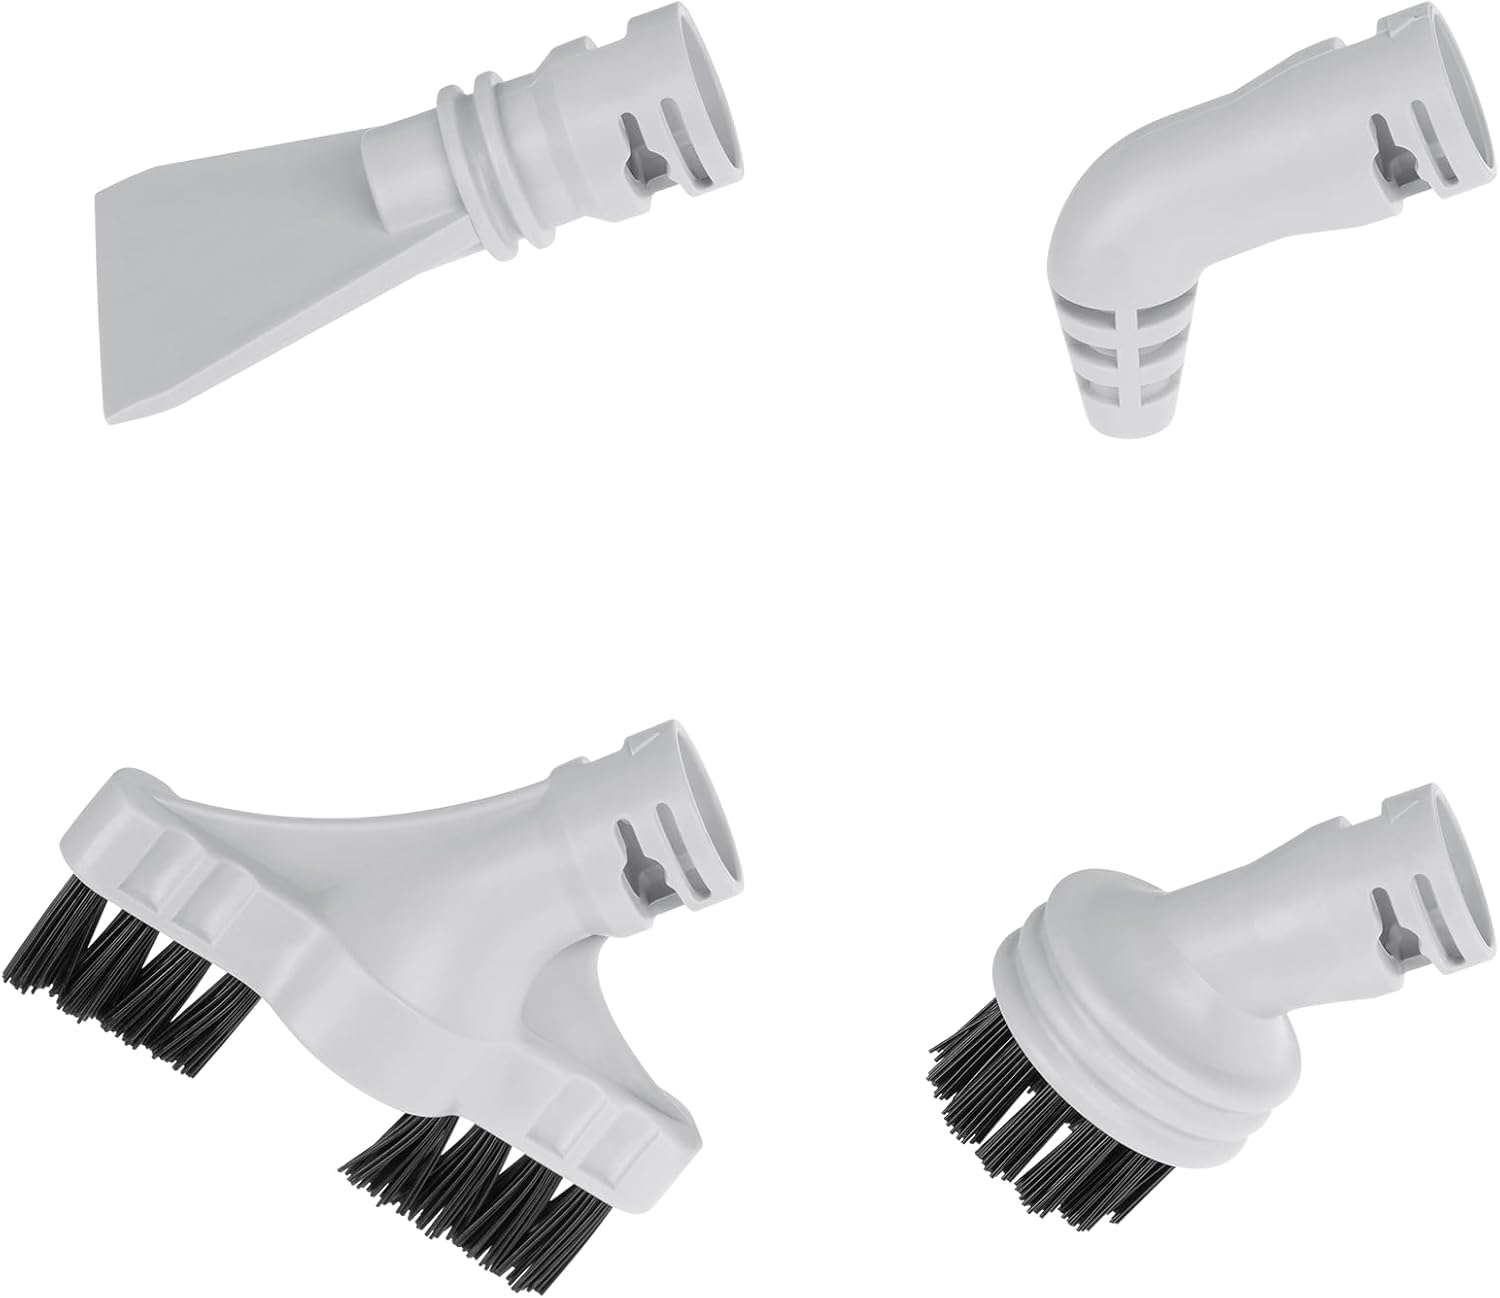
Figur 2.5: Included accessories: round brush, joint accessory, slot nozzle, scraper.

Figur 2.6: Measuring cup for water and adapter for accessories.
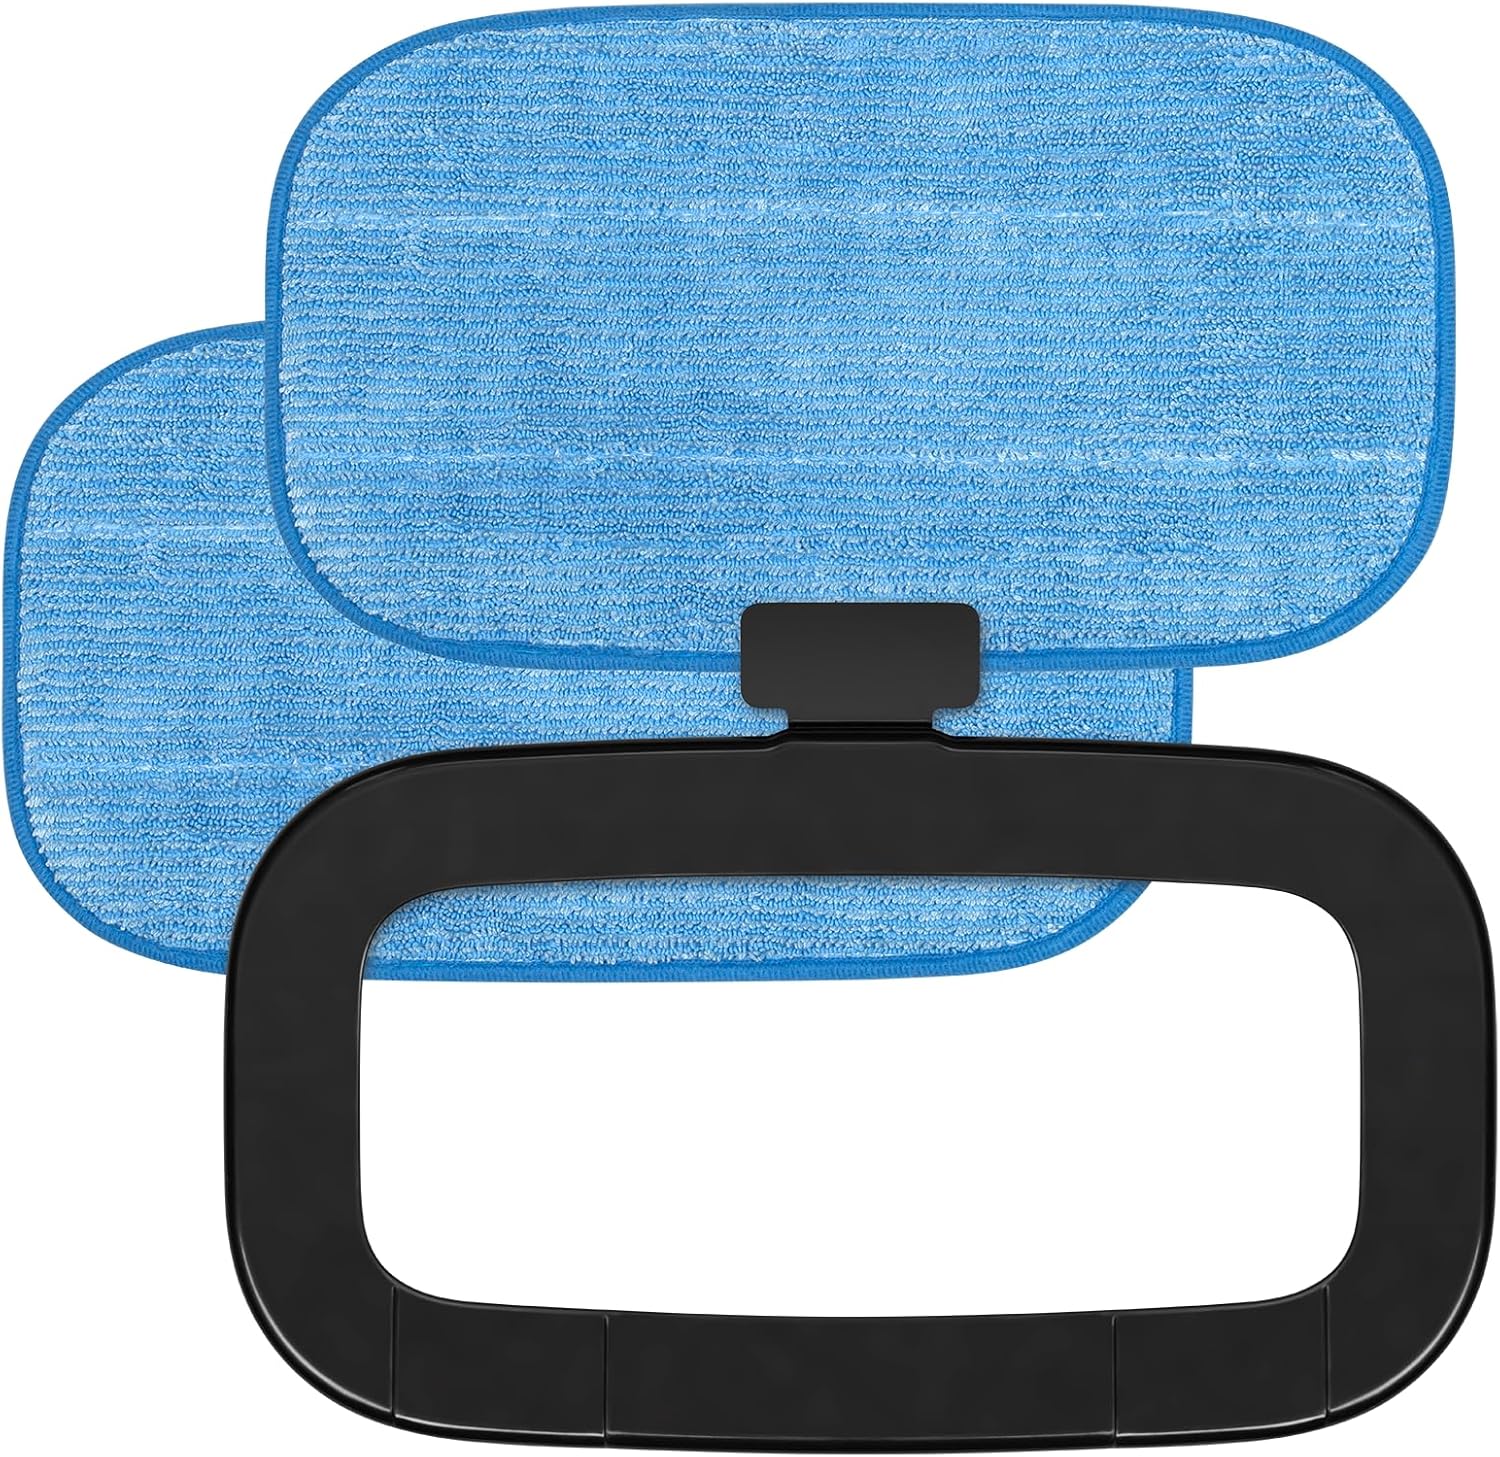
Figur 2.7: Two sponge cloths (mop pads) and the carpet glider frame.
Inkluderede komponenter:
- Main Steam Mop Unit (with detachable handheld steamer)
- Håndter samling
- 2 x Sponge Cloths (Mop Pads)
- Målebæger
- Adapter til tilbehør
- Rund børste
- Joint Accessory
- Spaltemundstykke
- Skraber
- Carpet Glider Frame
3. Opsætning og montering
- Saml håndtaget: Insert the handle assembly into the main steam mop unit until it clicks securely into place.
- Attach Cleaning Pad: Place one of the sponge cloths onto the bottom of the mop head, ensuring it is securely attached.
- Fyld vandtank:
- Åbn vandtankens dæksel.
- Using the provided measuring cup, fill the water tank with up to 380 ml of distilled or demineralized water. Do not overfill.
- Luk vandbeholderens dæksel forsvarligt.
- Optional: Attach Carpet Glider: For refreshing carpets, place the mop head with the attached cleaning pad into the carpet glider frame.
4. Betjeningsvejledning
4.1. Brug som dampmoppe
- Sørg for, at vandtanken er fyldt, og at der er monteret en rengøringsklud.
- Plug the power cord into a grounded electrical outlet (220-240 V AC, 50 Hz).
- The steam mop will begin heating. The indicator light will illuminate, signaling preparation. The device is ready in approximately 25 seconds.
- Select the desired steam level (3 levels available) using the control button.
- Begin cleaning by moving the mop head slowly and steadily over the floor surface. The swivel head allows for easy maneuverability.
- For carpet refreshing, ensure the carpet glider is attached and move the mop over the carpet.
- When finished, unplug the appliance and allow it to cool before emptying any remaining water and cleaning.
4.2. Brug som håndholdt damprenser
- Unplug the steam mop and ensure it is cool.
- Press the release button to detach the handheld steam unit from the main body (refer to Figure 2.4).
- Attach the desired accessory (e.g., round brush, slot nozzle, joint accessory, scraper) to the handheld unit using the accessory adapter if needed.
- Fill the water tank if necessary (follow instructions in Section 3.3).
- Plug in the handheld unit. Wait for the indicator light to show it's ready (approx. 25 seconds).
- Ret dampen mod den overflade, der skal rengøres. Vær forsigtig, da dampen er varm.
- After use, unplug the unit and allow it to cool before detaching accessories and storing.
5. Vedligeholdelse
Regular maintenance ensures optimal performance and extends the life of your steam mop.
- Rengøringspuder: The sponge cloths can be machine washed with mild detergent. Do not use bleach or fabric softeners. Air dry only. Replace pads when they become worn or lose their cleaning effectiveness.
- Tømning af vandtank: After each use, unplug the appliance and allow it to cool. Empty any remaining water from the tank.
- Rengøring af ydersiden: Tør ydersiden af dampmoppen af med enamp klæde. Brug ikke skrappe kemikalier eller slibende rengøringsmidler.
- Afkalkning: If you notice a decrease in steam production or mineral residue, descaling may be necessary.
- Mix a solution of 1 part white vinegar to 2 parts water.
- Hæld opløsningen i vandtanken.
- Plug in the unit and allow it to heat up.
- Run the unit until half of the solution is used, then unplug and let it sit for 30 minutes.
- Plug it back in and run until the tank is empty.
- Rinse the tank thoroughly with fresh water and run two full tanks of fresh water through the unit to flush out any vinegar residue.
- Opbevaring: Store the steam mop in a cool, dry place. Wrap the power cord around the designated cord wraps on the handle (refer to Figure 2.2).
6. Fejlfinding
| Problem | Mulig årsag | Løsning |
|---|---|---|
| No steam or low steam. |
|
|
| Vand lækker fra moppehovedet. |
|
|
| Moppen glider ikke jævnt. |
|
|
7. Specifikationer
| Modelnummer | TSA5051 |
| Magt | 1500 W |
| Vandtankkapacitet | 380 ml |
| Steam Ejection Rate | 21 / 28 ml/min (3 levels) |
| Opvarmningstid | Ca. 25 sekunder |
| Strømforsyning | 220-240 V AC, 50 Hz |
| Strømkabellængde | 5 m |
| Vægt | 3.0 kg (product), 4 kg (package) |
| Dimensioner (samlet) | 30 x 25 x 110 cm |
8. Garanti og support
For warranty information and customer support, please refer to the warranty card included with your product or visit the official Teesa webwebsted. Gem din købsbevis i tilfælde af garantikrav.
For further assistance, you may contact Teesa customer service through their official channels.